
Managing Data Objects in a Project
When a project contains only a small amount of data, it is easy to navigate the project tree, find the objects you want to work with and keep track of the relationships between them. As a project grows larger and more complex, however, it can be difficult to keep track of data and find what you want to work with.
This topic describes a number of tools that can be useful in navigating the project tree, understanding relationships between objects and organising data objects. This topic is divided into:
- Finding Objects
- Viewing Relationships Between Objects
- Display Project Tree Lines
- Subfolders
- Copying Objects
- Renaming Objects
- Commenting on Objects
- Sharing Objects
- Deleting Objects
- Folder Commands and Hotkeys
Finding Objects
To find objects in the project tree, click the search button at the top of the project tree:
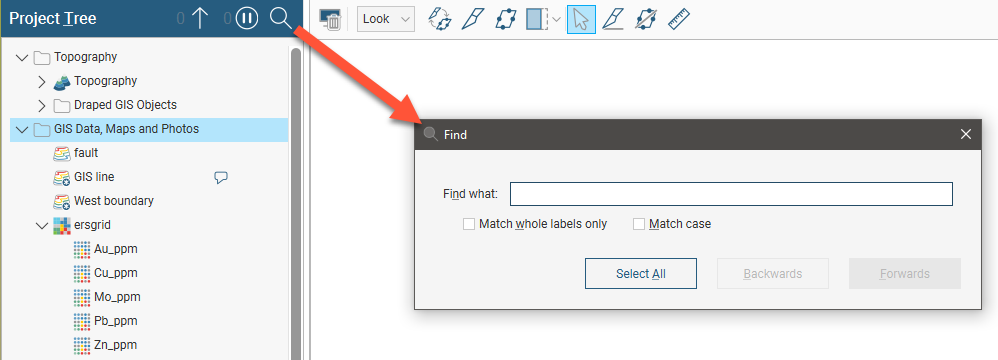
You can also click anywhere in the project tree and type “Ctrl-F”.
In the Find window, enter the information you are searching for, then click Backwards or Forwards to locate the object in the project tree.
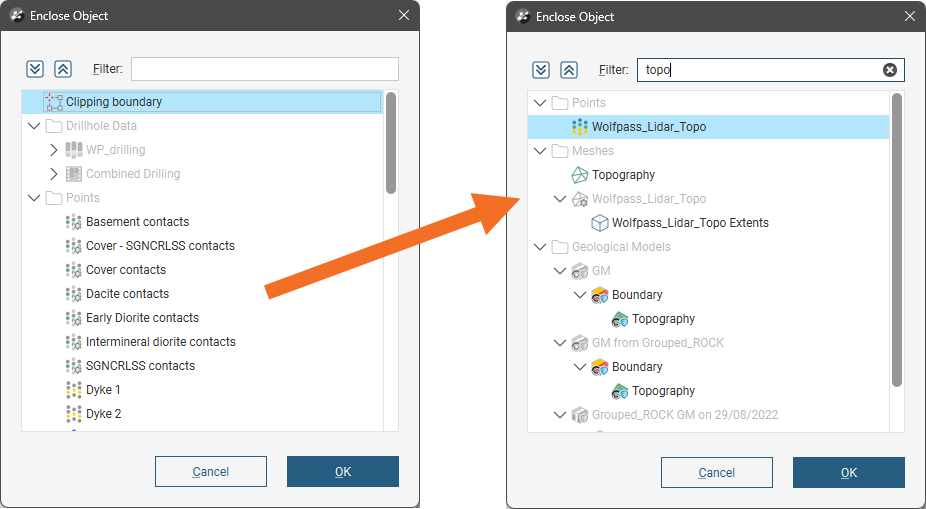
You can also search for objects in many Leapfrog Energy windows. For example, here the list of objects that could be used as the basis of a model’s extents is quite long. But filtering the suitable objects by name makes it easier to find the object you’re looking for:
Viewing Relationships Between Objects
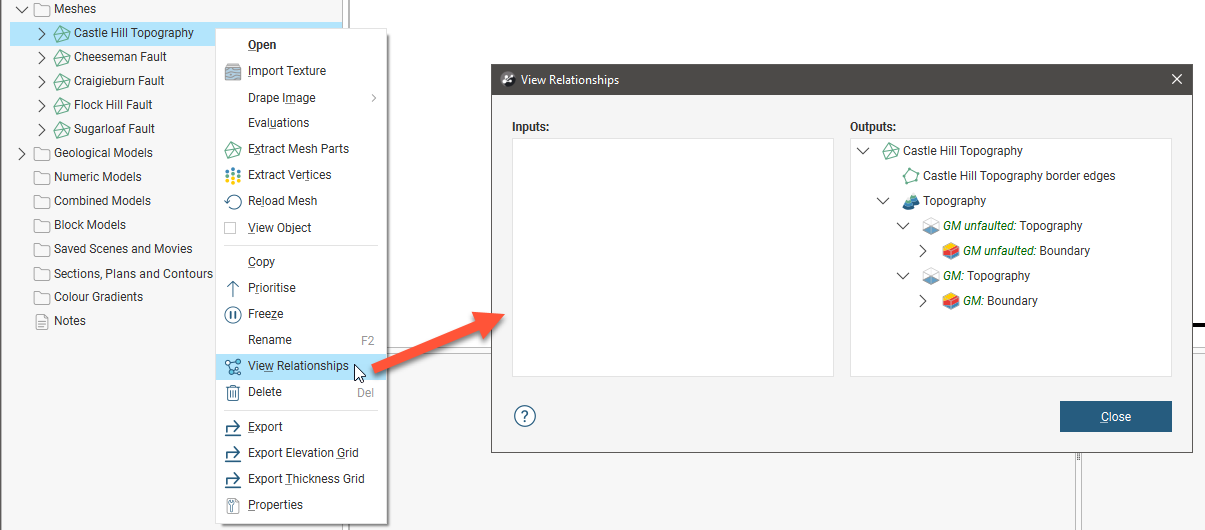
Objects in a project have a View Relationships option that lets you see how the object is used in the project. To see this information, right-click on an object in the project tree and select View Relationships.
In the window that appears, all inputs and outputs for an object are listed. Here, relationships are shown for an imported mesh. There are no inputs, but the mesh has a border edges object that was created when it was imported into the project. The mesh has been used to create a topography object, which has then been used as a boundary in two geological models.
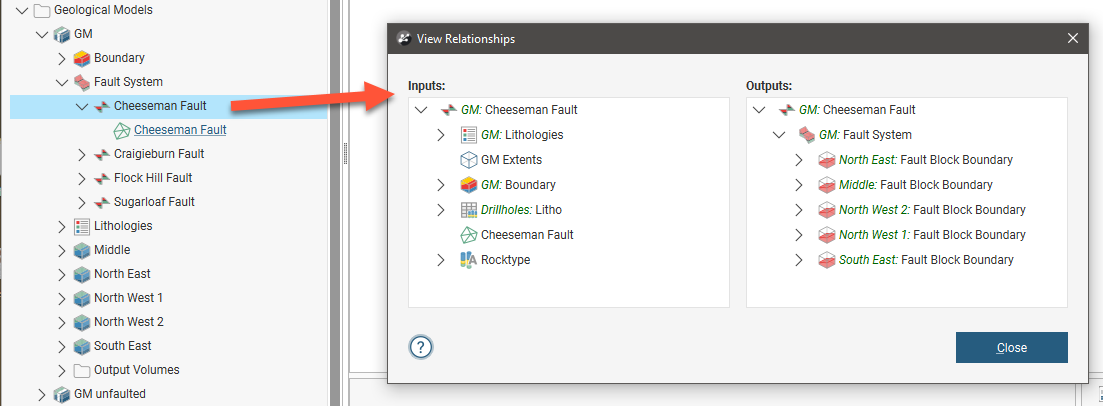
Here, viewing relationships for a fault in a geological model shows us not just the mesh that the fault was created from, but the different parts of the geological model that have been used in building the fault. In the Outputs part of the window, we can see that the fault has been used as an input to the fault system and so also affects the different fault blocks in the model.
Information in the View Relationships window is useful in understanding how models have been built in Leapfrog Energy and in understanding the effects on a project should an object be updated or deleted. For example, if you are going to be working on an object and do not wish to have dependent objects reprocessed each time you make a change, you can use the View Relationships window to determine which objects you should freeze until you are finished working on the object. See the Object Processing topic for more information on freezing objects.
Display Project Tree Lines
You can display lines in the project tree to better show relationships:
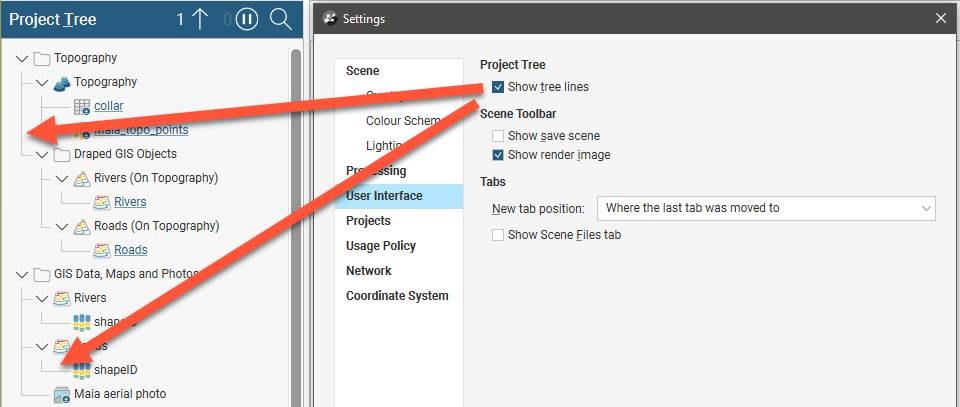
If you wish to display lines in the project tree, open the Settings window from the Leapfrog Energy menu. Click on User Interface and enable Show Tree Lines.
Subfolders
In many project tree folders, you can create subfolders that help in organising large numbers of data objects. For example, here colour gradients have been organised into subfolders:

To add a subfolder, right-click on a folder in the project tree and select New Subfolder. Add objects to subfolders by dragging and dropping them. You can also use Cut (Ctrl-X) and Paste (Ctrl-V) shortcuts to move objects and subfolders.
Subfolders can be renamed, moved and deleted, but cannot be moved to other top-level folders.
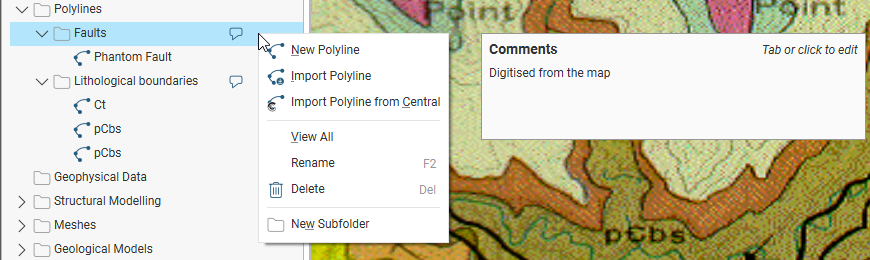
Subfolders have the same right-click commands as their parent folder, which means you can import or create new data objects inside the subfolder rather than in the parent folder. You can also add comments to folders to aid in keeping data organised:
You can view all objects in the subfolder by dragging the folder into the scene or by right-clicking on the subfolder and selecting View All.
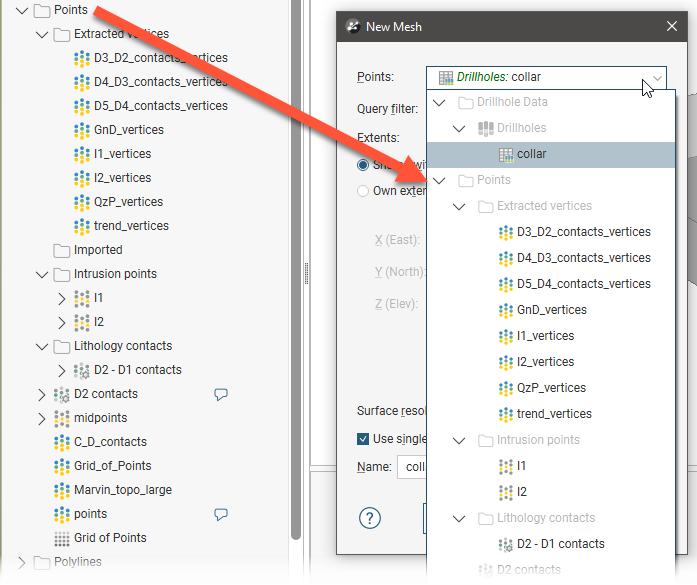
When lists of objects are displayed, the subfolder organisation will be reflected in the list. For example, when creating a mesh from points, the list of points objects that can be used to create a mesh is displayed organised by subfolder:
Subfolders cannot be created in the Well Data folder, although they can be created in the Composites and Planned Wells folders.
Copying Objects
Many objects in the project tree can be copied. Right-click on an object and select Copy. You will be prompted to enter a name for the object’s copy.
The copied object is not linked to the original object. However, if the original object is linked to other objects in the project, the copy will also be linked to those objects.
Renaming Objects
When an object is created in Leapfrog Energy, it is given a default name. It is a good idea to give objects in Leapfrog Energy names that will help you distinguish them from other objects, as large projects with complicated models will contain many objects.
To rename an object in the project tree, right-click on the object and select Rename. The Rename Object window will be displayed:
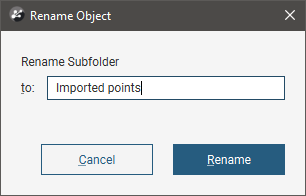
Enter a new name for the object. Click Rename to change the object’s name.
Commenting on Objects
You can record comments on many objects in the project tree, including subfolders. This can be helpful when the project contains many objects and when several different people are working on a model. Objects that have comments are indicated in the project tree by a comment balloon (![]() ). The comment will be displayed when you right-click on the object:
). The comment will be displayed when you right-click on the object:
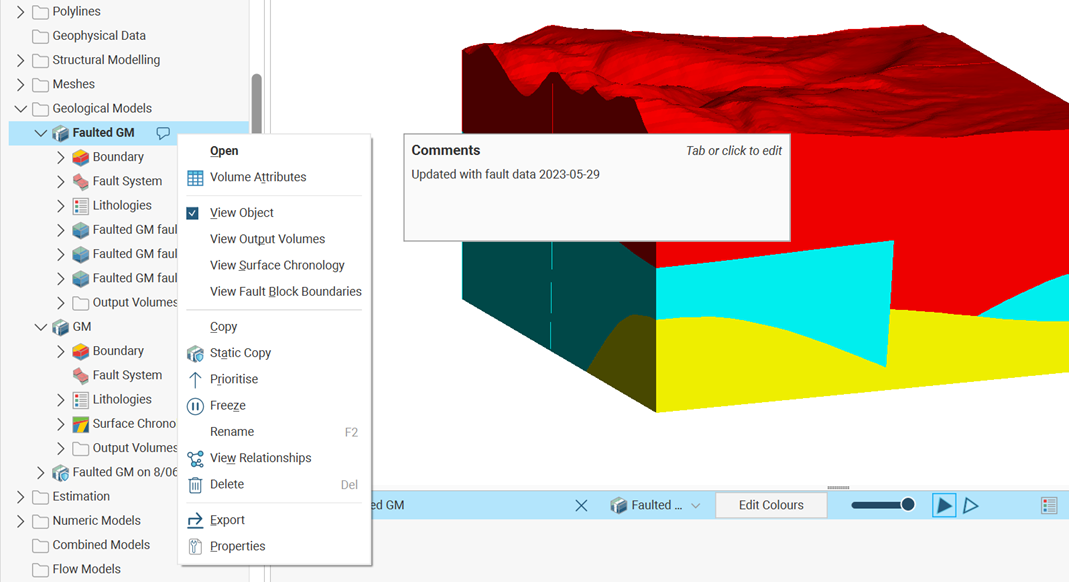
Tab or click to add a new comment or edit an existing one. You can also add standard information to a comment, such as date and time. If you add a URL to a comment, it will be converted to a clickable link.
Sharing Objects
Some objects are created as part of working with other objects and are not available elsewhere in the project. An example of this is a polyline drawn as part of creating a model boundary. To share such objects within the project, right-click on the object in the project tree and click Share. The shared object will be copied to the relevant location in the project tree and a hyperlink added to the object it was shared from.
For example, here a polyline created as part of a lateral extent is shared:
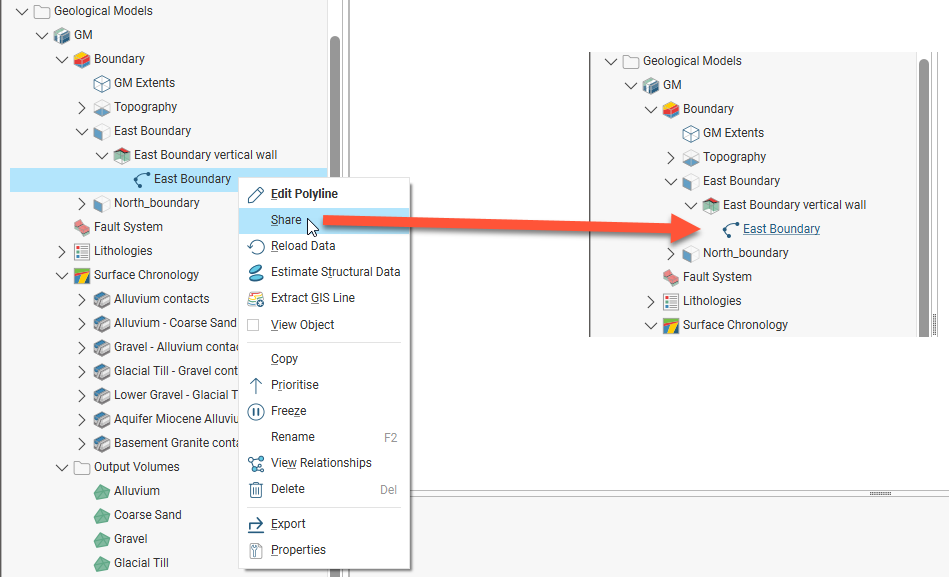
The polyline is saved to the Polylines folder and a hyperlink to it appears as part of the model’s boundary. Whenever the polyline is updated, changes will be made wherever it is shared in the project.
Deleting Objects
You can delete objects from the project by right-clicking on them in the project tree and selecting Delete. A window will be displayed showing how many other objects will be affected by deleting the object. You can click on the link to view a list of objects that will be deleted and those that will be reprocessed:
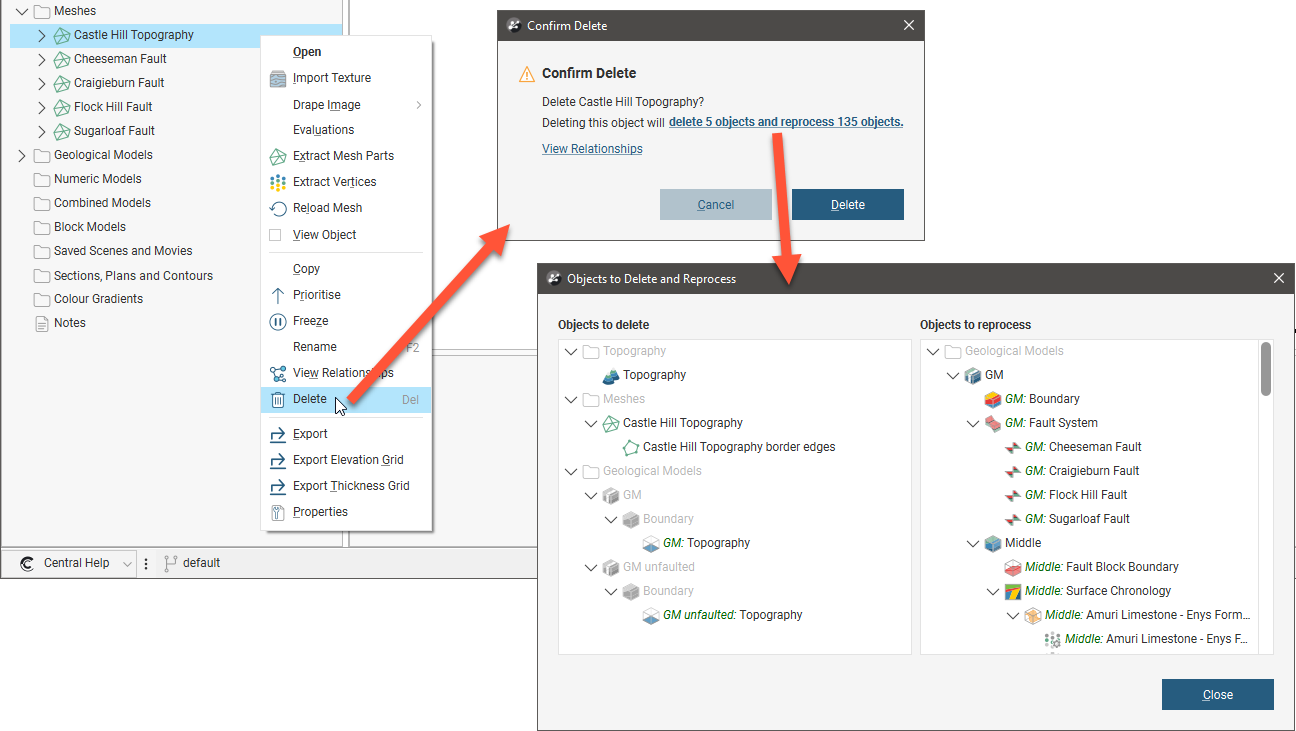
The Confirm Delete window may also appear when you make changes to objects in the project.
You can also open the View Relationships window from the Confirm Delete window. See Viewing Relationships Between Objects earlier in this topic.
Some of the reprocessed objects will be put into an error state; you will need to correct those errors before the affected object can be used elsewhere in the project. Consider also that reprocessing of a project when objects are deleted can take some time.
It is strongly recommended that you use the View Relationships option to understand how the project will be affected before you start the process of deleting an object. Consider carefully the effects on other objects in the project, as once an object is deleted, it cannot be recovered.
To delete more than one object from the tree, hold down the Shift key or the Ctrl key while selecting objects.
Folder Commands and Hotkeys
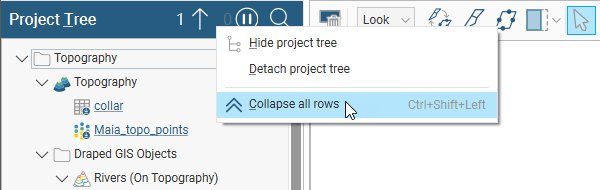
When you have a large number of folders open in the project tree, you can close all folders by right-clicking on the top of the project tree and selecting Collapse All:
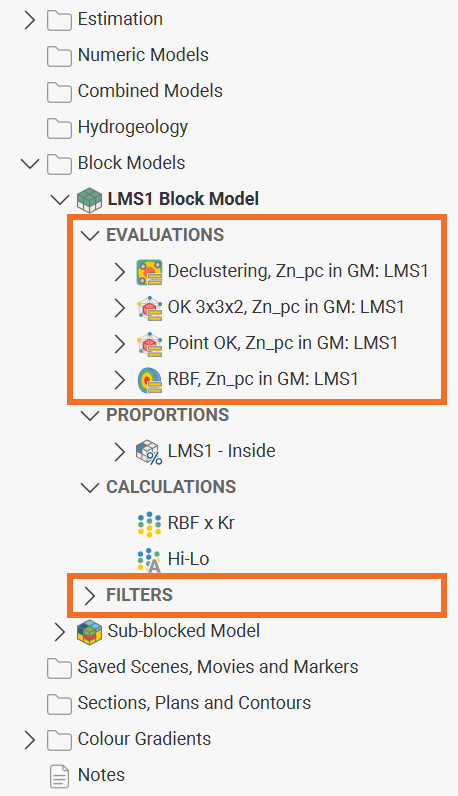
Some objects in the project tree have components organised into named sections, e.g. EVALUATIONS or FILTERS. These behave like folders and other tree branches, and can be collapsed and expanded as required.
Hotkeys for opening and closing folders include:
- Ctrl + shift + left arrow collapses all folders.
- Right arrow expands a collapsed folder or object but keeps child objects collapsed.
- Shift + right arrow expands a collapsed folder or object and child objects.
- Left arrow collapses an expanded folder or object but keeps child objects expanded.
- Shift + left arrow collapses an expanded folder or object and child objects.
Hotkeys work with more than one object selected.