
Slicing Through Data in the Scene
The slicer is a powerful tool for revealing data that is concealed behind other objects and for emphasising data. Slicing can be considered a form of dynamic sectioning.
This topic describes how to use the slicer in the scene. It is divided into:
- Slicer Properties
- Slicer Options
- Slicer Directions
- Object Slice Mode
- Slicer Sets
- Slicer Appearance
- Slicer Shortcuts
Two buttons in the toolbar can be used to add the slicer to the scene:
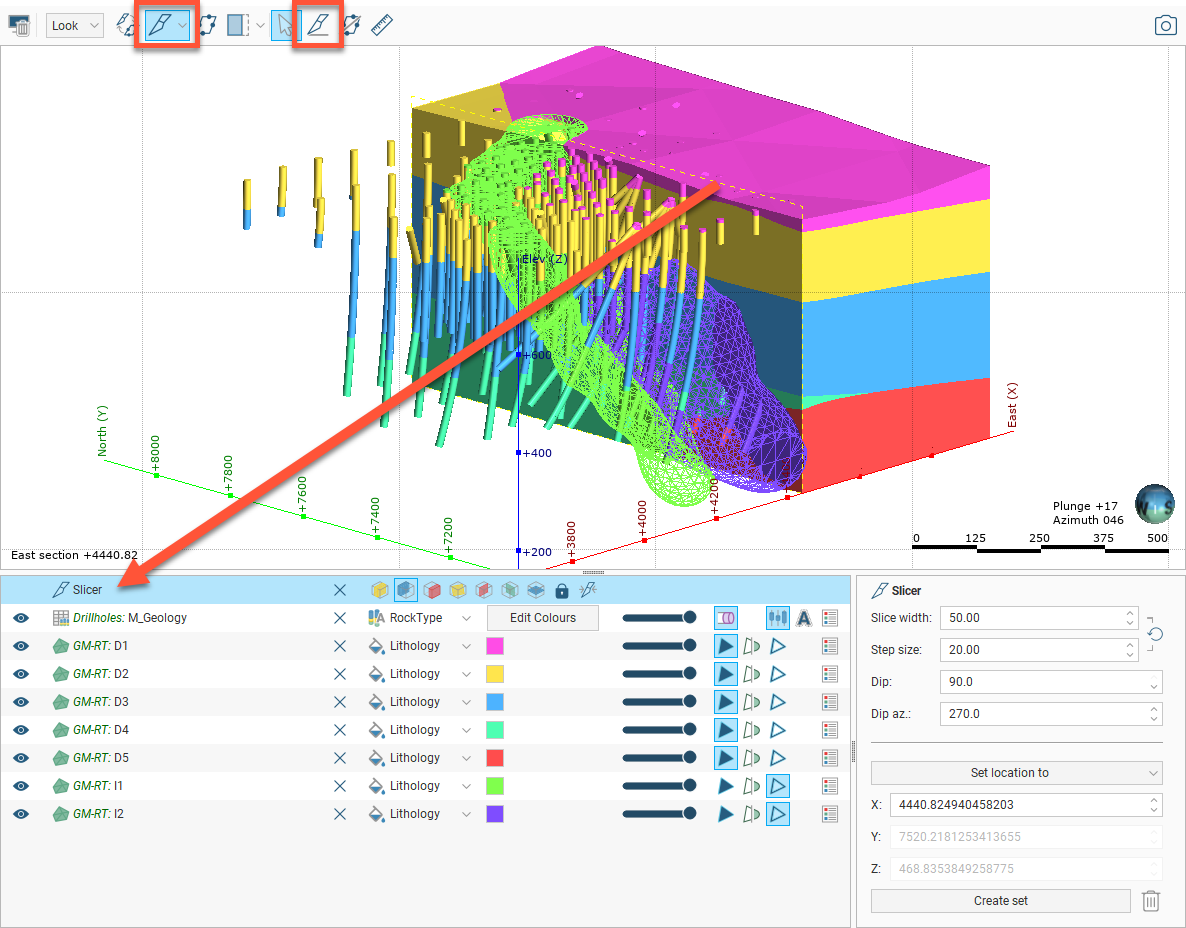
You can add the slicer to the scene by clicking the Show slicer button (![]() ) or (
) or (![]() ). The slicer will appear in the scene and you can adjust its position using the controls in the shape list.
). The slicer will appear in the scene and you can adjust its position using the controls in the shape list.
You can also click the Draw slicer line button (![]() ) then click and drag in the scene to cut a slice through the scene.
) then click and drag in the scene to cut a slice through the scene.
The scene may appear empty because the slicer has removed all visible data. Reposition the slicer or turn it off.
Slicer Properties
You can change the way the slice appears in the scene using the controls in the shape list, and finer controls are available in the shape properties panel:
Slicer Options
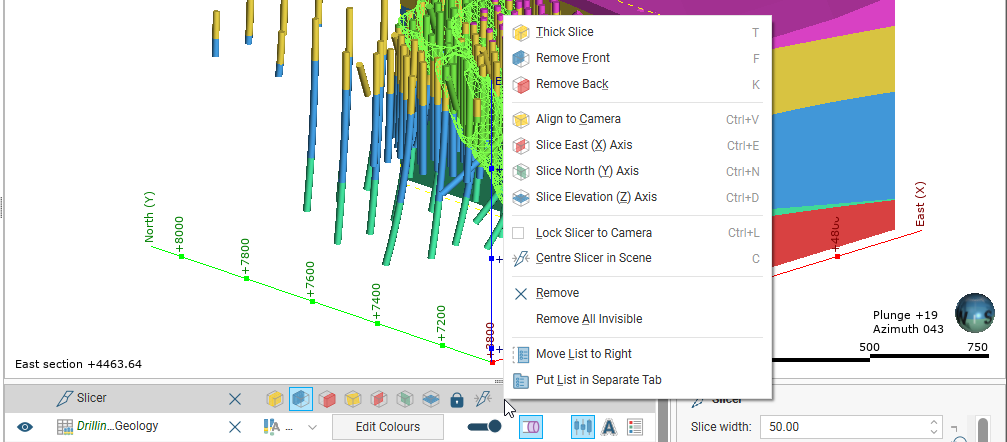
Right-click on the slicer in the shape list to view more information about each option:
Some objects may not be sliced in the scene because of their Slice mode setting. See Object Slice Mode for more information.
Remove Front (![]() ) and Remove Back (
) and Remove Back (![]() ) will cut through the scene along the slicer and only show sliced objects on the front or back side of the slicer, respectively.
) will cut through the scene along the slicer and only show sliced objects on the front or back side of the slicer, respectively.
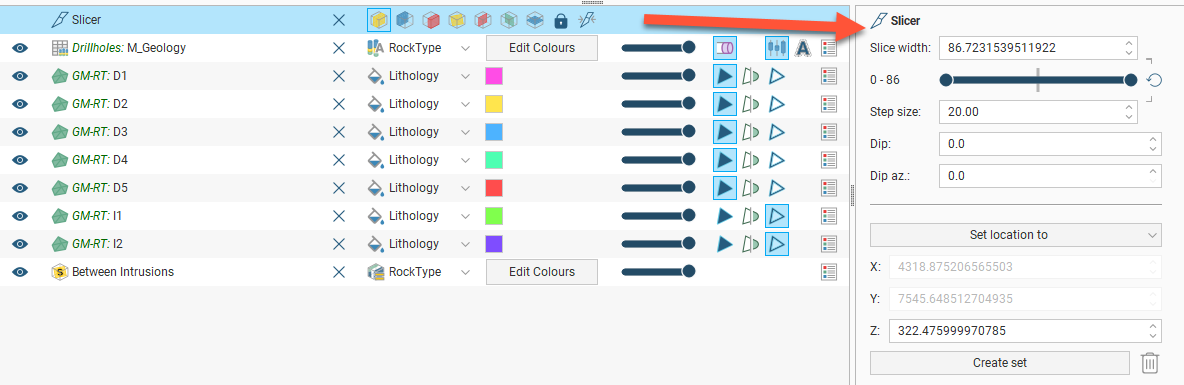
Thick Slice (![]() ) will display a slice with a Slice width specified in the shape properties, initially with half the width of the slice either side of the slicer plane. To change the thickness of a thick slice, hold down the Ctrl key and the middle mouse button while dragging the mouse. If you have a two-button mouse, hold down the Ctrl key and hold both mouse buttons while dragging.
) will display a slice with a Slice width specified in the shape properties, initially with half the width of the slice either side of the slicer plane. To change the thickness of a thick slice, hold down the Ctrl key and the middle mouse button while dragging the mouse. If you have a two-button mouse, hold down the Ctrl key and hold both mouse buttons while dragging.
You can get an asymmetric thick slice with different amounts either side of the slicer plane by dragging the ends of the thickness adjustment control in the properties panel immediately below the Slice width field. Double-click on the thickness adjustment control to zoom in for finer control, and right-click to zoom back out.
Slicer Directions
Align to Camera (![]() ) will position the slicer parallel to the viewing plane in the scene. Then position the slicer at the desired distance towards you or away from you in the view by holding down the Ctrl key and the right mouse button while dragging the mouse.
) will position the slicer parallel to the viewing plane in the scene. Then position the slicer at the desired distance towards you or away from you in the view by holding down the Ctrl key and the right mouse button while dragging the mouse.
The Slice East (X) Axis, Slice North (Y) Axis and Slice Elevation (Z) Axis buttons (![]()
![]()
![]() ) will position a slicer orthogonal to the relevant axis. Slice East (X) Axis will set the slicer’s dip to 90 and dip azimuth to 270, Slice North (Y) Axis sets the dip to 90 and the dip azimuth to 180. Slice Elevation (Z) Axis sets the dip to 0 and the dip azimuth to 0. Hold down the Ctrl key and the right mouse button while dragging the mouse to reposition the slicer along the axis.
) will position a slicer orthogonal to the relevant axis. Slice East (X) Axis will set the slicer’s dip to 90 and dip azimuth to 270, Slice North (Y) Axis sets the dip to 90 and the dip azimuth to 180. Slice Elevation (Z) Axis sets the dip to 0 and the dip azimuth to 0. Hold down the Ctrl key and the right mouse button while dragging the mouse to reposition the slicer along the axis.
The Centre slicer in scene button (![]() ) will reposition the slicer parallel to its current position, but closer to the centre of the scene. Hold down the Ctrl key and the right mouse button while dragging the mouse to reposition the slicer parallel to the current orientation.
) will reposition the slicer parallel to its current position, but closer to the centre of the scene. Hold down the Ctrl key and the right mouse button while dragging the mouse to reposition the slicer parallel to the current orientation.
The Lock to Camera (![]() ) option locks the slice to the current orientation in the view. Moving the scene moves the objects through the slicer in its locked position.
) option locks the slice to the current orientation in the view. Moving the scene moves the objects through the slicer in its locked position.
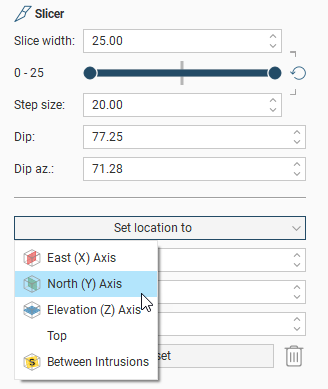
The Set location to list in the shape properties panel contains options to slice across each of the coordinate axes, plus the options to set a slice at the very top of the model and to position the slicer at the location of any sections displayed in the scene:
Object Slice Mode
When the slicer is in the scene, how an object is sliced depends on its Slice mode, which is set in the properties panel. Being able to set Slice mode for each object gives you more flexibility in how you display data in the scene. For example, here the M_Geology table is selected in order to change how the wells are displayed in relation to the slicer:
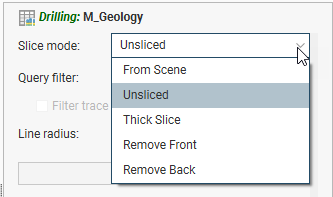
The From Scene setting is the default; the object is sliced according to the properties set for the slicer.
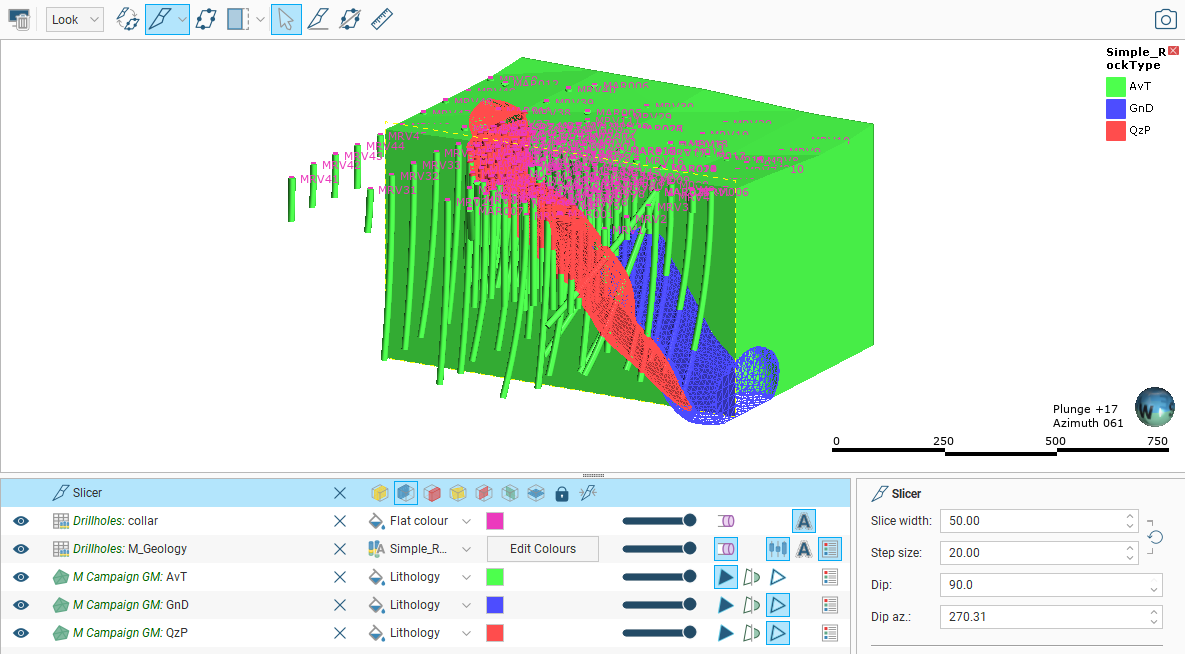
By changing the Slice mode for objects in the scene, you can illustrate how a model has been constructed. For example, here the AvT volume is displayed sliced, but the other volumes are unsliced, as is the drilling data, and we can see the relationship between the drilling data and the two intrusion surfaces modelled from it:
Slicer Sets
When you have settled on a slicer orientation, you can save the slicer position and give it a name by clicking Create Set in the properties panel. You can also define a Number of slices in front of and/or behind the slicer and parallel to it. Once defined, the Show slicer button changes from ![]() to
to ![]() .
.
You can recall a slicer set by clicking the dropdown list indicator next to the Show slicer button (![]() ) and selecting a slicer set from the list.
) and selecting a slicer set from the list.
Slicer Appearance
In the Settings window, you can change the general appearance of the slicer in the scene. You can change:
- Whether or not the slicer outline is displayed in the scene
- Whether or not additional information about the slicer is displayed for certain slice types
- The appearance of the slicer outline when it is displayed
To make these changes, click on the Leapfrog Energy menu and selecting Settings.
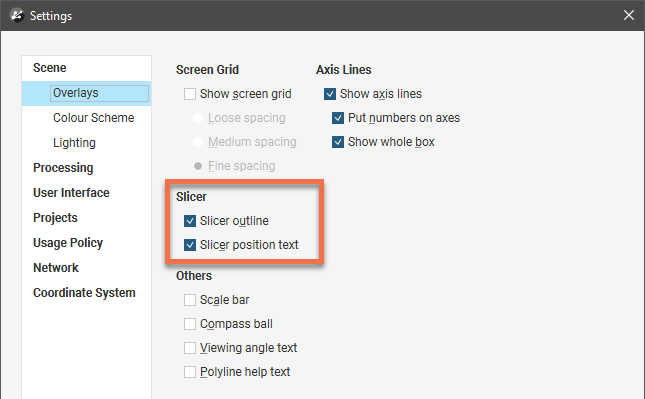
In Scene > Overlays, you can show or hide the slicer outline and the slicer position text:
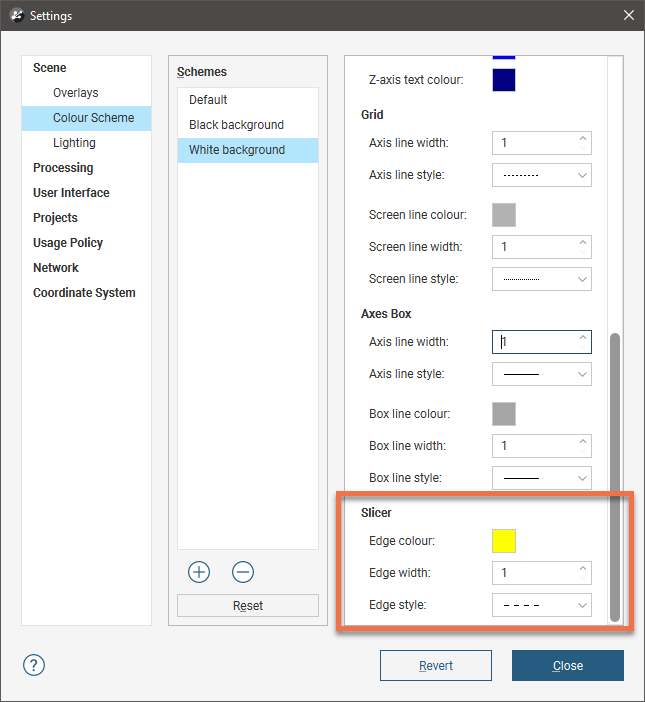
In Scene > Colour Scheme, you can change the slicer’s outline colour and width, along with the line style used for displaying the edge of the slicer.
Slicer Shortcuts
Use the following keyboard shortcuts to control the slicer:
| Key(s) | Action |
|---|---|
| Ctrl+/ | Add the slicer to the scene. Press Ctrl+/ to remove the slicer from the scene. |
| L | Look at the slicing plane |
| Shift+L | Look at the back of the slicing plane |
| T | Thick slice ( |
| F | Remove front ( |
| K | Remove back ( |
| Ctrl+V | Orient the slicer to the current view |
| Ctrl+E | Slice the east (X) axis ( |
| Ctrl+N | Slice the north (Y) axis ( |
| Ctrl+D | Slice the elevation (Z) axis ( |
| Ctrl+L | Lock the slicer to the camera ( |
| C | Centre the slicer in the scene ( |
| Ctrl+right mouse button | Move the slicer forward and backward in the scene |
| Ctrl+middle (or left+right) mouse button | Change the slice width |
| , (comma) | Step the slicer forward |
| . (full stop) | Step the slicer backward |