Selecting Intervals
If the lithologies in a column are poorly sorted, you can display the column in the scene and use the interval selection tool to work with all the segments and sort them into new units. The original lithology column is preserved and a new lithology column is added to the interval table. You can then select the original lithology column or the new one when displaying data and creating models.
The difference between the interval selection tool and the split lithologies tool is that with splitting lithologies, you are limited to selecting intervals from a single lithology. With interval selection, you can choose intervals from any lithology displayed in the scene.
The rest of this topic describes how to use the interval selection tool for well data tables. It is divided into:
- Creating an Interval Selection
- The Interval Selection Toolbar
- Selecting Intervals and Assigning Lithologies
- Editing an Interval Selection Column
- Exporting Interval Selection Edits
- Importing Interval Selection Edits
Creating an Interval Selection
To start selecting intervals, first add the drilling data to the scene.
- For an interval table, right-click on the table in the project tree and select New Column > Interval Selection.
- For a merged table, right-click on the table and select Interval Selection.
In both cases, the New Lithology Column window will appear:
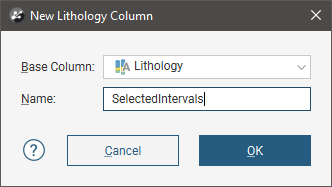
The Base Column determines the lithologies each interval in the new column will initially be assigned. You can:
- Choose any lithology column in the interval table you are working with. Choose this option if you will be making minor changes to the imported lithologies. You will also be able to create new lithologies and assign intervals to them.
- Choose None, which results in a new column with no lithologies assigned to any intervals. You will need to define all the lithologies you wish to assign to intervals.
Enter a Name for the new lithology column, then click OK.
The new column will be created and displayed in the scene, along with the Interval Selection window and a set of tools for working with the intervals in the scene.
- If you have chosen a lithology column as the base column, the intervals displayed will be using the lithologies from the base column. You can start selecting them and assigning them to new or existing lithologies.
- If you have chosen None for the base column, only the well traces will be visible in the scene, if that option is enabled. To view the intervals and start selecting them, display the data using one of the other columns.
The Interval Selection Toolbar
The first five tools in the interval selection toolbar are the primary tools for selecting intervals in the scene:

The Select Intervals tool (![]() ) is for drawing across intervals in the scene. This tool adds intervals to or removes them from the current selection, depending on which of the Add Intervals(
) is for drawing across intervals in the scene. This tool adds intervals to or removes them from the current selection, depending on which of the Add Intervals(![]() ) or Remove Intervals(
) or Remove Intervals(![]() ) tools is also enabled:
) tools is also enabled:
- If Add Intervals(
 ) is enabled, drawing across intervals adds them to the current selection.
 - If Remove Intervals(
 ) is enabled, drawing across intervals removes them from the current selection. Drawing across unselected intervals will have no effect.
Selected intervals are highlighted in the scene.
You can change the width of the line used by the Select Intervals tool by clicking on the second button in the toolbar:
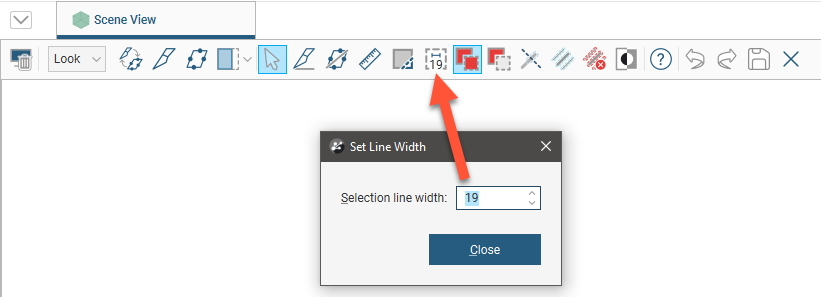
The number shown as part of the Change line width button is the currently set line width.
You can keep this window open while selecting intervals so you can increase the line width to choose more intervals or reduce the line width to select fewer intervals.
When adjacent intervals belong to the same lithology, the Select Intervals tool will select all adjacent intervals, even when the tool’s stroke does not cross those other intervals. If you wish to select only one interval, enabling the Individual Intervals option (![]() ) restricts selection to only intervals the tool’s stroke crosses.
) restricts selection to only intervals the tool’s stroke crosses.
You can also:
- Select all visible intervals by clicking on the Select all button (
 ) or by pressing Ctrl+A.
 - Clear all selected intervals by clicking on the Clear selection button (
 ) or by pressing Ctrl+Shift+A.
 - Swap the selected intervals for the unselected intervals by clicking on the Invert selection button (
 ) or by pressing Ctrl+I.
Selecting Intervals and Assigning Lithologies
To select intervals, click on the Select Intervals button (![]() ) and click the Add Intervals button (
) and click the Add Intervals button (![]() ). In the scene, draw a line across each interval you wish to select:
). In the scene, draw a line across each interval you wish to select:
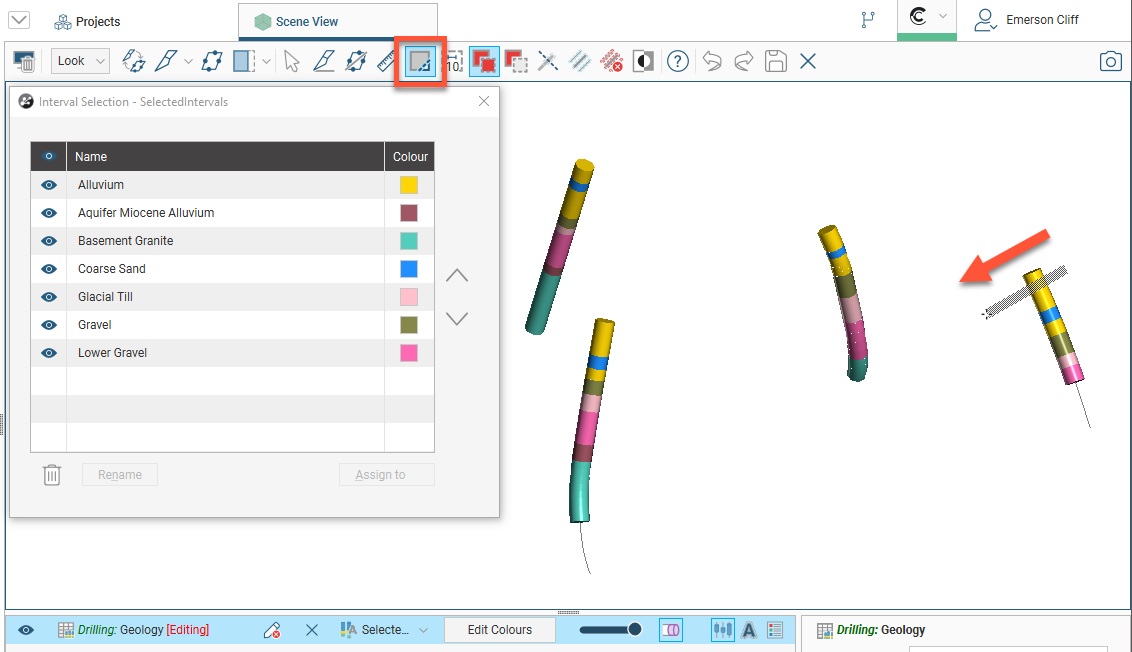
Selected intervals are highlighted in the scene. If you accidentally select the wrong interval, either:
- Hold the Ctrl key while drawing across the interval.
- Click the Remove intervals button (
 ) and draw across the interval once again.
When you have selected at least one interval, click on the Assign to button, then either select an existing lithology or create a new lithology by selecting Create New Lithology:
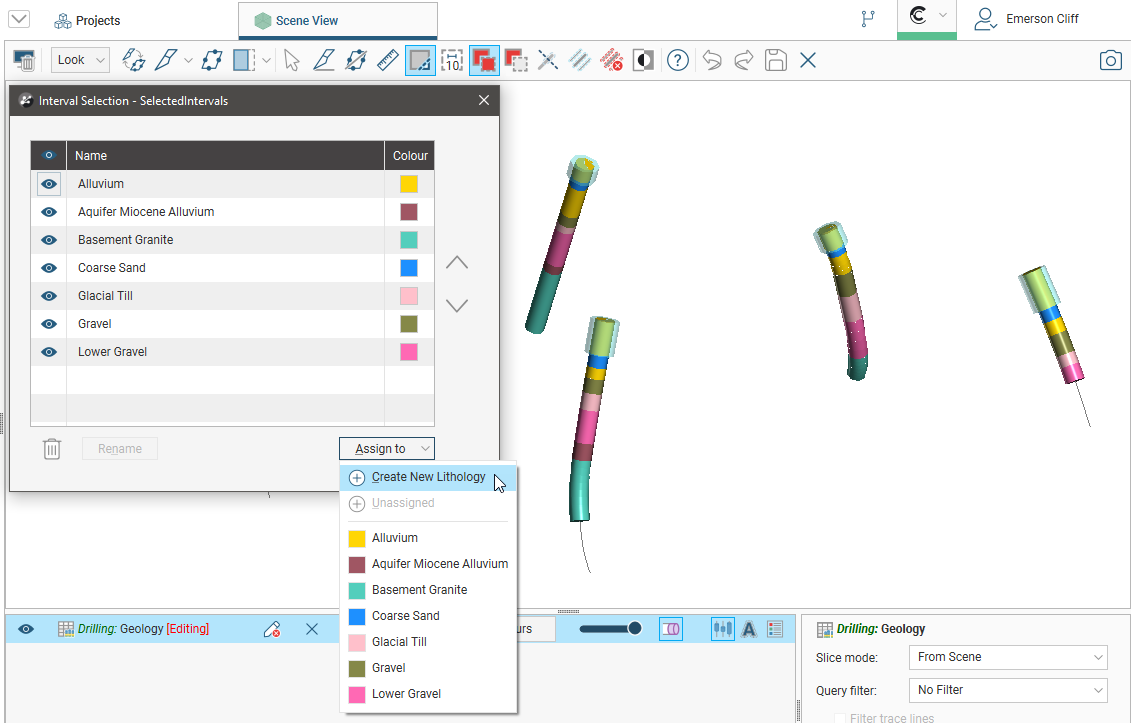
Enter a Name for the new lithology, then click OK:
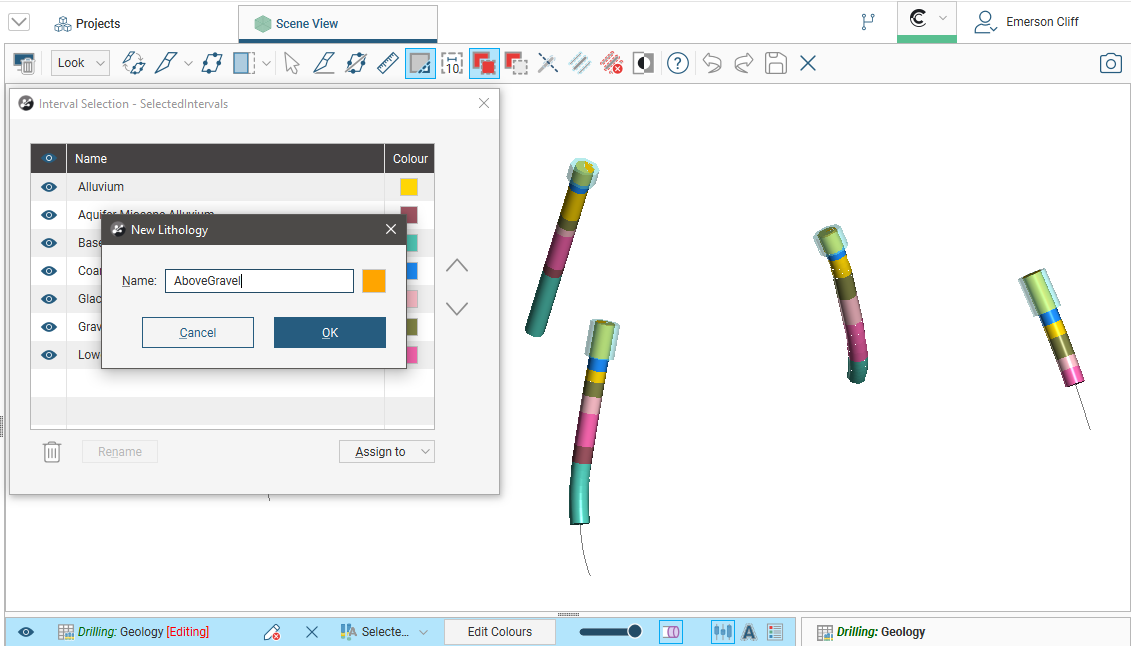
The new lithology will be created and the scene updated to reflect the changes:
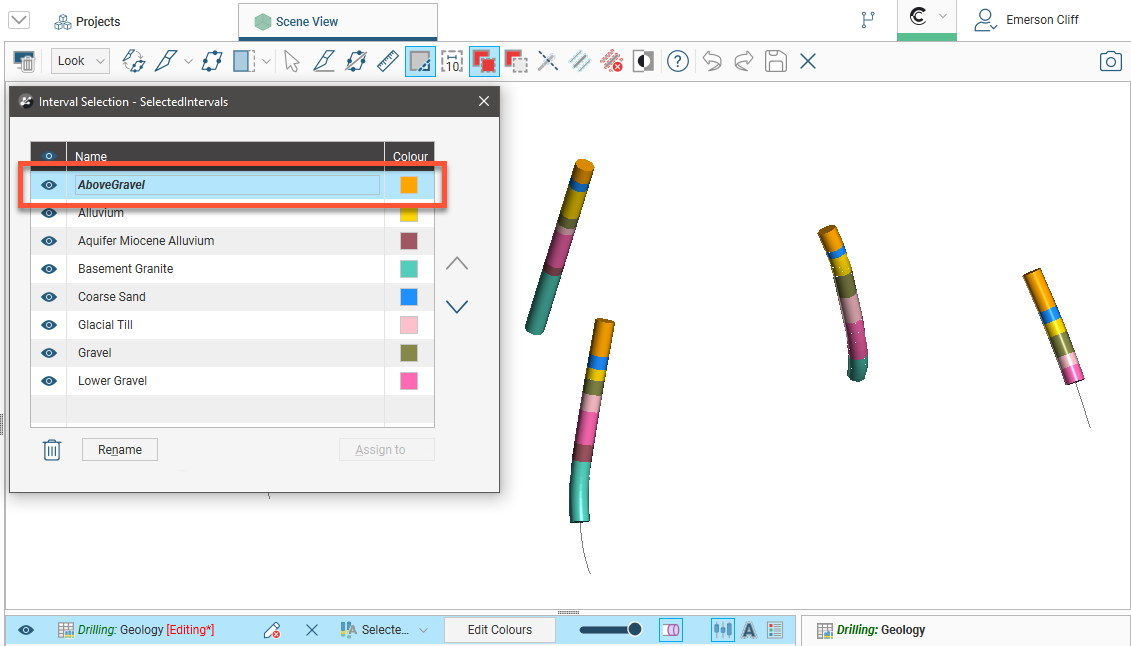
Once you have created a new lithology, you can:
- Assign more intervals to the lithology. Select intervals in the scene, then select the lithology from the Assign to list.
- Rename the lithology. Click on the lithology in the list, then click the Rename button.
- Delete the lithology. Click on the lithology in the list, then click the delete button (
 ). When you delete a lithology from the list, all intervals that have been assigned to that lithology will revert to the lithology assigned in the Base Column.
When you are finished, click the Save button (![]() ).
).
The new lithology column will appear in the project tree as an additional lithology column in the interval table. Select the new column from the shape list to display it:

Editing an Interval Selection Column
If you wish to make further changes to an interval selection column, either:
- Double-click on the column in the project tree.
- If the column is displayed in the scene, click on the Edit button (
 ) in the shape list.
Exporting Interval Selection Edits
To export a list of interval selection edits, right-click on the interval selection in the project tree and select Edits > Export:
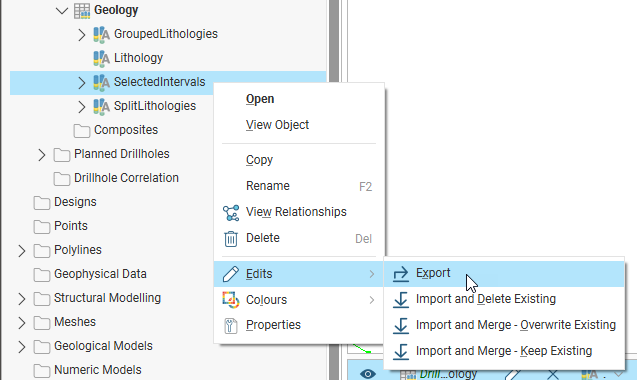
The file is exported in *.txt format.
Although the file containing the edits is a text file, editing it is not recommended.
Importing Interval Selection Edits
If you have a list of interval selection edits you need to import into a project, right-click on the interval selection in the project tree and select Edit. Each of the Import options handles interval selections in the file and interval selections in the project in different ways.
- Import and Delete Existing. This option discards any edits made in the project and uses those in the file, even if the file does not contain edits that match those in the project. If you do not wish to keep any of your existing interval selection edits and will rely solely on those made in the file, choose this option.
- Import and Merge - Overwrite Existing. This option prioritises edits in the file over those in the project. Edits that are in the project but not in the file will be retained.
- Import and Merge - Keep Existing. This option prioritises edits in the project over those in the file. Edits that are in the file but not in the project will be added to the project.
For each option, if there are edits in the file that do not match an interval (hole_id, from, to) in the project, a message will be displayed. A text file listing the errors will be saved on your local hard drive.
