
Well Planning
In Leapfrog Energy, you can plan wells, view prognoses for models in the project and export planned wells in .csv format.
Planned wells are added to a project from the Planned Wells folder, which is in the Well Data folder. When displayed in the scene, the planned well is made up of a collar point, a target location and a path defined by lift and drift parameters.
The rest of this topic is divided into:
Adding Planned Wells
To plan a well, right-click on the Planned Wells folder and select Plan Well. The Well Planning window will appear:
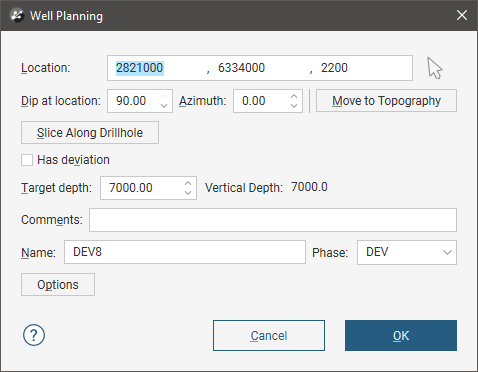
If the well deviates, tick Has Deviation to enter information about the Kickoff depth, Build-up rate and Target depth:
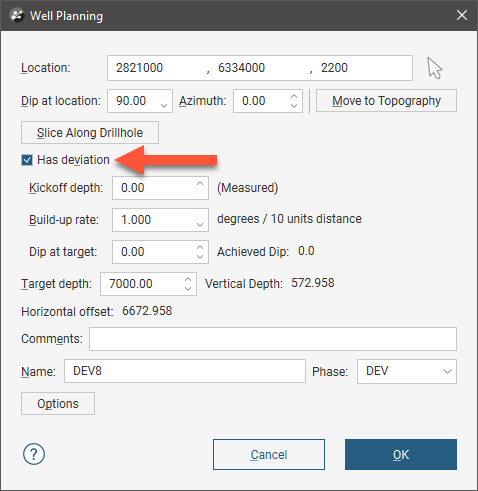
If a Kickoff depth greater than the Target depth is entered, the Target depth will be updated to reflect the new value.
When the planned well is positioned as required, click OK to finish.
Planned wells will appear in the Planned Wells folder. You can change a planned well by right-clicking on it and selecting Edit Well.
Planning Options
In the Well Planning Options window, you can change the maximum build-up rate permissible in the Well Planning window. To open this window, click the Options button in the Well Planning window:
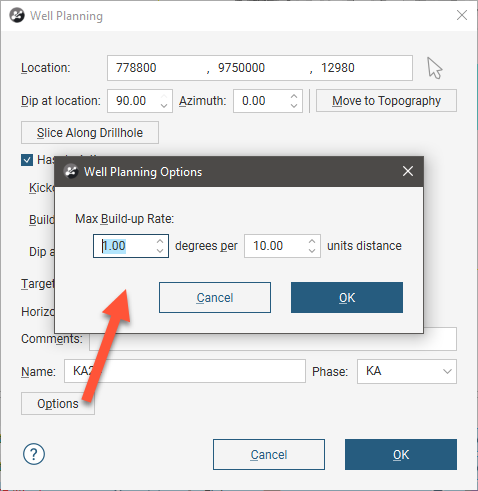
Enter the information required and click OK to return to the Well Planning window. The new settings will be applied to the next new planned well added to the project.
Drilling Prognoses
Planned wells can be evaluated against any model in the project. To view drilling prognoses for a well, right-click on it and select Drilling Prognoses. The Drilling Prognoses window will appear:
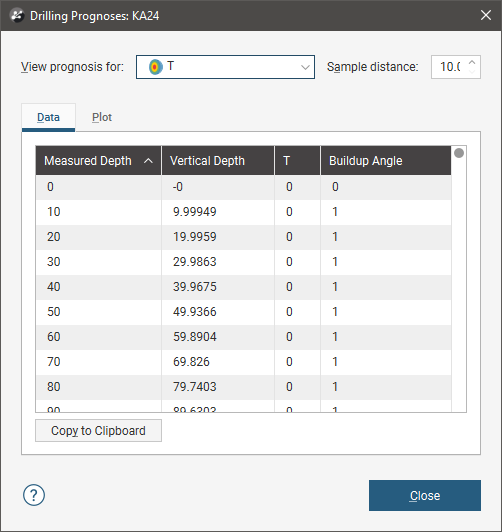
You can display prognoses for different models by selecting them from the list. For numeric models, you can view a plot of the data by clicking on the Plot tab.
In each tab, you can copy the information displayed to your computer’s clipboard by clicking the Copy to Clipboard button. The information in the Data tab will be copied as tab delimited text, which can be copied into a spreadsheet application such as Excel. The plot displayed in the Plot tab will be copied as a bitmap image.
Exporting Planned Wells
There are two ways to export planned wells:
Export as CSV
To export a planned well in CSV format, right-click on it in the project tree and select Export. You will be prompted for a filename and location.
Export as Polylines
A planned well can be exported as a polyline the following formats:
- Leapfrog Polylines (*.lfpl)
- Leapfrog Mining Polylines (*.csv)
- Drawing Interchange Polylines Files (*.dxf)
- Surpac String Polyline Files (*.str)
- Gocad Polylines Files (*.pl *.ts)
- MineSight Polylines Files (*.srg)
- Datamine Polylines Files (*.asc)
- Micromine Polylines Files (*.str *.asc)
- AutoCAD Drawing Files (2013/LT2013) (*.dwg)
- Bentley Drawing Files (v8) (*.dgn)
To export a planned well as a polyline, right-click on the well and select Export as Polyline. In the window that appears, select where you wish to save the file, enter a file name, select the file type from the Save as type options, and then click Save.