Editing the Vein Reference Surface
A vein includes a reference surface ( ) that represents the trend or form of the vein. When the vein is derived from drilling data, this is initially calculated as the best fit surface using the midpoints and the hangingwall and footwall surfaces. When derived from data other than drilling data, a planar reference surface is initially used. Whatever data source the vein is derived from, the reference surface setting can be changed to be a curved reference surface, a planar reference surface or another mesh in the project.
Double-click on the reference surface in the project tree; this opens the Edit Vein Reference Surface window and you can see what option is being used for the surface. In this example, the B1 vein has been created from lithology data and so it has a curved reference surface and the midpoints for the vein lithology are used as Input values:
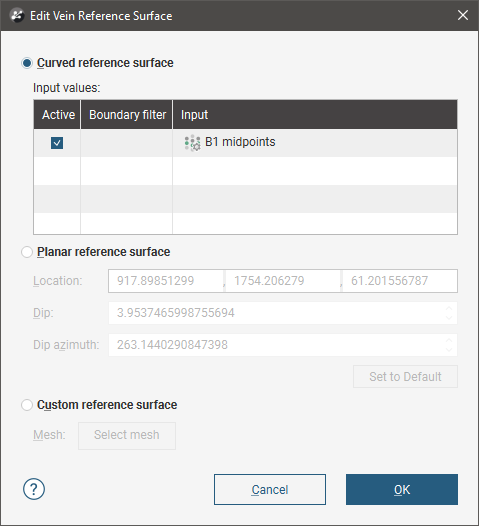
Each option is described below:
There is a great deal of flexibility in Leapfrog Energy for refining the reference surface, including the ability to created a surface in the Meshes folder from vein midpoints. A possible workflow is to:
- Create an initial vein in the geological model.
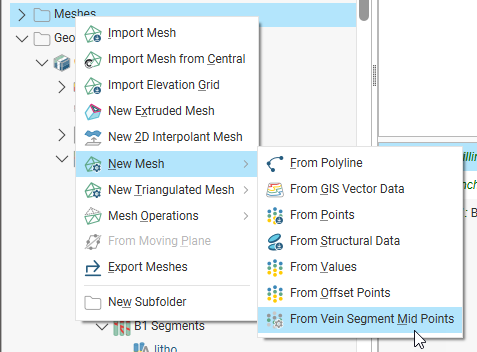
- Use the midpoints from this initial vein to create a mesh in the Meshes folder:
- Refine the mesh using the Meshes folder tools.
See the Interpolated Meshes topic for information on creating and refining and interpolated meshes.
- Use the mesh as a custom reference surface.
Curved Reference Surface
The Curved reference surface option is the default for veins created from lithology data and the objects used to build the reference surface are shown in the Input values part of the Edit Vein Reference Surface window:
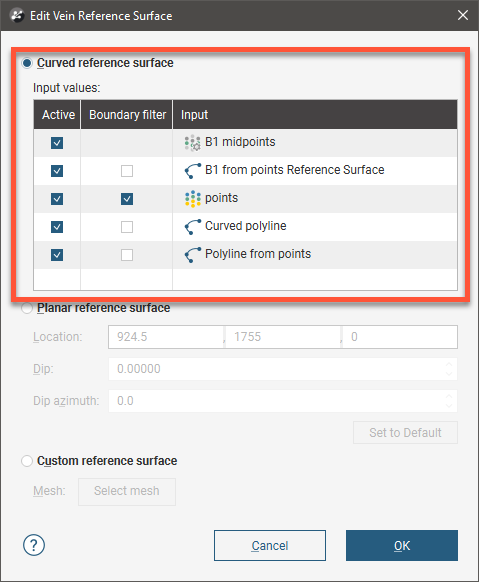
You can enable or disable the different data objects to see their effects on the vein by ticking and unticking the Active box, then clicking OK to reprocess the vein.
The Boundary filter setting for each object determines whether or not the data that lies outside the reference surface’s boundary is filtered.
- Tick Boundary filter so that the surface is only influenced by the data that falls inside the reference surface’s boundary.
- Untick Boundary filter if you want the surface to be influenced by the data both inside and outside the reference surface’s boundary.
Boundary filtering for the midpoints used to create a curved reference is controlled by the setting for the vein itself. See Vein Surfacing Settings in the Veins topic for more information.
The Curved reference surface option is the default for veins created from lithology data, whereas the Planar reference surface option is the default for veins created from other types of data. In order for a vein created from data other than lithology data to use a curved reference surface, other data must be added to it. To add data, right-click on the reference surface in the project tree and select Add or Edit.
Using the Add option, you can add points data, GIS data or polylines to the surface. Using the Edit option, you can add a polyline to the reference surface, but its editing options are limited in that you can not add tangents or normals to the polyline.
Planar Reference Surface
Veins created from objects other than lithology data use a planar reference surface by default. To edit a planar reference surface, double-click on the reference surface in the project tree. This will open the Edit Vein Reference Surface window and display controls in the scene for adjusting the plane.
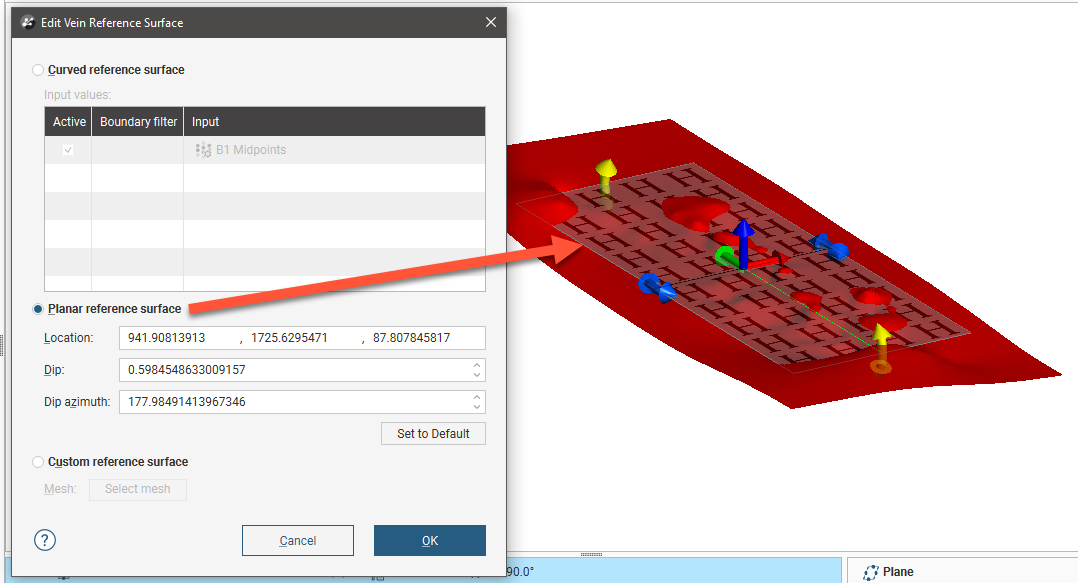
These handles work in the same manner as the moving plane controls, as described in The Moving Plane.
To use a planar reference surface for a vein created from lithology data, double-click on the reference surface to open the Edit Vein Reference Surface window, then select the Planar reference surface option. Adjust the plane in the scene, then click OK to reprocess the vein.
Custom Reference Surface
If you wish to use another surface in the project as a reference surface, double-click on the reference surface to open the Edit Vein Reference Surface window. Enable the Custom reference surface option, then select the mesh from those available in the project:
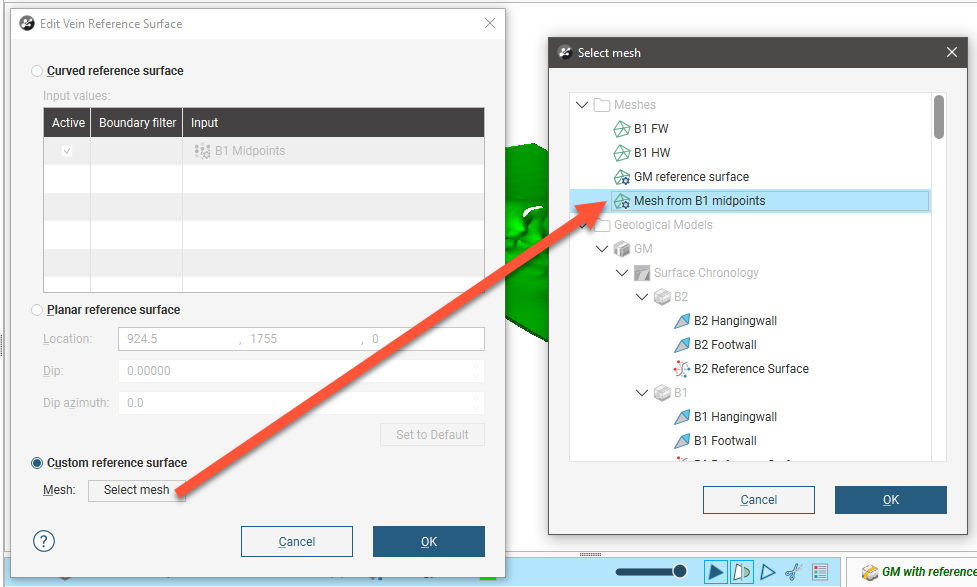
This option is useful if you wish to use an existing surface, such as the foot- or hanging-wall surface of an adjacent vein, as your vein’s custom reference surface, or if you need to use a fault surface to influence the trend of the vein. You can create and use your own custom vein surface, if needed.
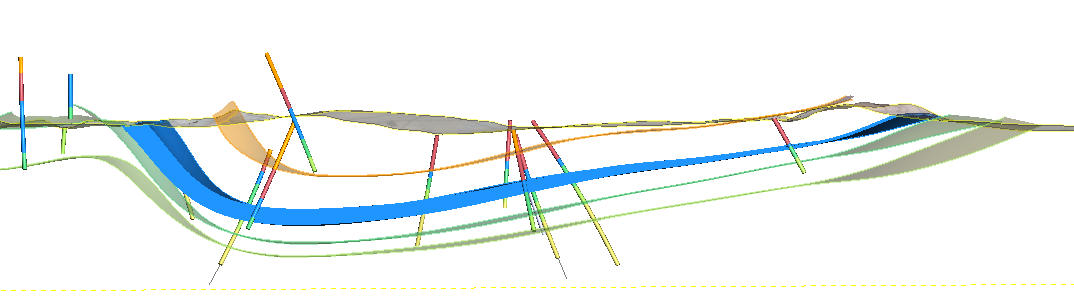
Here, a thin folded layer has been modelled using a vein, created from a base lithology using sparse drilling data. The vein does not conform to known geology, crossing other modelled surfaces.
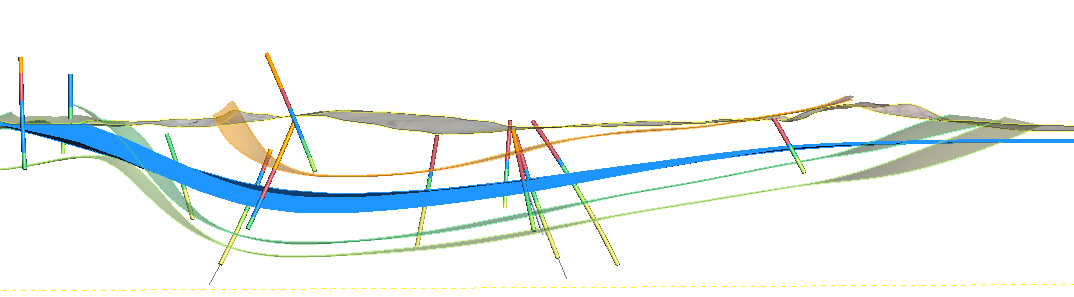
When the reference surface is edited to use a Custom reference surface with one of the existing surfaces in the model selected, the vein is modelled in a way that is more geologically reasonable: