Adding and Organising Comments
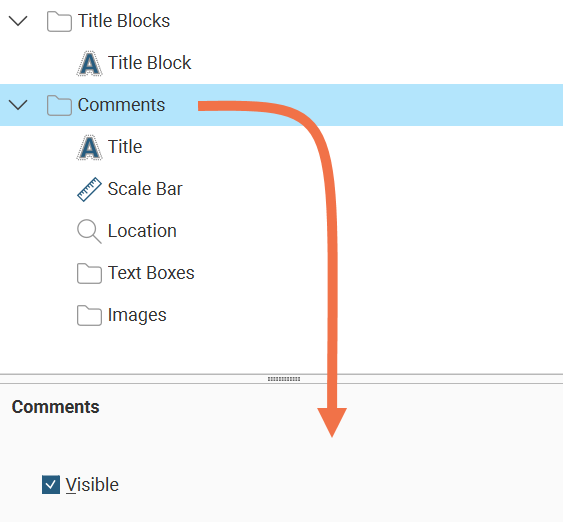
Once you have laid out the main Section object and organised the Legend Group, you can add a number of different types of comment annotations to the layout, including a title, location information and a scale bar, text boxes and imported images. A master Visible tickbox is used to show or hide all the comment types.
Displaying a Title
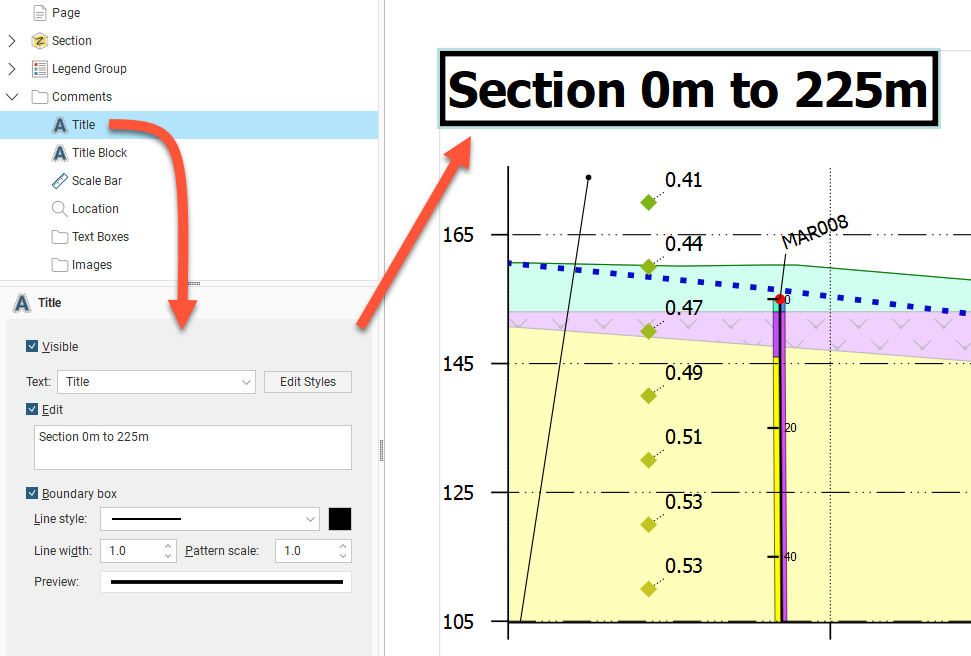
The Title object formats the title displayed on the section. To move the title, click on it in the layout preview and drag it to the preferred location. The text used for the Title is the name for the section in the project tree, but this can be changed in the properties panel. Enable the Edit option, then edit the text in the box. You can display a line around the Title by enabling the Boundary box option. You can customise the Line style, Line width, Pattern scale and colour of the box. A Preview is displayed and the boundary is updated in the section preview.
Displaying a Scale Bar Information
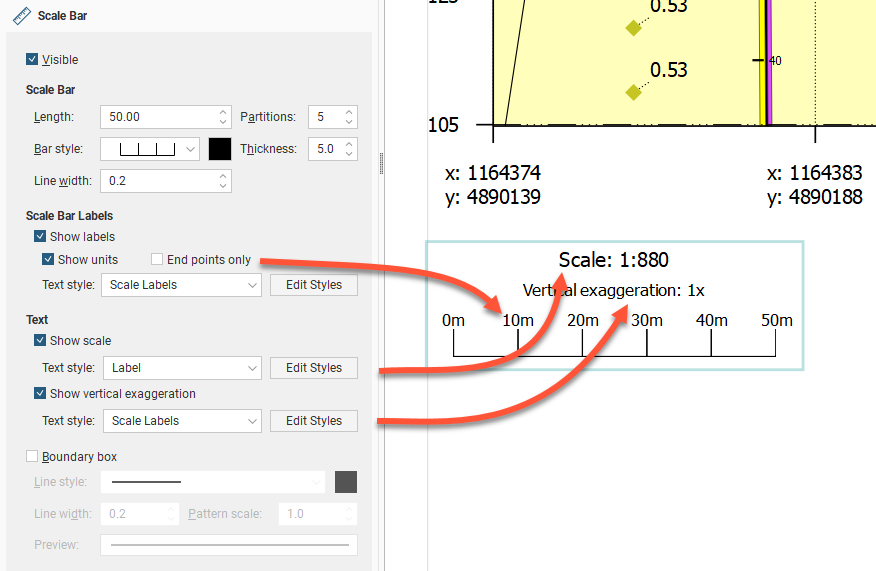
As for other section elements, the Scale Bar has an option to make the scale bar Visible. Click and drag the scale bar to reposition it on the section. There are a number of different styles available for the Scale Bar, and you can control its Length, Partitions, Bar style, Thickness and Line width:
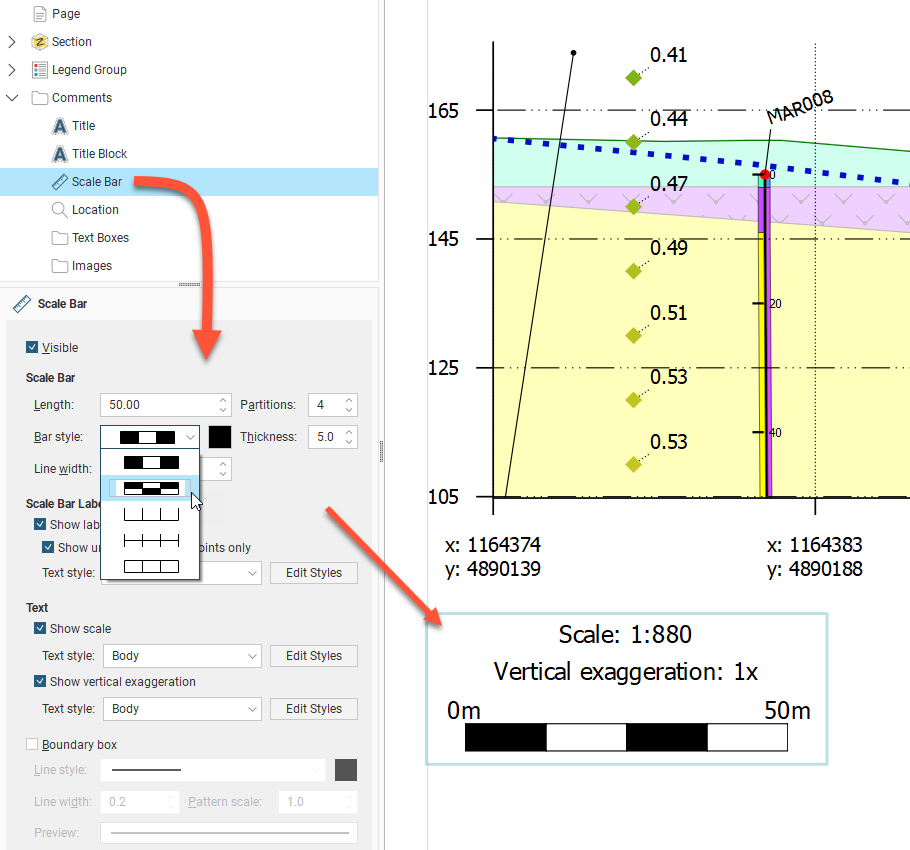
You can show the Scale Bar with or without labels, and labels can be shown all along the bar by disabling the End Points Only option. There is also a Show scale tickbox to show or hide the scale of the section, and an option to Show vertical exaggeration or hide it. As for other section elements, the scale bar box can be defined with a Boundary box with a customisable line style.
Displaying Location Information
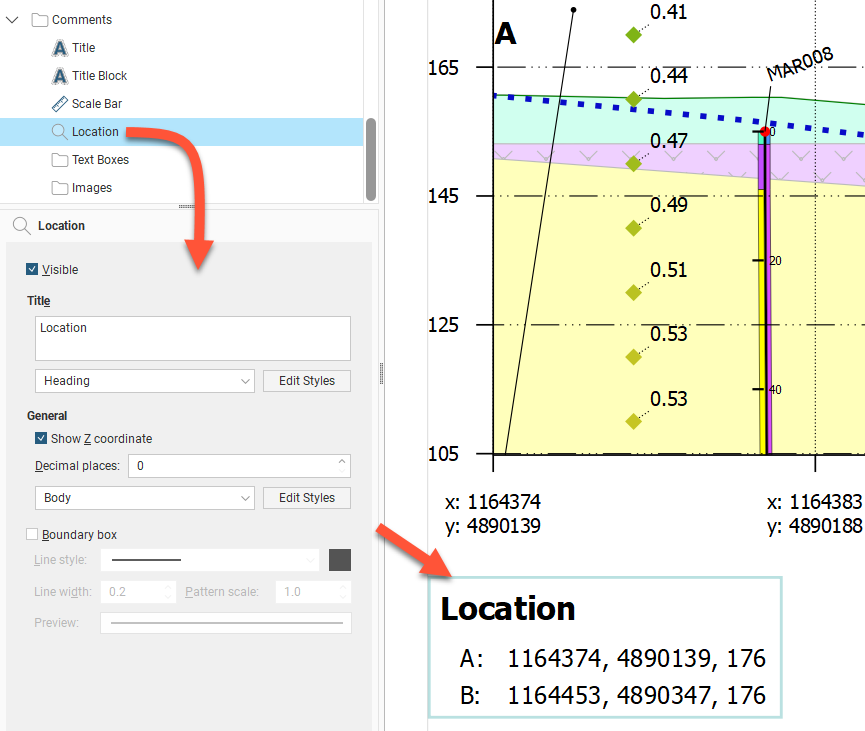
The Location object controls how location information is displayed. It can be made Visible or hidden. Click and drag the location box to reposition it on the section. You can choose to include the Z coordinate and change the number of decimal places used to display coordinates.
The two points referenced in the Location are the top-left and top-right points of the section. The labels for these two points is editable and can be set by navigating in the layout tree to Section > Extents tab > Show end point labels Options button where Left label and Right label can be edited. These labels are used for the Location box even if the section extents Show end point labels tickbox is unticked.
There is a Boundary box option for the Location box. You can customise the Line style, Line width, Pattern scale and colour of the box. A Preview is displayed and the boundary is updated in the section preview.
Adding Text Boxes
With the Text Boxes object, you can add text boxes and arrows to highlight information and details on the section:
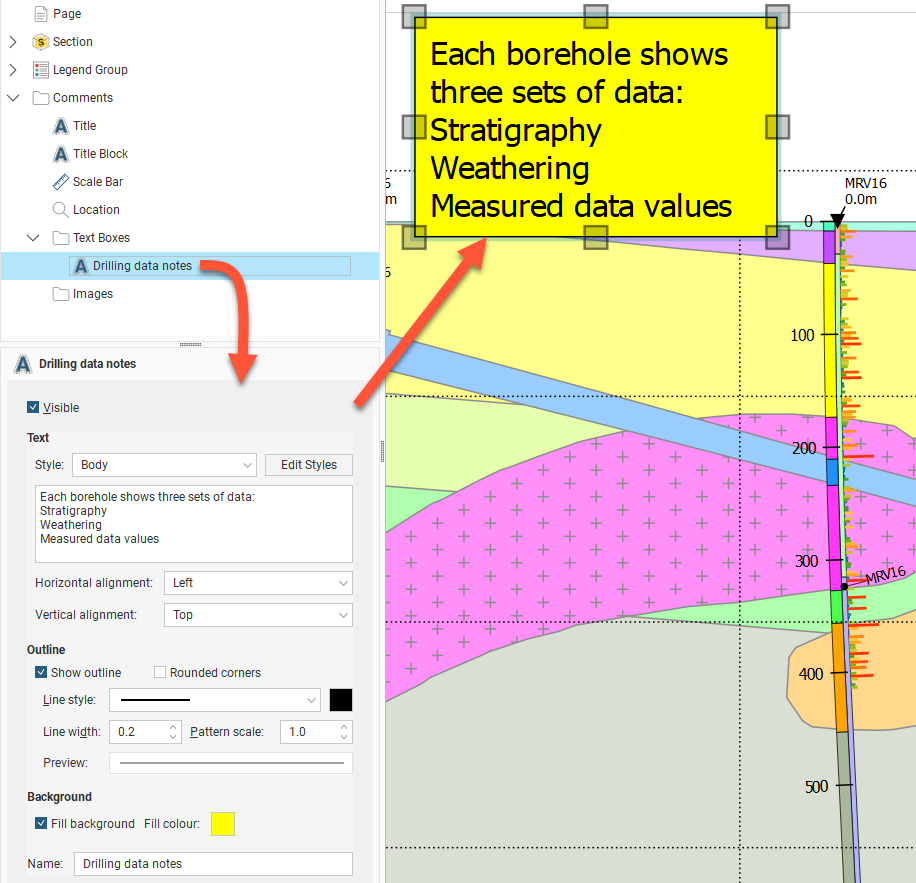
Besides the usual Visible tickbox, the Style of the text can be chosen from the styles available, and can be customised by clicking the Edit Styles button. The text is edited using the box provided. Both the Horizontal alignment and Vertical alignment can be set for the text inside the text box.
There is also a Show Outline option for the text box, and corners can be square or rounded. You can customise the Line style, Line width, Pattern scale and colour of the outline. A Preview is displayed and the text box is updated in the section preview.
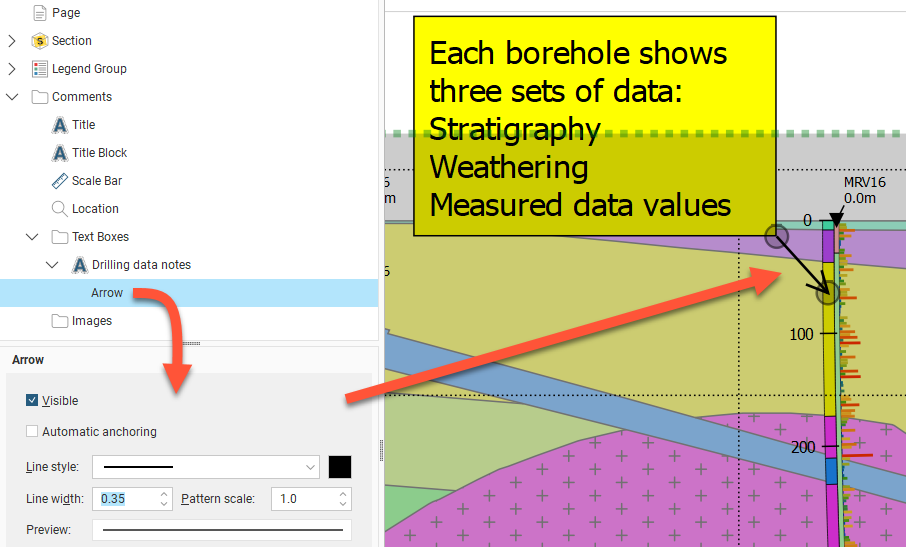
Once a text box has been created, an arrow can be added to connect the text box to a relevant part of the section. Right-click the text box in the layout tree and select Add Arrow. The arrow Line style, Line width, Pattern scale and colour can be customised. The arrow head scales with the line width. The arrow head style is not customisable. Each end of the arrow can be repositioned. When the Automatic anchoring option is enabled for an arrow, the arrow’s anchor will move when its associated text box is moved. If this option is disabled, the arrow will move when you move the text box, but you will have to place its anchor manually.
Adding Images
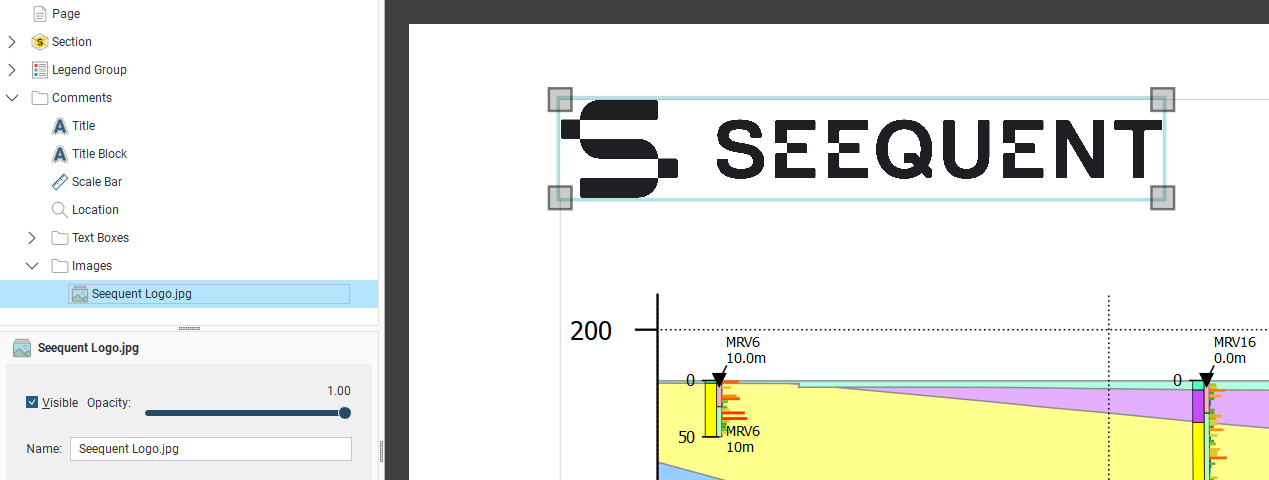
If you wish to import an image such as a logo or map, right-click on the Images object and select Add Image. Navigate to the folder that contains the image file and select the file. Click Open to import the file, which will automatically be added to the section layout. Move the image by clicking on it in the preview and dragging it. You can resize the image by dragging the corners of the image. Visible will show or hide the image, and Opacity will control the transparency of the image.