Interpolated Meshes
An interpolated mesh is a type of editable mesh (![]() ). An interpolated mesh uses FastRBF to fit and interpolate surface data. The FastRBF is useful for creating meshes from sparse data sets or when data has large areas where there are no points. Interpolated meshes can be created from points data, GIS data, polylines, structural data and values objects.
). An interpolated mesh uses FastRBF to fit and interpolate surface data. The FastRBF is useful for creating meshes from sparse data sets or when data has large areas where there are no points. Interpolated meshes can be created from points data, GIS data, polylines, structural data and values objects.
Interpolated meshes can be edited by adding more data to the mesh and changing settings.
This topic describes creating and working with interpolated meshes. It is divided into:
Creating an Interpolated Mesh
The steps for creating a mesh from data in the project are similar, regardless of the data used to create the mesh.
To create an interpolated mesh from data in the project, right-click on the Meshes folder and select from the New Mesh options.
Here, a new mesh is being created from points:
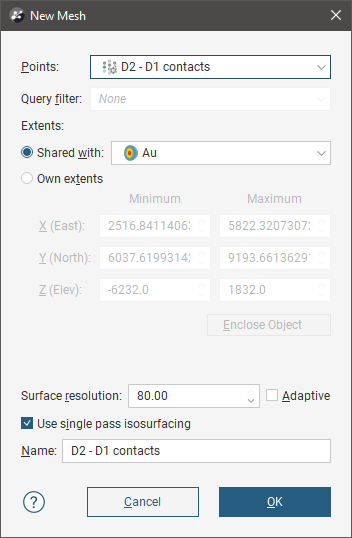
Select the required object from the list.
When defining the mesh’s extents, you can set the extents to be independent of other objects in the project (Own extents) or you can use the extents of another object (Shared with). When you select the Shared with option, the mesh will be updated when the extents object it shares is updated.
Leapfrog Geo automatically sets the surface resolution based on the data available in the project. You can experiment with the surface resolution, adaptive and single pass settings once you have created the mesh. See Surface Resolution in Leapfrog Geo for more information on the effects of these settings.
Enter a name for the new mesh and click OK.
If you are creating the mesh from a polyline, you will be prompted to select an existing polyline or draw a new one. If you draw a new polyline, it will not be able to be used elsewhere in the project unless it has been shared. To share the polyline, expand the mesh in the project tree, right-click on the polyline and select Share.
The new mesh will appear in the Meshes folder. Expand the mesh in the project tree to see how it was made. As further refinements are made to the mesh, that information will also be added to the mesh in the project tree.
Refining an Interpolated Mesh
Editable interpolated meshes (![]() ) can be refined by adding data, as described in Adding Data to Surfaces. The options available depend on how the mesh was created.
) can be refined by adding data, as described in Adding Data to Surfaces. The options available depend on how the mesh was created.
To add data to an editable mesh, right-click on it and select one of the options from the Add menu. A list of objects available in the project will be displayed. Select the required object and click OK. The mesh will be updated and the object used to modify it will appear under it in the project tree.
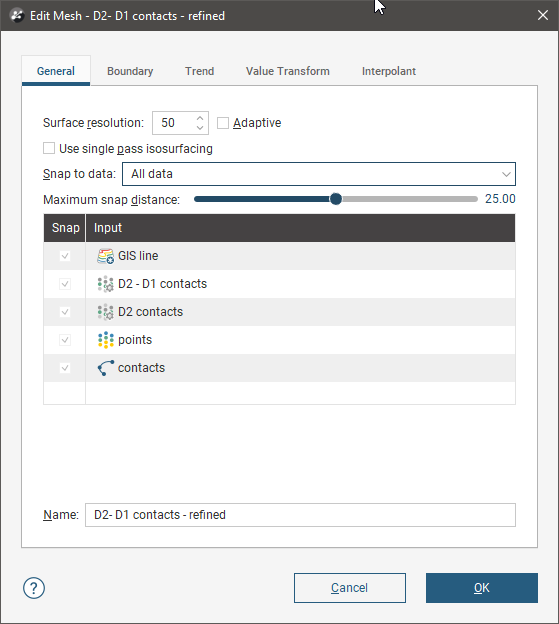
You can also refine editable interpolated meshes by changing the trend, transforming values, adjusting the interpolant and changing the boundary. To do this, double-click on the mesh. The Edit Mesh window will be opened:
See Offset Meshes for the options available for meshes from offset points.
Surface Resolution Settings
See Surface Resolution in Leapfrog Geo for more information on the Surface resolution settings in the General tab.
Snap Settings
The mesh can be set to snap to the data objects used to create it. There are four options:
- Off. The mesh does not snap to the data.
- All data. The mesh snaps to data within the Maximum snap distance.
- Drilling only. The mesh snaps only to drilling data and data objects derived from drilling data within the Maximum snap distance but not to other data. For example, the mesh will honour points data derived from drilling data, but not points data imported into the Points folder.
- Custom. The mesh snaps to selected data objects within the Maximum snap distance.
Take care in enabling snapping and in selecting what data the surface will snap to, as the more data you include, e.g. by setting a large Maximum snap distance or selecting All data for Snap to data, the greater the possibility that errors in the data or assumptions inherent in interpretations (e.g. polylines) will cause distortions in the meshes. If you do enable snapping, it is best to snap only to drilling data. See Honouring Surface Contacts for more information on these settings.
When Snap to data is set to Custom, you can then set whether or not Snap is enabled for the objects used to create the mesh, as discussed in Honouring Surface Contacts. Custom is the most flexible options as you can select the specific data objects the mesh will or will not snap to.
If you will be exporting the mesh for use in another application, you may wish to adjust the snap settings.
Data used to create the mesh will appear in the Input list. When you add more data to the mesh, those objects will also be listed. You can remove those additional objects by expanding the mesh in the project tree, then right-clicking on the data object and selecting Remove.
Other Options
In the Boundary tab, you can change whether the mesh boundary is independent of other objects in the project (Own extents) or you can use the extents of another object (Shared with). When you select the Shared with option, the mesh will be updated when the extents object it shares is updated.
Options available in other tabs are similar to those available for interpolants. See:
For information on the parameters in the Interpolants tab, see the Interpolant Functions topic.
Got a question? Visit the Seequent forums or Seequent support