Publishing to Central
Publishing is the process of uploading a revision of a Leapfrog Geo project to a Central server. When you publish a revision of your Leapfrog Geo project to Central, there are different choices you can make. Which options you choose will depend on how your team works and on where the project falls in your organisation’s workflows.
This topic discusses the process of publishing Leapfrog Geo projects to a Central server, including how to make decisions about when to publish and what to include in the publish event. It is divided into:
- Factors to Consider in Publishing to Central
- Initiating a Publish Event
- Selecting the Objects to Publish
- Setting the Project Workflow Stage
- Including the Project
- Branching
- Adding a Revision Note
- Preparing and Uploading the Package
Factors to Consider in Publishing to Central
The publishing process is flexible and you can choose different options such as:
- What data objects to include
- What project stage to use
- Whether or not to include the Leapfrog Geo project
- Whether to publish to the current branch or create a new one
How often you publish to Central and the options you choose depend on different factors, including your team’s technical needs and the stability or speed of your internet connection. Every situation will be unique, but reasons to publish can include:
- Wanting to back up projects regularly
- Making sure the whole team has access to the latest information
- Adding newly-available data to a project
- Sharing data with other projects
- A milestone being reached
- A project being ready for handover to a colleague who will carry out further work
- A project being ready for review
Publishing is always manually triggered from Leapfrog Geo, which means you can choose to publish when it suits you, such as at the end of the work day, when you know you can avoid peak network traffic or during a time of day when you won’t be using Leapfrog Geo.
Another consideration in choosing when to publish is how large the publishing upload will be, as publishing many objects and/or including the Leapfrog Geo project can result in a large upload that takes some time. Here, for example, are three upload summaries for the same project. The first upload includes all objects, plus the full project, the second includes a limited set of objects and an unprocessed version of the project, and the third upload is only a limited a set of objects:

Initiating a Publish Event
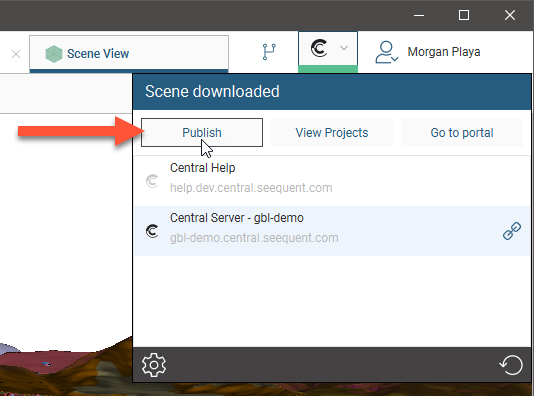
When you are ready to publish your revision to Central, you can start the publishing process by clicking on the Central button in the top right-hand corner of the screen and selecting Publish:
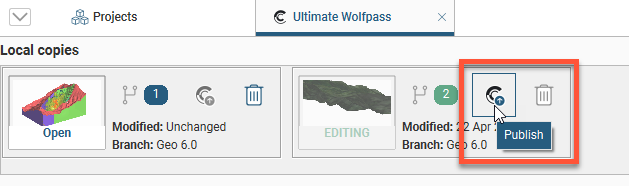
You can also use the Publish button (![]() ) in the Local copies panel:
) in the Local copies panel:
When you click Publish, you may receive a message saying there is an unfinished publish event:
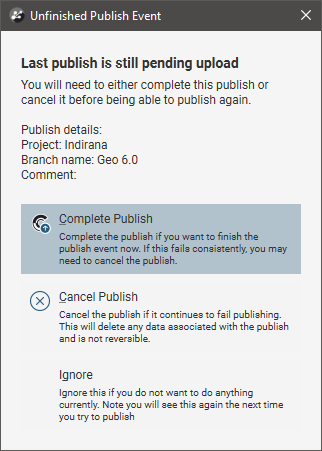
This occurs when a previous publish event was interrupted. Choose from the options presented.
If the publish event was abandoned, it can be removed via the Central Portal.
Leapfrog Geo will then step you through the different options, which are described in the sections that follow.
Selecting the Objects to Publish
The first step in setting up the publish event is to select which, if any, data objects to publish. Published objects:
- Are available for visualisation in the Central Portal and the Central Browser
- Can be exported from the Central Portal and the Central Browser
- Can be imported into other Leapfrog Geo projects on the same Central server, when the Central user has the correct permissions for the project from which the objects were published
You can choose to publish all objects in a project, but if your team’s discussion is limited to, for example, a subset of data or one or two models, it might be best to publish only those objects relevant to the discussion.
In this example, only four objects have been selected to be published:
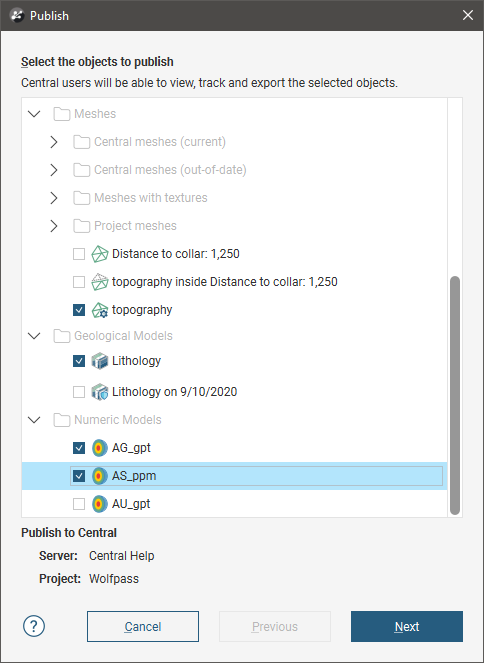
In the Central Portal, it will be possible to visualise the Topography mesh, the surfaces in the Lithology geological model and the surfaces in the AG_gpt and AS_ppm numeric models from the Wolfpass project:
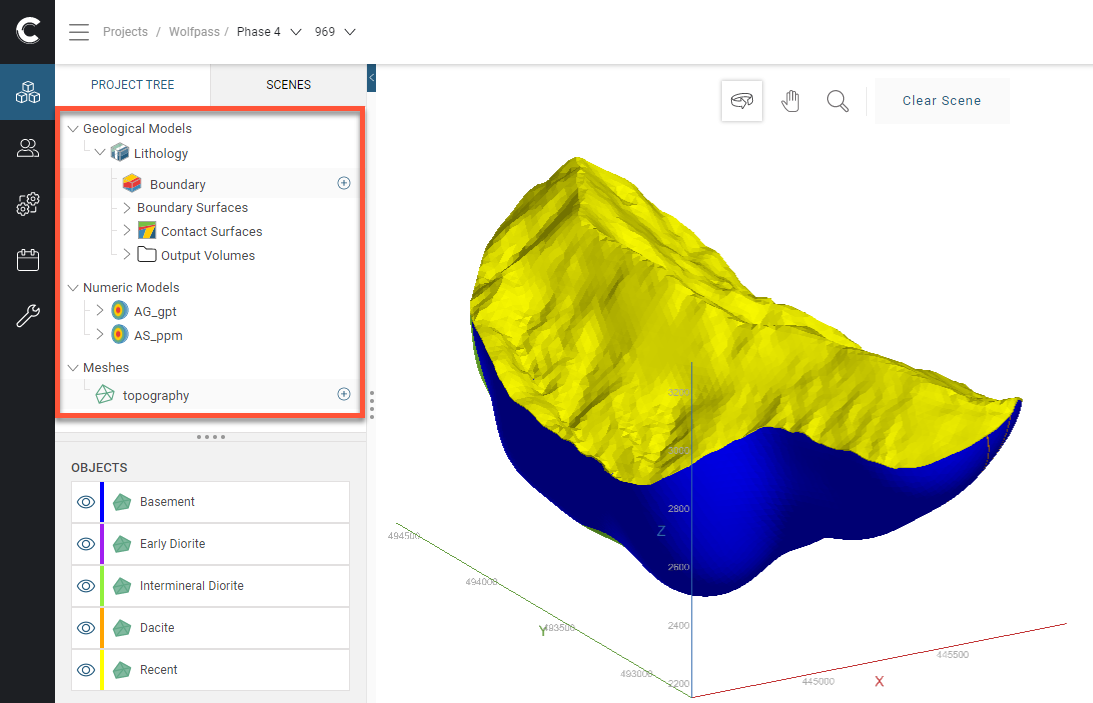
Unticked objects such as the Distance to collar mesh, the topography inside Distance to collar mesh, the Lithology on 9/10/2020 geological model and the AU_gpt numeric model will not be available.
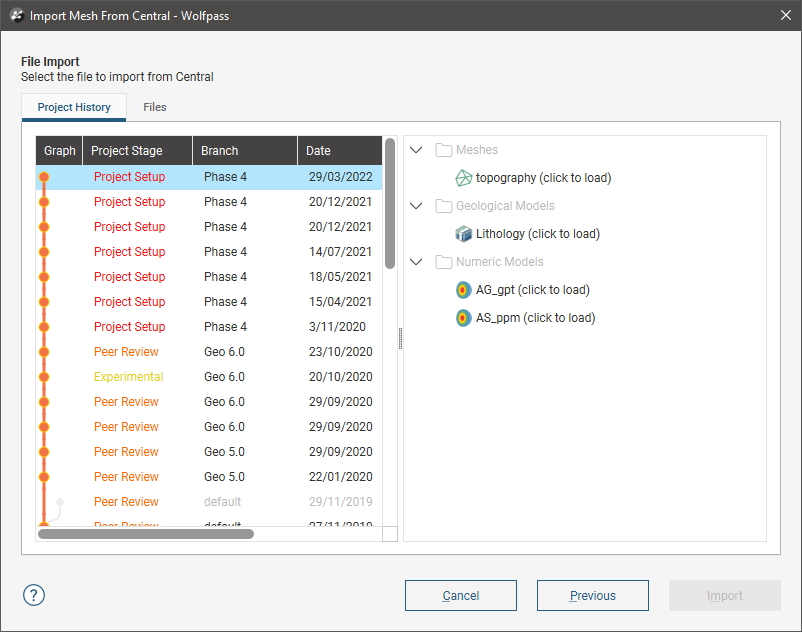
Another consideration in selecting the objects you will publish is whether or not you want to make a data object available for use in other revisions of the project or in other projects on the server. Published objects can be imported into other projects by team members who have permission to access the project from which the objects were published. For example, here the four published objects from the Wolfpass project can be imported into another project:
Select the objects you wish to publish from those available in the project.
Most data types in Leapfrog Geo projects can be published to Central. If a data object is not listed in the Publish window, then the publishing of that data type is not yet supported.
Although sub-blocked models can be published to Central, the dip will not be included.
Setting the Project Workflow Stage
Project stages are useful for advancing projects through an organisation’s processes. If the project is ready to be moved on to a different stage, select a different Project Workflow Stage from the list.
The project stages you can select from are set by your Central administrator and apply across your organisation.
If you set the wrong project stage, you can change it later in the Central Portal, once the publish is complete. To do this, click on the project’s History tab, then click on the node for the revision you need to update:

Including the Project
Whether or not you include the Leapfrog Geo project along with the publish event depends on many factors, including whether it’s time to back up your work and whether or not other members of your team will need to work on the project in Leapfrog Geo.
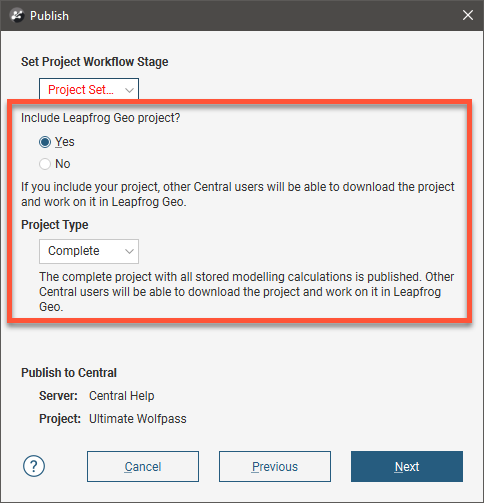
First choose whether or not to include the project. If you choose not to, the Leapfrog Geo project will not be published and other Central users will not be able to download the project and work on it in Leapfrog Geo. They will, however, be able to visualise and review the published objects and their history in the Central Portal and the Central Browser.
If you are including the project, there are two options:
- Complete.This option publishes the complete Leapfrog Geo project, including stored modelling calculations. Other Central users will be able to download the project and work on it in Leapfrog Geo without reprocessing the project.
- Unprocessed. An unprocessed project has a smaller upload/download size because stored modelling calculations are removed. When an unprocessed project is downloaded again, all of the modelling calculations will need to be reprocessed from the underlying data. Other Central users will be able to download the project and work on it in Leapfrog Geo. Depending on the size of the project, reprocessing may take some time.
Branching
With branching, you can split your Leapfrog Geo modelling tasks into multiple timelines that co-exist in the same Central project. Branching is useful for:
- Splitting a large modelling project into smaller subsets based on domain or area
- Separating modelling tasks by specialisation, e.g. lithology, resource, structure
- Separating branches for modelling at differing scales
Once you branch from a timeline, you cannot merge back into it. There’s no reason, however, that you can’t keep working in a branch and start considering that the main branch, if that’s the conclusion you and your team reach.
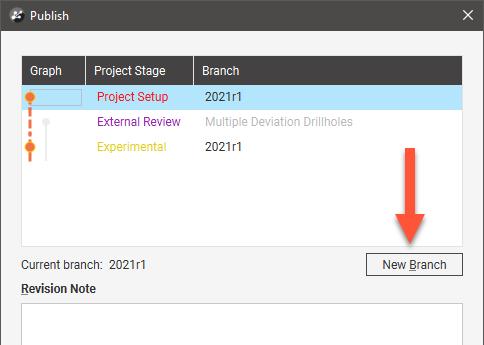
Branches are created in Leapfrog Geo as part of the publishing process:
Branches cannot be created in the Central Portal, although they can be renamed.
If the revision you have been working in is the most recent on that branch, you can publish to that branch. However, you cannot publish to a different branch, even if your revision is more recent than the revisions on that other branch.
If, however, there is a more recent revision on the current branch, you will receive a message saying you need to publish to a new branch:
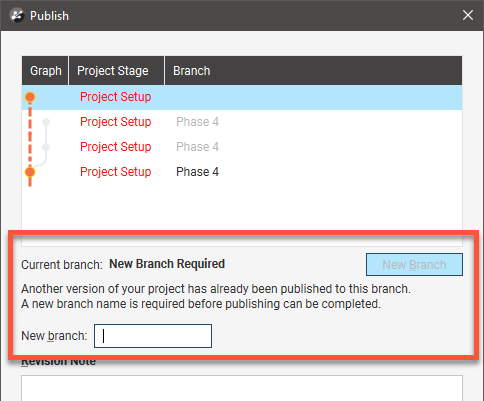
Most likely, this has occurred because another team member has download a copy of the project and published a revision to Central. If you wish to prevent other Leapfrog Geo users from publishing to that branch while you work on it, you can lock the branch, as described in Locking Branches in the Central Projects topic.
Adding a Revision Note
Enter information about the new revision; this will appear in the project’s history and is useful for keeping track of work carried out by different team members:

Preparing and Uploading the Package
Once you set the various options for the publish event, Leapfrog Geo will prepare the package. Disable the Auto upload option if you wish to review the summary before starting the upload. This gives you the option of cancelling the upload before it starts. Otherwise, the upload will begin automatically once all the information has been packaged.once Leapfrog Geo has finished preparing the upload package.
If for some reason you need to stop the upload, click on the Central dropdown menu and click the cancel button (![]() ):
):

You can resume the upload by clicking Publish in dropdown menu.
If the upload is interrupted because the connection to the server is lost, you will be prompted to finish the publish event the next time you log in to Central.
If you exit Leapfrog Geo while a publish event is in progress, you will be warned that a publish event is in progress. You can:
- Cancel exiting Leapfrog Geo, in which case the publish event will continue.
- Confirm that you wish to exit Leapfrog Geo. The next time you connect to this Central server or publish from this project or from another project on the same server, you will be prompted to the resume the interrupted publish event. You can complete the interrupted publish event, if you wish, or ignore it.
Got a question? Visit the Seequent forums or Seequent support
© 2022 Bentley Systems, Incorporated