
Grouped Meshes
Versions of Leapfrog Geo before 2021.1 included a feature called Combined Evaluations. This feature has been replaced with Grouped Meshes, and projects created in older versions of Leapfrog Geo will be automatically converted to Grouped Meshes when the project is upgraded.
Grouped Meshes can be used to associate several different meshes together and use them collectively for the purposes of evaluation onto points, block models, sub-blocked models and octree block models, flow models and interval tables. Two or more meshes from any source can be grouped. For example, geological model or mining volume meshes imported from another tool might be combined using Grouped Meshes. Grouped Meshes provide an alternative to the construction of a geological model for evaluations onto a block model.
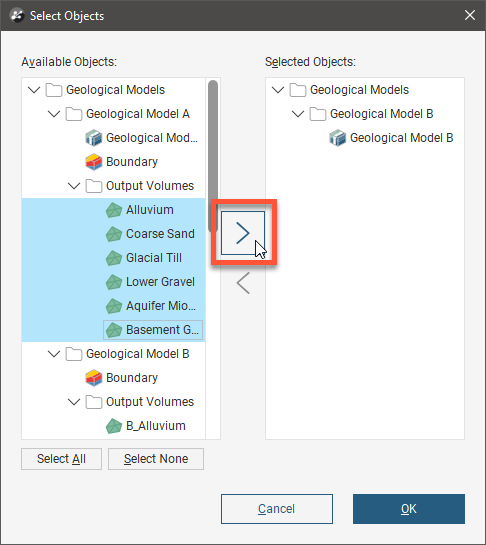
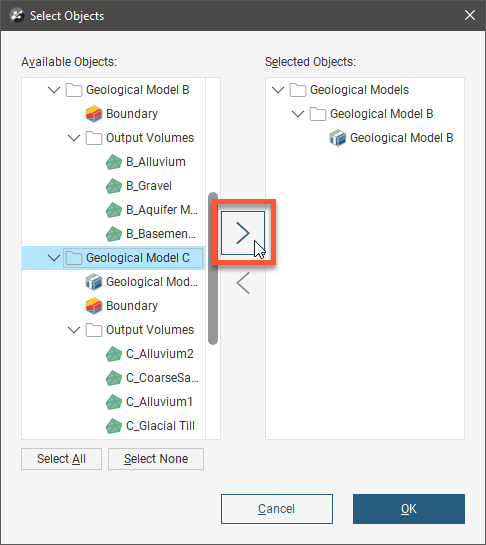
Right-click Combined Models in the project tree then select New Grouped Mesh. To add meshes to the new grouped mesh, click the Select Objects button (![]() ). In the Select Objects window, all meshes that can be used in grouped meshes are listed under Available Objects. Select objects from the list and move them to the Selected Objects list using the arrow (
). In the Select Objects window, all meshes that can be used in grouped meshes are listed under Available Objects. Select objects from the list and move them to the Selected Objects list using the arrow (![]() )button. Select OK to add the objects to the new grouped mesh.
)button. Select OK to add the objects to the new grouped mesh.
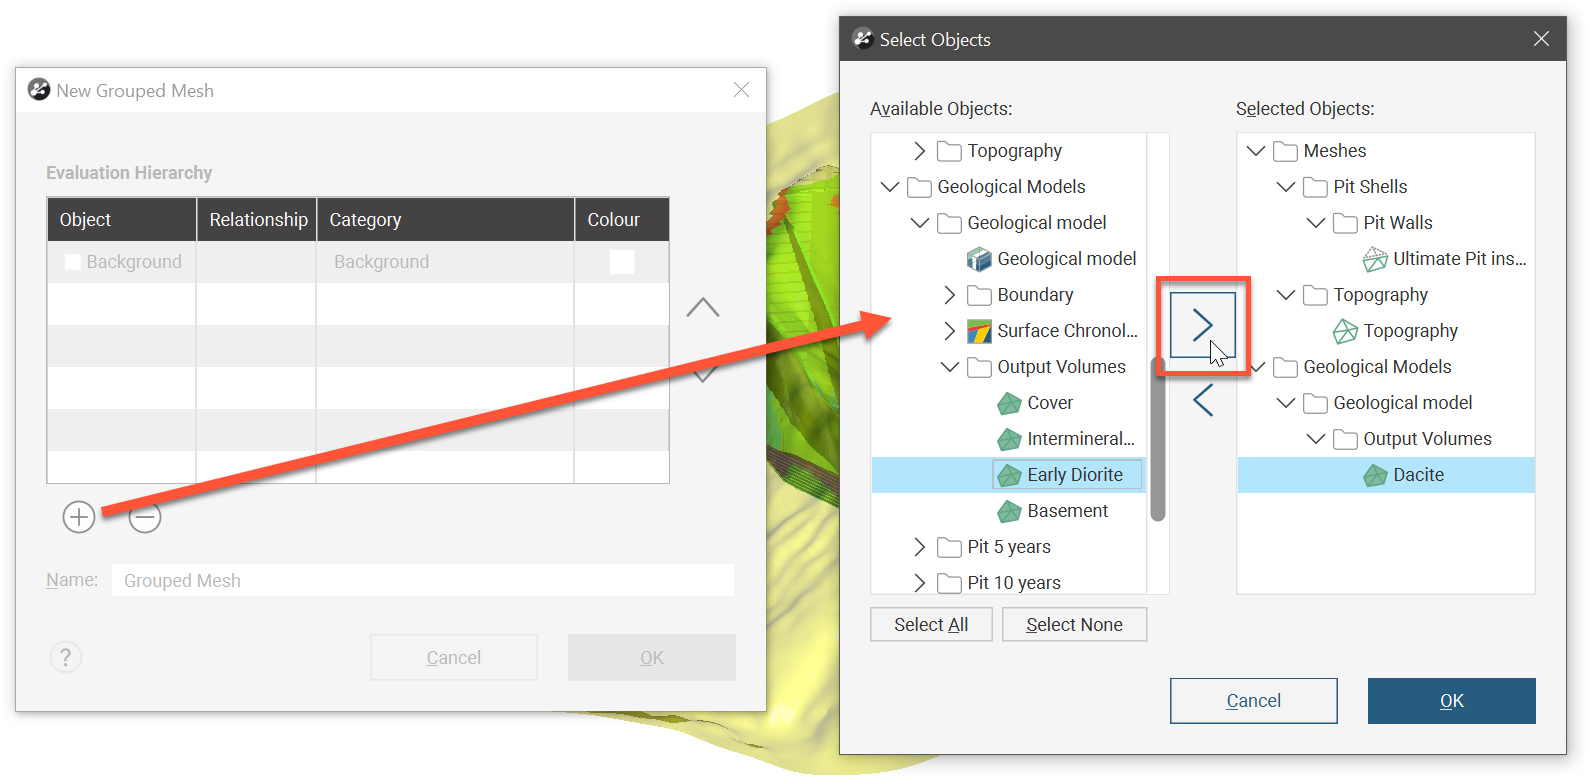
The Remove button (![]() ) next to the Select Objects button (
) next to the Select Objects button (![]() ) will remove a single object. You can also use the Select Objects button to not only add but also remove multiple objects from the grouped mesh.
) will remove a single object. You can also use the Select Objects button to not only add but also remove multiple objects from the grouped mesh.
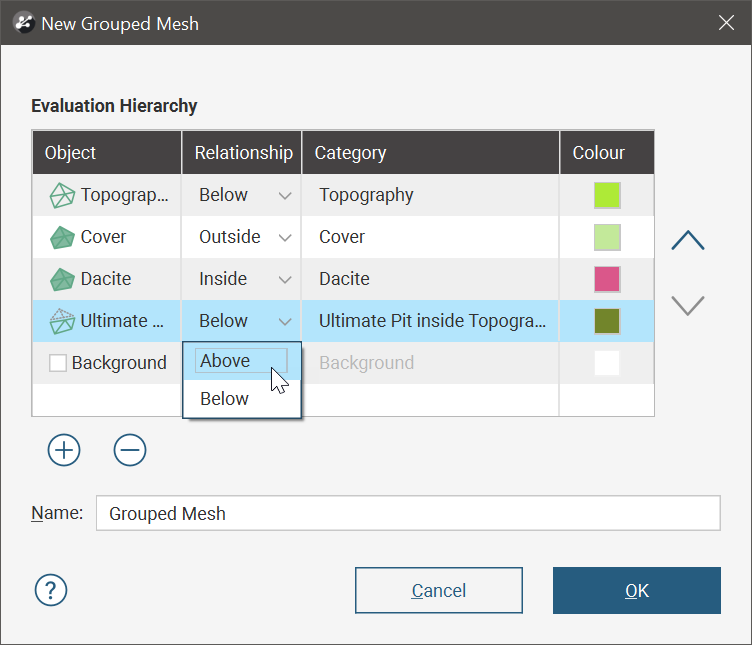
In the New Grouped Mesh window, you can set the Relationship value to identify whether the region of interest is Inside or Outside a closed mesh or Above or Below an open mesh. You can also provide a Category name that will be used when the Grouped Mesh is evaluated onto other objects. Each mesh being added to the Grouped Mesh can be assigned a customised Colour.
Click OK on the New Grouped Mesh window to create the grouped mesh.
A grouped mesh cannot be viewed in the scene as a single object, but each of the components under the grouped mesh in the project tree can be individually added to the scene.
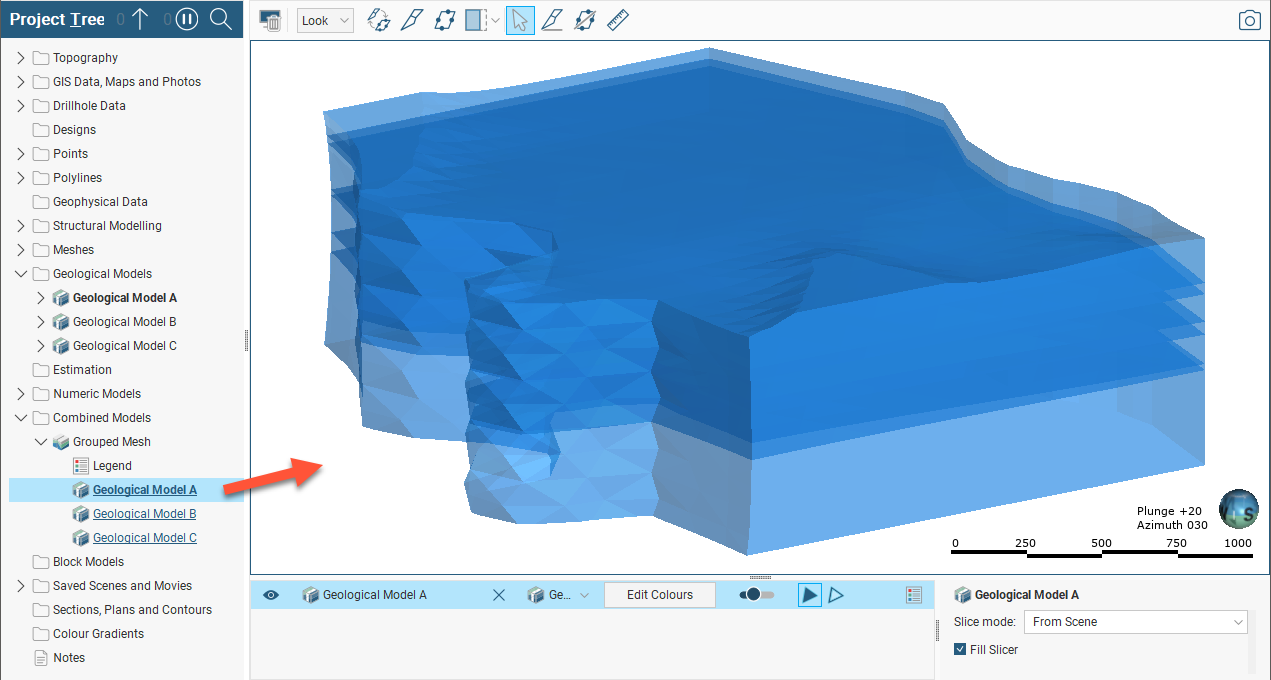
However, the main utility of the grouped mesh is not for it to be added to the scene as meshes, but to be evaluated onto other objects: points, block models, sub-blocked models and octree block models, flow models and interval tables. To evaluate a grouped mesh onto one of these objects, right-click the object in the project tree, select Evaluations, then move the grouped mesh from the Available to the Selected list using the arrow (![]() ) button.
) button.
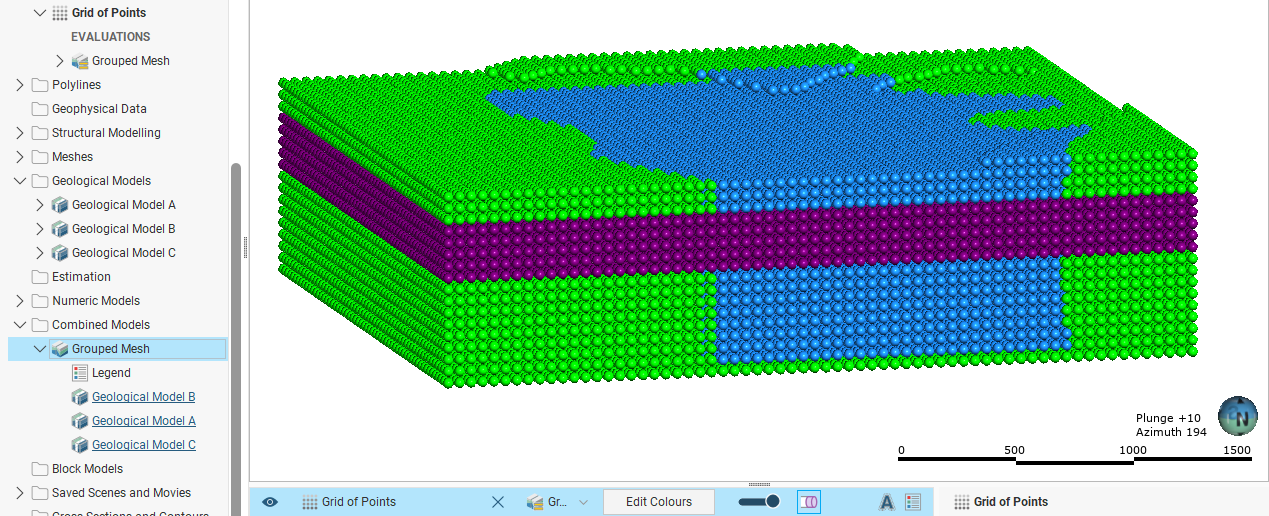
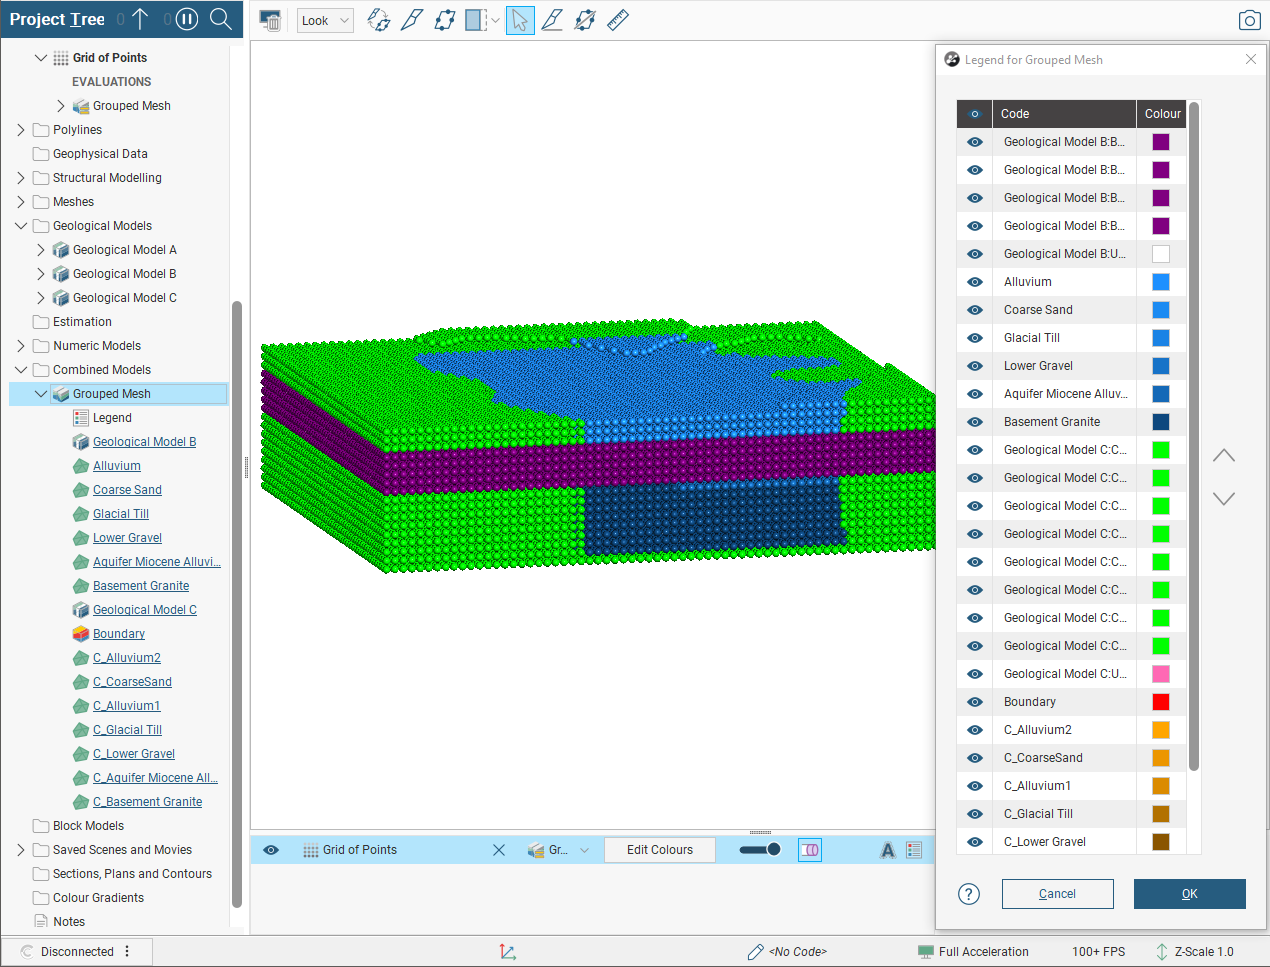
Here the grouped mesh created above has been evaluated onto a grid of points:
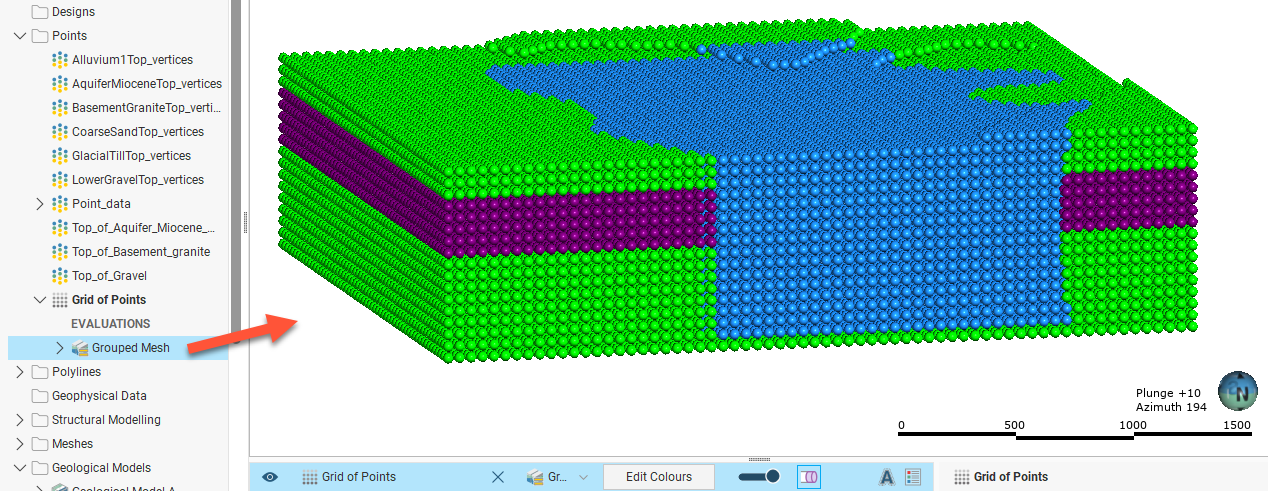
In the image above, Geological Model A in blue forms a large block vertically in the centre of the grid of points. This is because when the grouped mesh was created, Geological Model A was listed first in the Evaluation Hierarchy, giving it top priority when it comes to the evaluation of the grouped mesh onto the grid of points. The priority order in the Evaluation Hierarchy can be modified by selecting an object and moving it down or up in the hierarchy using the up (![]() ) and down (
) and down (![]() ) buttons next to the list of objects.
) buttons next to the list of objects.
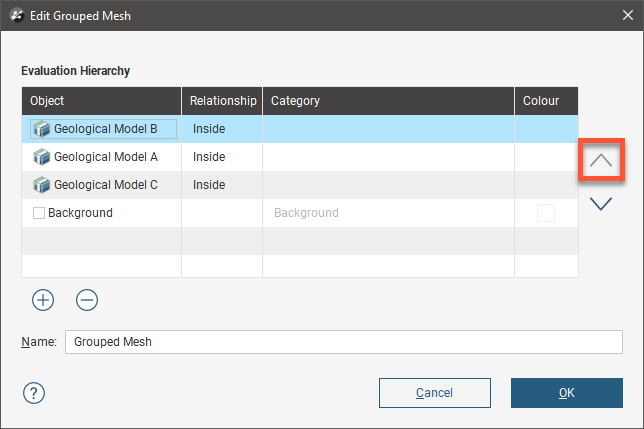
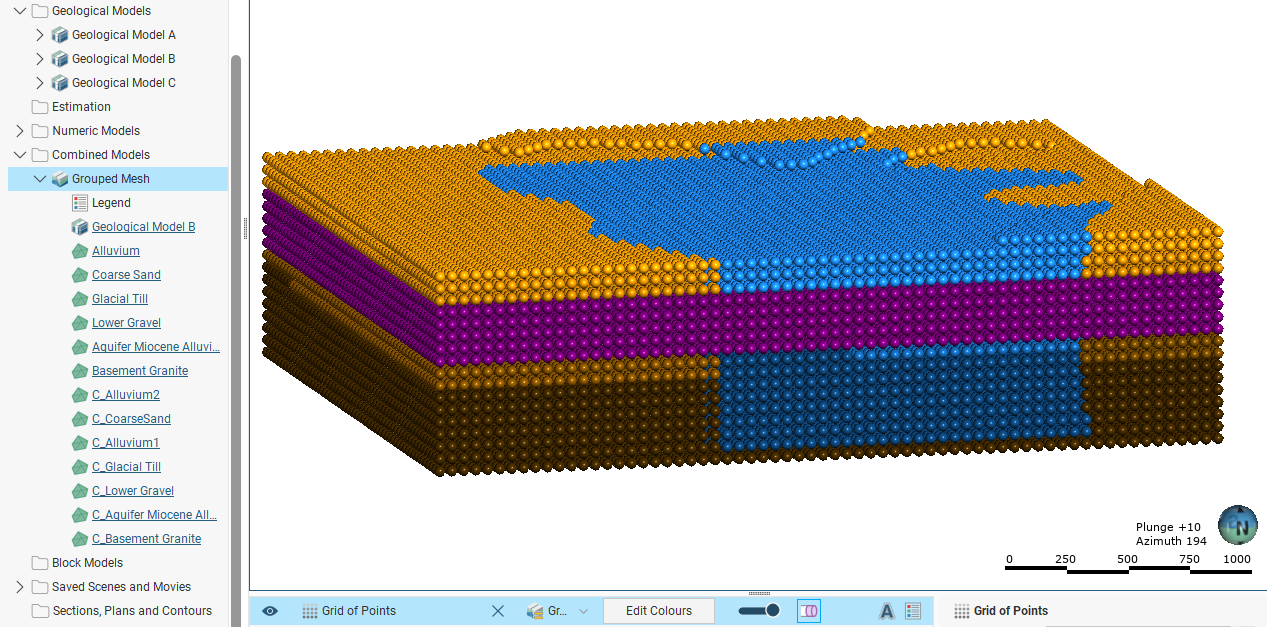
This is the result of raising the priority of Geological Model B in the Evaluation Hierarchy. Note Geological Model B in purple now cuts horizontally through Geological Model A, because it now has higher priority when being evaluated onto the grid of points.
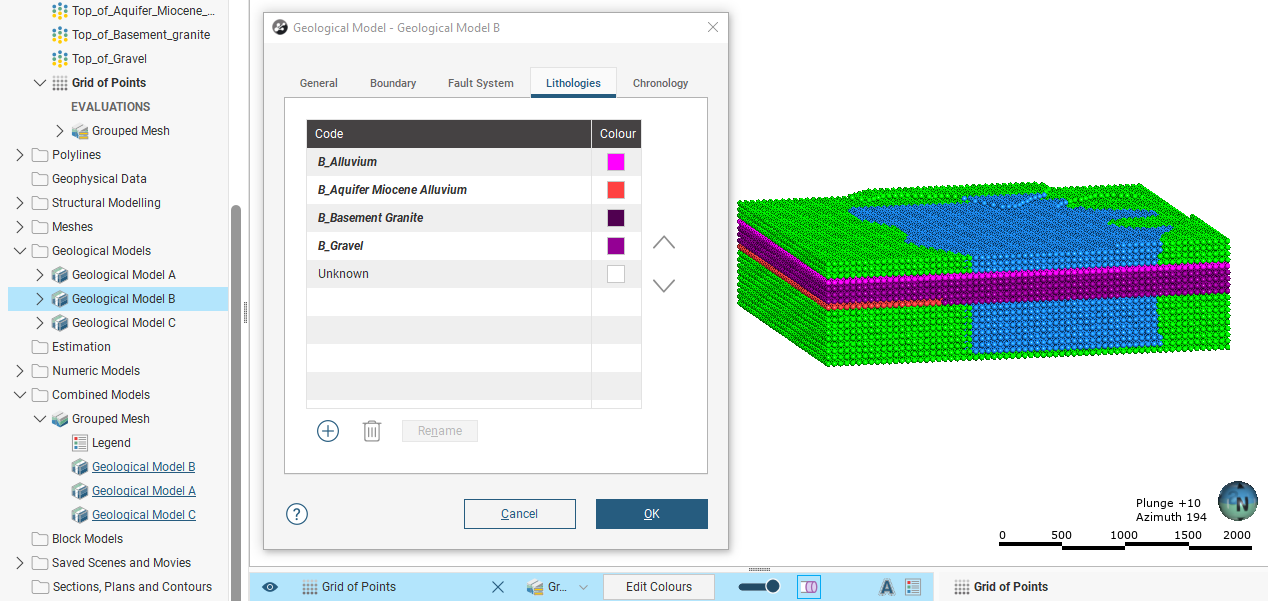
Note that the geological model objects in the grouped mesh Evaluation Hierarchy do not have editable colours. Geological model objects are typically made up of multiple volumes, and the colours for each are inherited from the geological model lithologies tab.
To control the colour of each mesh volume from the Edit Grouped Mesh window, either:
- add each of the individual geological model output volumes to the grouped mesh, or
- add the whole folder for the geological model to the grouped mesh.
Once these objects have been added, click the Colour chip for any object to see the Select Colour window and pick the colours you want for each object.

It is important to recognise the effects of certain object prioritisations in the Evaluation Hierarchy. For instance, when the whole folder for Geological Model C was added, the geological model object and the boundary object were added with a higher priority than the output meshes for Geological Model C. The result is that although all the output mesh volumes for Geological Model C have been assigned a range of orange-brown colours, none of these appear on the points in the scene because both the geological model object and boundary object have higher priority, and the points are coloured green according to the settings for the geological model object.
To delete a mesh object from the grouped mesh, select the mesh in the Evaluation Hierarchy and click the Delete (![]() ) button. In this example, in order to see the evaluations onto the grid of points for each of the individual mesh volumes, Geological Model C and the Boundary object need to either be assigned lower priorities or deleted:
) button. In this example, in order to see the evaluations onto the grid of points for each of the individual mesh volumes, Geological Model C and the Boundary object need to either be assigned lower priorities or deleted:
Each object in the grouped mesh has a Category field that can be modified. Double-click the Category column for an object in the Evaluation Hierarchy and replace the label text.
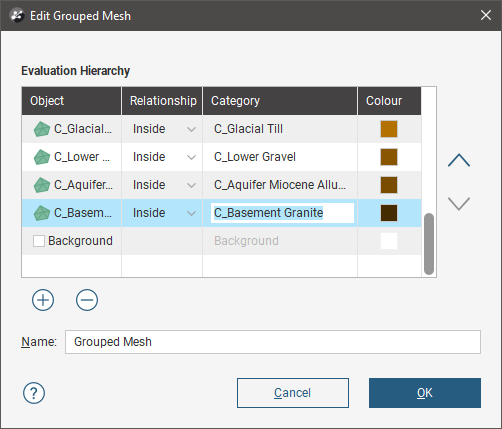
In the Edit Grouped Mesh window, the Relationship column defaults to Inside and evaluations inside the mesh will be identified with the selected mesh. Changing the Relationship option to Outside will result in evaluations outside the mesh being associated with the selected mesh. In most cases, it will be necessary to change the Category label so the legend makes sense.
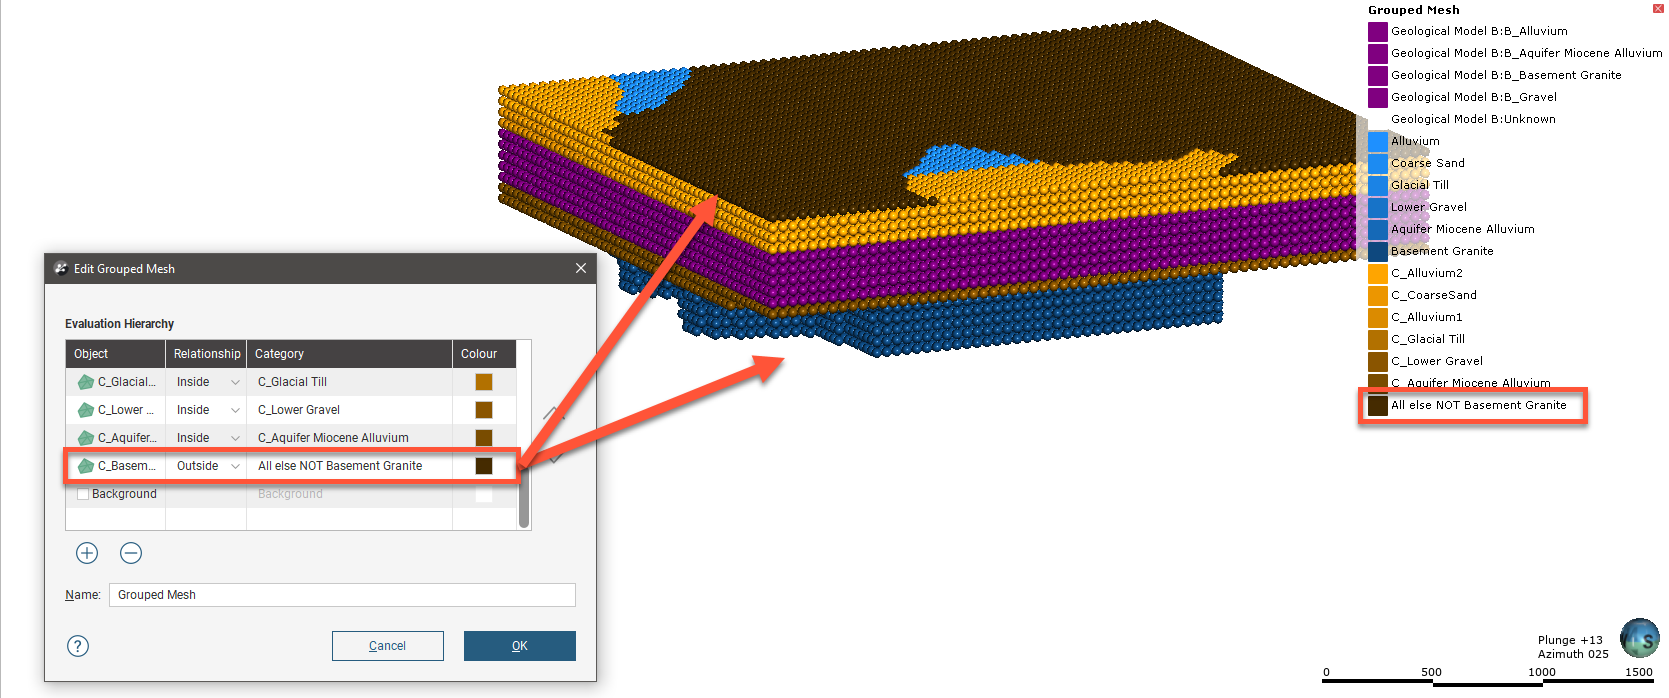
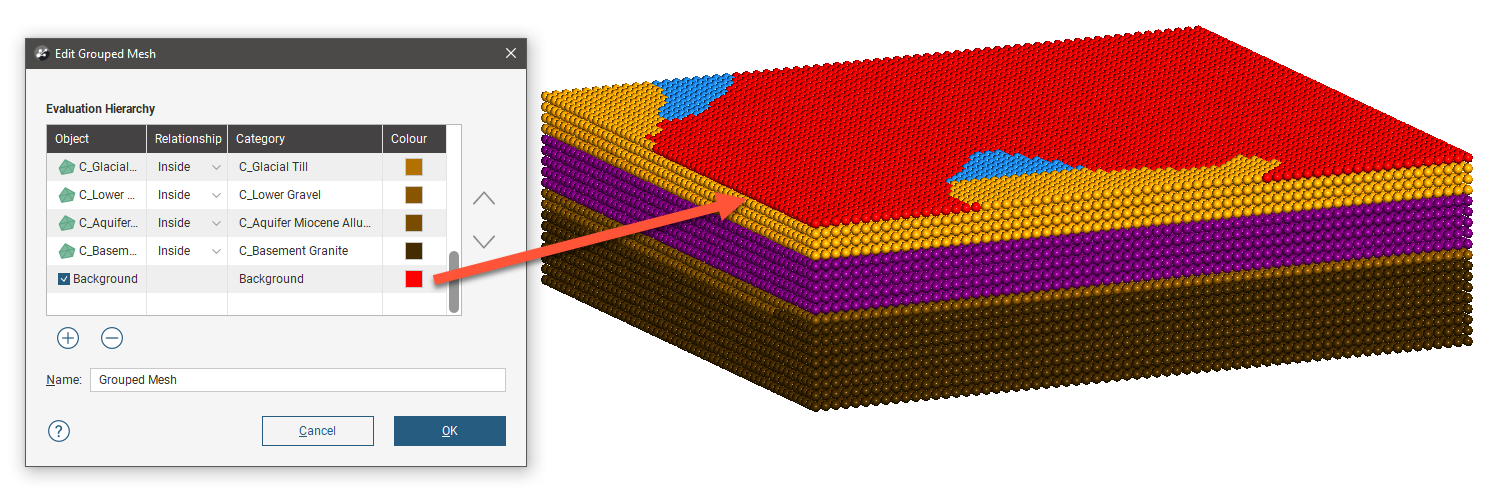
It is not possible to add a mesh to a grouped mesh twice in order to set one evaluation as Inside and the other as Outside. However, a special Background object can be enabled and prioritised in the hierarchy to achieve the desired result.
Got a question? Visit the Seequent forums or Seequent support
© 2023 Seequent, The Bentley Subsurface Company
Privacy | Terms of Use