
Combining Planar Structural Data Tables
When you have planar structural data from various sources stored in different tables, it can be useful to combine them into a single table for use in downstream workflows, such as when comparing structures with geology and grade.
Combined structural data tables can be created from:
- Planar structural data tables in the Structural Modelling folder
- Existing combined structural data tables in the Structural Modelling folder
- Downhole planar structural data that is part of a drilling dataset
Data from the source tables is used to build the combined structural modelling table as follows:
- When the same data appears in more than one source table, all instances of the data are included in the combined table, but the rows from lower priority tables are marked as ignored in the combined table.
- Where data in a source table is marked as ignored, it is included in the combined table marked as ignored.
- If a row in the source table is in error, that row will be included in the combined table but it will be marked as having an error (
 ). The error can only be corrected in the source table.
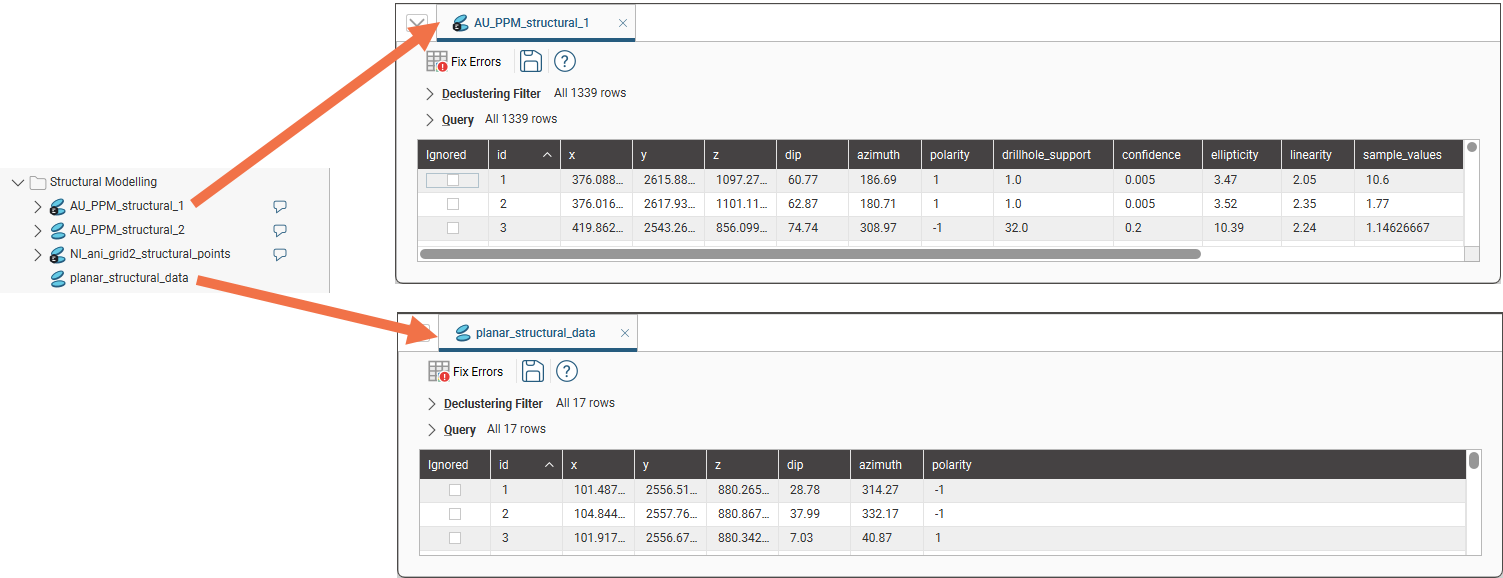
This example shows how the data from two planar structural data tables is used in a combined table. Here we have the two tables we will use to create the combined table. Note that the first source table contains columns that the second source table does not contain:
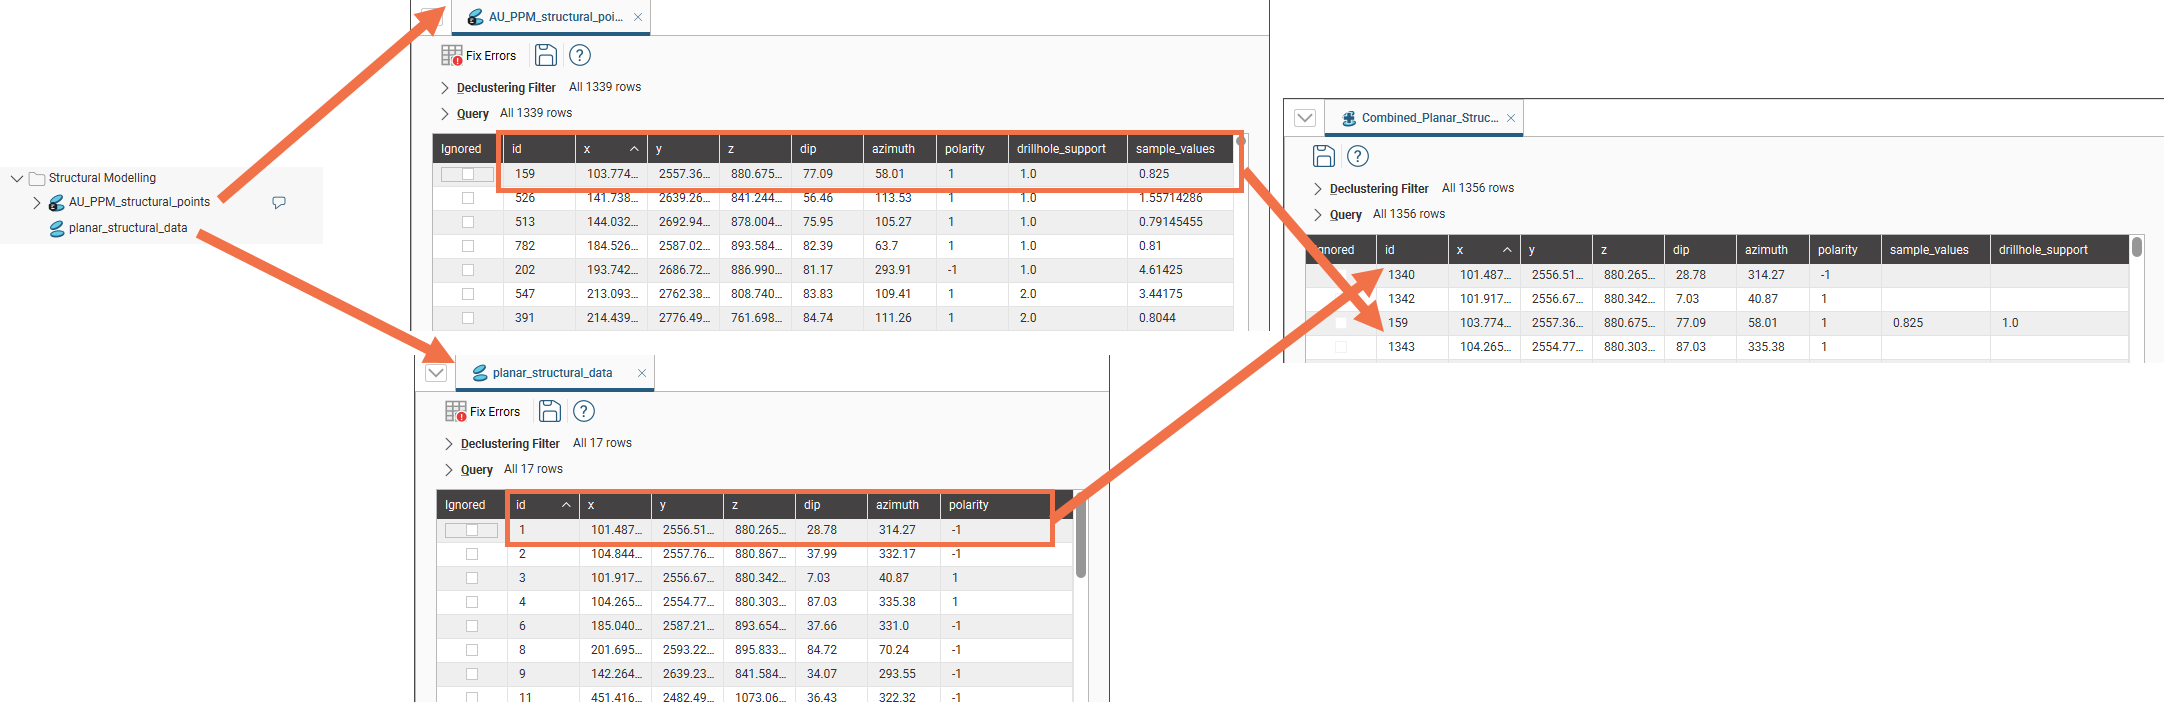
The information from each source table is used to build the combined table. For example, here we can see that in the combined table, row id 159 is from the table AU_PPM_structural_points as it contains data from the additional columns in the AU_PPM_structural_points table, whereas the surrounding rows are from the table planar_structural_data that does not contain those extra columns:
If there are any duplicate rows, the row from the table with given lower priority will be marked as ignored.
The rest of this topic describes the steps involved in building a combined structural data table. It is divided into:
- Creating a Combined Structural Data Table
- Changing Table Priority
- Editing a Combined Structural Table
Creating a Combined Structural Data Table
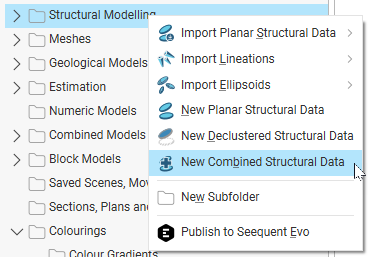
To create a combined structural data table, right-click on the Structural Modelling folder and select New Combined Structural Data:
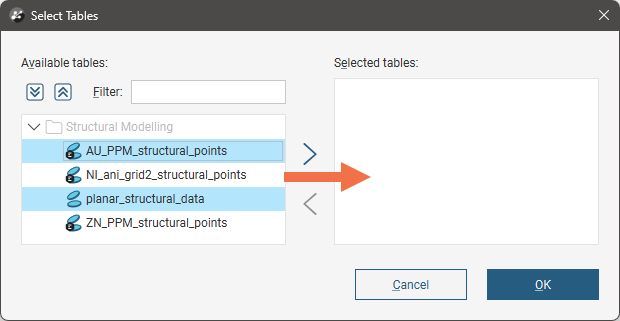
In the window that appears, all tables with suitable data columns are displayed in the Available tables list. Select those you wish to use in the combined structural data table and move them into the Selected tables list:
Click OK.
In the New Combined Structural Table window, the selected tables are displayed, along with the data columns available for use in the combined table. The Combined Columns list shows the columns that will result.
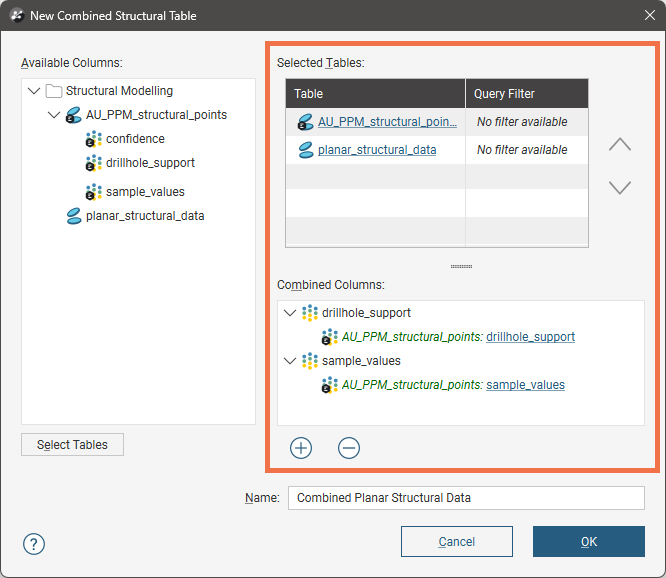
Depending on what columns are in the source tables, some columns from the selected tables list may be automatically added to the Combined Columns list. If you wish to add non-selected columns to the Combined Columns list, either:
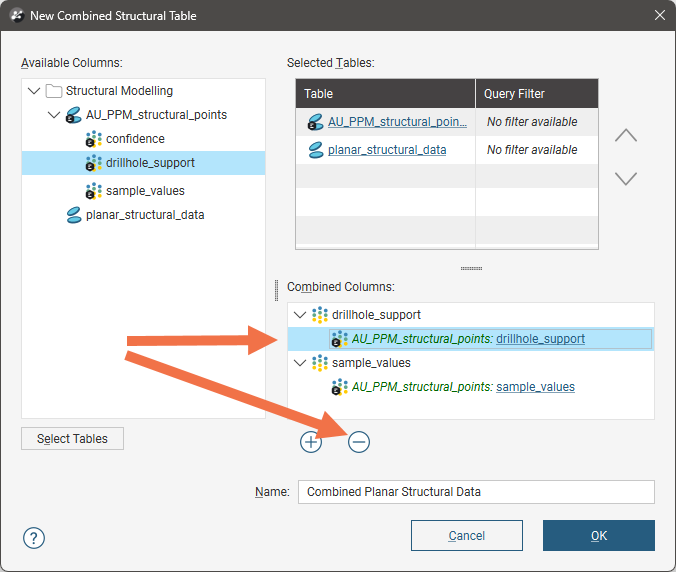
- Drag them from the Available Columns list into the Combined Columns list or
- Click the Add button (
 ) to move columns into the Combined Columns list.
If you wish to remove a column from the combined table, click on it in the Combined Columns list, then click the Remove button (![]() ):
):
You can also:
- Use the arrows in the Selected Tables list to change the priority of the tables. This is discussed further in Changing Table Priority later in this topic.
- Add more tables to the Selected Tables list. To do this, click the Select Tables button, then choose from those in the project.
- Add more columns to the combined table. Drag a column from the Available columns list into the Combined Columns list or click the Add button () to open the Select Columns window.
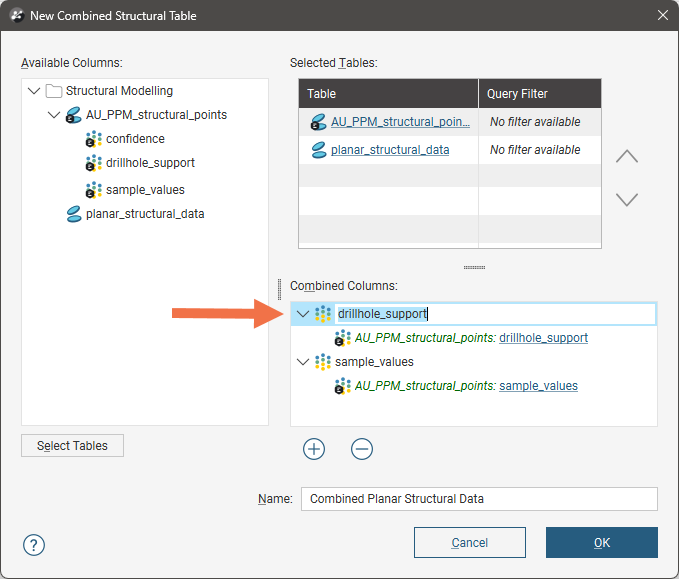
- Rename a combined column. Double-click on it and enter the new name:
Once you have added the data columns you wish to include, set a Name for the new combined structural table, then click OK. The new combined structural table will be created and added to the project tree.
Changing Table Priority
The priority of each table in the Combined Structural Table window determines what information is used when there is duplicate information. For example, here the AU_PPM_structural_1 table is higher in the list and so has higher priority than the AU_PPM_structural_2 table:
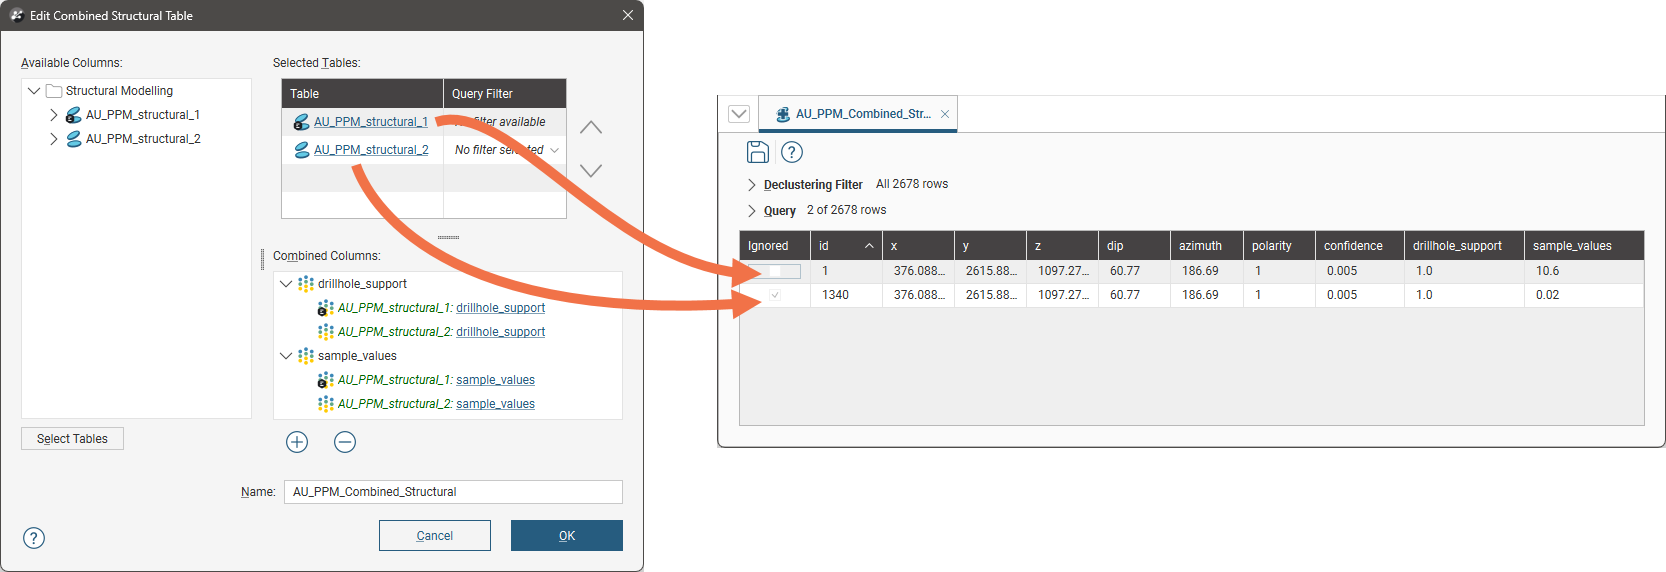
Because the same coordinates are used in each source table, the row from the lower priority table is marked as ignored in the combined structural table.
Use the arrows to change the priority of selected tables:
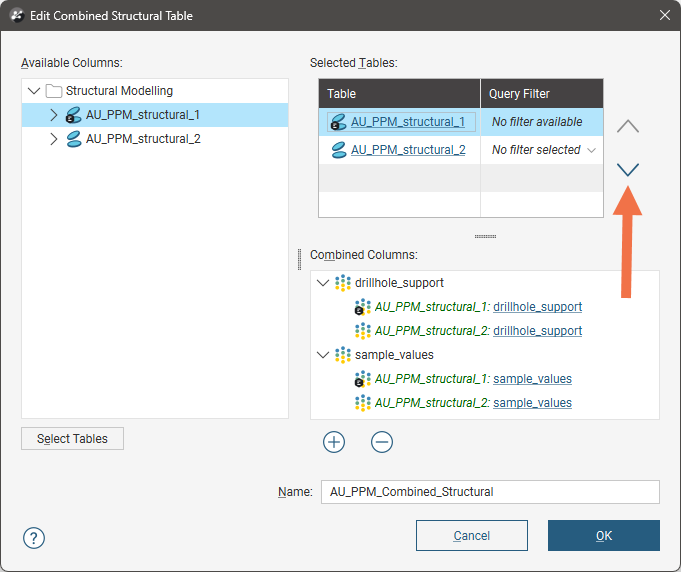
Click OK to close the window and make the changes.
Editing a Combined Structural Table
To edit a combined structural table, right-click on the table in the project tree and select Edit Combined Structural Data. This opens the Edit Combined Structural Table window. In this window, you can:
- Use the arrows in the Selected Tables list to change the priority of the tables.
- Add more tables to the Selected Tables list. To do this, click the Select Tables button, then choose from those in the project.
- Add more columns to the combined structural data table. Drag a column from the Available columns list into the Combined Columns list or click the Add button () to open the Select Columns window.
- Rename a combined column. Double-click on it and enter the new name.