Leapfrog-Imago Image Streaming
With Leapfrog Geo-Imago image streaming, you can view core imagery directly in Leapfrog Geo alongside the 3D scene, making it easier to validate logged intervals and check modelling decisions against core imagery.
You can:
- Change the imagery types displayed in panels
- Lock a panel to a specific drillhole interval
- Display imagery for multiple drillholes in separate, detachable panels
This topic describes how to set up and use Imago image streaming. It is divided into:
- Setting Up the Integration
- An Overview of the Imago Panel
- Navigating in the Imago Panel
- Locking a Panel to a Drillhole
- Changing the Scene Highlight Properties
- Working in Multiple Panels
- Opening Imagery in Imago
- Removing the Imago Link
The images in this topic make use of an image dataset sourced from the East Tennant National Drilling Initiative (https://www.eftf.ga.gov.au/east-tennant-national-drilling-initiative ) by Geoscience Australia, which is © 2024 Commonwealth of Australia and is provided under a Creative Commons Attribution 4.0 International Licence and is subject to the disclaimer of warranties in section 5 of that licence.
Setting Up the Integration
Before you can view core imagery, you must first set up the integration between Leapfrog Geo and the Imago database. To do this, right-click on the Drillhole Data folder and select Add Core Photo Link:

In the window that appears, select Imago and click OK.
The Imago Settings window will appear.
Imago supports Seequent ID, and so the Subscription Name list displays all the subscriptions your Seequent ID has access to.
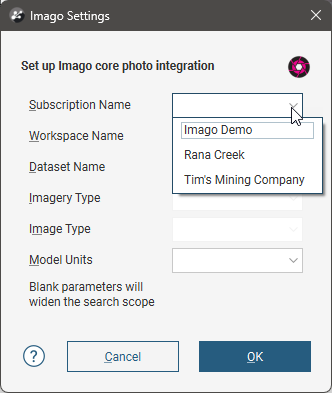
It is a good idea to be as specific as possible when configuring the Imago integration; set at least the subscription, workspace and dataset names.
Click OK to save the information.
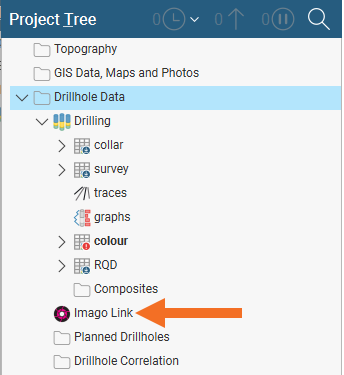
A link will appear in the project tree as part of the Drillhole Data folder:
You can double-click on this link to edit the Imago integration settings.
An Imago button ( ) will also appear in the toolbar:

Clicking on this button will open the Imago Panel:
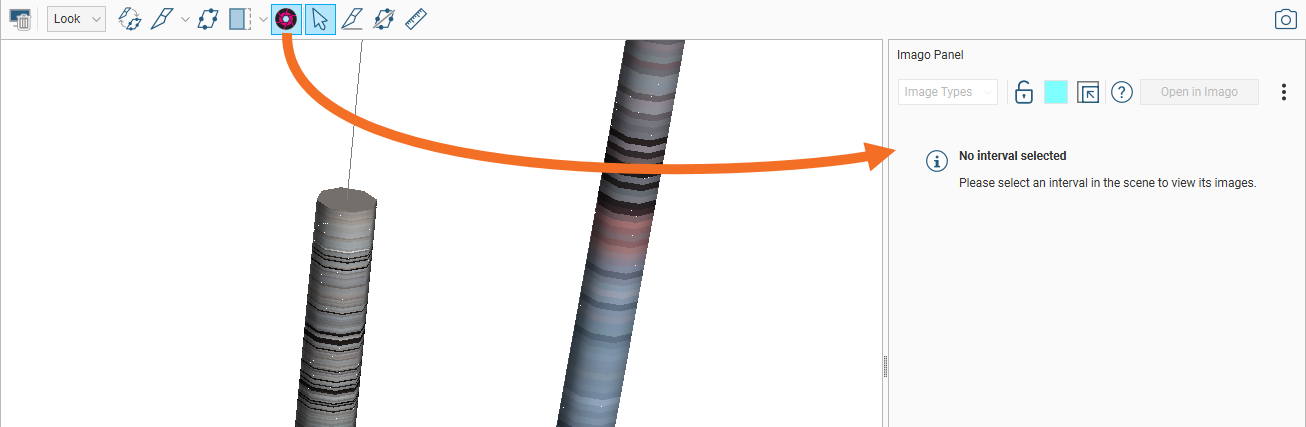
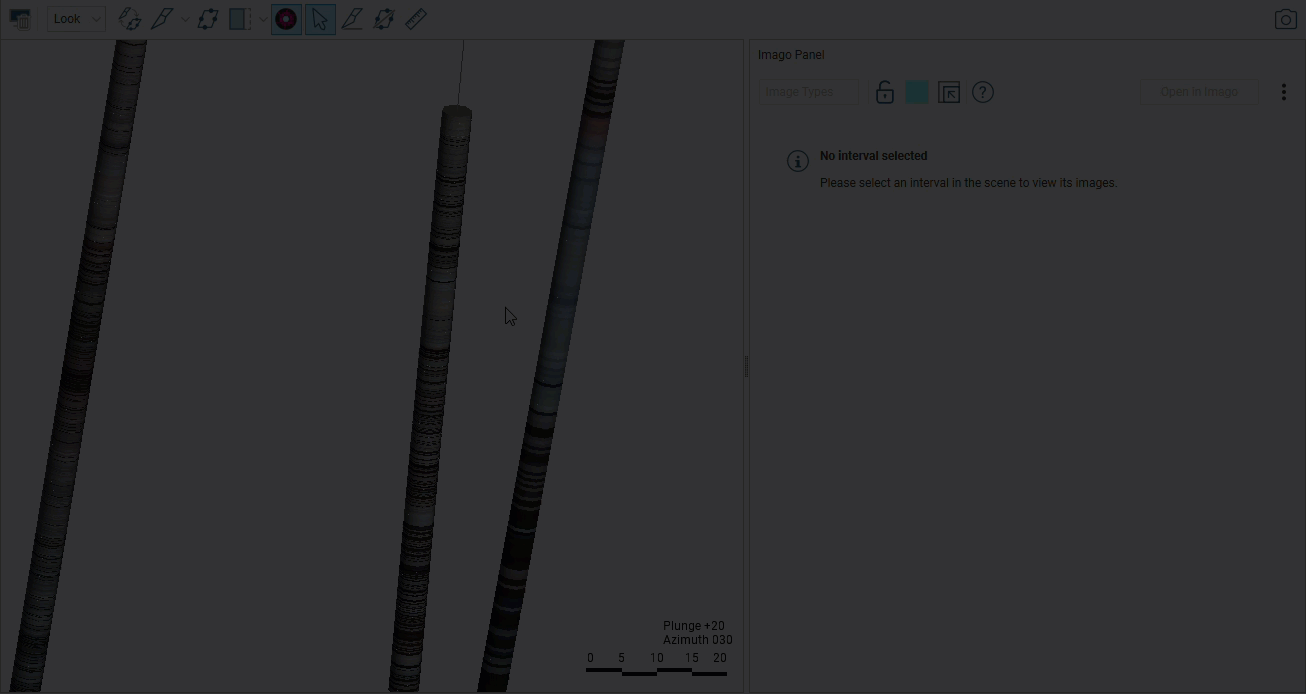
An Overview of the Imago Panel
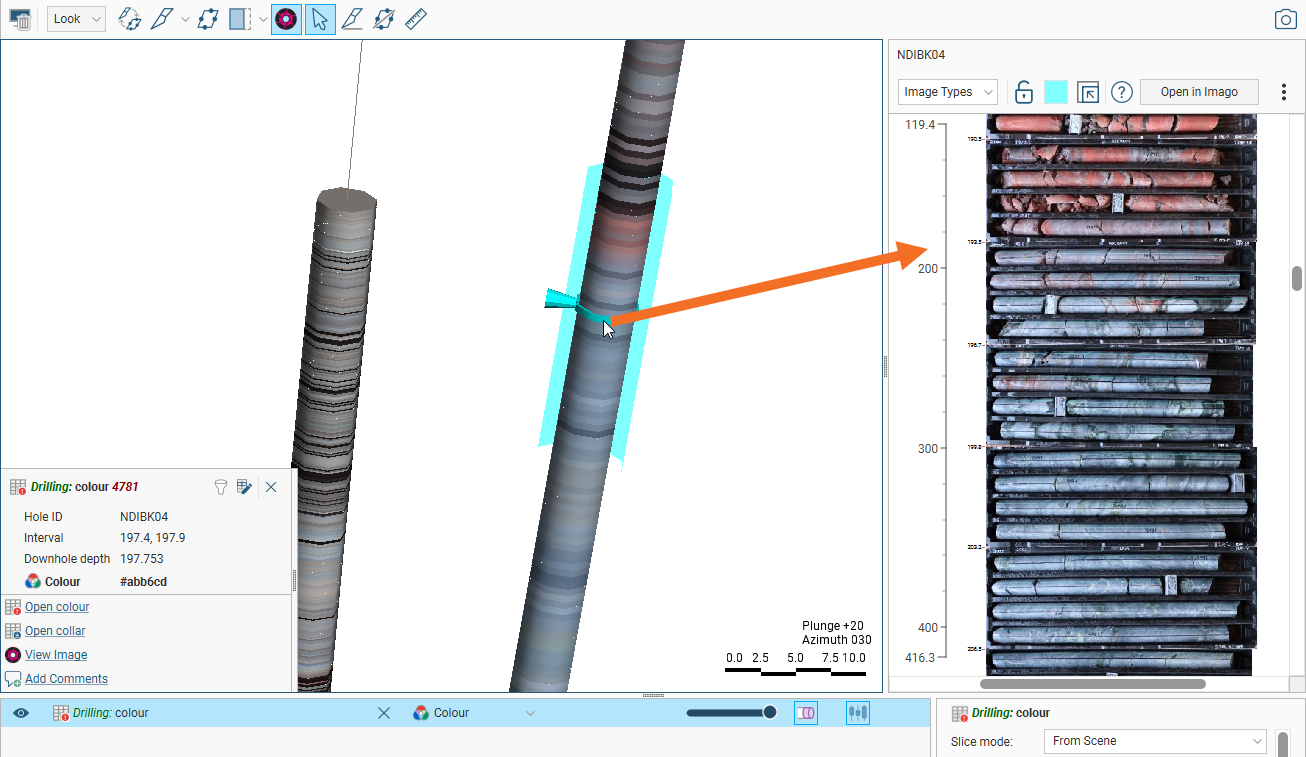
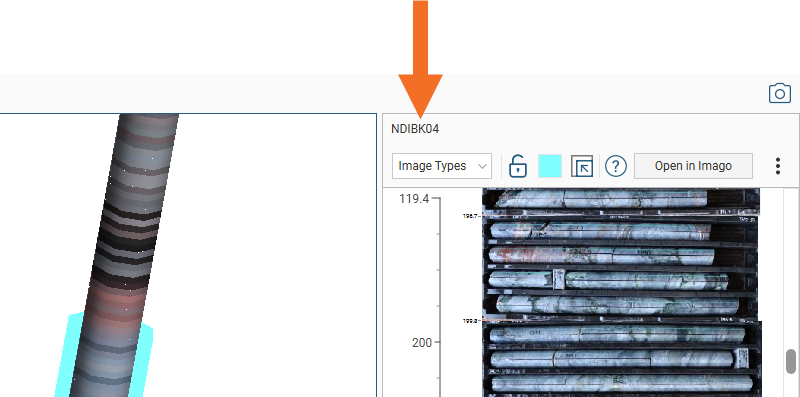
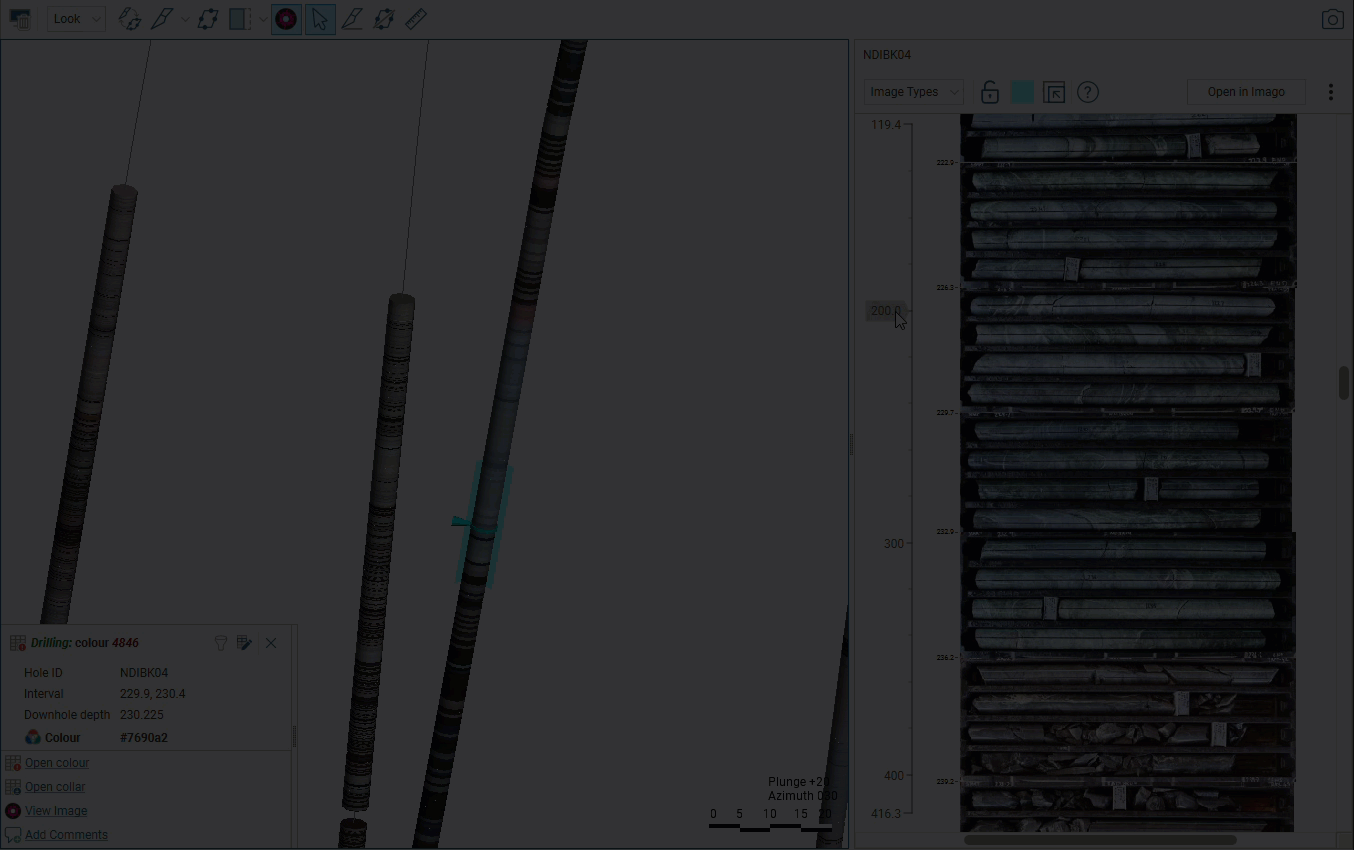
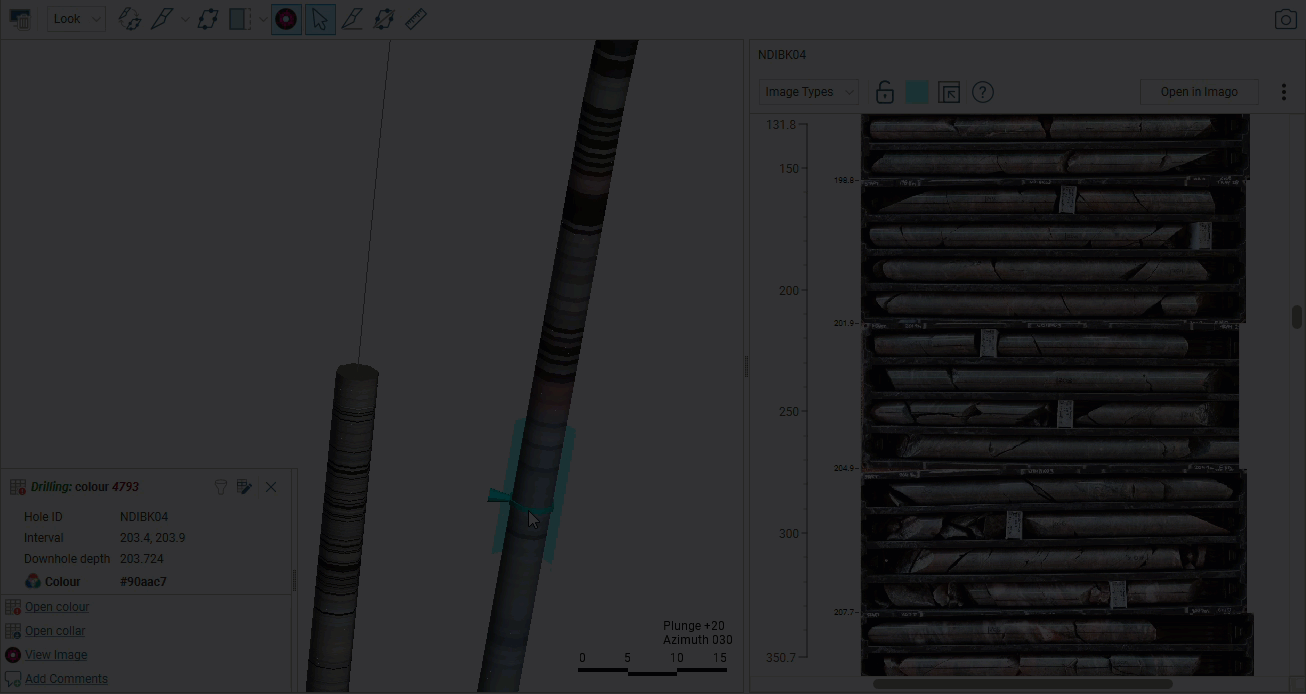
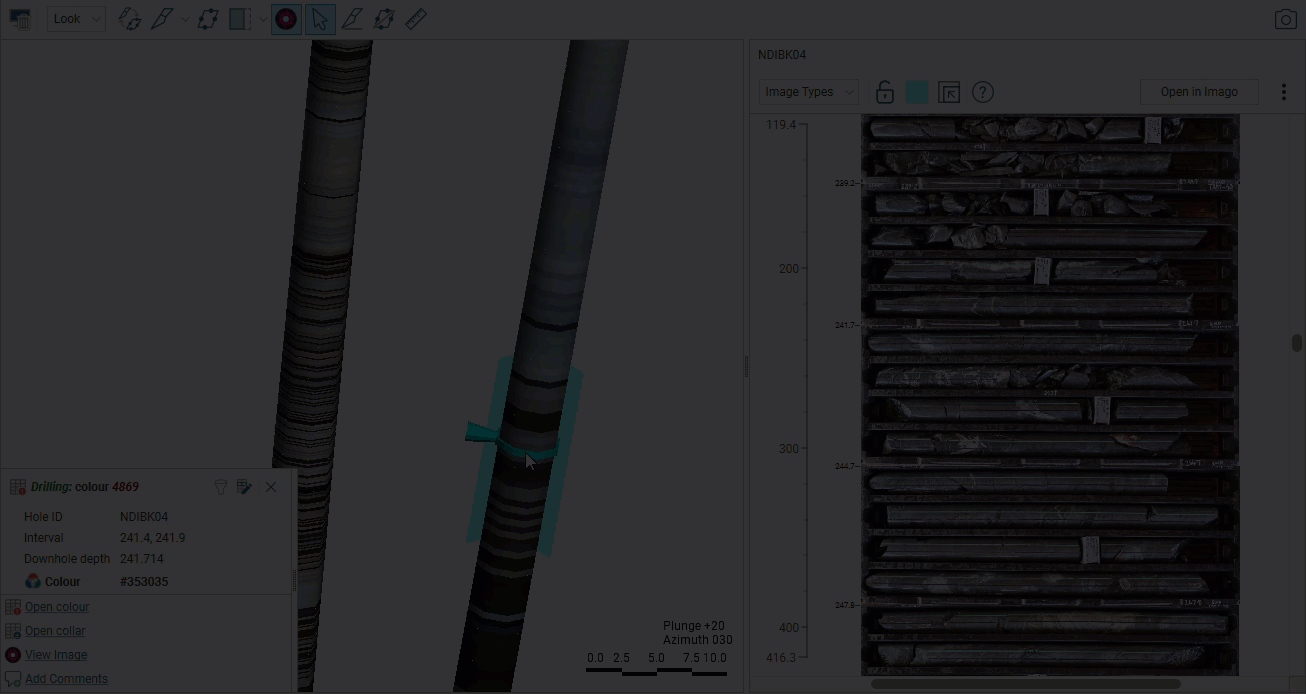
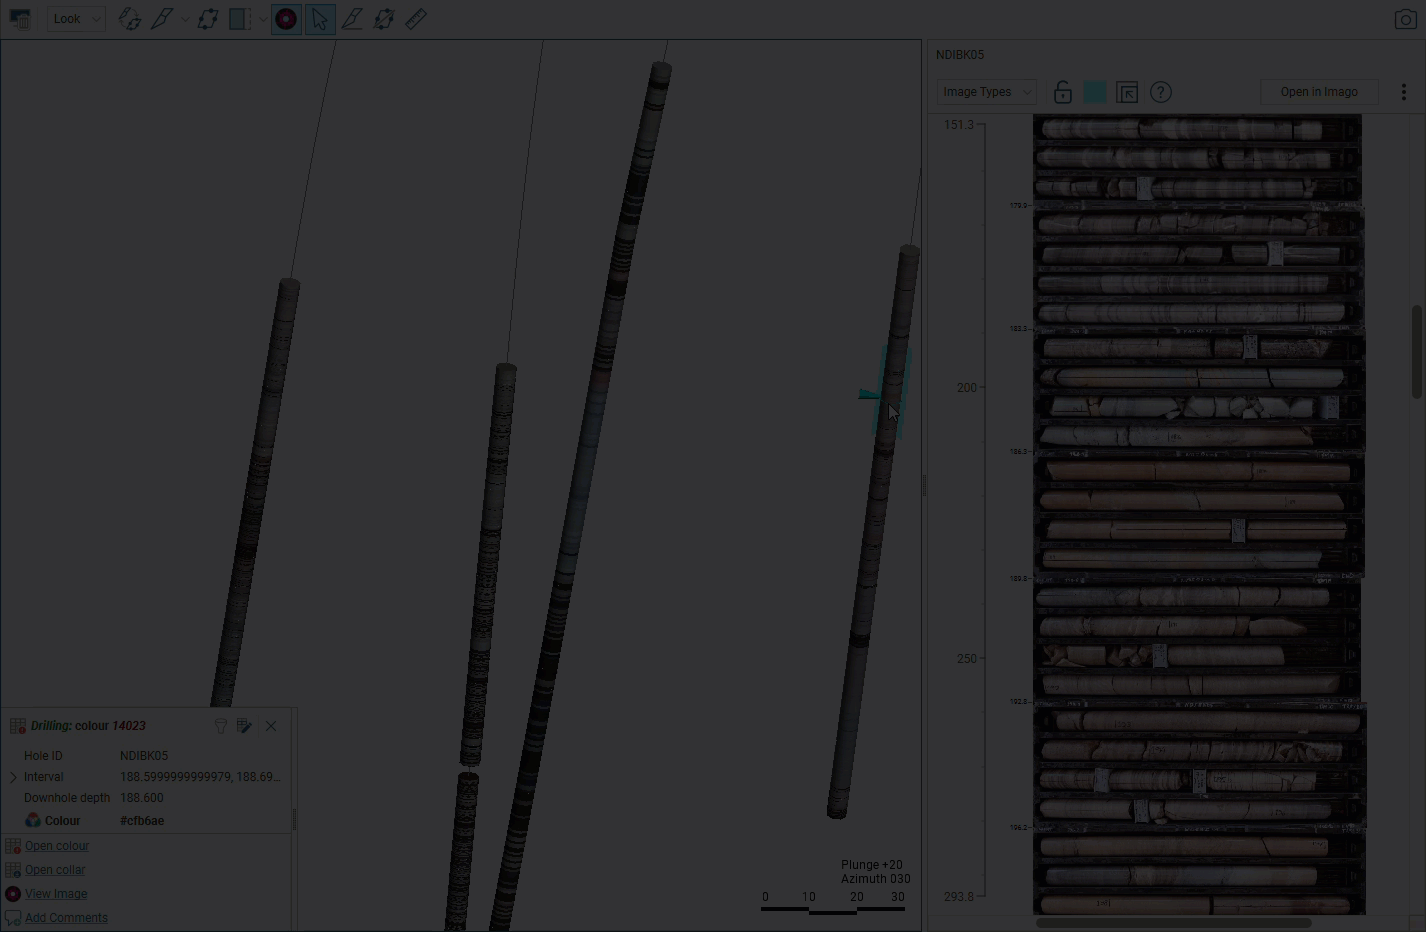
Click on the Imago button () in the toolbar (A), then on a drillhole interval in the scene (B) to display Imago imagery for that interval in the docked panel alongside the scene (C). The scene highlight (D) shows the part of the drillhole that corresponds to images in the panel.

The scene highlight is open toward the viewing angle in order to avoid impeding viewing the drillhole data associated with the core imagery. The scene highlight colour and other properties can be customised, which is described in Changing the Scene Highlight Properties later in this topic.
Note that the drillhole ID is displayed at the top of the panel:
Depth information is displayed on the ruler in the panel. To view imagery at a particular depth, click on the ruler at that depth.
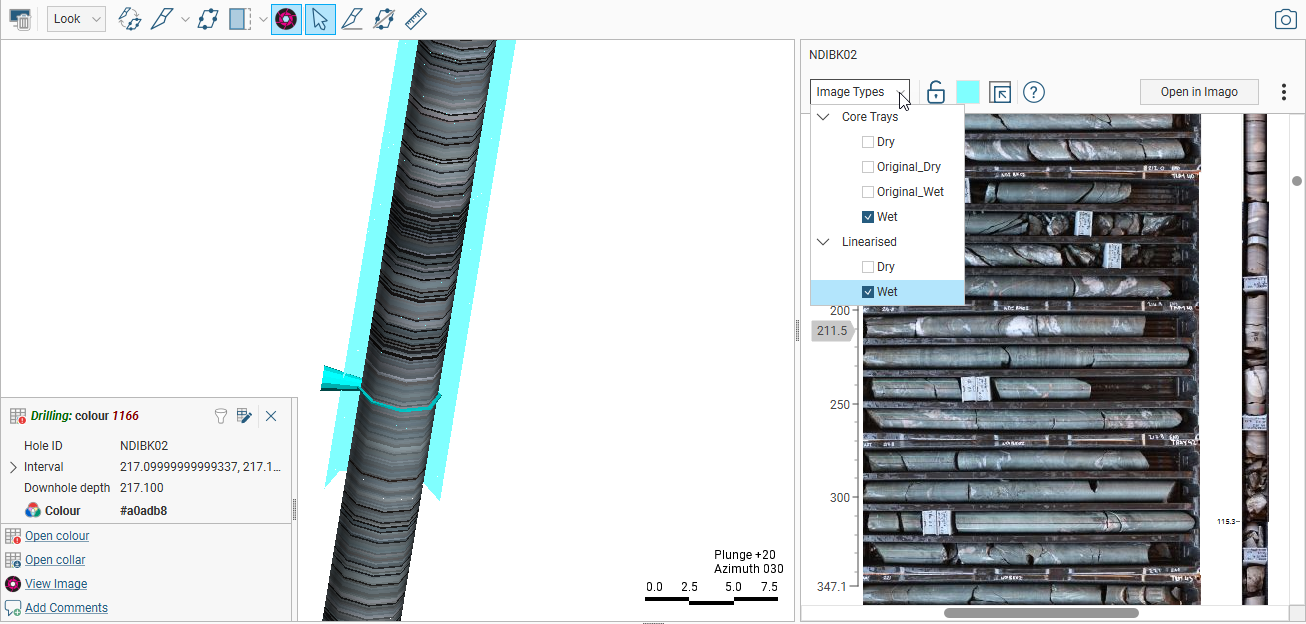
From the Image Types list, you can see all the imagery available for that drillhole that matches the search criteria set in the Imago Settings window. For example, here both core tray images and linearised images are displayed for a drillhole:
The panel has an overflow menu ( ) that contains more Imago streaming settings:
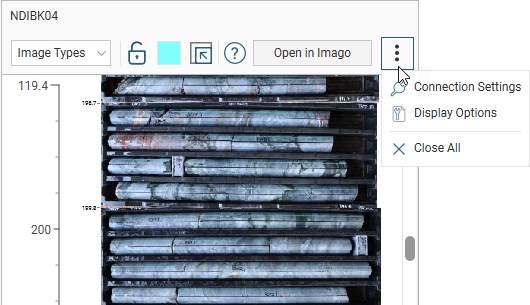
If an image type you expect to see is not listed, you can check your Imago settings by clicking on the overflow menu and selecting Connection Settings. This opens the Imago Settings window.
The panel can be used docked (![]() ) or undocked (
) or undocked (![]() ). You can also open multiple panels, although only one panel can be docked at a time. Using multiple panels is discussed in Working in Multiple Panels later in this topic.
). You can also open multiple panels, although only one panel can be docked at a time. Using multiple panels is discussed in Working in Multiple Panels later in this topic.
Navigating in the Imago Panel
The best way to navigate in the Imago panel is using the mouse, using the scroll wheel to zoom in and out and clicking and dragging to pan and scroll.
You can also use the keyboard.
|
Action |
Mouse |
Keyboard |
|---|---|---|
|
Zoom in and out |
Use the scroll wheel |
Press the Page Up or Page Down keys For smaller steps, hold down the Shift key while pressing the Page Up or Page Down keys |
|
Pan and scroll |
Click and drag |
Click in the panel, then press the arrow keys to pan and scroll Press the Page Up or Page Down keys to jump through images up and down the drillhole |
Locking a Panel to a Drillhole
The Lock (![]() ) button is for locking a panel to the drillhole selected in the scene. Locking a panel is useful for examining other data in the scene while viewing a specific drillhole alongside its core imagery. It is also useful when displaying multiple panels.
) button is for locking a panel to the drillhole selected in the scene. Locking a panel is useful for examining other data in the scene while viewing a specific drillhole alongside its core imagery. It is also useful when displaying multiple panels.
Changing the Scene Highlight Properties
Click on the colour chip to change the colour used for the scene highlight:
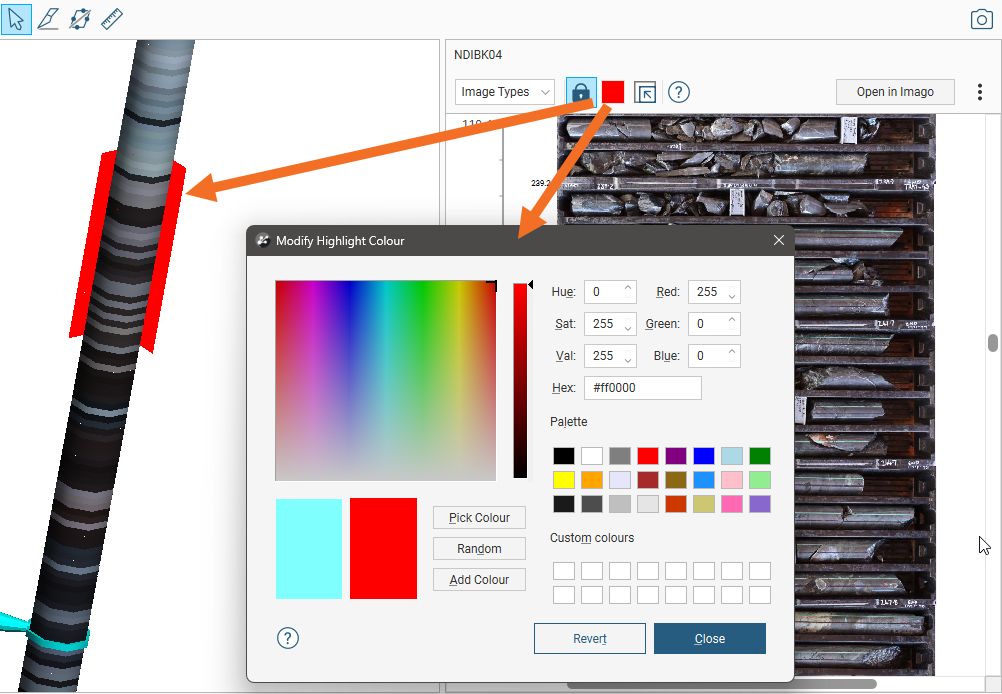
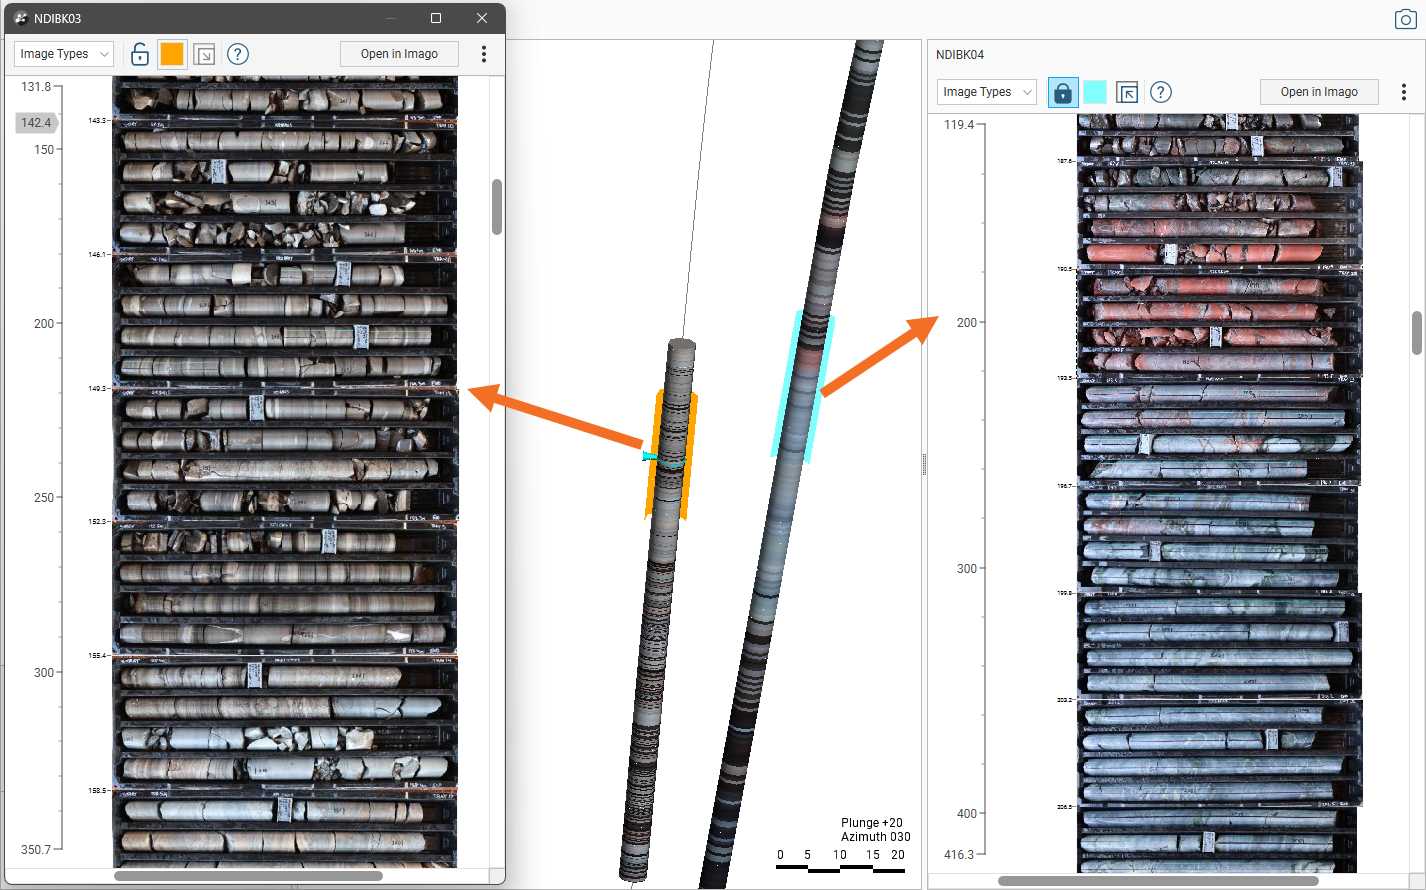
Changing the colour of the scene highlight is useful when displaying imagery for multiple drillholes, which is the case here where the scene highlight is blue for the docked panel and orange for the undocked panel:
Additional scene highlight properties can be changed by selecting Display Options from the overflow menu:
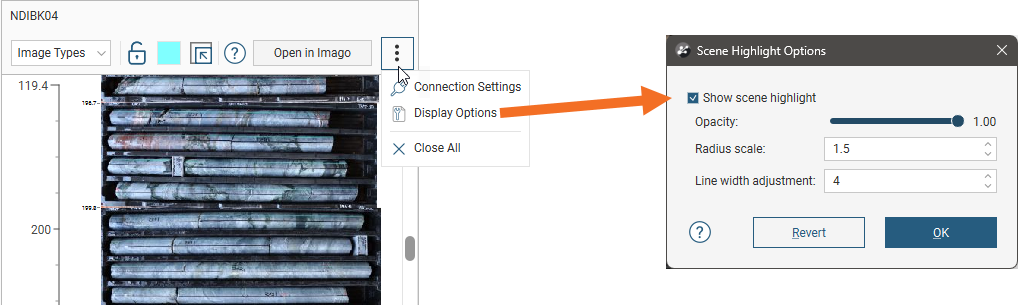
These settings apply to all scene highlights, whereas the colour setting applies only to the scene highlight for that panel.
Working in Multiple Panels
The panel can be used docked (![]() ) or undocked (
) or undocked (![]() ). You can also open multiple panels, although only one panel can be docked at a time.
). You can also open multiple panels, although only one panel can be docked at a time.
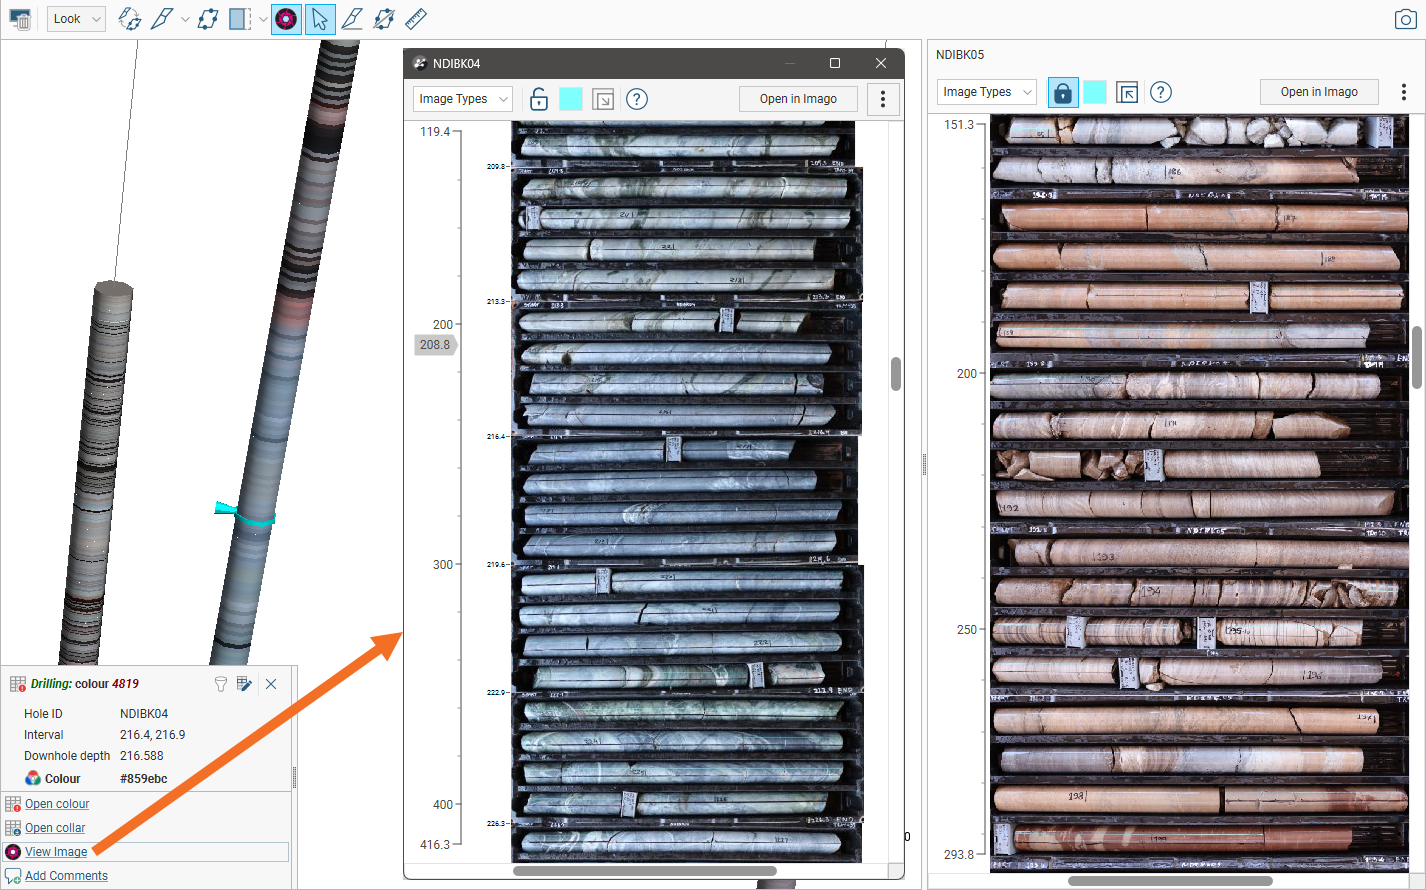
To open a second panel, lock the first panel. This prevents different imagery from being displayed in first panel when you click on other drillholes in the scene.
Next, click on an interval in the scene. The View Image link in the scene details panel opens a new Imago panel with imagery loaded for that drillhole:
To close all panels, select Close All from the overflow menu for any of the panels. This closes all panels, including a docked panel, if there is one.
Opening Imagery in Imago
To open imagery in the Imago Portal, click the Open in Imago button at the top of the panel:
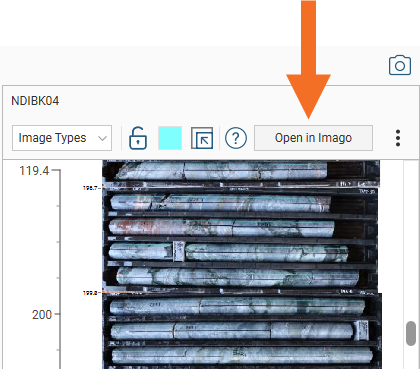
This opens the Imago Portal in your default web browser. You may need to sign in.
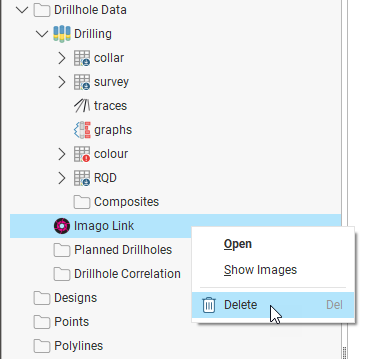
Removing the Imago Link
To remove the Imago link, right-click on it in the project tree and select Delete: