
Category Colourmaps
Category data such as lithologies is displayed according to a colourmap of the categories in the table. Category colourmaps can be reused in other objects and can easily be shared between projects on a column-by-column basis, which is useful if your organisation uses standard category colourmaps.
This topic describes how to work with category colourmaps. It is divided into:
- Importing and Exporting Category Colourmaps
- Editing a Category Colourmap
- Sharing Category Colourmaps
- Applying a Shared Category Colourmap
Importing and Exporting Category Colourmaps
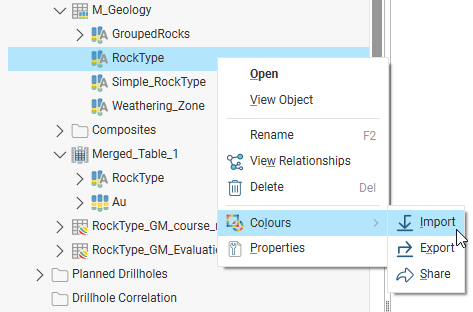
To import or export a category colourmap, expand the data table in the project tree and right-click on a column. The Import, Export and Share options are available from the Colours menu:
Sharing colourmaps is described later in this topic.
Leapfrog Geo supports importing colourmaps in *.lfc format.
To import a colourmap, right-click on the data object and select Colours > Import. Navigate to the folder containing the colourmap file and click Open.
When you import a category colourmap, the existing colourmap will be overwritten.
Leapfrog Geo will map the information in the file to the information in the selected data column.
To export a category colourmap, select the Colours > Export option. In the window that appears, navigate to the folder where you wish to save the colourmap. Enter a filename and click Save. The colourmap will be saved in *.lfc format.
Editing a Category Colourmap
Category data colourmaps can be edited by adding the data column to the scene, then clicking on the Edit Colours button in the shape list. To change the colour used for a category, click on its colour chip in the Legend window.
Sharing Category Colourmaps
Shared colourmaps are saved in the project tree in the Colourings > Shared Colourmaps folder.
To share a colourmap so it can be used by other objects in the project, right-click on a data object that has a colourmap you wish to share and select Colours > Share. The colourmap will be added to the Shared Colourmaps folder in the project tree. Once there, you will be able to choose that colourmap for other objects using the colour options selector in the shape list.
Some objects imported from Evo may automatically import an associated colourmap, which will appear in the Colourings > Shared Colourmaps > Imported folder in the project tree. These imported colourmaps will automatically be applied to the imported object.
To delete a shared category colourmap, right on the colourmap in the Share Colourmaps folder and select Delete. You will be prompted to confirm your choice. When you delete a shared colourmap from a project, local copies of that colourmap are retained as the category column in the parent object.
Applying a Shared Category Colourmap
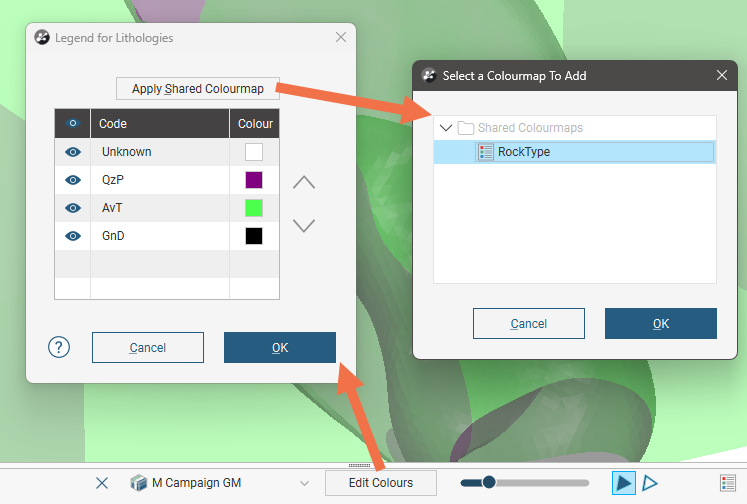
Instead of manually changing each of the category colours to match a standard colourmap, ensure the colourmap you want to use is in the Shared Colourmaps folder. Next, click Edit Colours in the shape list, and in the window that appears, click Apply Shared Colourmap. Available colourmaps will be listed; select the one you want to apply to the object categories then click OK.
Once a shared colourmap is applied to an object, any changes made to the object's colours will not make changes to the shared colourmap.