Geological Models
In Leapfrog Geo, geological models can be created from any type of category data, including but not limited to weathering, geology, alteration, mineralised zones, geotechnical domains and structural domains. The basic process is:
- Set the model’s boundary
- Select the base lithology, if using drilling data as the basis for the model
- Define a fault system, if required
- Define contact surfaces from other data in the project
- Enable the contact surfaces to divide the model’s boundary into output volumes
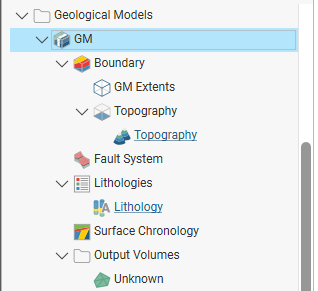
A geological model is represented in the project tree divided into objects that you can work with in building the model:
- The Boundary object (
 ) defines the limits of the geological model. When the model is first created, this is the rectangular model extents. If a topography has been defined, it is automatically used for as the upper boundary. You can modify the boundary further by adding lateral extents and a base.
- The Fault System object (
 ) defines faults and their interactions in the model.
- The Lithologies object (
 ) describes all the lithology codes to be modelled and the colours used to display them in the scene. When a geological model is created from lithology data, the lithology codes in the model are derived from that data. You can add more lithology codes from other lithology data in the project. You can also define lithology codes manually. If the model is not derived from lithology data, codes will need to be defined manually or added from lithology data in the project.
- The Surface Chronology object (
 ) describes the contact surfaces in the model, organised in chronological order, from youngest to oldest. These surfaces and their chronology determine how the volume inside the model extents is divided into lithological units. When the model is first created, the Surface Chronology is empty, but it will eventually hold all contact surfaces and inputs to them.
- The Output Volumes folder contains all the volumes (
 ) generated in building the geological model. When the model is first created, the Surface Chronology is empty and so there is only a single output volume in the Output Volumes folder. This volume fills the model’s extents and is called “Unknown”. Once contact surfaces have been generated and added to the Surface Chronology object, new volumes will be generated and added to the Output Volumes folder.
See Creating and Editing a Geological Model for information on the basics of setting up a new geological model and editing its settings. Once you have defined your model’s initial settings, see the following topics:
- Geological Model Lithologies
- Modifying a Geological Model’s Boundary
- Building Surfaces Using the Surface Chronology
- Building Faulted Models
The rest of this topic describes some useful tools for working with geological models and their output volumes. It is divided into:
- Displaying Geological Models
- Copying a Geological Model
- Creating a Static Copy of a Geological Model
- Geological Model Volumes and Surfaces Export Options
- Extracting Model Volumes
Displaying Geological Models
Right-click on the geological model in the project tree to view its display options:
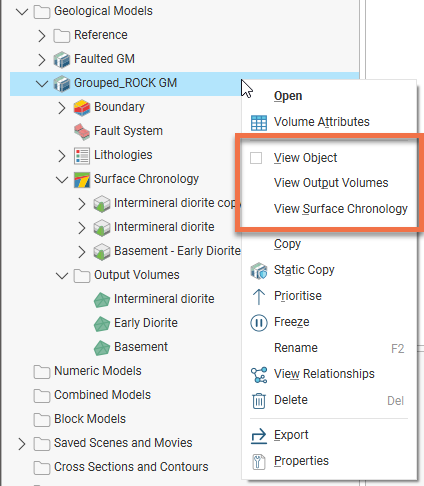
The View Object option adds the geological model to the shape list as a single object. You can also display the geological model in this way by dragging it from the project tree into the scene.
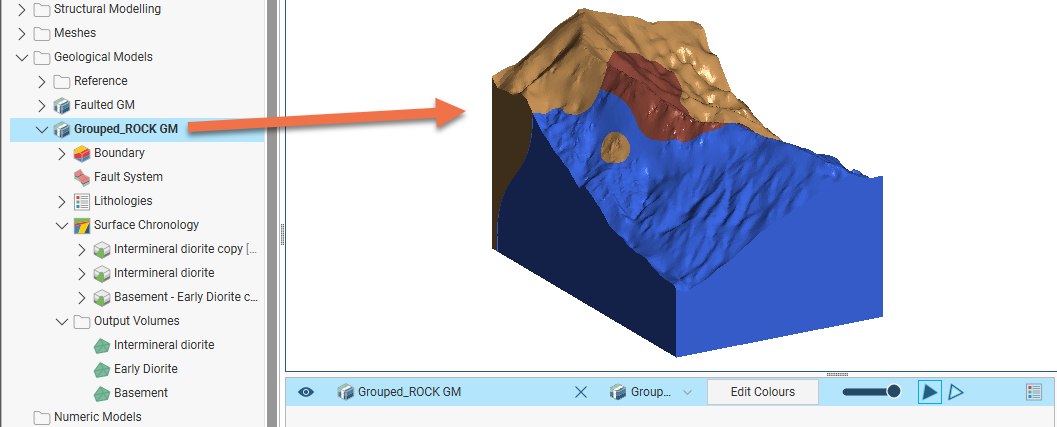
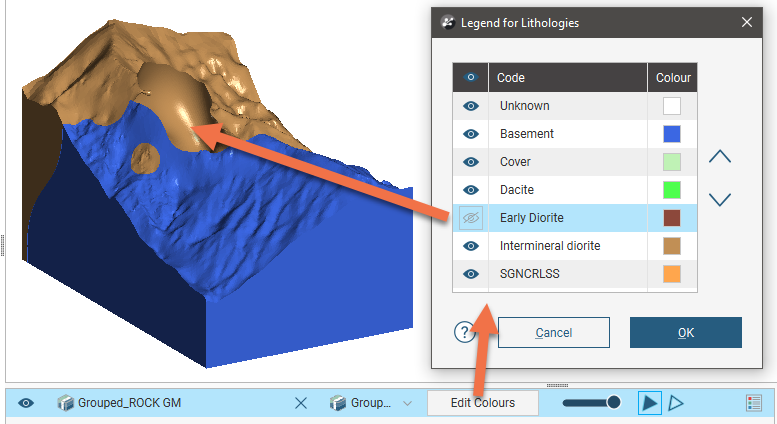
Change the visibility of the model’s volumes by clicking the Edit Colours button in the shape list:
The View Output Volumes option adds the model to the scene as a series of output volumes. It is the equivalent of dragging the Output Volumes folder into the scene.
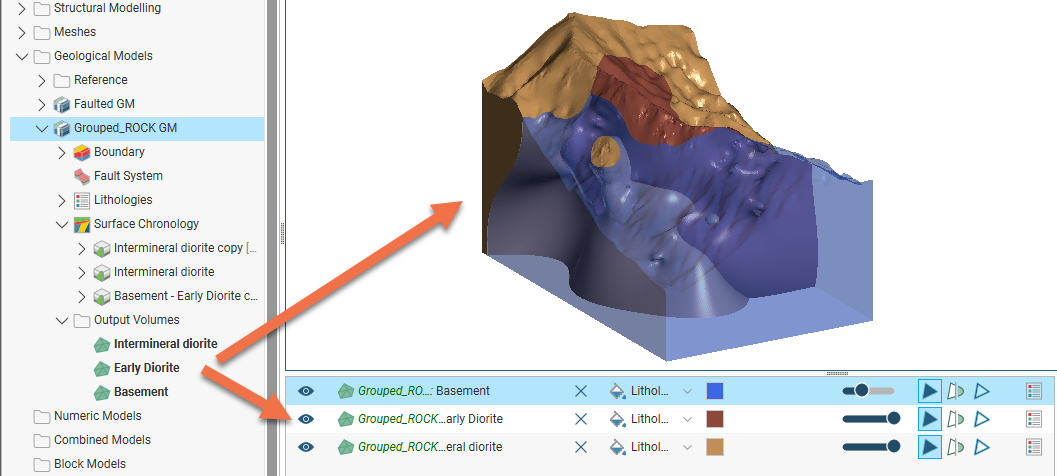
You can change the visibility of the model’s volumes individually.
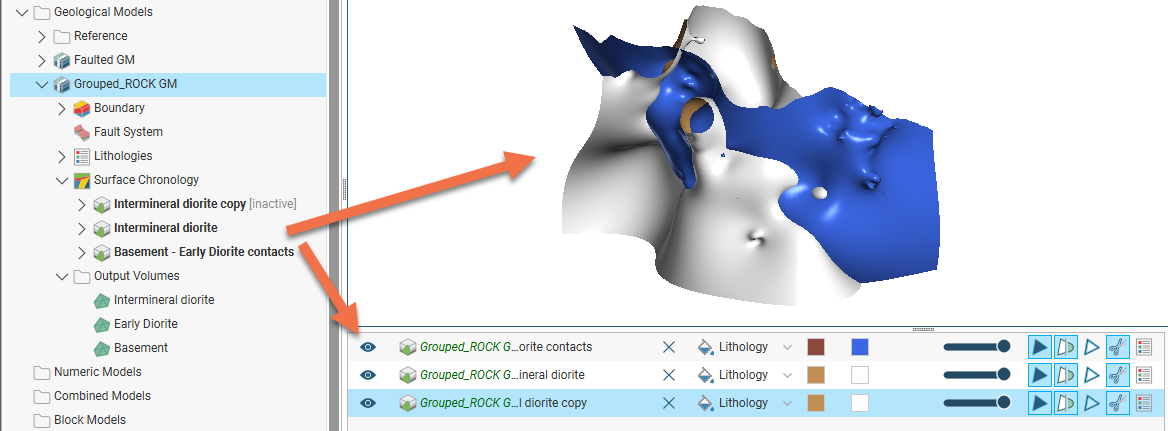
The View Surface Chronology option displays the surfaces that are used to divide up the model:
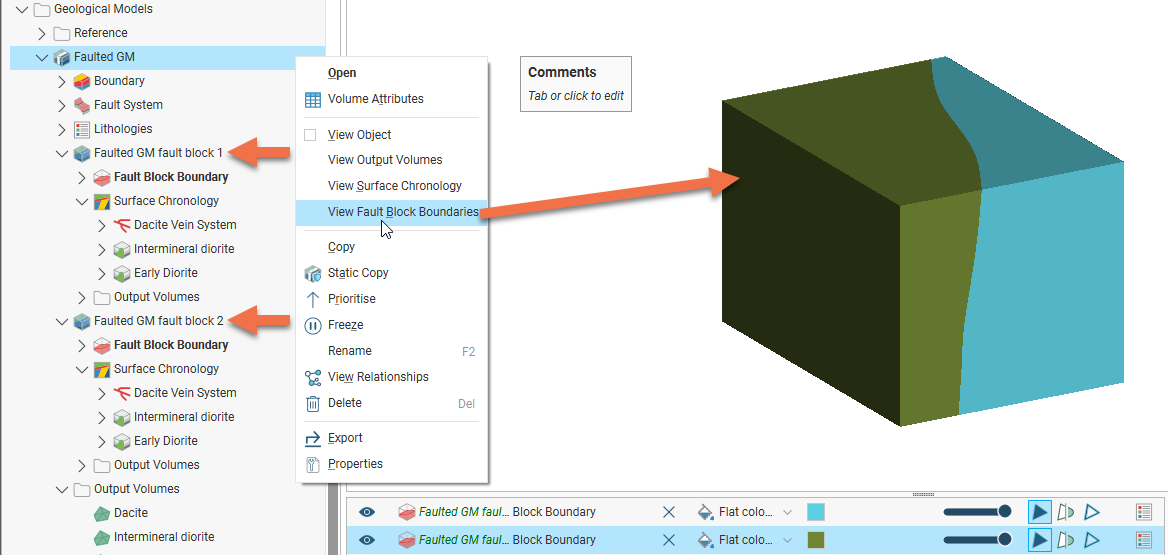
The View Fault Block Boundaries option is only available when a fault system has been defined and enabled for the model. Selecting View Fault Block Boundaries displays the fault blocks without displaying the lithology layers:
Copying a Geological Model
Creating a copy of a geological model is a useful way of experimenting with changes to a model.
To copy a geological model, right-click on it in the project tree and select Copy:
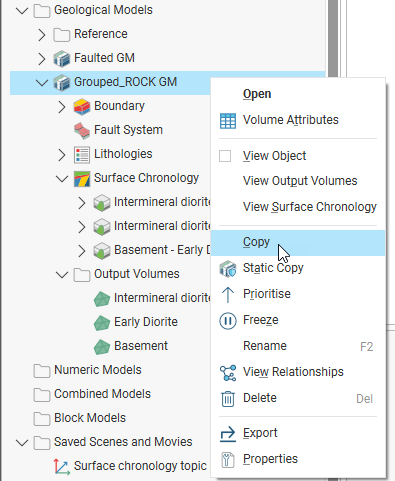
Enter a name for the copy of the model and click OK. The copy will be added to the project tree and you can work in it as you would in any other geological model.
Creating a Static Copy of a Geological Model
A static copy of a geological model is a snapshot of a geological model that does not change, even when changes are made to the data on which the original model was dependent. This is a useful way of storing historical models and comparing models. Static copies can be exported from Leapfrog Geo, as described in Geological Model Volumes and Surfaces Export Options below. The surfaces can be used elsewhere in the project and can also be exported for use in other projects.
To create a static copy of a geological model, right-click on it in the project tree and select Static Copy. Enter a name for the copy of the model and click OK. The copy will be added to the Geological Models folder.
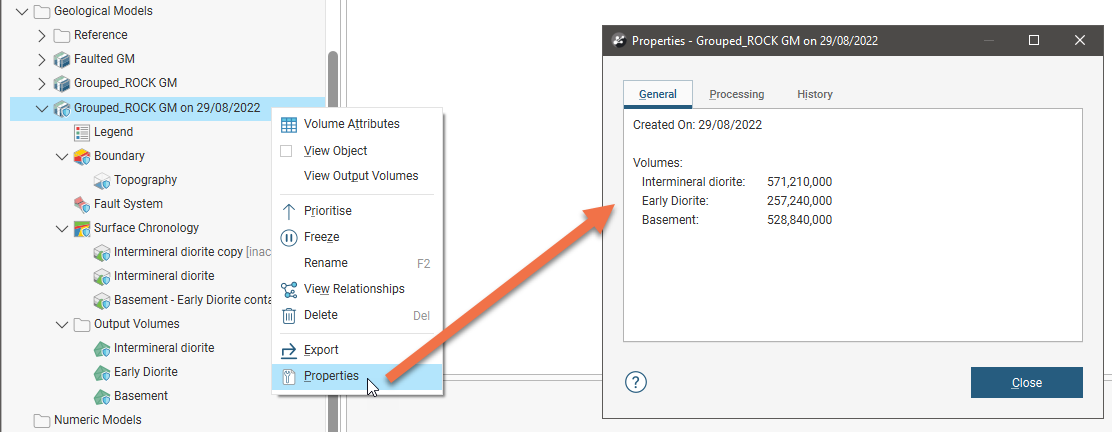
In the project tree, the static copy is made up of a Legend object, a boundary, a fault system, the output volumes and all surfaces created in building the model. To view information about a static copy, right-click on it in the project tree and select Properties. The date the copy was created is shown in the General tab.
Geological models imported from Central are imported as static models, although they can be updated when the geological model in the Central project is updated. To reload a static model, right-click on it and select one of the Reload From Central options:
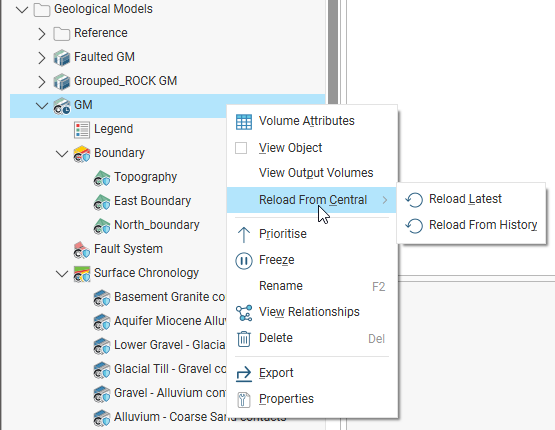
See Updating Out-of-Date Objects in the Importing Data From Central topic for more information.
Geological Model Volumes and Surfaces Export Options
There are three options for exporting a geological model’s output volumes and surfaces. These are:
- Export an output volume or a surface as a mesh. Right-click on it in the project tree and click Export. You will be prompted for a file name and location. See Exporting a Single Mesh.
- Export an output volume as a thickness grid. Right-click on it in the project tree and click Export Thickness Grid. See Thickness Grids.
- Export multiple output volumes and surfaces. Right-click on the geological model in the project tree and select Export. See Exporting Multiple Meshes from Models.
When exporting output volumes, the Merge output lithology volumes setting in the geological model’s General tab (see Creating and Editing a Geological Model) determines how the output volumes are handled when they are exported. If this setting is enabled, internal walls and surface seams will be removed from volumes of the same lithology.
Extracting Model Volumes
There are number of options for extracting meshes from geological model output volumes. These options are available by right-clicking on volumes in the Output Volumes folder and selecting Extract Mesh. There are five options:
- Mesh Parts
- Component Surfaces
- Younger Surfaces
- Older Surfaces
- Boundary Surfaces
The Mesh Parts option is the same as the option available on meshes elsewhere in the project. See Extracting Mesh Parts.
The Younger Surfaces, Older Surfaces and Boundary Surfaces options extract different parts of the selected volume, which are saved into the Meshes folder. Here, the boundary surfaces are shown in blue, the younger surfaces in yellow and the older surfaces in orange:
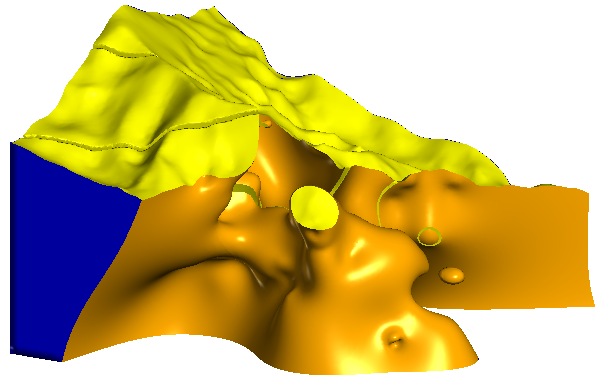
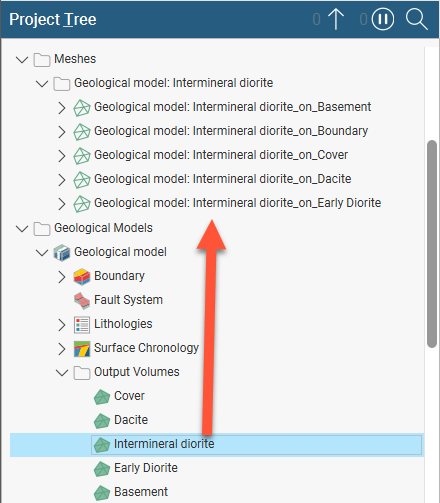
Component Surfaces extracts a separate surface for each volume the selected volume interacts with, including the boundary. The component surfaces are named after the boundary they are derived from and saved into a subfolder in the Meshes folder. For example, here meshes have been extracted for each contact with the Intermineral diorite volume: