The Clipping Boundary
An important consideration in defining the project space is setting the clipping boundary.
The default clipping boundary in a new project file encompasses everything in the project and grows as more data is added to the project. It is not necessary to set the clipping boundary. However, the clipping boundary defines the limits of the X-Y coordinates for the region in which data will be imported and models built and so defines the region in which calculations are made. Restricting the size of the clipping boundary limits the area in which calculations are made and is especially important if you are working with a large dataset.
The best way to set the clipping boundary is using an imported map or aerial photo, as this provides a visual reference that is helpful in working with data added to the project in the future. GIS data or drillhole data can also be used to set the clipping boundary.
To set the clipping boundary, add to the scene the objects you wish to reference in setting the boundary.
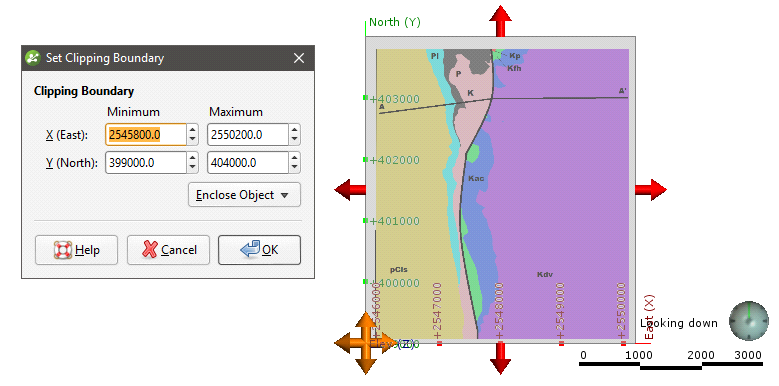
There are three ways to define the rectangular clipping boundary:
- Enter the coordinates.
- Select Enclose Object and choose from the list of objects in the project. The clipping boundary will be updated using the selected object.
- Use the controls that appear in the scene. The orange handle adjusts the corner of the clipping boundary and the red handles adjusts its size.
When you have finished adjusting the clipping boundary, click OK.
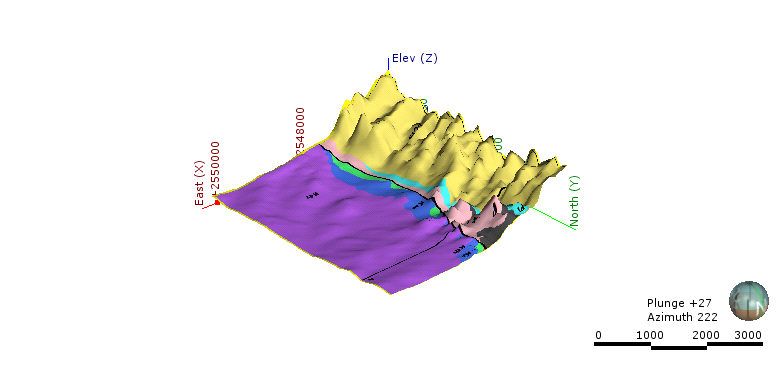
If you are going to import elevation data and use it to create a topography, it is important to set the clipping boundary before creating the topography. For example, here a map has been imported and a topography (yellow) created from an elevation grid. The map is displayed draped on the topography:
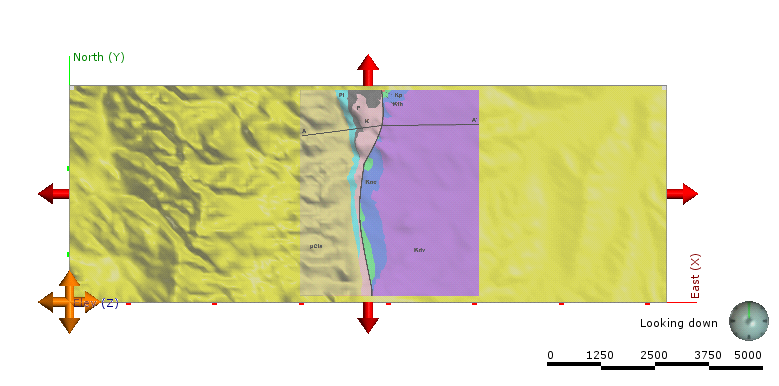
The red arrows and orange handle show the clipping boundary, which has been allowed to expand to encompass all data imported to the project. Because the topography was created before the clipping boundary was set, all the data in the imported elevation grid has been used and the resulting topography is larger than might be practical. Clearly, if the intention is to model within the area on the map, the clipping boundary should be limited to the region indicated by the map.
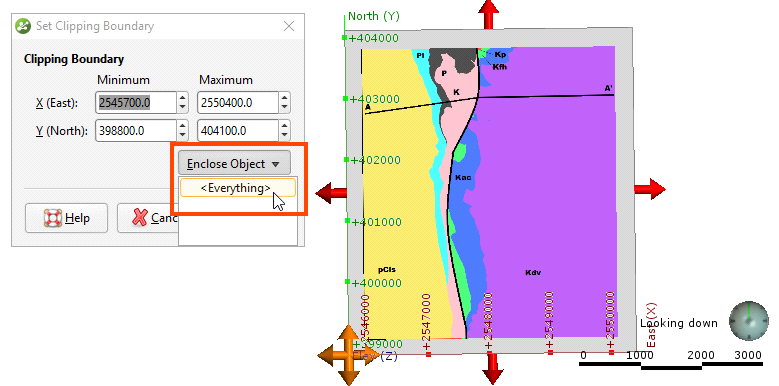
If the map is the only object in the project, it can easily be used to set the clipping boundary by selecting <Everything> from the Enclose Object list:
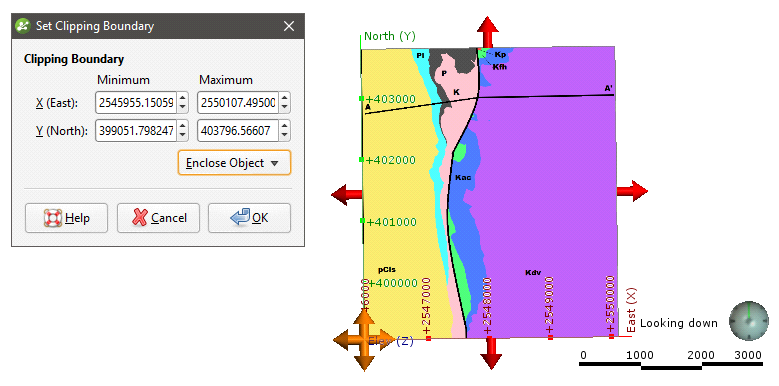
This results in a clipping boundary that is limited to the extents of the map:
Once the clipping boundary has been set, further data imported into the project will be clipped to it. For example, importing the elevation grid and using it to create a topography only after the clipping boundary has been set to the map extents will result in a topography (with the map draped) that looks like this:
Once the clipping boundary has been set, a good next step is defining the topography. See Defining a Topography.