Vein Systems
This topic describes creating a vein system for a geological model. The topic is divided into:
- Creating a Vein System
- Adding Veins to the Vein System
- Editing the Veins
- Vein System Lithology Settings
- Vein Interactions
An alternative to defining veins one-by-one is to create a vein system. The vein system represents a single lithology within the geological model. For example, for a model of a sedimentary system cross-cut by vertical intersecting dykes, we could model the veins one-by-one, in which case each “vein” in the model is represented by a separate lithology:

Modelled as a vein system, however, the veins are grouped into a vein system object (![]() ) that defines the lithology for the vein system as a whole:
) that defines the lithology for the vein system as a whole:
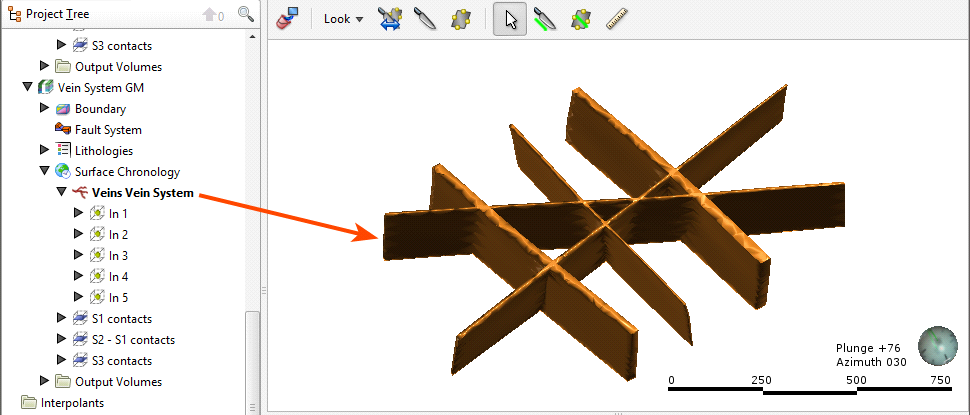
Note that the individual veins are part of the vein system.
The vein system defines how the veins interact, and veins can be added to it using the same techniques used to create individual veins.
Creating a Vein System
To create a vein system, right-click on the Surface Chronology and select New Vein System. In the window that appears, select the Vein lithology:

If the vein system contacts only one lithology, set the Outside lithology. Otherwise, leave Outside lithology set to Unknown.
Click OK. An empty vein system (![]() ) will be added to the project tree under the Surface Chronology. Double-click on it to change the lithologies.
) will be added to the project tree under the Surface Chronology. Double-click on it to change the lithologies.
Adding Veins to the Vein System
Once the vein system has been created, you can create veins using the same techniques described in Veins From Lithology Contacts and Veins From Other Data.
To add veins to the vein system, right-click on the vein system and select one of the New Vein options. Veins will appear in the project tree as part of the vein system object and can be expanded to show how they were created.
Editing the Veins
The techniques for editing vein system veins are the same as those for veins created one-by-one. See Refining Veins.
Vein System Lithology Settings
You can change the lithology settings for a vein system by double-clicking on the vein system (![]() ) in the project tree. In the Lithology tab, change the Vein lithology or the Outside lithology.
) in the project tree. In the Lithology tab, change the Vein lithology or the Outside lithology.
Vein Interactions
Once all the veins required have been created, you can start defining the interactions between them by double-clicking on the vein system (![]() ), then clicking on the Vein System tab:
), then clicking on the Vein System tab:

The veins appear in the list from highest priority to lowest. Organise the veins in chronological order before defining interactions. You cannot define an interaction for the highest priority vein in the list.
To add an interaction, click on a vein, then click the Add button. Select the Interaction Type and set how the veins interact:
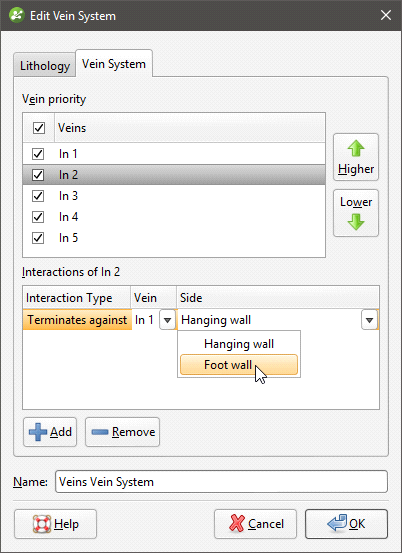
Once you have defined the required vein interactions, tick the box for each vein, then click OK. Add the Vein System object to the scene to check that the veins interact correctly.
You can also edit vein interactions by double-clicking on the individual veins.
Veins and the vein system are not active in the geological model until the box is ticked for each vein in the Edit Vein System window and the vein system is enabled in the Surface Chronology. This means you can check the vein system without regenerating the geological model.
Got a question? Visit the My Leapfrog forums at https://forum.leapfrog3d.com/c/open-forum or technical support at http://www.leapfrog3d.com/contact/support