Creating a New GIS Line
There are three ways to create a new GIS lines object in Leapfrog Geo:
- If you do not have GIS data for a topographical feature you wish to use in model building, you can draw a new GIS line. See Drawing a New GIS Line
- If you have two surfaces that intersect, you can generate a new GIS line from their intersection. You can use any surface in the project, including those that are generated in building models. See Creating a New GIS Line from Intersecting Meshes.
- If you have a polyline you wish to use as a GIS lines object, right-click on it in the project tree and select Extract GIS Line. The new GIS line (
 ) will appear in the GIS Data, Maps and Photos folder. It is not linked to the original polyline.
To view new GIS line draped on the topography, select the object from the GIS data > GIS objects list, as described in Topography Display Options.
Drawing a New GIS Line
GIS lines can be drawn on the slicer or on a surface.
Right-click on the GIS Data, Maps and Photos folder and select New GIS Line > From New Drawing. In the window that appears, enter a name for the new object and click OK.
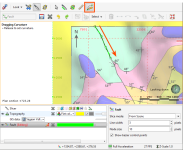
The object will be created in the project tree and added to the shape list. The scene view will change to view the objects in the scene from above and tools for drawing polylines will appear. Click on the Draw lines button (![]() ) and start drawing in the scene, as described in Drawing in the Scene.
) and start drawing in the scene, as described in Drawing in the Scene.
When you have finished drawing, click the Save button (![]() ). The new line (
). The new line (![]() ) will be saved in the project tree.
) will be saved in the project tree.
You can edit the GIS line by right-clicking on it in the project tree and selecting Edit. If it is in the shape list, you can edit it by clicking on the Edit button (![]() ).
).
Creating a New GIS Line from Intersecting Meshes
You can create a new GIS line from two intersecting meshes. You can use any surface in the project, including those that are generated in building models.
To create a new GIS line from two intersecting meshes, right-click on the GIS Data, Maps and Photos folder and select New GIS Line > From Intersecting Meshes. In the window that appears, select the meshes to use, enter a name for the new object and click OK.
The new line (![]() ) will be saved in the project tree. It is not linked to the meshes used to create it and will not be updated when the meshes are updated.
) will be saved in the project tree. It is not linked to the meshes used to create it and will not be updated when the meshes are updated.
Got a question? Visit the My Leapfrog forums at https://forum.leapfrog3d.com/c/open-forum or technical support at http://www.leapfrog3d.com/contact/support
