Editing a MODFLOW Model
This feature is only available as part of the Hydrogeology module. See Flow Models for more information.
Once you have created a MODFLOW model, you can edit it by expanding the model in the project tree and double-clicking on the grid object (![]() ). The Edit MODFLOW Grid window will appear. You can edit the grid spacings as described in Creating a MODFLOW Model, using the information in the scene window as a guide.
). The Edit MODFLOW Grid window will appear. You can edit the grid spacings as described in Creating a MODFLOW Model, using the information in the scene window as a guide.
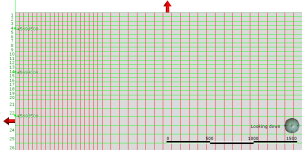
Another way to edit the grid is to use the controls in the scene to apply different cell size settings in different parts of the grid. For example, you may want to define a grid that has smaller cells in the centre than at the outer edges:
To set cell sizes in this way, it is best to start with a MODFLOW model where the Default Cell Size is set to the smallest cell size you will use in the model.
For this example, we will start with a new grid with a Default Cell Size of 50. We will set the adjacent cell size to 100 and the cell size at the outer boundary to 200.
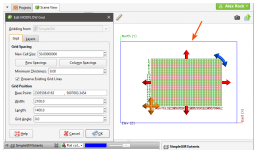
First, we need to reduce the area that uses the cell size of 50 by using the red handles in the scene:
The blue box in the scene is the geological model extents for the model used to define the MODFLOW model and represents the unedited boundary of the MODFLOW model.
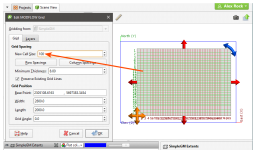
Next, enter the cell size to use for the area adjacent to the 50.0 cells in the New Cell Size field. Then, drag the red handles to enlarge the grid. The centre part of the grid is still set to 50, while the new area is set to 100:
If the Preserve Existing Grid Lines option is enabled, grid lines for cells already defined will not be moved to account for new cells.
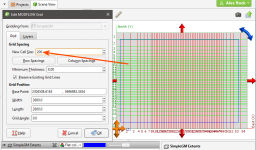
Enter the next cell size in the New Cell Size field and then use the handles to enlarge the grid again:
Click OK to update the grid.
For further information on working with the new model, see:
- MODFLOW Model Display
- MODFLOW Evaluations
- MODFLOW Hydrological Properties
- Head Values and MT3D Concentrations
- Generating a Head Value Mesh
- MODFLOW Model Export
Got a question? Visit the My Leapfrog forums at https://forum.leapfrog3d.com/c/open-forum or technical support at http://www.leapfrog3d.com/contact/support


