Organising Your Workspace
You can split the Leapfrog Geo main window into separate parts to make better use of your screen space. In addition, some Leapfrog Geo windows open in separate tabs that can be used either docked or detached. This topic describes how to change the main window to make the best use of your screen space. It is divided into:
Detaching Tabs
To detach a tab, either:
- Click on it and drag it away from the main window.
- Right-click on it and select Move to New Window.
You can then move and resize the detached tab.
To dock a detached tab, click on it and drag it to where you want to dock it:

When the move handle (![]() ) appears, release the mouse and the tab will dock.
) appears, release the mouse and the tab will dock.
Tabs can be docked to the main window or to other tabs. Drag tabs to reorder them.
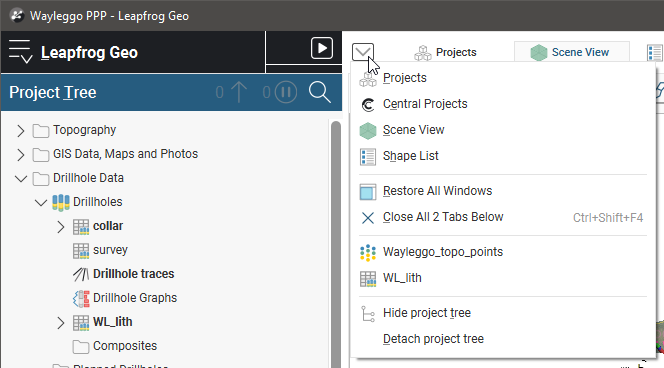
You can view a list of all open tabs by clicking the List open tabs button, which is the down arrow to the right of the processing queue button:
When you close a project, the position of open tabs will be saved and restored when the project is next opened.
For Leapfrog Geo windows that open in separate tabs, the position in which tabs open is determined by the New tab position setting in the Settings window:
- Open all tabs in the main window.
- Open all tabs in separate windows.
- Tabs can open where the last tab was moved to. This setting can be used for creating a window in which all tables and dockable windows open, with the scene window, project tree and shape list in another window.
To change this setting, click on the Leapfrog Geo menu, select Settings and then click on the User Interface tab.
Detaching and Minimising the Project Tree
The project tree can also be detached from the main window. To do this, either:
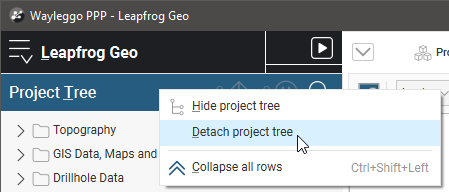
- Right-click at the top of the project tree and select Detach:
- Click on the List open tabs button and select Detach project tree:

To reattach the project tree, click the X to close the tab. It will reappear docked to the main window. You can also click on the List open tabs button and select Attach project tree.
You can also hide the project tree. To do this, right-click on it and choose Hide project tree or press the F8 key. Restore the project tree by:
- Clicking on the List open tabs button and selecting Show project tree.
- Pressing the F8 key once again.
Organising the Scene View Tab
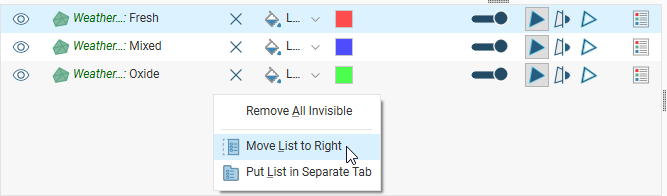
The Scene View tab is made up of the scene window, the shape list and the shape properties panel. The shape list and shape properties panel can be displayed on the right-hand side of the scene rather than below the scene. To do this, right-click in the shape list and select Move List to Right:
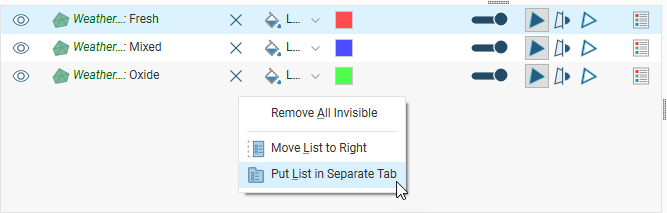
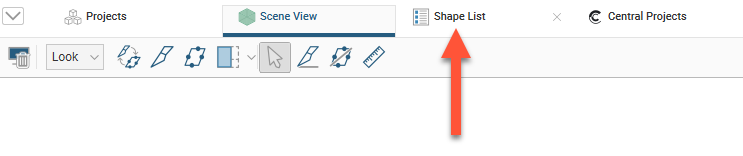
You can also detach the shape list and display it as a tab, which can then be detached from the main window. To do this, right-click in the shape list and select Put List in Separate Tab:
You can then detach the tab from the main window:
To dock the shape list to the Scene View tab, right-click in the Shape List tab and choose where you wish to dock the list:

Got a question? Visit the Seequent forums or Seequent support