Splitting Lithologies
With the split lithologies tool, you can create new units from a single unit by selecting from intervals displayed in the scene. When you split lithologies, the original lithology column is preserved and a new lithology column is added to the interval table. You can then select the original lithology column or the new one when displaying data and creating models.
The difference between the interval selection tool and the split lithologies tool is that with splitting lithologies, you are limited to selecting intervals from a single lithology. If you wish to select intervals from multiple lithologies, see Interval Selection.
To start splitting a lithology, first add the drillhole data to the scene. Then right-click on the interval table in the project tree and select New Column > Split Lithologies. The New Lithology Column window will appear:
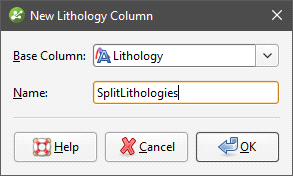
Select the lithology column you wish to use from the Base Column list, then enter a Name for the new lithology column. Click OK.
The Lithologies and Splits window will appear, together with a set of tools that will help you to select intervals in the scene:
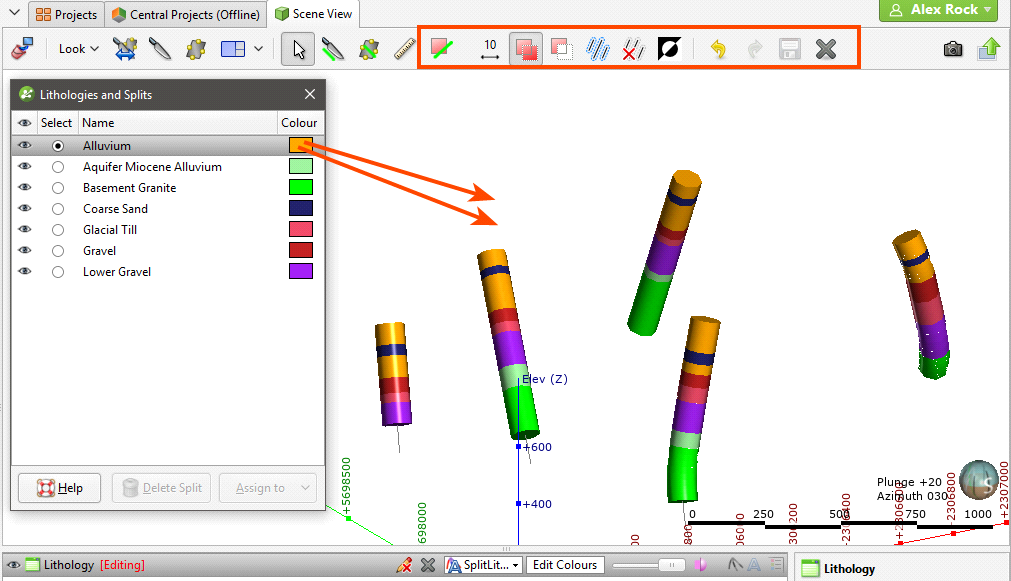
Alluvium (gold) appears both above and below Coarse Sand (blue) and so should be split into two separate lithologies.
The first step is to select the lithology that will be split in the Lithologies and Splits window. In the example above, Alluvium is already selected.
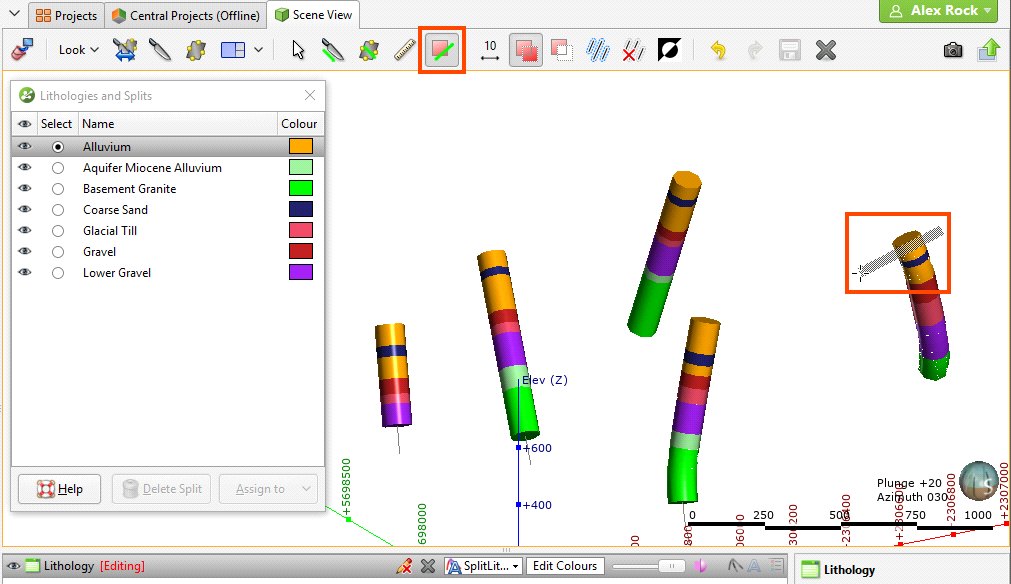
Next, click on the Select Intervals tool (![]() ) and click the Add Intervals tool (
) and click the Add Intervals tool (![]() ). In the scene, draw a line across each interval you wish to select.
). In the scene, draw a line across each interval you wish to select.
To change the width of the line used to select intervals, click on the Change line width button (![]() ) and enter a new value. You can keep the Set Line Width window open while you select intervals so you can change the line width as required:
) and enter a new value. You can keep the Set Line Width window open while you select intervals so you can change the line width as required:
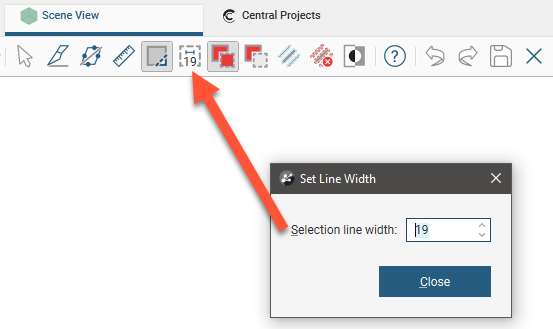
Note that the current line width is indicated by the Change line width button.
Selected intervals are highlighted in the scene. If you accidentally select the wrong interval, either:
- Click the Remove intervals button (
 ) and draw across the interval once again.
 - Hold the Ctrl key while drawing across the interval.
You can also:
- Select all visible intervals by clicking on the Select all button (
 ) or by pressing Ctrl+A.
 - Clear all selected intervals by clicking on the Clear selection button (
 ) or by pressing Ctrl+Shift+A.
 - Swap the selected intervals for the unselected intervals by clicking on the Invert selection button (
 ) or by pressing Ctrl+I.
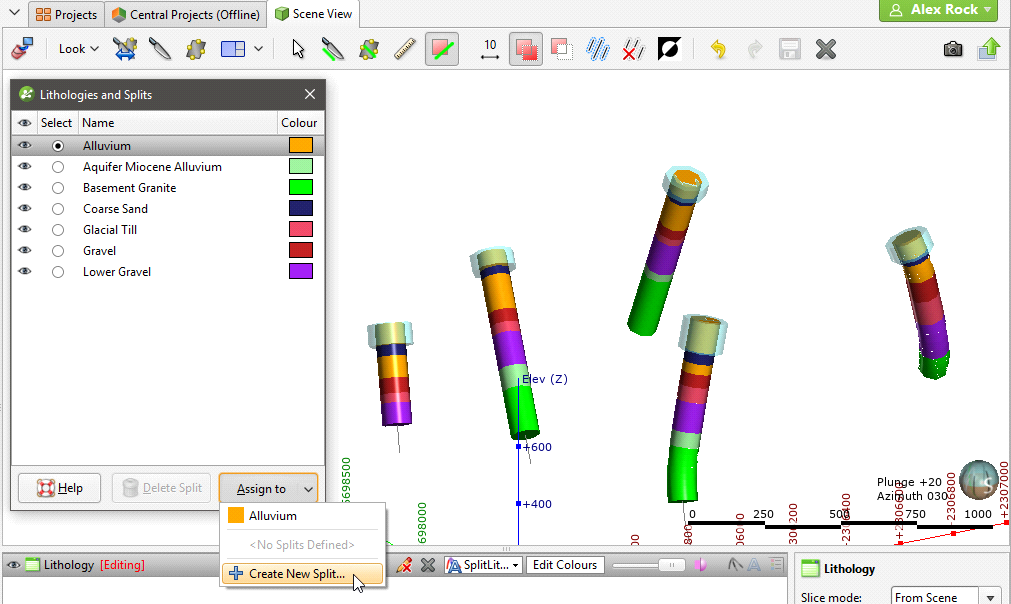
Once you have selected some segments, click on the Assign to button in the Lithologies and Splits window and select Create New Split:
The New Split window will appear:
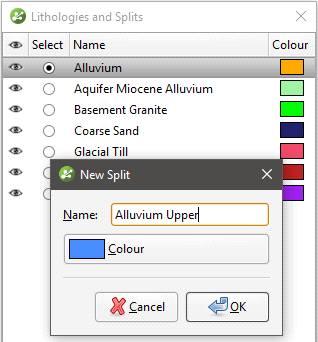
Enter a Name for the new lithology, then click OK. The new lithology will be created and the scene updated to reflect the changes:
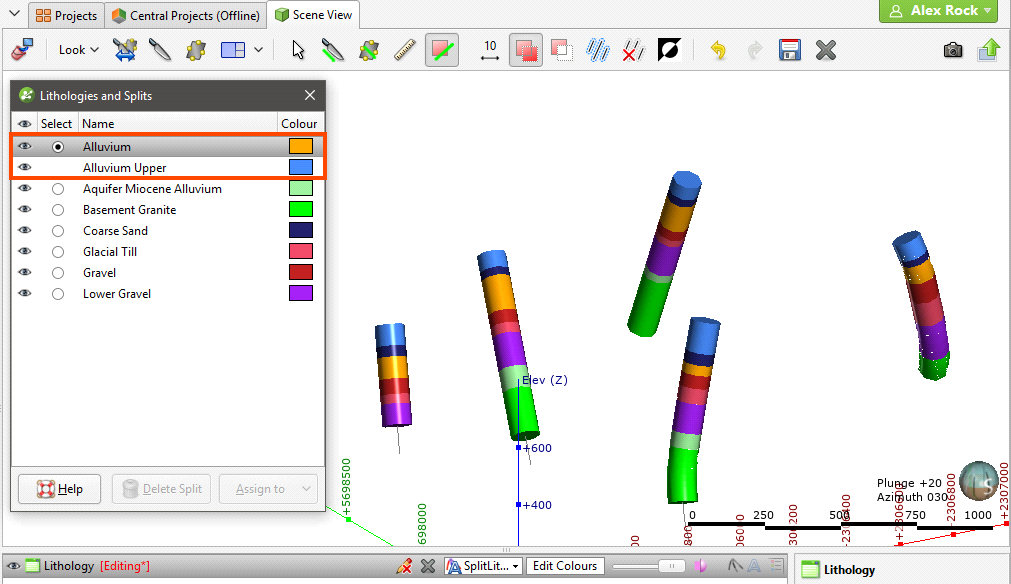
Once you have created a new lithology, you can add to it by selecting intervals, then selecting the lithology from the Assign to list.
When you are finished, click the Save button (![]() ) and close the Lithologies and Splits window. The new lithology column will appear in the project tree as an additional lithology column in the interval table.
) and close the Lithologies and Splits window. The new lithology column will appear in the project tree as an additional lithology column in the interval table.
Select the new column from the shape list to display it:
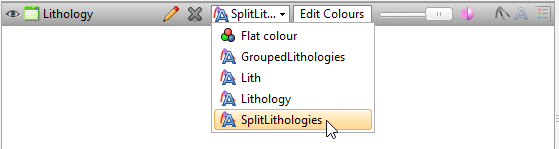
Click on the Edit button (![]() ) to start editing the selected column.
) to start editing the selected column.
Got a question? Visit the Seequent forums or Seequent support