Grids of Points
You can create a grid of points that can be evaluated against geological and numeric models and exported for use in other modelling packages. This topic describes creating and working with grids of points. It is divided into:
- Creating a Grid of Points
- Evaluating a Grid of Points
- Statistics for a Grid of Points
- Exporting a Grid of Points
Creating a Grid of Points
You can create a grid of points that can be evaluated against geological models and interpolants and exported for use in other modelling packages.
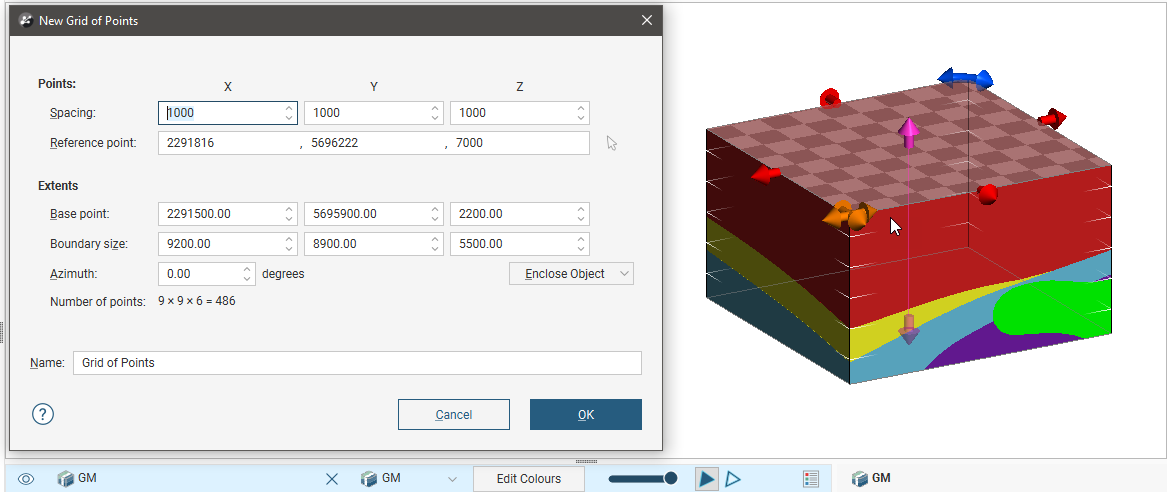
To create a grid of points, right-click on the Points folder and select New Grid of Points. The New Grid of Points window will appear, together with controls in the scene that will help in setting the grid’s boundary:

Set the Spacing and Reference Point, which will control the number of points in the grid. You can set the Reference Point by clicking in the scene. To do this, first click on the Select button (![]() ) for the Reference Point, then click in the scene. The coordinates in the scene will be copied to the New Grid of Points window.
) for the Reference Point, then click in the scene. The coordinates in the scene will be copied to the New Grid of Points window.
For the Extents, you can select an object from the Enclose Object list to use the extents of another object in setting the grid’s extents. You can also change the size and position of the grid using the controls in the scene:
- The orange handle adjusts the Base Point.
- The red and pink handles adjust the Boundary Size.
- The blue handles adjust the Azimuth.
If you have set the extents from another object and then rotated the grid, you will need to reset the extents by selecting the object again from the Enclose Object list.
The Number of Points in the grid will be updated as you change settings in the New Grid of Points window. If the number of points will be very large, rendering of the grid in the scene will be disabled.
You will be able to change the settings in this window once the grid has been created.
Click OK to create the grid, which will appear in the Points folder. Double-click on the grid to change its settings.
Evaluating a Grid of Points
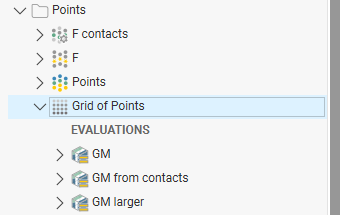
Once you have created the grid, you will be able to evaluate it against geological models, interpolants and distance functions in the project. Right-click on the grid and select Evaluations, then select from the models available. The evaluations will be shown in the project tree as part of the grid:

Evaluations will be exported with the grid. See Exporting a Grid of Points below.
Statistics for a Grid of Points
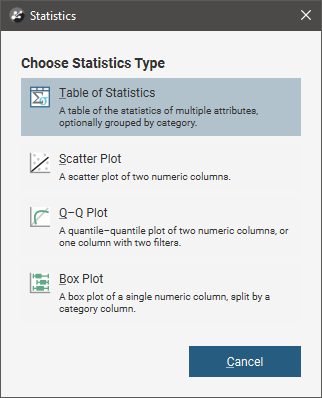
To view statistics on a grid of points, right-click on the grid and select Statistics.

See the Analysing Data topic for more information on each option:
Exporting a Grid of Points
You can export a grid of points in the following formats:
- CSV file (*.csv)
- GSLIB Data file (*.dat)
- Surpac Block Model file (*.mdl)
- Isatis Block Model file (*.asc)
- Geo 3D Point Data file (*.pl3, *.ara)
For CSV, Surpac Block Model and Isatis format files, all evaluations on the grid of points will be exported as part of the file. For all other file types, only numeric evaluations will be exported.
To export a grid of points, right-click on it in the project tree and select Export. Select the format required, enter a filename and location, then click Save.
Got a question? Visit the Seequent forums or Seequent support