Overlaid Lithology Column
You may have two versions of an interval column, one that contains draft data and one that contains the final version. The final version may contain gaps, which can be filled in using the draft version. The overlaid lithology tool lets you combine the two columns to create a new column.
Both columns must be part of the same interval table. If they are not, use the merged table tool to create a new table that contains both columns. See Merged Well Data Tables.
To create an overlaid lithology column, right-click on the interval table in the project tree and select New Column > Overlaid Lithology Column. For a merged table, right-click on it and select Overlaid Lithology Column.
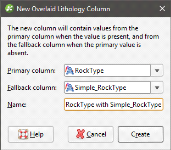
The New Overlaid Lithology Column window will appear:
For the Primary column, select the column that you wish to have precedence. Data in the Fallback column will be used when no data is available from the Primary column.
Click Create to create the new column. The new column will appear in the project tree.
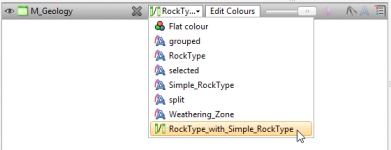
You can display well data with the new column by selecting it from the shape list:
Got a question? Visit the Seequent forums or Seequent support

