Modelling
This section describes how to build models in Leapfrog Geothermal.
- It is not necessary to define a topography to model in Leapfrog Geothermal, but a defined topography can be used as an upper boundary for all models built in the project. A key advantage of defining a topography is that it provides consistent elevation data for objects imported to and created in the project. The quality of elevation information can be poor compared to X- and Y-coordinates, which can create problems when using objects to build a model. A topography can be created from the most reliable elevation data, and other objects can have elevation set from this topography.
- Geological models can be built from lithology data or from any other suitable data in the project. Visualising data in the scene is an important step in determining the model that will be built, and the tools for doing this are described in Visualising Data. Once this has been determined, the next step is to define a basic geological model and refine its boundaries. Modelling contact surfaces and setting their cutting relationships determine how the basic model volume is divided into lithologies. Models can also have a fault system that, once activated, will subdivided the model into fault blocks.
- With the Numeric Models folder, you can interpolate downhole numeric data, composited well data and points data.
- Combined models use information from up to four geological models, interpolants and distance functions in order to visualise relationships between different types of data in the project.
- Geological models created in Leapfrog Geothermal can be used as the basis for MODFLOW, FEFLOW and TOUGH2 models. You can create flow models directly in Leapfrog Geothermal and assign hydrological/material properties based on the lithologies in the geological model. Flow models can be exported for use in other applications, and you can import existing flow models and use them as the basis for the construction of new models. Flow models can be displayed in the scene, and time-dependent output data can also be visualised.
-
Assigning Attributes to Volumes
For geological models, numeric models and combined models, you can assign attributes to the model volumes. To do this, right-click on the model in the project tree and select Volume Attributes. In the window that appears, click the Add Attribute button ( ) to add a new column.
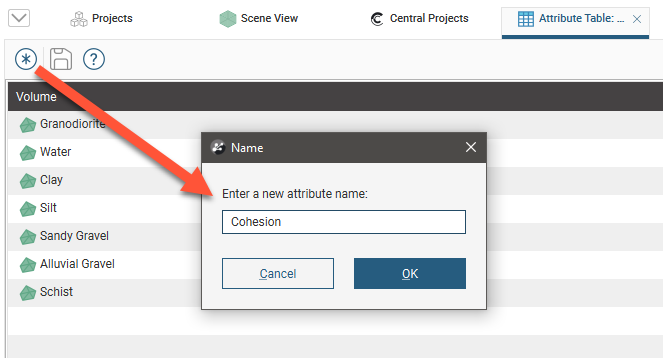
Enter a name for the column and click OK. You can then edit the values in the table. When you click in the scene, the values will be included in the information displayed about the selected volume:
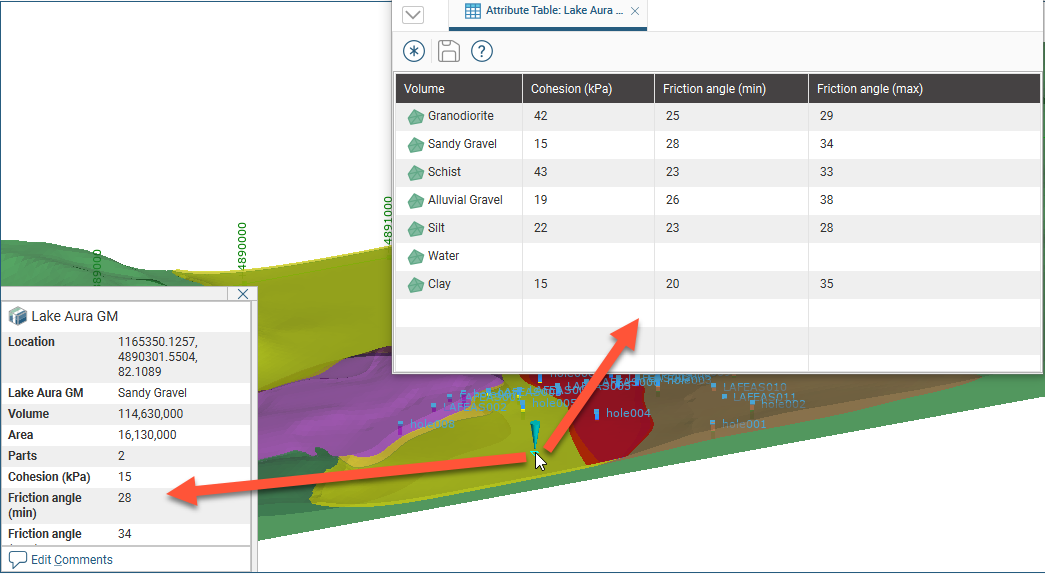
Attribute information cannot be displayed in the Central Browser.
When you save scenes for viewing in Leapfrog Viewer, manually entered attributes will be displayed when volume information is displayed.
Got a question? Visit the Seequent forums or Seequent support