Drawing Slices
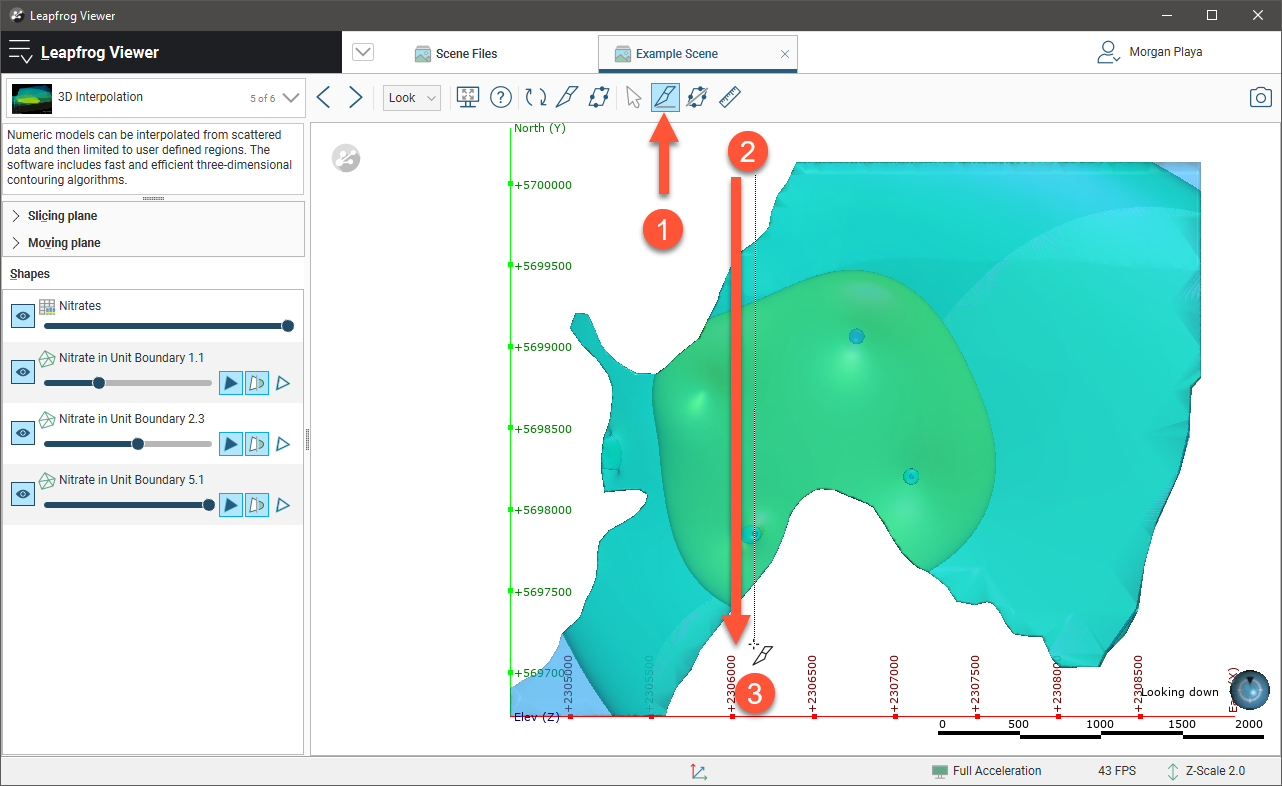
With the slicer, you can cut away part of the scene to see the internal structure of an object. To draw a slicing plane:
1. Click on the Draw slicer line button (![]() ), then
), then
2. Click and drag in the scene, then
3. Release the mouse button at the end point.
The slicer appears in the scene and the Scene tool is selected once again so you can rotate the scene to see the slice clearly. Open the Slicing plane panel to view options that give you more control over the size, shape and position of the slice:
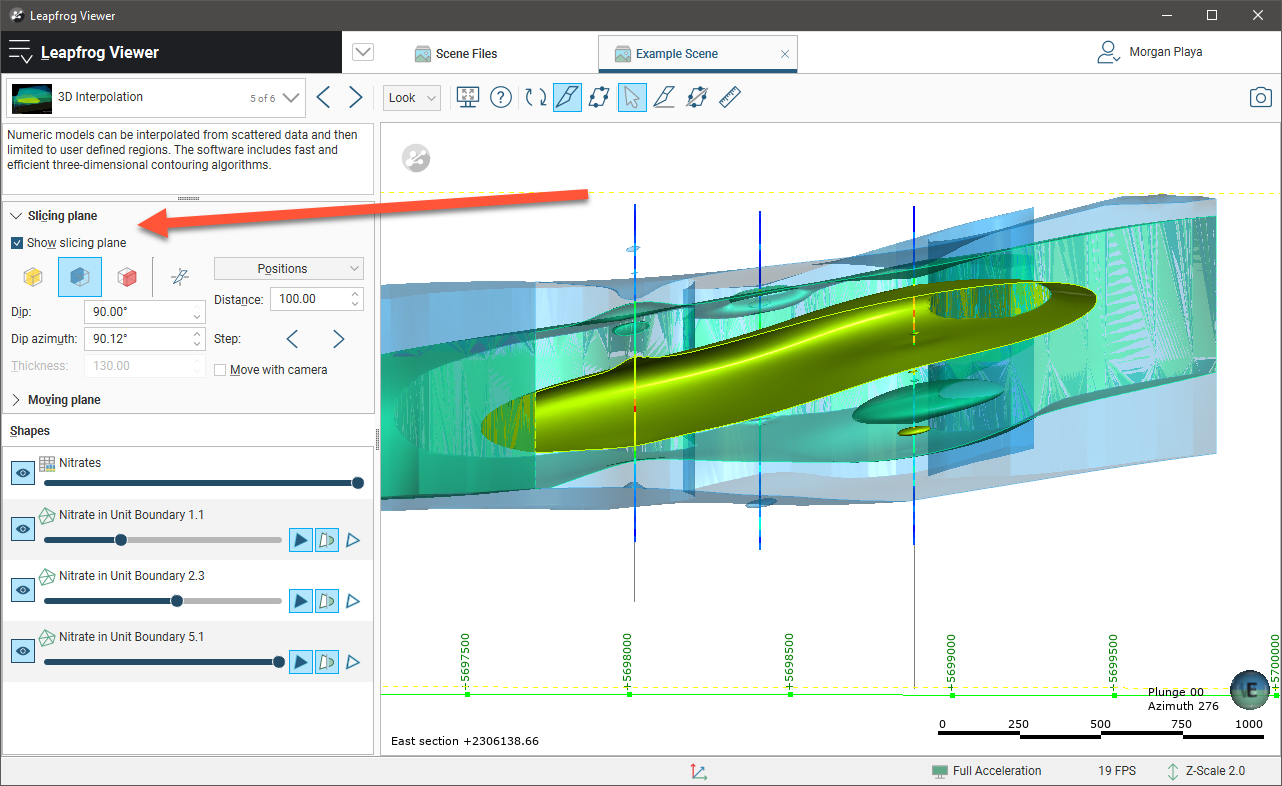
In the Slicing plane panel, the three slice modes (![]()
![]()
![]() ) determine how the model is cut away from the slice. The Thickness control applies only to the thick slice (
) determine how the model is cut away from the slice. The Thickness control applies only to the thick slice (![]() ) option.
) option.
You can:
- Centre the slicer in the scene by clicking the Centre in scene button (
 ).
). - Change the position of the slice to one of the preset Positions.
- Tick the Move with camera option to change the direction of the slice when you rotate the scene.
- Use the Step buttons (

 ) to move the slice forward and backward in the scene by the value of Distance.
To draw a new slice, click the Draw slicer button (![]() ). To remove the slice from the scene, untick the Show slicing plane box or click on the Show slicer button (
). To remove the slice from the scene, untick the Show slicing plane box or click on the Show slicer button (![]() ) in the toolbar. Until a new slice is drawn, the current slice can be made visible once again by ticking the Show slicing plane box or clicking on the Show slicer button (
) in the toolbar. Until a new slice is drawn, the current slice can be made visible once again by ticking the Show slicing plane box or clicking on the Show slicer button (![]() ).
).
Got a question? Visit the Seequent forums or Seequent support