Managing Leapfrog Projects
Once you have signed in to Leapfrog using your Seequent ID, the Leapfrog main window will appear with the Projects tab displayed. The Projects Tab is used for organising your Leapfrog projects.
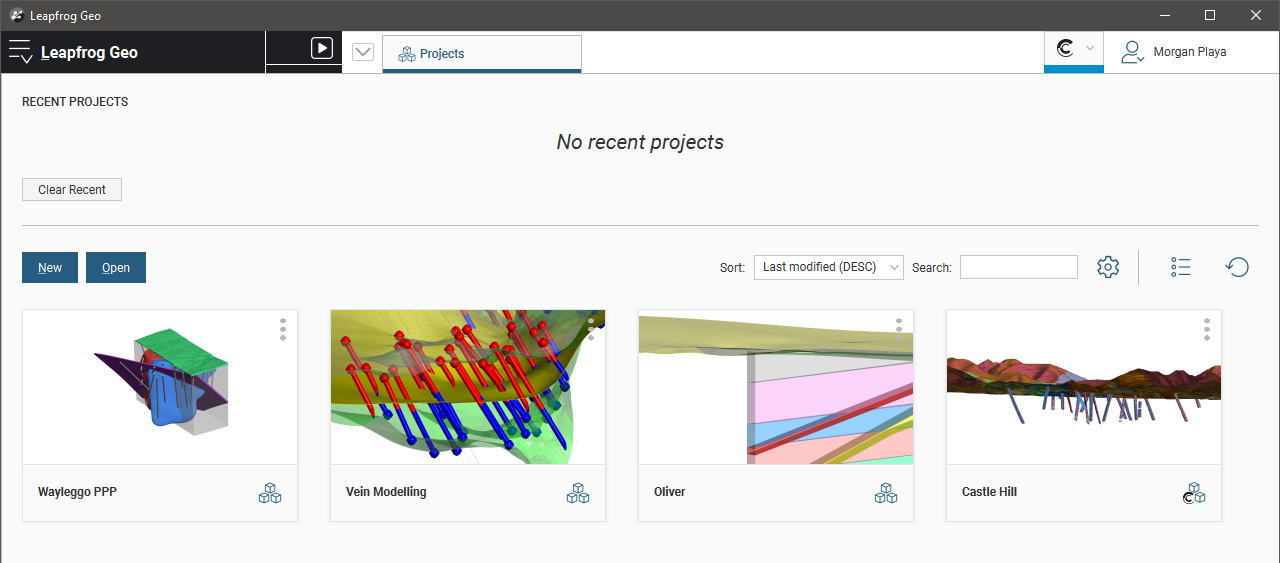
Three “types” of projects will be listed in the Projects tab:
- Projects marked with the
 symbol are local Leapfrog projects not connected to Central. Click on a local Leapfrog project to open it.
 - Projects marked with the
 symbol are local copies of Central projects. Click on a local copy to view the Central project’s history. Until you are connected to the project’s Central server, the history will be blank. You can open the local copy and connect to its Central server by clicking on the thumbnail in the history tab. See Downloading a Local Copy of a Project in the Central Projects topic for more information on local copies.
 - Projects marked with the
 symbol are the Central projects themselves. These will only appear in the list when you are connected to a Central server. Click on a Central project (
 ) to view its history.
The rest of this topic describes how to work with Leapfrog projects. It is divided into:
- The Projects Tab
- Creating New Projects
- Recording a Coordinate System
- About Leapfrog Project Files
- Opening Projects
- Upgrading Projects
- Missing Data Warnings
- Saving, Backing Up and Compacting Projects
- Tracking Project Work Using Reference Codes
The Projects Tab
After you have signed in using your Seequent ID, the Leapfrog main window will appear with the Projects tab displayed.
If your organisation is using Central 3.0 or later, the Central servers you have access to are configured via your Seequent ID. You will have a single Projects tab that shows all your Leapfrog and Central projects. If your organisation is using a version of Central older than Central 3.0 or is not using Central at all, you will still need to sign in to Leapfrog via your Seequent ID, but you will have two tabs, a Projects tab that shows all your local Leapfrog projects and a Central Projects tab. See The Projects Tab - Without Central or Using an Older Version of Central.
The Central servers you have access to via your Seequent ID are shown in the Central dropdown menu:

If a server you expect to see does not appear in the list, click the refresh button (![]() ).
).
Click on a server to connect to it.
The stripe under the Central menu shows your connection status. For example, the blue stripe above indicates Leapfrog Works is not connected to a Central server. Here the stripe is green, indicating that Leapfrog Works is connected to a Central server. Clicking on the menu displays more information, including an option to disconnect from the server (![]() ):
):

The stripe will be red when there is a connection error and orange if you are connected to a Central server as part of a trial programme.
More information is shown in the Central dropdown when Leapfrog Works is connecting to a server or publishing an update to the server. In this example, Leapfrog Works is in the process of connecting to a server:
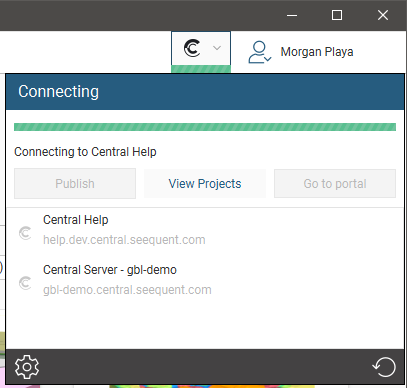
When you first start Leapfrog, the Projects tab lists all projects you have access to without connecting to a Central server. Here Morgan Playa has access to three local projects (![]() ) and a local copy of a Central project (
) and a local copy of a Central project (![]() ):
):

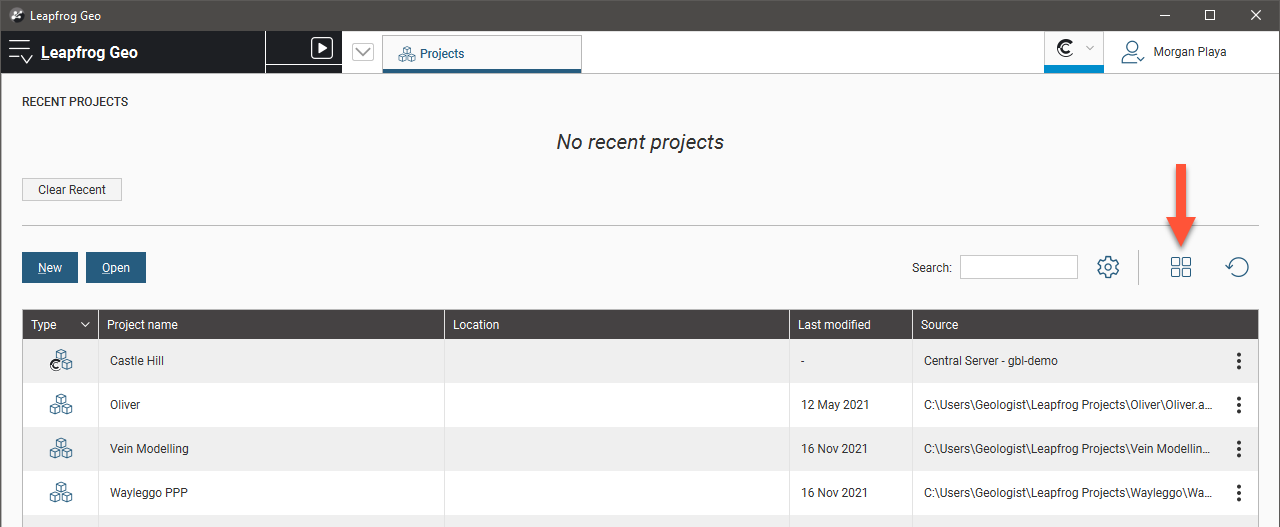
You can view the list of projects as thumbnails, as shown above, or as a list. The list view shows more information about each project, such as the date the project was last modified, the file location for local projects and the Central server for local copies of Central projects.
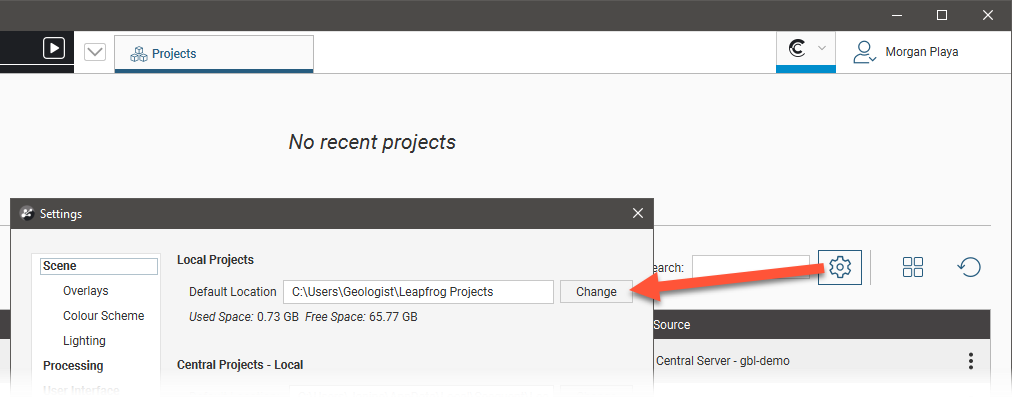
The folder the Projects tab searches for local projects can be changed by clicking on the Settings button:
In both the thumbnail and the list views, click on the overflow menu (![]() ) for more project-related options:
) for more project-related options:

Connect to a Central server by clicking on the server button and selecting from those in the list:
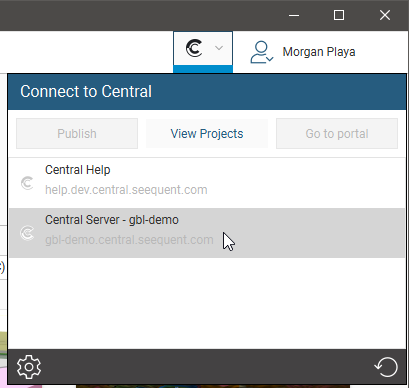
Once connected, the list will be updated to show the Central projects available on that server, along with local projects:
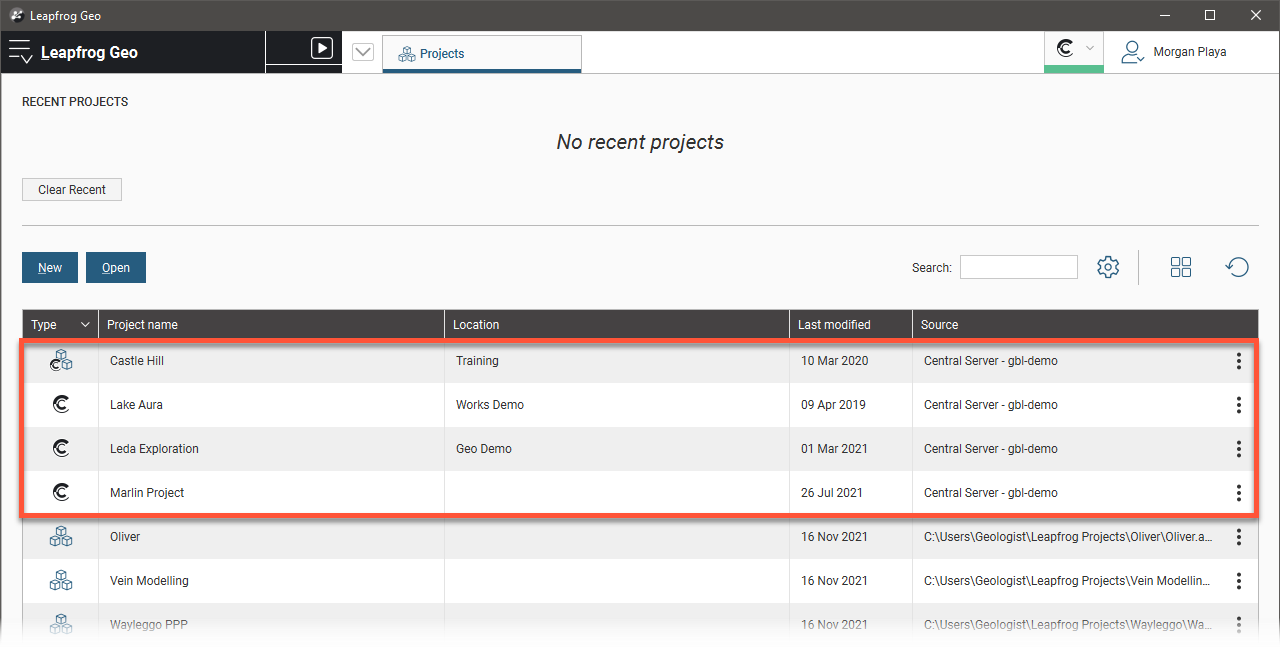
Use the Search box to filter the list of projects.
When not connected to a Central server, the list may show local copies of Central projects from multiple Central servers. Once connected to a server, only Central projects from that server are listed.
As with the local copies of the Central projects, clicking on the Central project will open its history.
A Central project is the history of a Leapfrog project tracked through time, organised into revisions. In Leapfrog, you can view the history of a Central project, and you can download local copies of these revisions and work on them in Leapfrog. Here, the history of a Central project called “Castle Hill” is shown, and there are two local copies of that project, one that has not been modified since it was downloaded and the other modified on the 16th of November 2021:
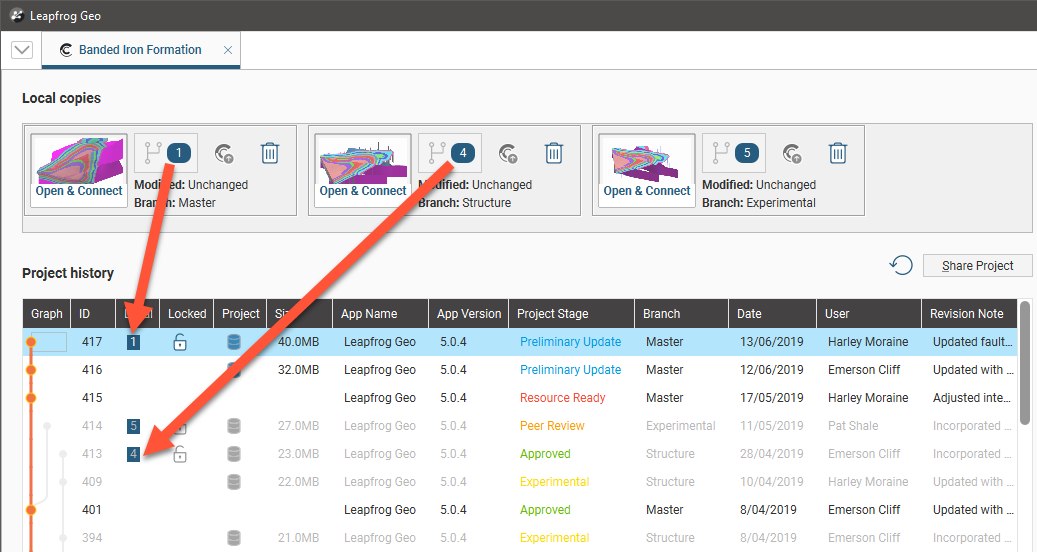
Click on a thumbnail to open a project, which will automatically connect you to the project’s Central server.
Creating New Projects
There are two ways to create a new Leapfrog project. You can:
- Click the New button in the Projects tab
- Select New Project from the Leapfrog menu
In the New Project window, enter a name for the new project and, if you want it to be a Central project, enable the Central Project option:
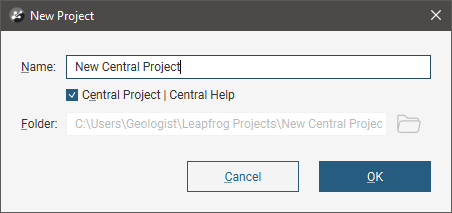
The Central Project option is only available when you are connected to a Central server. If you want to create a Central project on another server, you need to connect to that server first.
When you create a new Central project, a new project will be created on the Central server and a local copy will be created and saved in the location specified in the Settings window (Projects > Central Projects - Local). Leapfrog will open that local copy and you can start working in it right away, and when you are ready to publish the first revision, initiate the process as described in Initiating a Publish Event.
To create a local project, disable the Central Project option. The project will be saved in the location specified, but if you want to change it, you can do so by clicking on the folder button and navigating to a different folder.
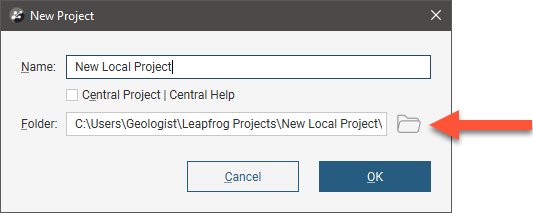
Leapfrog will open the project and you can start working in it right away.
Recording a Coordinate System
Leapfrog Works is unit-less and adopts the units used in the data you import. For example, if your imported data is in metres, the units displayed will be metres, and figures such as resolution, measured distances and slicer thickness will be in metres. It is important, therefore, to be consistent in the units used in the data you import. If you are importing data that uses different coordinate systems, you will need to pre-process the data so that it is using the same coordinate system.
In order to communicate to the wider team, you can record in each Leapfrog Works project the coordinate system that should be used, which will then be displayed at the bottom of the Leapfrog Works window:

The Projected Coordinate System is for information only. Leapfrog Works will not convert any data that is imported with references using a different coordinate system into the project coordinate system, nor does changing the project coordinate system perform a conversion of the data within Leapfrog Works from the previous coordinate system to the new coordinate system.
The Projects tab will show the project coordinate system metadata setting in the Coordinate system column when the projects are displayed in the List view:

To record and display the coordinate system team members should be using in a project, click on the button at the bottom of the Leapfrog Works window:
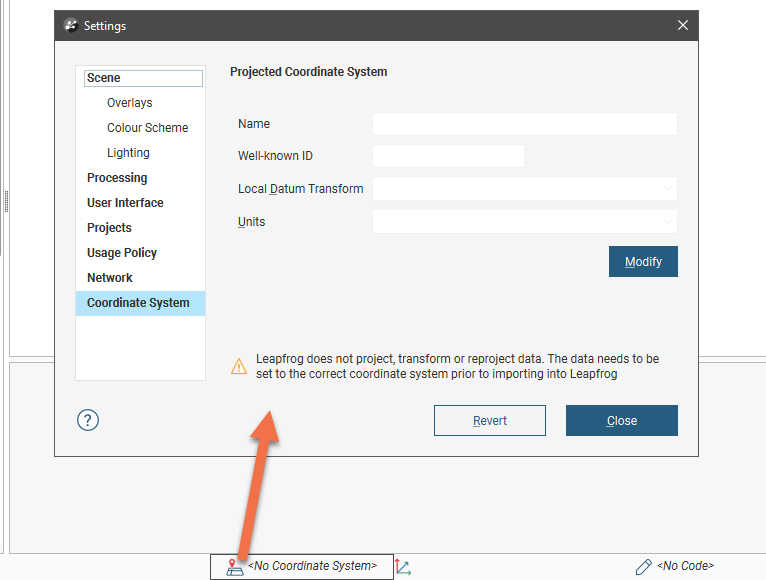
The Settings window will open with the Coordinate System tab displayed. Click the Modify button to see a comprehensive list of projected systems (not geographic systems). This list is based on the EPSG registry.
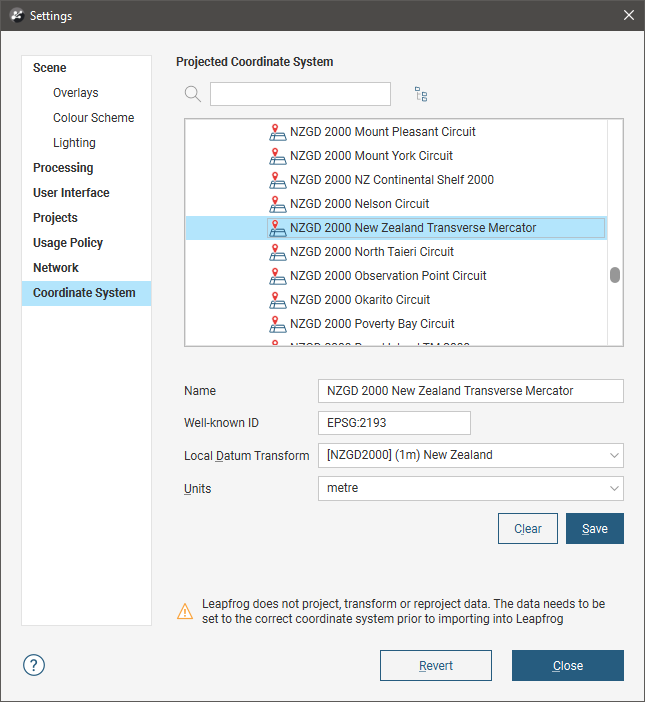
The Name and Well-known ID fields are not editable; these are changed automatically according to the coordinate system selected in the list. The Local Datum Transform and Units fields may contain additional options besides the default values for the selected coordinate system, and these can be selected as an option. Above the list is a search box, and what you enter there will be used to filter the list of systems:
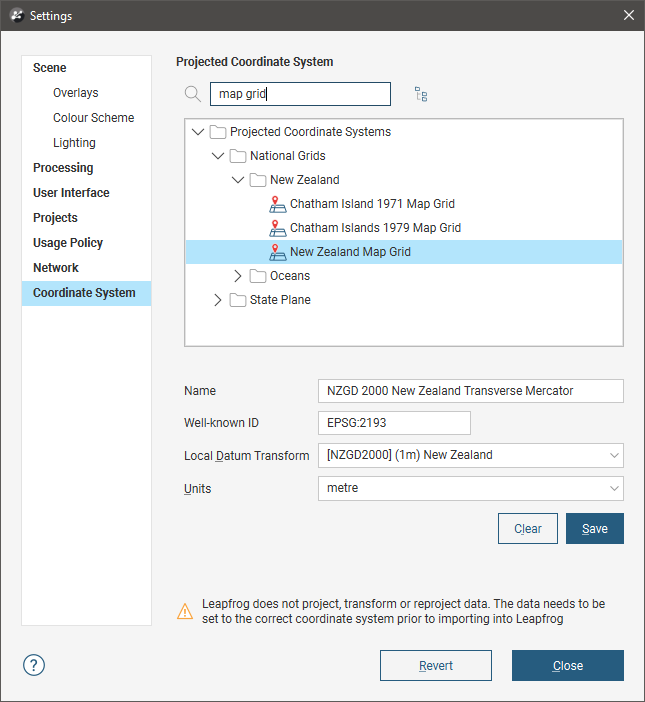
Click the Save button to record the information, which will then be displayed at the bottom of the Leapfrog Works window.
The Projected Coordinate System setting is primarily an informational field. The project coordinate system should be set when the project is created and all the data imported into Leapfrog Works should use the coordinate system that has been decided on for the project. Leapfrog Works will not convert any data that is imported with references using a different coordinate system into the project coordinate system, nor does changing the project coordinate system perform a conversion of the data within Leapfrog Works from the previous coordinate system to the new coordinate system.
About Leapfrog Project Files
Leapfrog stores two types of projects locally:
- Leapfrog projects not connected to Central
- Local copies of Central projects, which are stored in the location specified in the Settings window (Projects > Central Projects - Local)
In both cases, the project files use the extension .aproj:
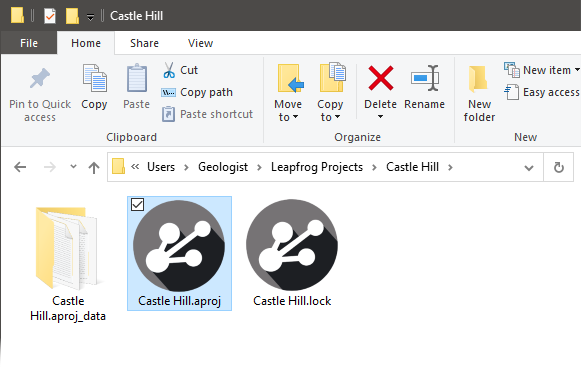
A project also has a project folder that contains information used by the project. This is named using the project name and the suffix .aproj_data.
Do not change the name of your .aproj_data folder or alter its contents. Doing so could render your project file unusable.
A .lock file is created when a project is opened. The .lock file protects the project from being moved while the project is open and from being opened by another instance of Leapfrog, which can happen when projects are saved on shared network drives.
Leapfrog is optimised for working off your local hard drive. You will experience increased processing times and object load times if you access your project from a different storage system. It is strongly recommended that you do not work from network drives, synced drives (e.g. OneDrive, Dropbox) or USB drives as working in this way can result in corrupted projects.
Opening Projects
From the Projects tab, click on a thumbnail to open a project. You can also navigate directly to the required project file by clicking on the Open Project button.
If when you open a project you get a message saying that the project contains restricted objects, this is because one or more objects were creating using Leapfrog Works features available in an extension you did not sign in with. Click Show restricted objects to view the affected objects. See Restricted Objects in The Project Tree topic for more information.
Once a project file has been opened, Leapfrog switches to displaying the Scene View tab. See An Overview of Leapfrog Works for a description of the different parts of the Leapfrog main window.
Upgrading Projects
When you open a project that was last saved in an earlier version of Leapfrog Works, you will be prompted to upgrade the project and a list of affected objects will be displayed. As part of this process, you will also be prompted to create a backup:
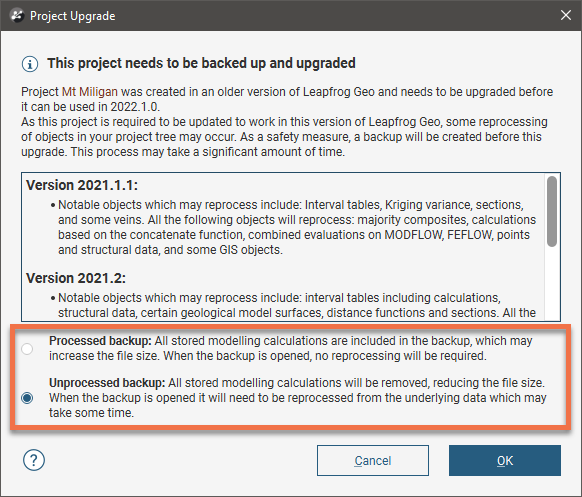
Backing up before upgrade is compulsory for local projects and local copies of Central projects; you cannot open the project without first creating the backup. You can choose between a processed or an unprocessed backup:
- A Processed backup includes all stored modelling calculations. This can result in large file sizes, but when the backup is opened, no reprocessing will be required.
- An Unprocessed backup removes all stored modelling calculations. This can reduce the size of the backup, but if the backup is needed, all of the modelling calculations will need to be reprocessed from the underlying data.
The tradeoff is that when an unprocessed backup is selected, the backup can be completed quickly and the resulting file size will be smaller, but when the backup is needed, reprocessing might take some time, especially with large, complex projects.
Select the option required, then click OK. You will be prompted to select where the backup should be saved. Once the backup is complete, the project will be opened and upgraded.
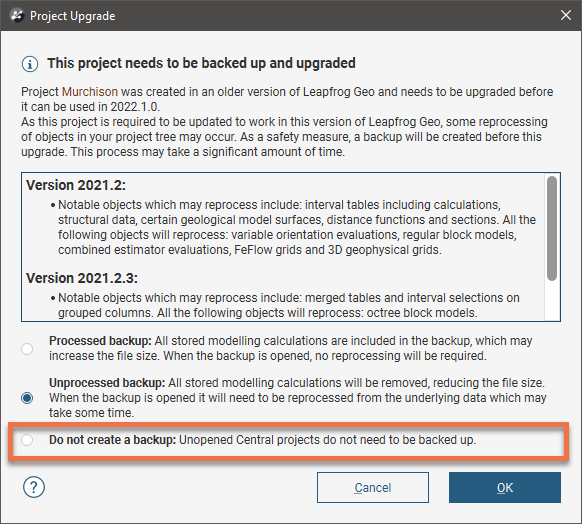
A third option is available for projects that have been downloaded from Central that have not changed, that of skipping creating a backup:
Missing Data Warnings
When a project is opened, Leapfrog checks the integrity of the project, looking for missing data. In some cases, Leapfrog can try to open the project and you may be able to continue working in it.
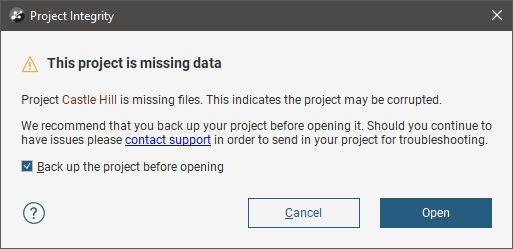
In other cases, Leapfrog can attempt to generate the missing files from data in the project, in which case you will be asked whether or not you wish to repair the project.
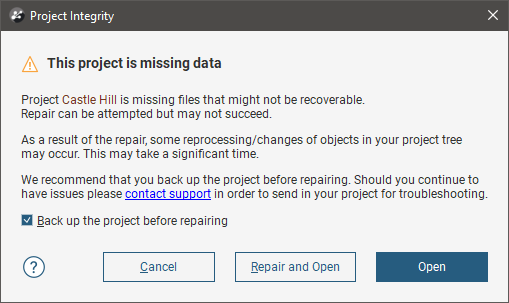
Whatever the case, read the information in the dialog and decide whether you wish Leapfrog to open the project or attempt a repair.
It is strongly recommended that you allow Leapfrog to back up a project that has files missing before attempting to open or repair it.
This message may be displayed if:
- You have copied a project to a different folder and the copying process is not yet complete
- You are unzipping a project and the process is not yet complete.
If this is the case, click Cancel and try opening the project again once the copying/unzipping is complete.
Saving, Backing Up and Compacting Projects
Leapfrog Works automatically saves an open project each time a processing task has been completed or settings have changed. Projects are also saved when they are closed.
You can also save a copy of a project, save a zipped copy of a project and compress a project. These options are available from the Leapfrog Works menu:
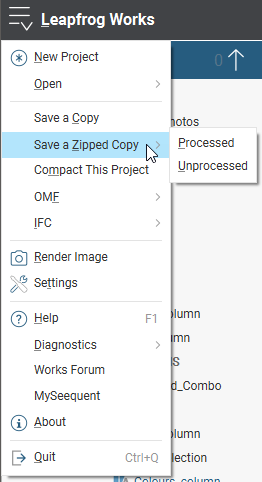
- Save A Copy. This option is only available for local projects. Save a backup copy of your project to a location on your hard drive. You will be prompted to choose a new name and location for the saved project. Click OK to create the new project file. Leapfrog Works will save a copy of the project in the location selected. Once the backup copy is saved, you can open and use it from the Projects tab. Otherwise, you can keep working in the original copy of the project.
- Save A Zipped Copy > Processed. Saves a zipped copy of a project that includes all stored modelling calculations. This can result in large file sizes, but when the backup is opened, no reprocessing will be required. You will be prompted to choose a name and location for the zipped project. Click Save to create the zip file.
- Save A Zipped Copy > Unprocessed. Saves a zipped copy of a project without stored modelling calculations. This can reduce the size of the backup, but if the backup is needed, all of the modelling calculations will need to be reprocessed from the underlying data. You will be prompted to choose a name and location for the zipped project. Click Save to create the zip file.
- Compact This Project. When you delete objects from a project file, Leapfrog Works retains those objects but notes that they are no longer used. Over time, the project file will grow in size and data stored in the database may become fragmented. Compacting a project removes these unused objects and any unused space from the database. When you compact a project, Leapfrog Works will close the project and back it up before compacting it. Depending on the size of the project, compacting it may take several minutes. Leapfrog Works will then reopen the project. When you select this option, you will be asked to confirm your choice.
Tracking Project Work Using Reference Codes
You can enter a reference code to track work on specific projects. The time associated with each reference code is included in your monthly usage report.
To enter a code, click the button in the status bar on the bottom edge of the Leapfrog main window:
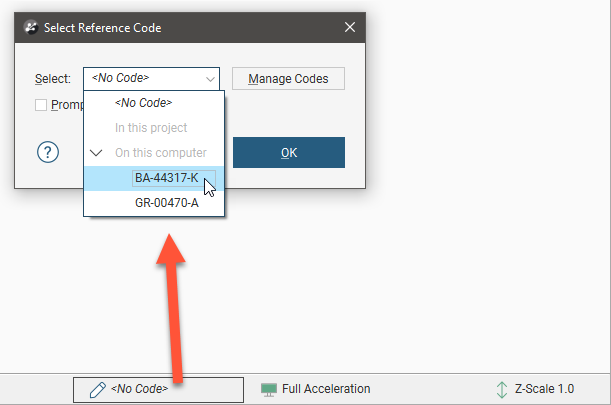
Select from the codes defined and click OK. The code entered will be displayed in the status bar:

To define new reference codes or delete old ones, click on the Manage Codes button. See Usage Policy Settings.
To work without a code, click on the button, select <No Code>, then click OK. Note that whether it’s possible to use Leapfrog without first entering a reference code depends on a setting in the Settings > Usage Policy window.
Got a question? Visit the Seequent forums or Seequent support
© 2022 Bentley Systems, Incorporated