Leapfrog Viewer
You can open Leapfrog Viewer scene files in Leapfrog Works by clicking on the Scene Files tab, then opening one of the scene files in the list.
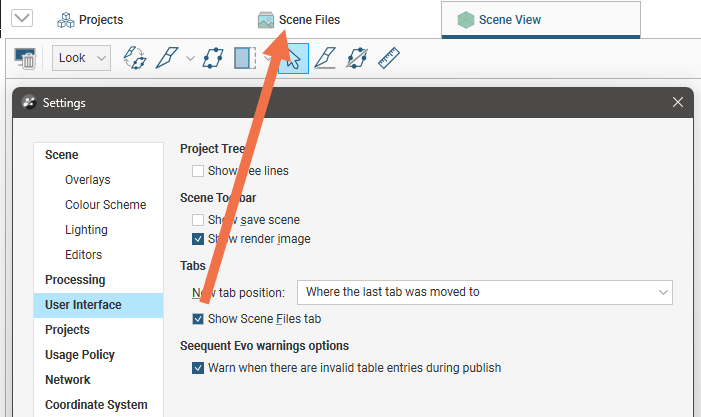
If the Scene Files tab is not shown in the main Leapfrog Works window, click on the Leapfrog Works menu and select Settings. In the User Interface tab, enable the Show Scene Files tab option:
The rest of this topic describes how to work with scene files to display and analyse data.
For information on creating scene files, see Exporting Scenes in the Saved Scenes topic.
The Scene Files tab is organised into a Recent Scenes list and the list of all scene files available in a designated folder:
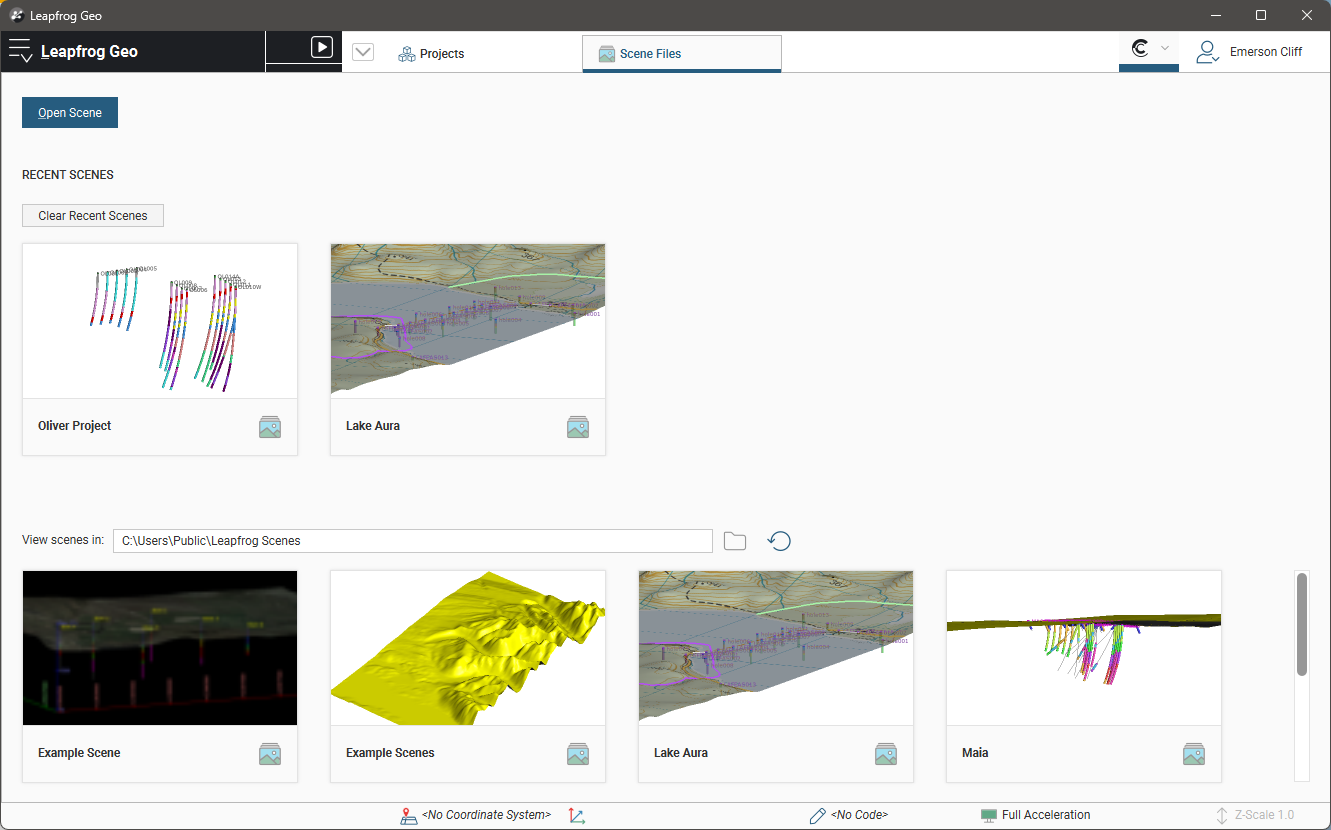
Click on the folder button (![]() ) to change the folder used. This folder is useful if you have one folder in which you keep most of your scene files. Click on the refresh button (
) to change the folder used. This folder is useful if you have one folder in which you keep most of your scene files. Click on the refresh button (![]() ) to update the list of scenes in the folder.
) to update the list of scenes in the folder.
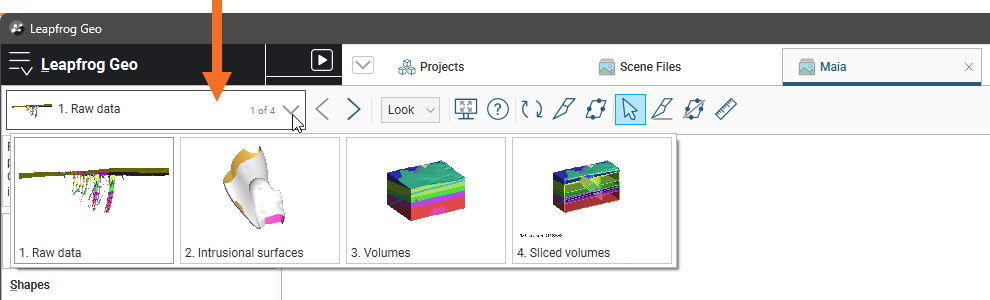
To open a scene file, click on a thumbnail. Leapfrog Works will switch to displaying the first scene in the file:
Click the scene list to view thumbnails of all the scenes in the file, or use the arrows (![]()
![]() ) to display each scene:
) to display each scene:
The Z-Scale setting (![]() ) shows the scaling of the Z-axis relative to the X- and Y-axes. When the scene file was created, the z-scale may have been set to a value that accentuates height data. For example, this scene has been set to a Z-Scale of 6.0:
) shows the scaling of the Z-axis relative to the X- and Y-axes. When the scene file was created, the z-scale may have been set to a value that accentuates height data. For example, this scene has been set to a Z-Scale of 6.0:

The best way to navigate in the 3D scene is using the mouse. If you are using a laptop, it is recommended that you plug in a mouse rather than using the laptop’s touchpad for navigation. However, you can also navigate in the scene using the keyboard.
| Action | Mouse | Keyboard |
|---|---|---|
| Changing the viewing angle | Click and drag to rotate the scene | Press the arrow keys to rotate the scene For smaller steps, hold down the Shift key while pressing the arrow keys |
| Zooming in and out of the scene | Use the scroll wheel Hold the right mouse button while moving the mouse |
Press the Page Up or Page Down keys For smaller steps, hold down the Shift key while pressing the Page Up or Page Down keys |
| Panning the scene | Click and hold both mouse buttons, then drag Hold the scroll wheel and drags |
Hold down the Alt key while pressing the arrow keys |
| Centre an object in the scene | Click the scroll wheel |
The current viewing angle and scale are displayed in the lower right-hand corner of the scene. Use the Look menu in the toolbar to switch to the different viewing angles:
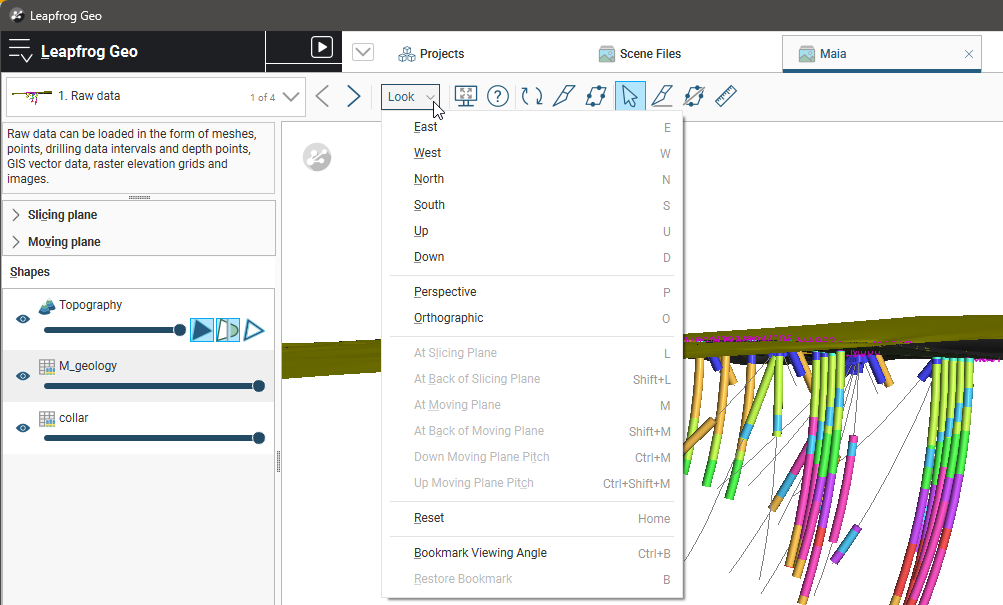
If you prefer to navigate using the keyboard, use the keyboard shortcuts shown in the Look menu.
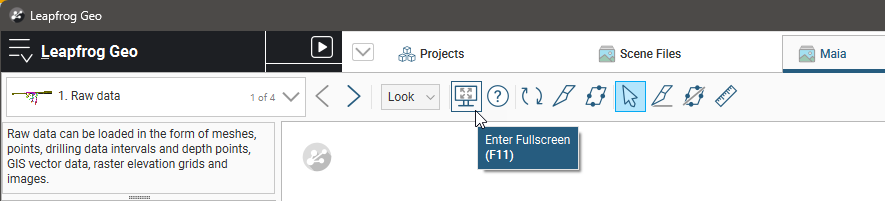
You can display the scene window full screen by clicking on the Fullscreen option in the toolbar (![]() ):
):
If you have more than one screen attached to your computer, you will be asked which screen to use:
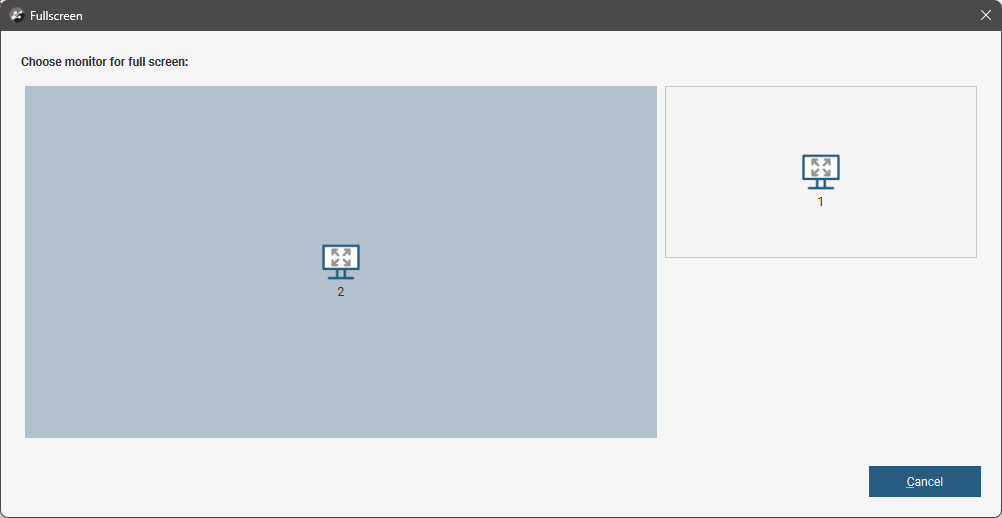
You can display the scene on the larger screen and work with the available objects and scenes on the smaller screen.
Fullscreen mode is useful for presentations with a projector. Select the projector as the full screen monitor, and you will be able to run Leapfrog Works from the other screen.
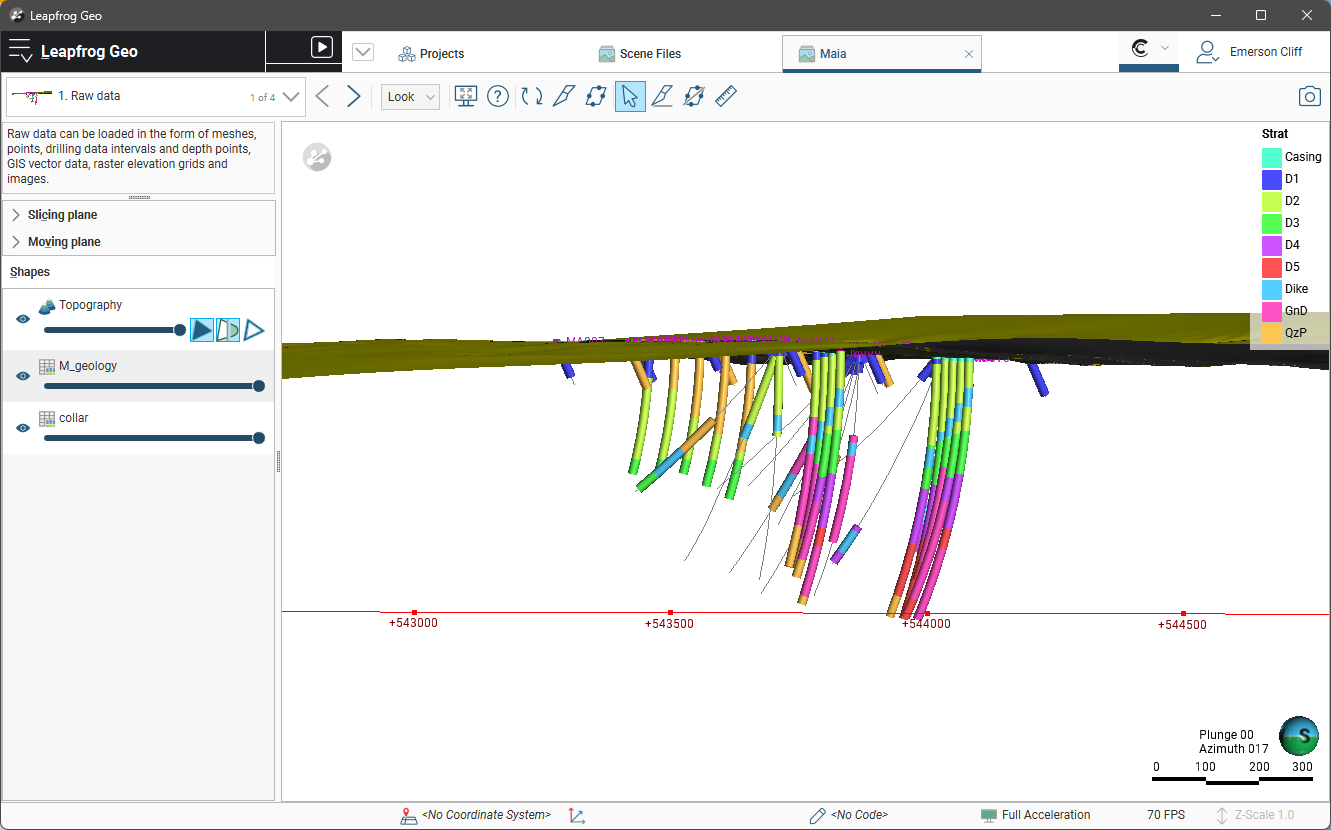
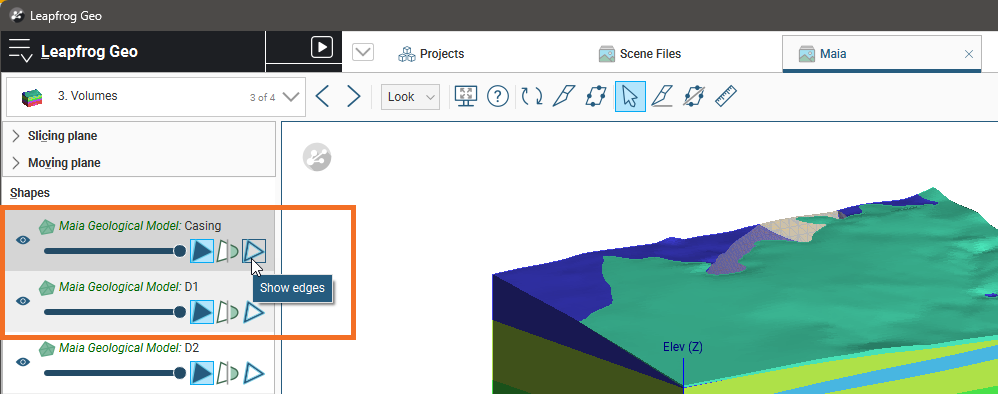
Use the controls in the Shapes panel to change how objects are displayed in the scene:
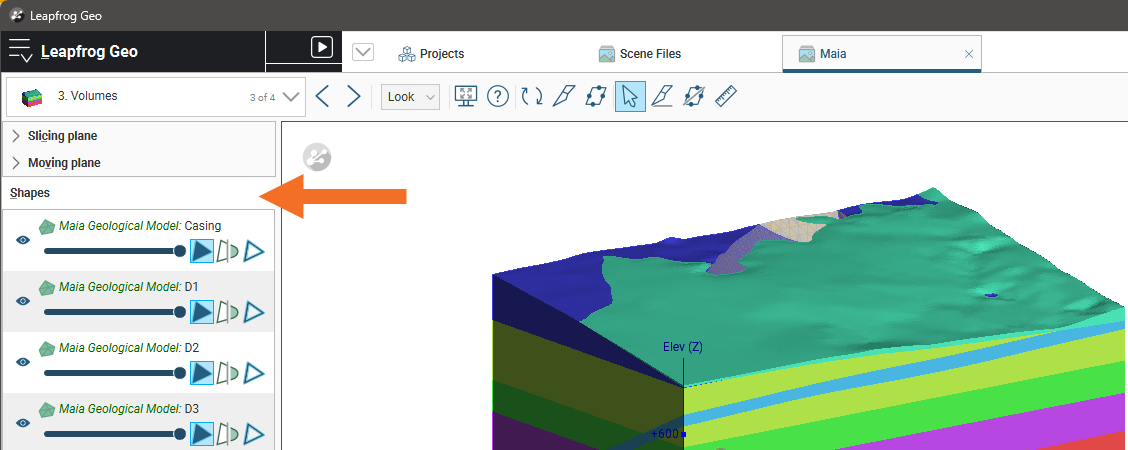
You can hide objects by clicking on the Show/Hide button (![]() ) and change the opacity of objects using the sliders. Different controls are available to change how the different shapes are displayed. To see what each control does, hold the cursor over it to see the tooltip:
) and change the opacity of objects using the sliders. Different controls are available to change how the different shapes are displayed. To see what each control does, hold the cursor over it to see the tooltip:
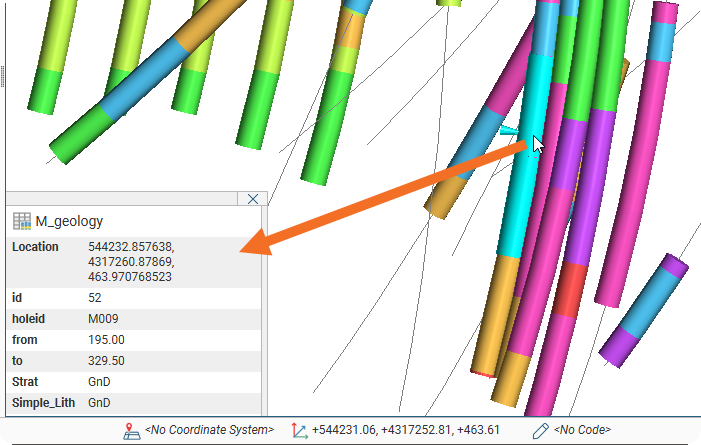
When you click on an object in the scene, a popup window will be displayed showing information about the object. If data was included when the scene was created, this will be displayed in the scene. For example, here we can see the selected data point’s location, identification, starting and ending points and lithology:
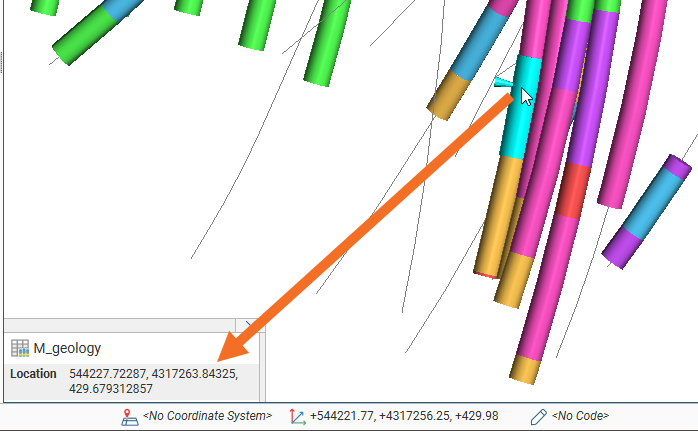
If no data is available, only basic location information about the selected shape will be displayed. Here, only the data point’s location is shown: