Importing Data from Seequent Evo
See the Leapfrog Works/Seequent Evo Data Flow topic for an overview of importing, publishing and reloading Evo data.
This topic discusses the process of importing data from Seequent Evo. It is divided into:
- Starting the Import Process
- The Import from Seequent Evo Window
- Importing Drilling Data from the File Service
Starting the Import Process
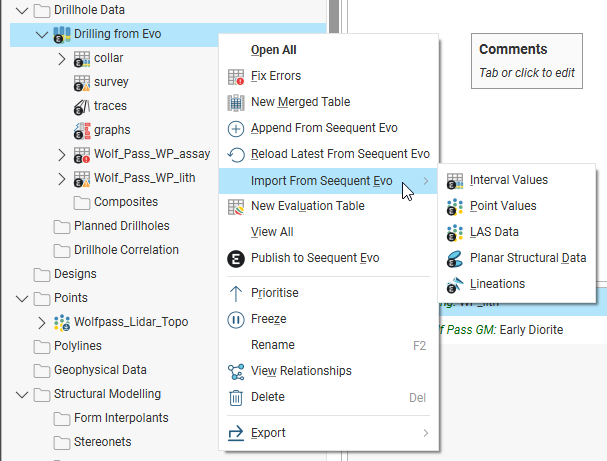
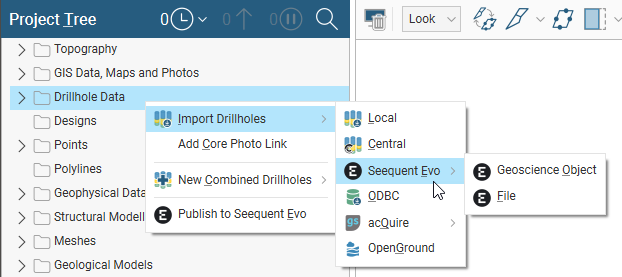
To start importing data from Seequent Evo, right-click on a folder in the project tree and choose the Seequent Evo option from the Import menu:
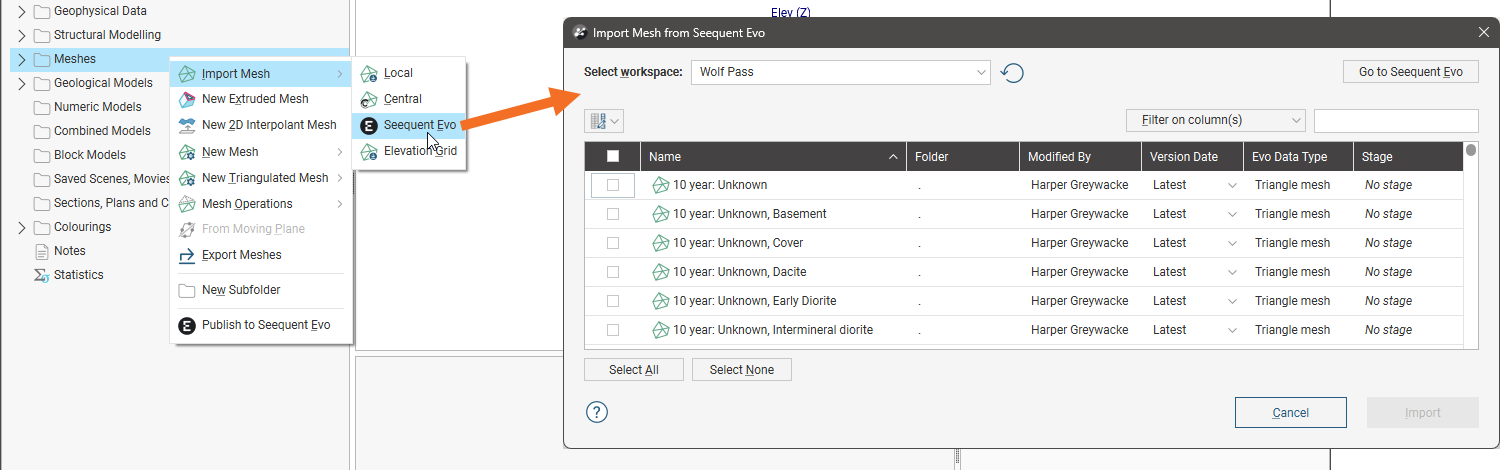
Importing data into a Leapfrog Works project is similar to importing data from local files, except you must first specify the workspace that contains the data you wish to import.
- If a workspace you expect to see is not listed, click the Refresh button (
 ) next to the Select workspace dropdown list.
 - If you are unsure as to what workspace contains the data you wish to import, click the Go to Seequent Evo button to open Seequent Evo in your web browser. You can then see what workspaces you have permissions for and, if necessary, create a new one.
For drilling data, you can choose whether to import data from Evo’s Geoscience Object service or from the File service:
Importing drilling data from the File service is discussed in further detail in Importing Drilling Data from the File Service later in this topic.
The Import from Seequent Evo Window
Once you have chosen the workspace you want to import data from, all data in the workspace that matches the data type you are importing will be displayed. Tick the box for any object you wish to import.
With the column button (![]() ), you can choose which columns appear in the table, which can assist in selecting which data to import when the workspace contains a lot of data.
), you can choose which columns appear in the table, which can assist in selecting which data to import when the workspace contains a lot of data.
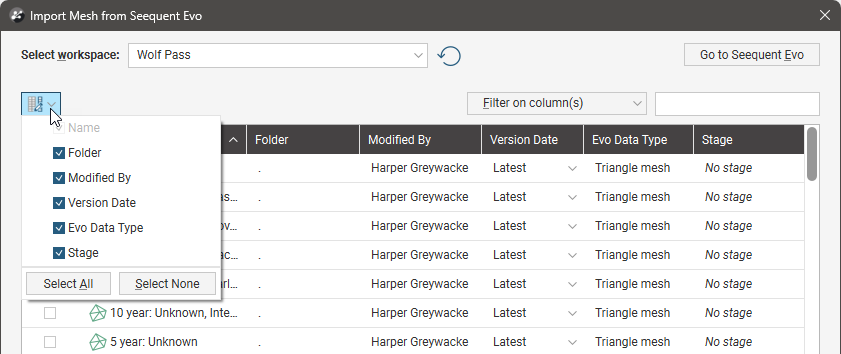
You can also filter the list to reduce the number of objects displayed. You can choose which columns are used to filter the list by clicking on Filter on columns. When no columns are selected, the filter is applied to only object names.
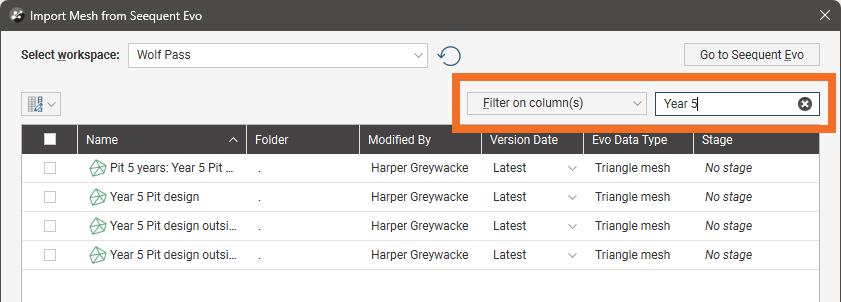
Note that filtering out objects in this way does not deselect them, if they were selected before the filter was applied.
Once you have selected the objects you wish to import, click the Import button. In most cases, the objects will be added to the Leapfrog Works project tree.
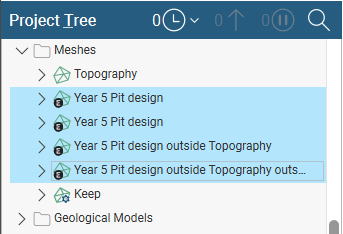
Objects in a project that have been imported from Evo are indicated in the project tree using an Evo badge, which is the case for the meshes selected here:
Some objects imported from Evo will include an associated colourmap. If this is the case, the colourmap will be automatically applied to the imported object. The colourmap will appear in the Colourings > Shared Colourmaps > Imported folder in the project tree, where it can be applied to other objects in the project.
Importing Drilling Data from the File Service
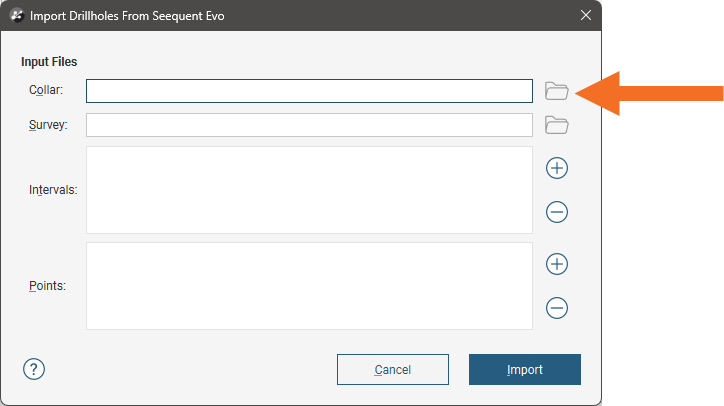
In addition to importing drilling data from Evo’s Geoscience Object service, you can also import drilling data from Evo’s File service. To do this, right-click on the Borehole Data folder in the project tree and select Import Boreholes > Seequent Evo > File.
In the window that appears, click the Collar button:
The window that appears will show all the files saved in the Evo workspace:
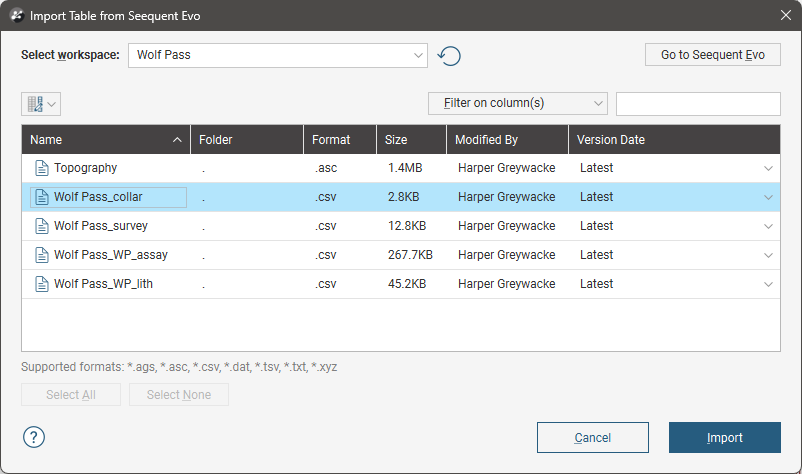
Select the collar file you wish to use, then click Import.
Other files in the workspace may be added to the Input Files list, which is the case here for a survey file:
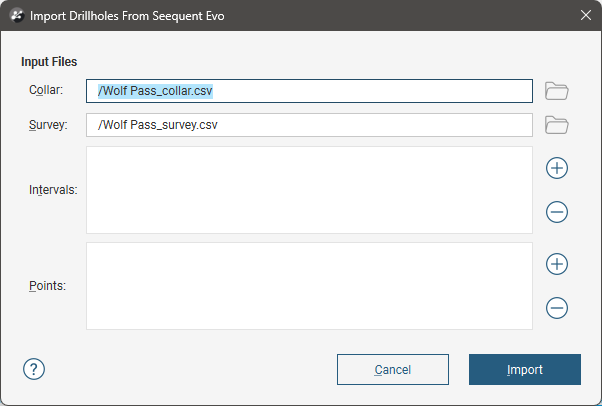
Continue adding files to the Input Files list until all the ones you want to import are listed. For example, here, we have a collar file, a survey file and two interval tables:
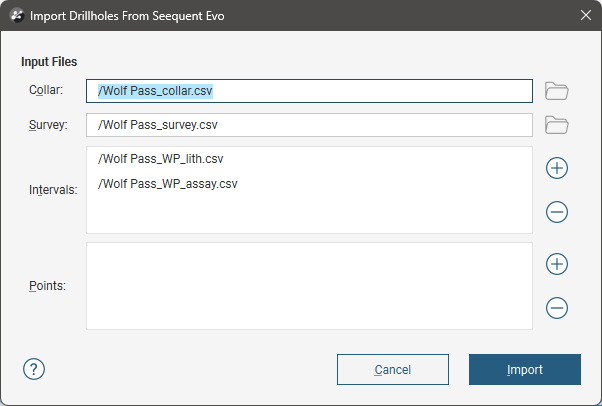
Click Import to start working through the files as described in Importing Data Tables.
A drilling dataset will be added to the project tree in the Borehole Data folder.
You can import additional drilling data tables to an existing drilling dataset from Seequent Evo, but you can only do so from the Geoscience Objects service. To import additional tables, right-click on a drilling dataset and select Import From Seequent Evo, then select the data type you wish to import.