Inviting Users to Central
If you are a Central admin managing projects and users for your organisation, this guide provides an overview of Central user roles and how to invite new users to Central. It also describes how to change users’ details and permissions as your organisation grows and changes. This guide is divided into:
- Controlling Access to Project Data Using Permissions and Connectors
- Inviting Users
- Assigning Projects to New Users
- Removing a User’s Project Permissions
- Changing a User’s Details
- Deleting a User
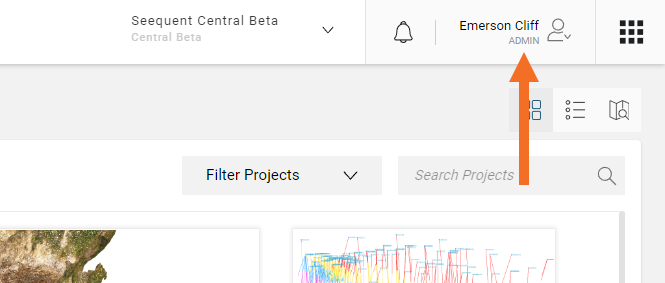
To carry out the tasks described in this guide, you need to be signed into the Central Portal as an Admin:
Controlling Access to Project Data Using Permissions and Connectors
Before you start adding users to the server, it’s important to understand both Central user roles and how access to project data is controlled using permissions and connectors.
First, there are two user roles you can define in Central: a basic User and an Admin. These roles determine what type of information the user has access to in the Central Portal.
- A User can use the Central Portal to view and comment on projects to which they have been given access. Users can share projects to other Central users when they are the assigned owner of that project.
- An Admin has full and unrestricted access to the portal, including viewing all events, changing project permissions and owners, creating and updating user permissions and connectors and maintaining instances.
Next, there are four levels of project permissions: Owner, Editor, Viewer+Export and Viewer.
- An Owner can assign other users as the owner of a project and can configure and add an integration to the project. A project can have more than one owner, and the user who uploads a new project to Central is automatically assigned as the project owner.
- Editor access allows a user to work in a project in Leapfrog, if they also have a Leapfrog Connector.
- Viewer+Export and Viewer access allow a user to view scenes in the Central Portal, but they cannot edit scenes or add new ones.
A Leapfrog Connector gives any type of Central user the ability to connect to Central from Leapfrog. Those with the Leapfrog Connector can download, work in and comment on any projects on the server to which they have been given Editor or Owner permissions. They can also publish projects to Central and import data from Central projects.
The following table summarises what functionality each level of project permissions gives a Central user for a particular project.
| Functionality | Owner | Editor | Viewer +Export /Viewer |
|---|---|---|---|
| Visualisation of data in the Central Portal |
|
|
|
| Publish updates from Leapfrog, when the user has a Leapfrog Connector |
|
|
|
| Access Data Room from Leapfrog, when the user has a Leapfrog Connector |
|
|
|
| Access Data Room from the Central Portal |
|
|
|
| Share project |
|
|
|
| Make comments |
|
|
|
| View scenes |
|
|
|
| Create private scenes |
|
|
|
| Create public scenes |
|
|
|
| Change private scenes to public scenes, and vice versa |
|
|
|
| Share scenes |
|
|
|
Inviting Users
You can start inviting users by entering their email addresses. It’s not necessary for an invited user to already have a Seequent ID; those who don’t will receive an email with instructions on how to created their Seequent ID.
To start inviting users, click on Users in the sidebar, then click on the Add User button. In the window that appears, enter the email addresses for the users you wish to add, set the new users’ Roles and Connectors and then click the Add Users button:
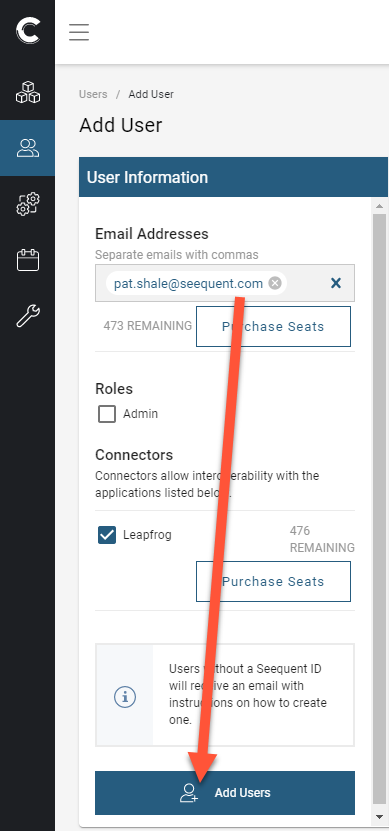
If you give a user the Admin role, they will be able to add new users to Central, and so this option is off by default. To give a user the Admin role, tick the box in the Add/Edit User screen:
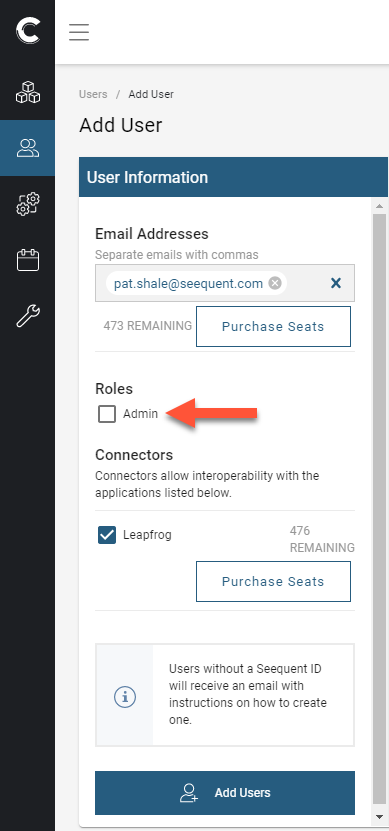
If both Leapfrog Connector and Admin are left unticked, the new user will be a basic User.
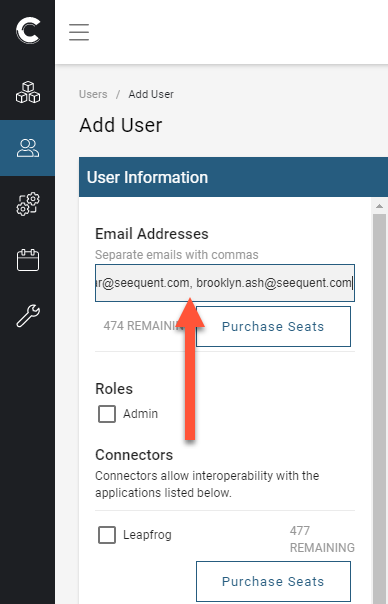
If you have a list of email addresses, you can paste them into the Email Addresses box, separated by commas:
You can also add more than one user at a time by typing a space after you enter an email address:
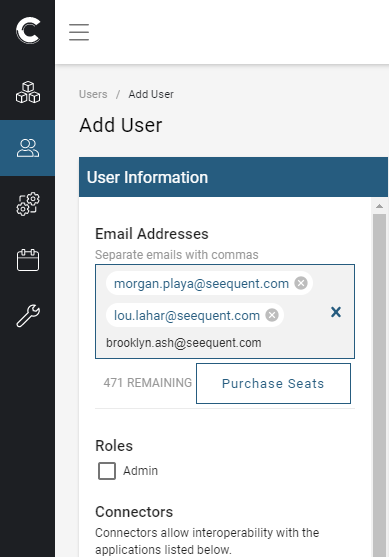
This is useful if you are entering, say, a number of users who will have the same set of permissions and who will be assigned the same projects.
Once you have clicked the Add Users button, your new users will be emailed their invitations. Those who do not yet have a Seequent ID will be invited to sign up.
Invited users appear at the top of the Users list:
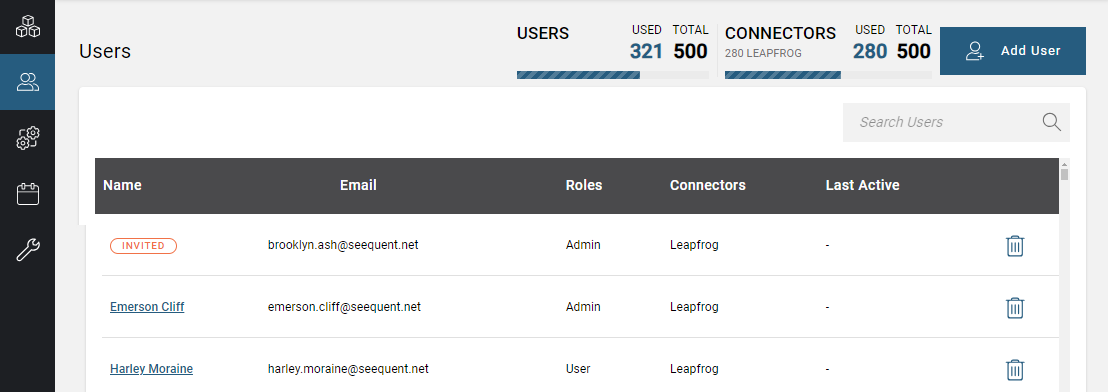
The label remains until they have created their Seequent ID and signed in to Central.
Assigning Projects to New Users
Next you can select projects to assign to the new users. There are different levels of access users can have to projects, which are discussed in Controlling Access to Project Data Using Permissions and Connectors earlier in this topic.
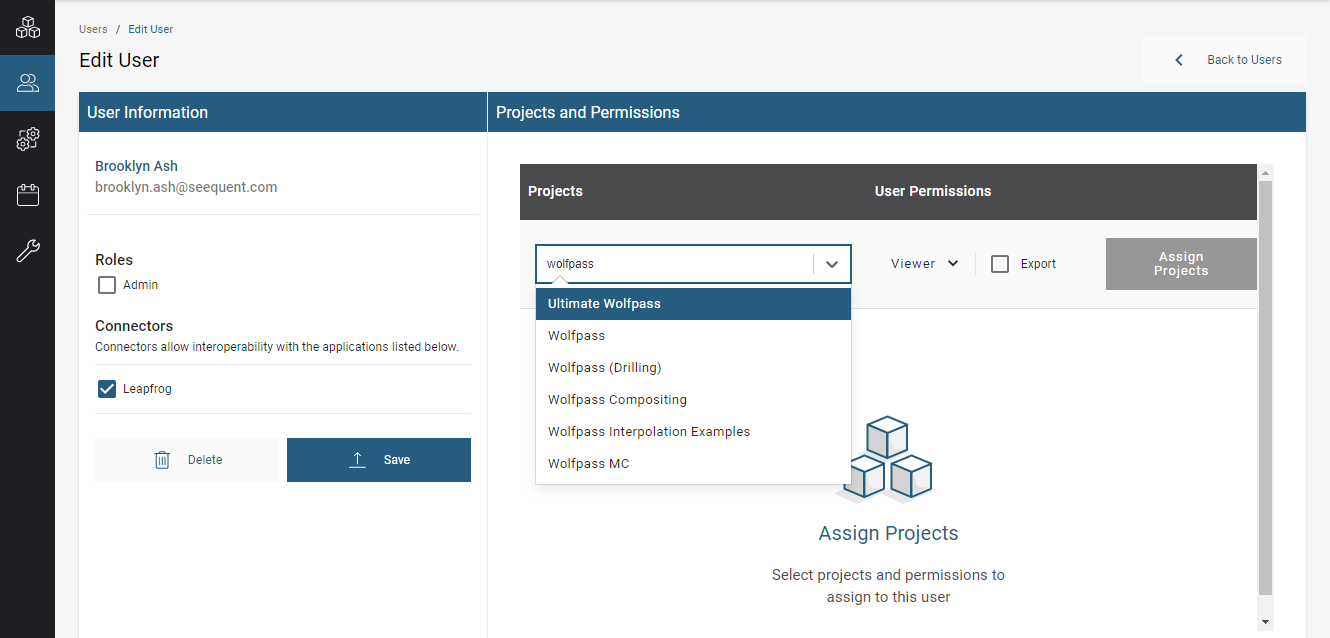
To assign a user project permissions, select the Users list from the sidebar, then click on a user to see more information. Under Projects and Permissions, click in the box and start typing the name of a project. The list will be filtered as you add more information:
Select a project from the list, then click Assign Projects. You can then set the permission for that project by selecting from the dropdown list:
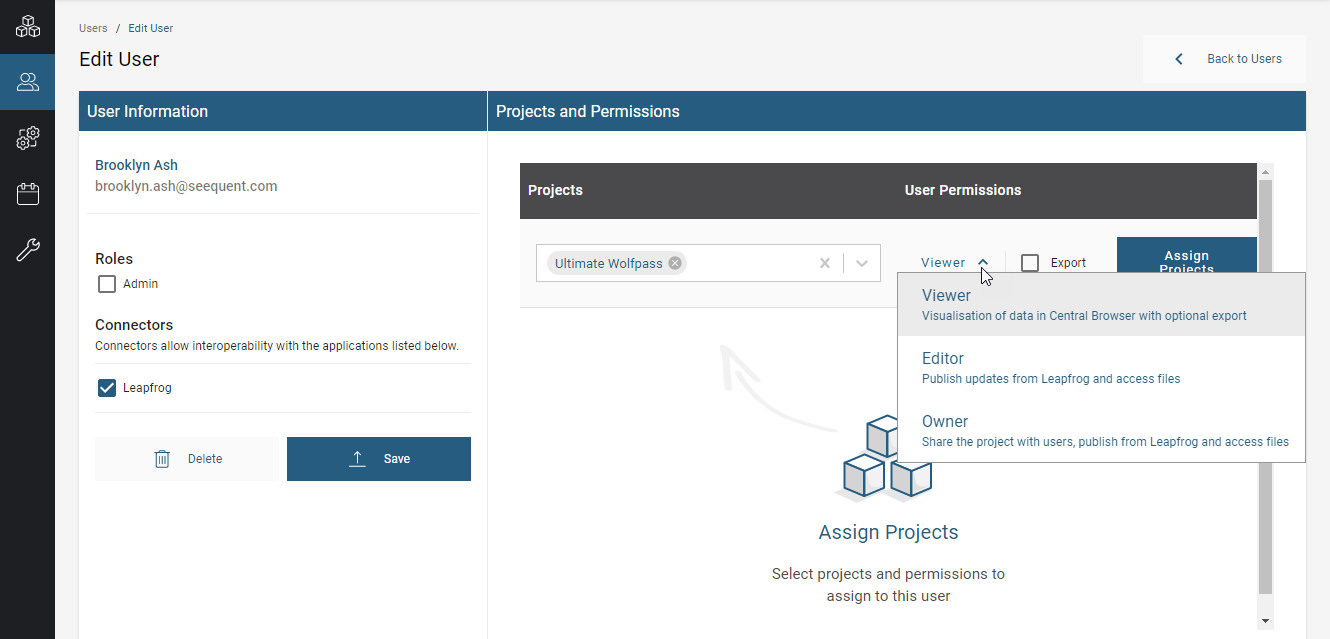
Give the user Viewer+Export access by ticking the Export box next to Viewer.
Changes made to permissions are automatically saved as you make them.
Removing a User’s Project Permissions
There are two ways to revoke a user’s project permissions:
- The first is by viewing a project’s details and removing users via the project’s Users tab. This is useful when you want to remove multiple users from a project.
- The second is by viewing a user’s details and removing projects from their Projects and Permissions list. This is useful when you want to change a single user’s project permissions. This is the process described below.
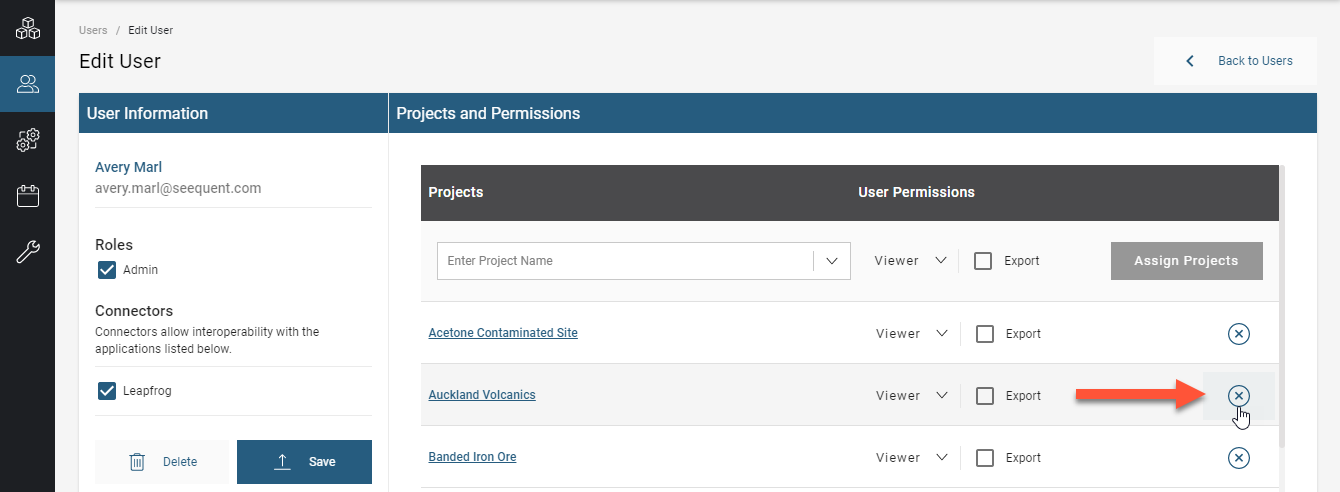
To remove a user’s project permissions, select the Users list from the sidebar, then click on the user. Under Projects and Permissions, click the delete button for the project you wish to remove the user from:
Changing a User’s Details
To edit a user’s permissions and connectors, select the Users list from the sidebar, then click on a user. In the Edit User window, change the details required, then click the Save button.
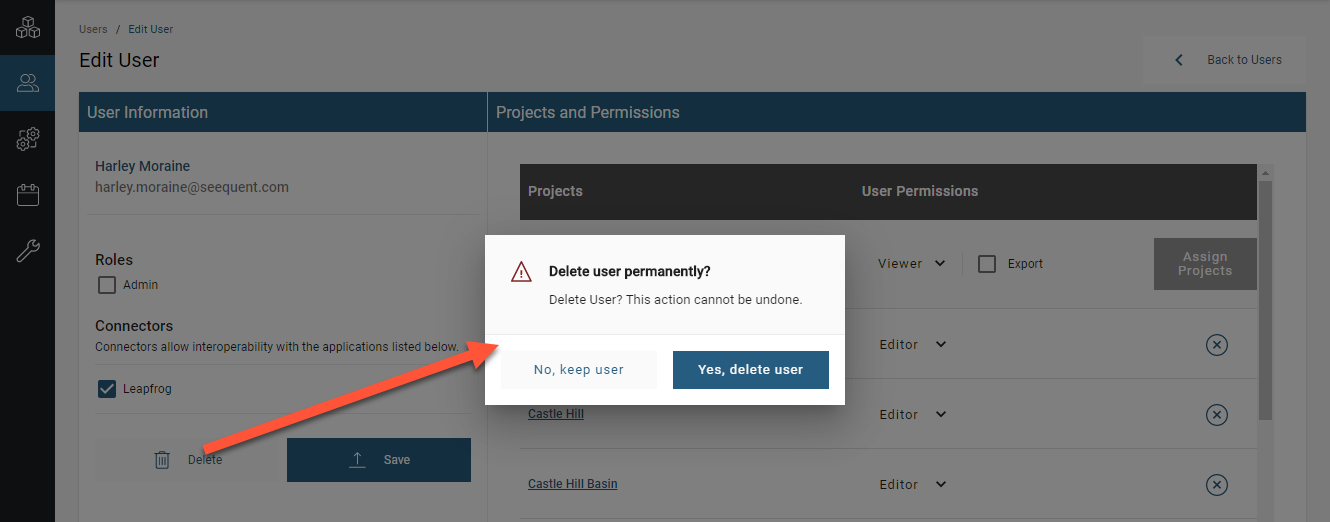
Deleting a User
To delete a user from Central Server, select the Users list from the sidebar, then click on the user. In the Edit User window, click on the Delete button. You will be asked to confirm your choice: