Managing Central Project Stages
You need to be an Admin to change project stages.
Project stages are useful for promoting projects through an organisation’s procedures. For example, your organisation may have project stages defined that include “Experimental”, “Ready for Peer Review” and “Ready for Production”. Different stages are displayed in different colours so it is easy to see at a glance what revisions belong to each stage.
This topic describes how to set up and manage project stages using the Central Portal. It is divided into:
There is one set of project stages that applies to all projects on the Central Server. These project stages are managed in the Central Portal. If you are an Admin, there will be a Maintenance option in the sidebar.
Adding a Project Stage
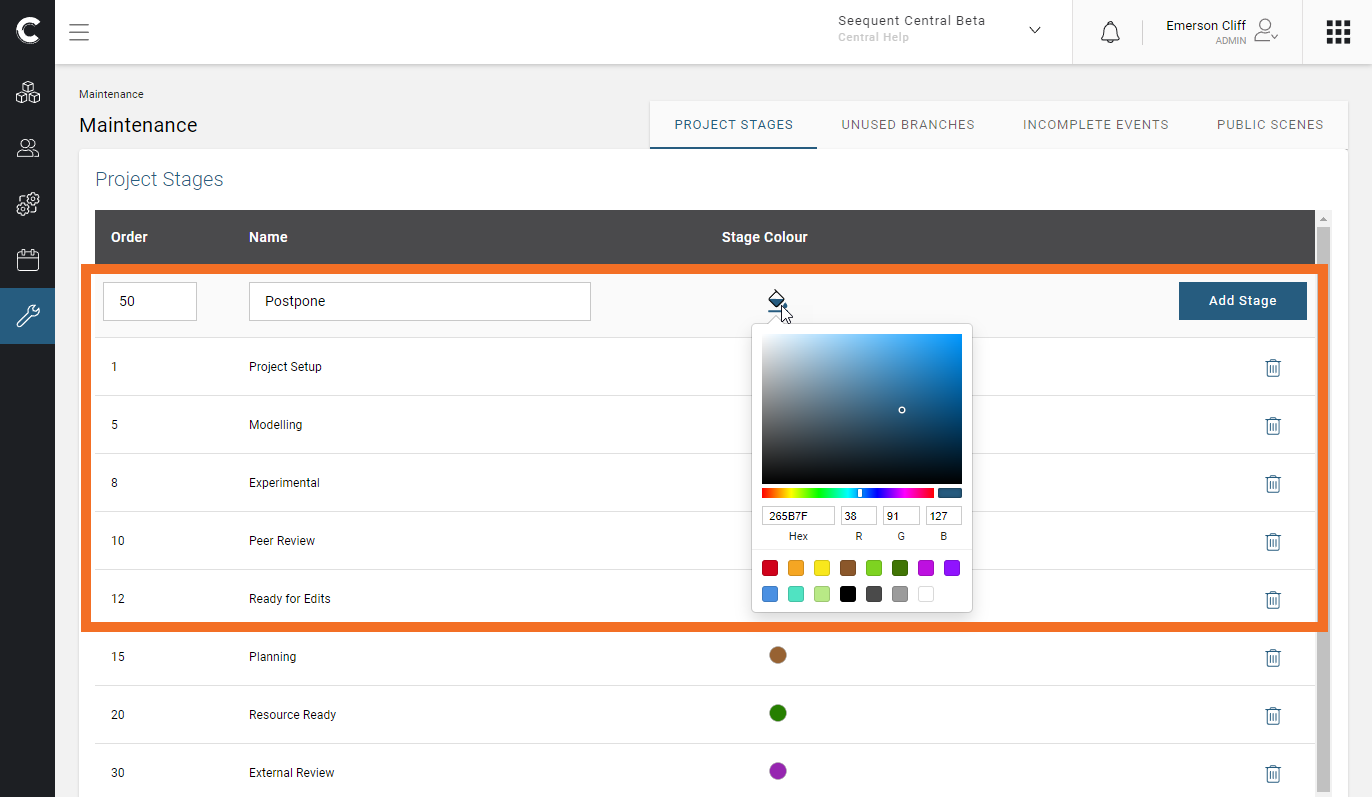
The set of fields at the top of the Project Stages list lets you quickly define a new stage:

The Order value is used to control where the new stage will appear in the list of stages. Choose a number larger than an existing stage to place it after that existing stage, or a smaller number to place it before the existing stage.
Select a colour for the stage, then click Add Stage.
Editing a Project Stage
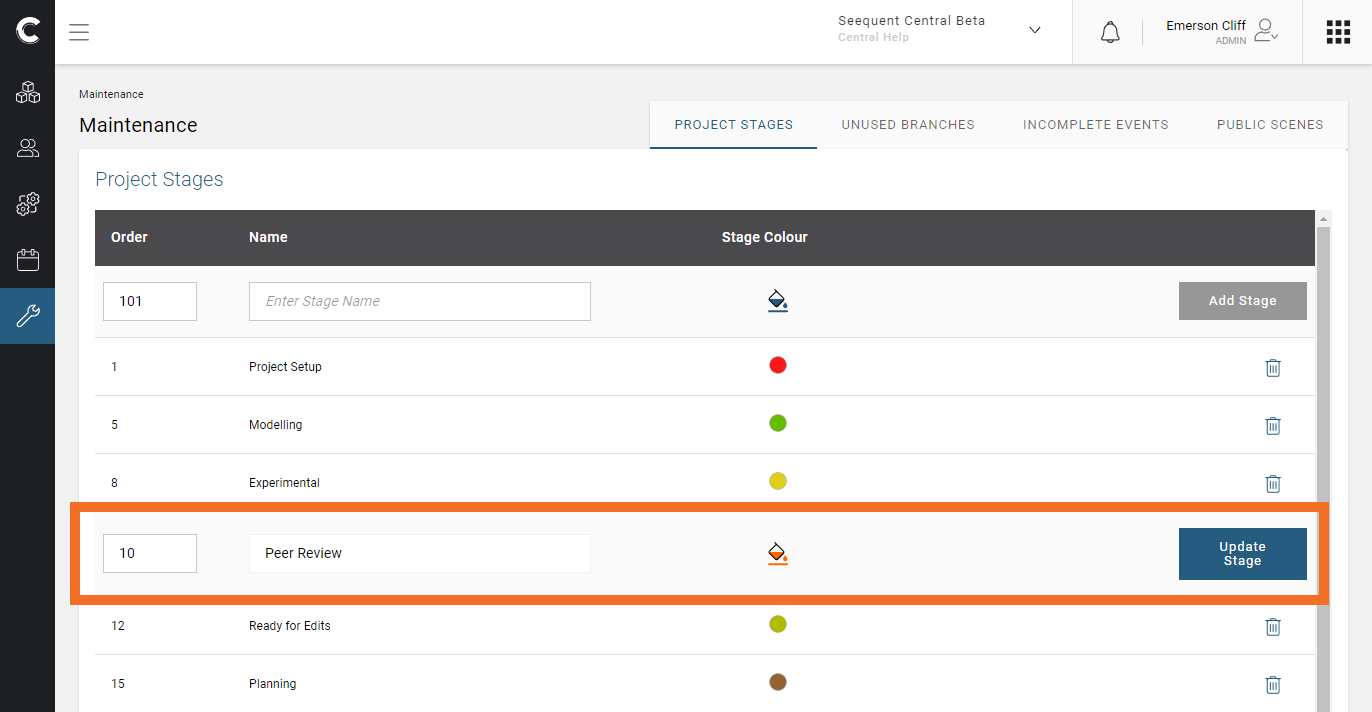
Simply click on a stage to edit it:

Click Update Stage to save the changes.
Deleting a Project Stage
When organisational procedures change and a previously-used approval state is obsoleted, you will want to delete it.
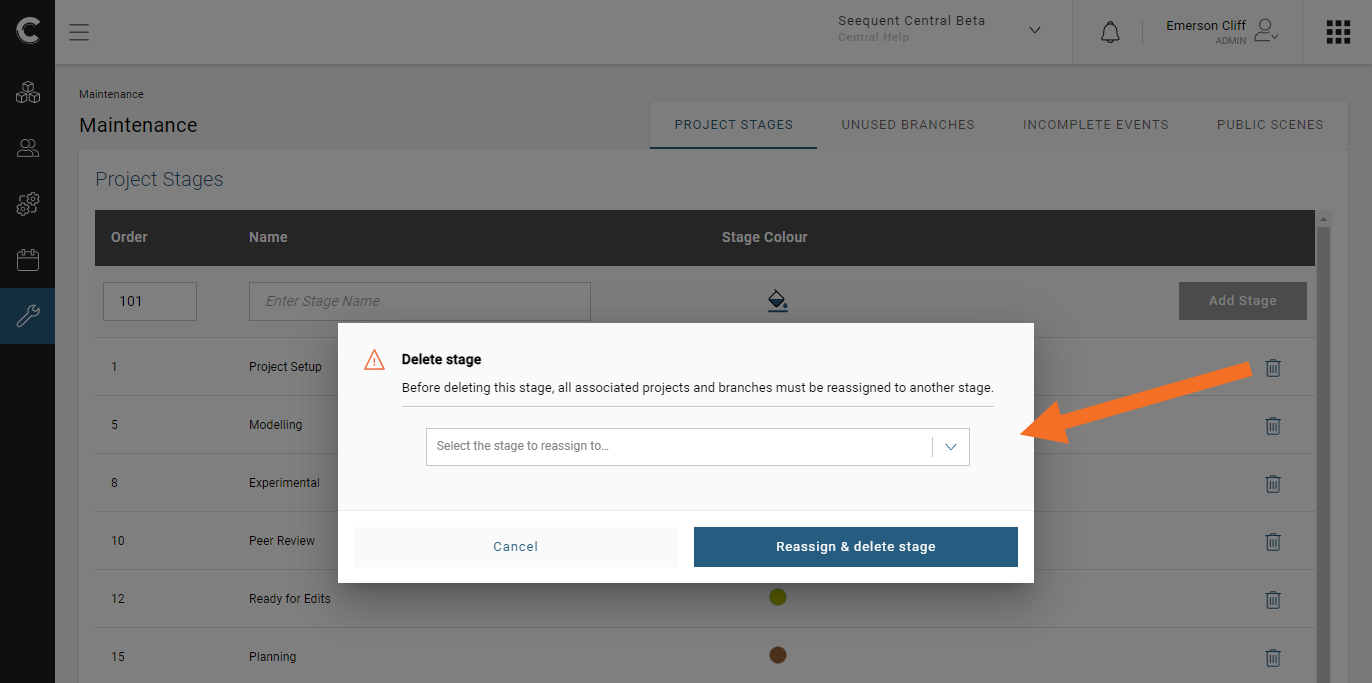
You cannot simply delete a stage if it is currently used by projects, but you can transfer those projects into a different project stage in the process of deleting the stage.
Click the delete button for the stage you want to remove. Enter a stage to reassign projects and branches to, then click to confirm your choice.

If a stage is not being used, you will still need to enter a different stage before you delete the selected one.
