
Serial Sections
This topic describes the process of creating a serial section, which is a series of cross sections taken at an offset from a single base section.
The type of section that allows for a series of sections following along a single line is called a long section, and is described in Long Sections.
This topic is divided into:
- Creating a Serial Section
- Section Layouts for Serial Sections
- Displaying a Serial Section
- Exporting a Serial Section
Creating a Serial Section
To create a serial section, add a model to the scene. Next, right-click on the Sections, Plans and Contours folder and select New Serial Section. The New Serial Section window will appear and planes representing the base section and the offset sections will be added to the scene:
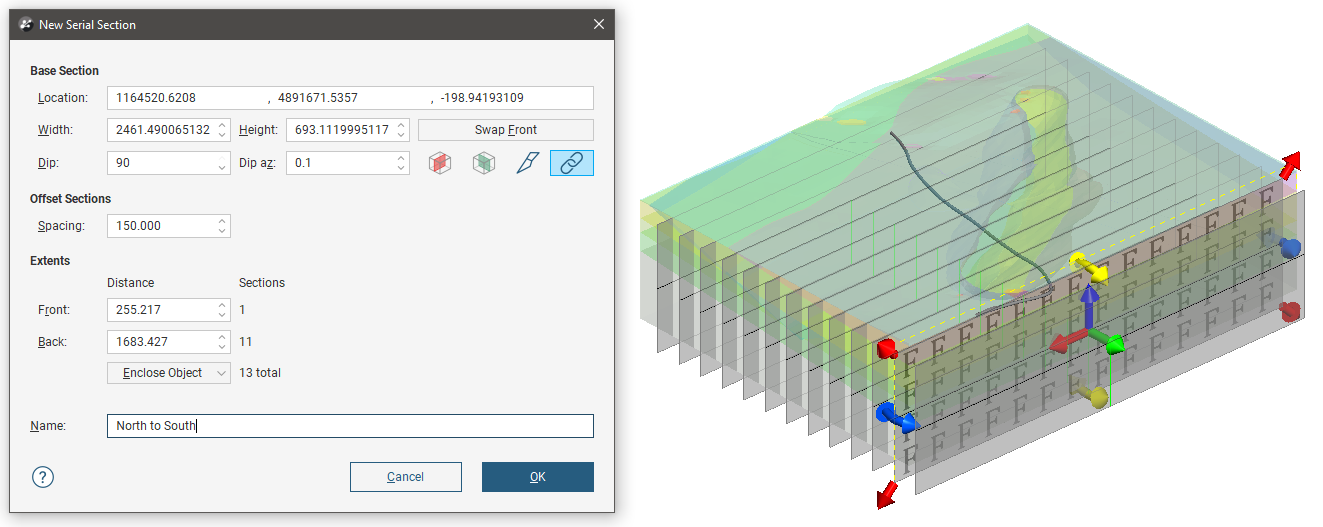
If the slicer is already in the scene when you select New Serial Section, the position of the slicer will be used to define the initial orientation of the base section.
The handles in the scene control the position of the base section and work in the same manner as the moving plane controls (see The Moving Plane).
The front (F) and back (B) of the base section plane are indicated in the scene. To swap the front and back, click the Swap Front button.
Two buttons in the New Serial Section window let you create a base section that is aligned north-to-south ( ) or east-to-west (
 ). The other two buttons are active when the slicer is in the scene. Clicking the Set section to slicer button (
 ) creates a cross section from the position of the slicer in the scene. When the Lock section to slicer button (
 ) is enabled it will be highlighted in blue, and moving the position of the slicer will update the position of the cross section in the New Serial Section window, and moving the orientation of the base section will change the position of the slicer.
The number of offset sections is determined by the value of the Spacing setting and the Front and Back Extents:
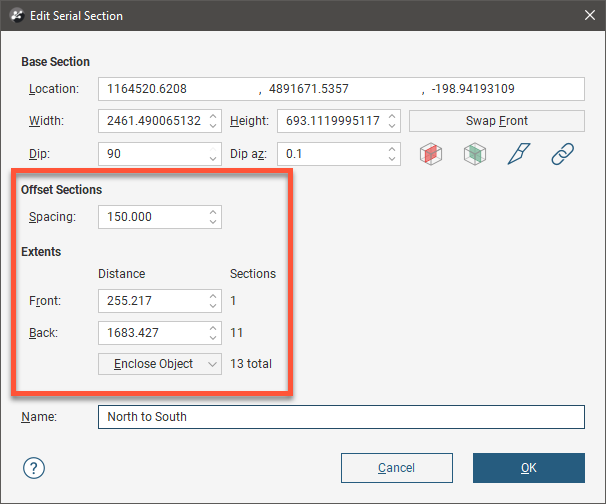
You can change the number of offset sections by:
- Changing the Spacing setting, which changes how far apart each of the section slices are. The number of offset sections will be recalculated and updated in the scene.
- Changing the Front or Back settings. For example, increasing the Front setting adds an offset section on the front of the base section, increasing the extents by the value of Spacing.
- Changing the object used to define the extents. Select an object from the Enclose Object list. The base section will be moved to the centre of the selected object.
Click OK to create the section.
In the project tree, the serial section includes the individual cross sections:
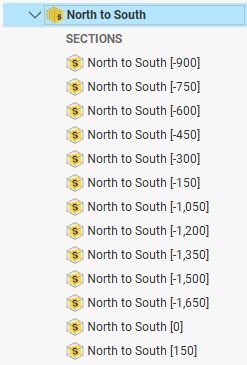
At this point no sub-section in the serial section has any defined layout.
Section Layouts for Serial Sections
Right-click on one of the component sections under the Sections headline for the serial section in the project tree and select New Layout. Use the section layout editor to design the section layout and communicate the information you need to convey. For a full description on using the section editor, see the Section Layout Editor topic. Once you have a layout designed, you can copy the layout to other segments in the long section. Right-click on the section layout in the project tree and select Copy Layout To from the menu. To apply the section layout design onto the other segments, move the long section segments from the Available Sections to the Selected Sections list, and click OK.
Alternatively, you can create a section layout template for a serial section by right-clicking on the Sections, Plans and Contours folder in the project tree and selecting New Layout Template. Design your section layout template using the section editor tools. Then right-click on the newly-created layout template in the project tree and select Copy Layout Template To, move the serial section from the Available Sections list to the Selected Sections list, and click OK. For a full description on using the section editor and copying section layout templates to sections, see the Section Layout Editor topic.
Individual section layouts can then be tweaked, adjusting the location of labels and objects to present each section optimally. Note that changing child section layouts will break the relationship with the layout template and modifications to the layout template will not affect the modified child section layout.
Displaying a Serial Section
Adding the top-level serial section object to the scene will display each of the sub-sections in the scene. The specific evaluation can be selected from the view list.
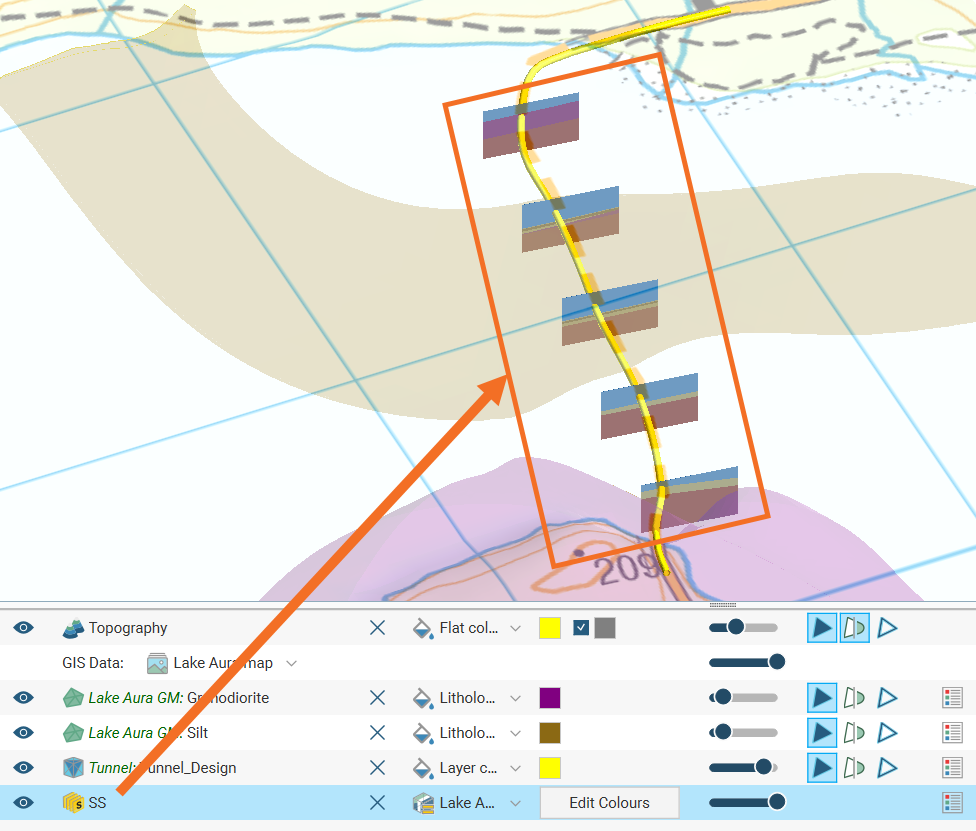
You can, however, add individual sub-sections to the scene from the project tree. By default the section layout will be displayed in the scene, but you can also select specific section evaluations from the view list to show instead of a section layout.
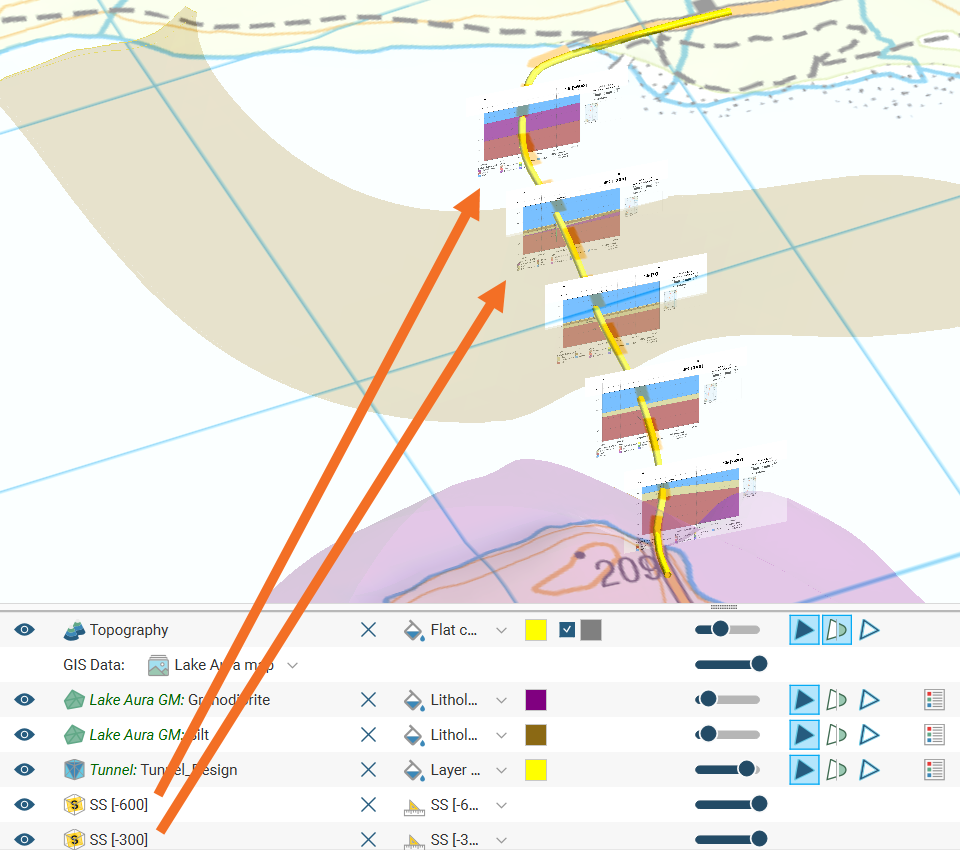
When you display a serial section in the scene, you can add the slicer to the scene and use it to move easily between the sections in the stack. To do this, click on the slicer in the shape list, then select a section from the Set location to list:
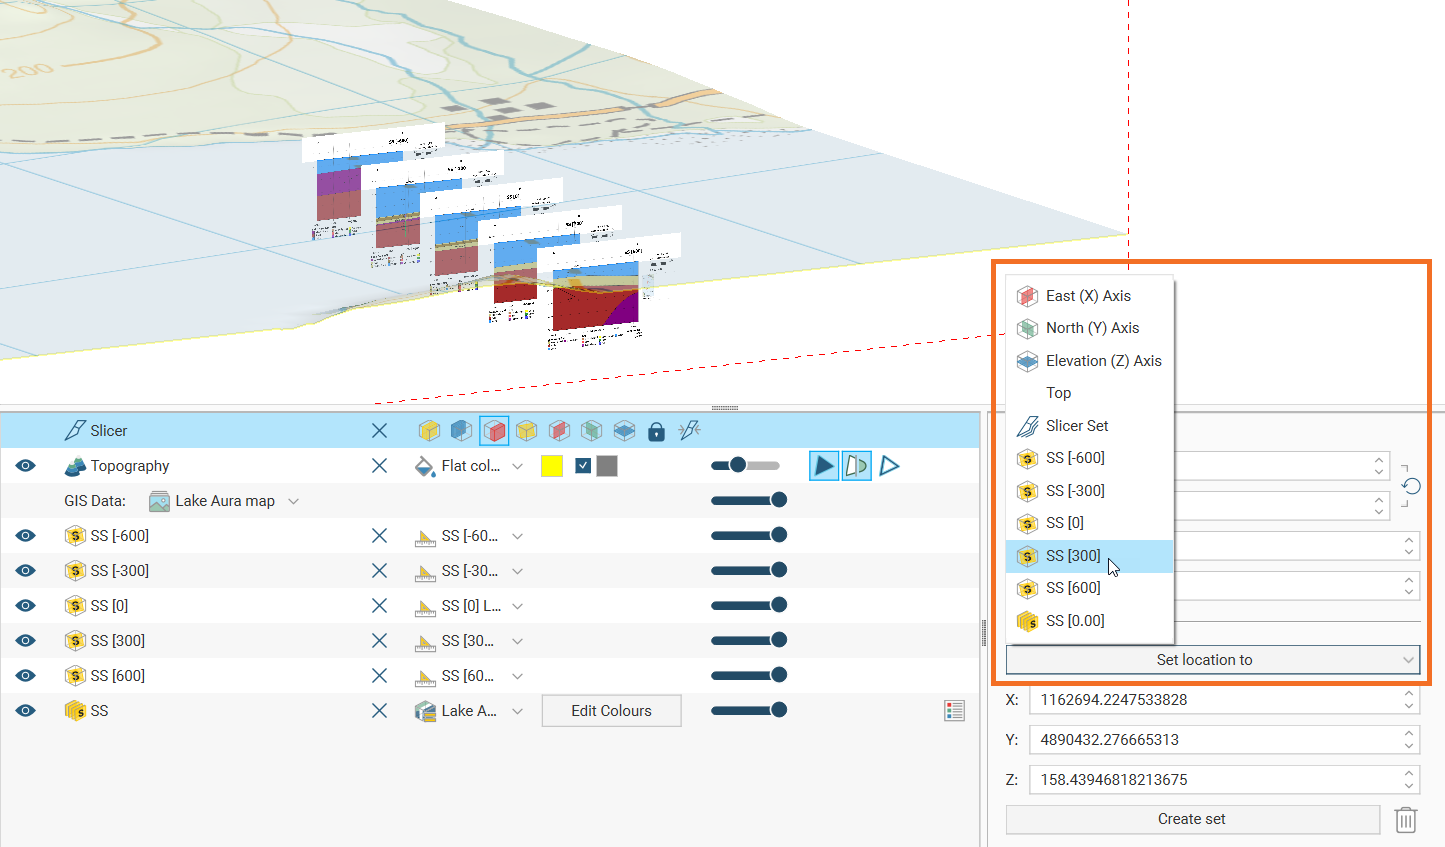
If you set the slicer’s Step size to the Spacing setting used to create the section, you can then use the , and . keys (these also have < and > on them) to go back and forwards. As you do, the slicer will move to centre over each cross section.
Exporting a Serial Section
Serial sections can be exported in the following formats:
- DXF Files (11/12 [AC1009]) (*.dxf)
- AutoCAD Drawing Files (2013/LT2013) (*.dwg)
- Bentley Drawing Files (v8) (*.dgn)
The DXF format exports a single file with a collection of DXF lines based on intersections between the selected evaluation and the section planes.
For more information on exporting a section layout, which exports not just the section but also the page designed around it, see Exporting Section Layouts in the Section Layout Editor topic.