Getting Started
Once Leapfrog is installed, there are some first steps to carry out before you begin working with projects. This topic describes those first steps and then provides an overview of the Projects tab and working with Leapfrog projects. This topic is divided into:
- Signing In With Seequent ID
- Graphics and Drivers
- About Leapfrog Project Files
- The Projects Tab
- Opening Projects
- Saving, Backing Up and Compacting Projects
- Creating New Projects
- Tracking Project Work Using Reference Codes
Once you have carried out these first steps, see An Overview of Leapfrog Geo for a description of the different parts of the Leapfrog main window and Concepts for information that is important to helping you get the most out of Leapfrog.
Signing In With Seequent ID
To use Leapfrog, you need a Seequent ID and the correct permissions.
If you do not have a Seequent ID, you can sign up for one by launching Leapfrog and clicking the Register button in the window that opens in your default browser.
To find out more about different permissions, visit the Leapfrog Pricing & Subscription Options page.
Once you have a Seequent ID and the correct permissions, launch Leapfrog. A window will launch in your computer’s default browser prompting you to sign in using your Seequent ID. Enter your email address, then click the Next button. You will then be prompted to enter your password.
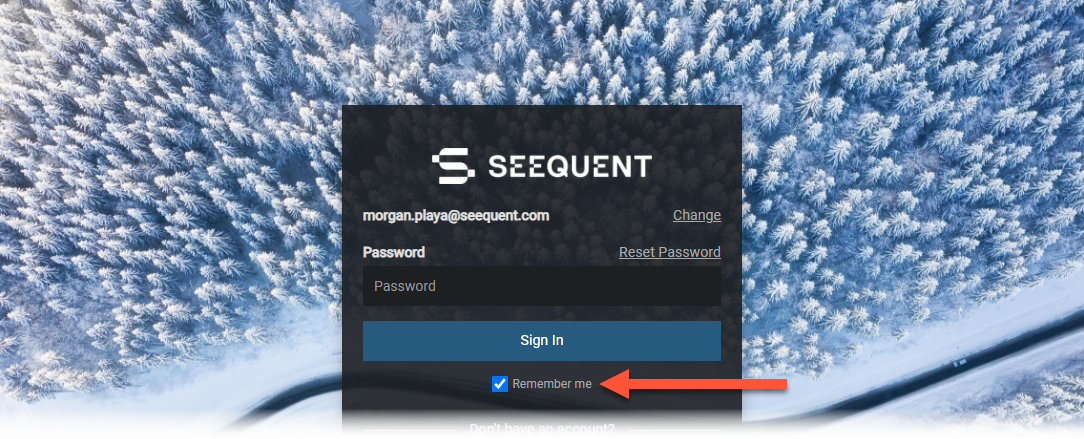
The Remember me setting is useful if do not wish to re-enter your Seequent ID and password each time you launch Leapfrog. If you sign out, however, you will have to enter your credentials once again, even when Remember me has been enabled.
Once you have entered your password, click Sign In. You will be prompted to launch Seequent Connector, which is a system tray application that handles the authentication and authorisation required to run Leapfrog. The entitlements page will then be opened in your browser.
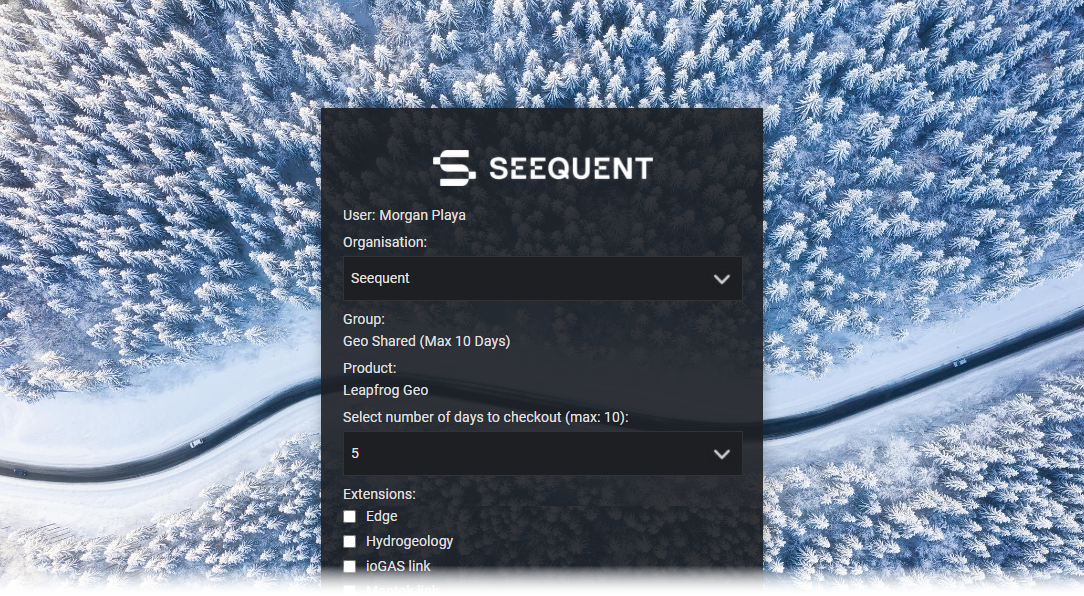
You can:
- Select your group, if your organisation has a number of different groups.
- Select what extensions you wish to use. Some Leapfrog features are only available with an extension.
- Select how long you wish to check out a seat, if your organisation is set up to check out seats on a day-by-day basis.
You can also select your own user name as the Organisation, which entitles you use Leapfrog Viewer to open scene files without having entitlements for Leapfrog Geo:
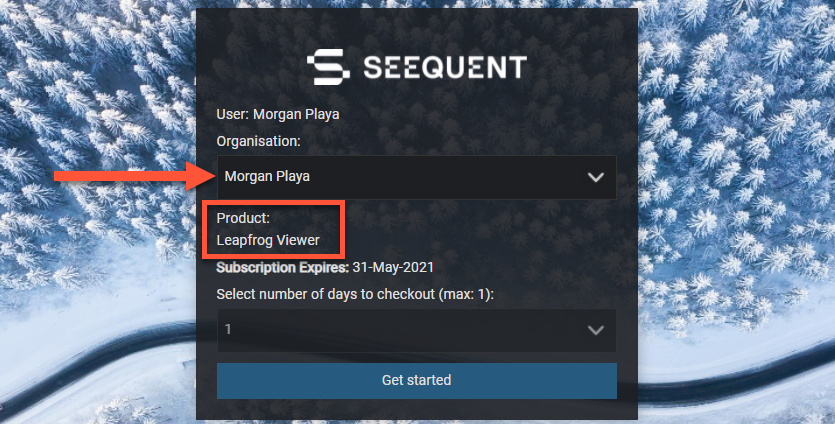
Select your options, then click the Get Started button and follow the prompts.
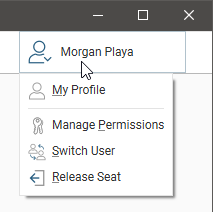
Once you have signed in to Leapfrog using your Seequent ID, the Seequent ID menu in the upper right-hand corner of the main window is used to manage your MySeequent identity, along with Seequent Connector:
If you are offline, options that require an internet connection will be greyed out:
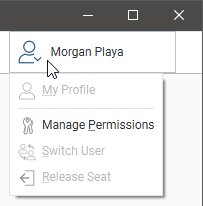
You can continue working in Leapfrog while you are offline until your session expires. To see when this is, click on the Seequent ID menu and select Manage Permission. The window that appears will display the time and date when your session will expire.
If your organisation shares Leapfrog seats between users, you can release your seat for other Leapfrog users in your organisation when you have finished working with Leapfrog. Select the Release Seat option from the Seequent ID menu or simply close Leapfrog or select Quit from the Leapfrog menu. Choose Release Seat when you are prompted.
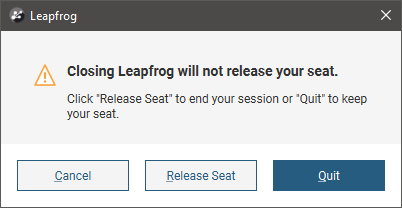
The Quit option retains your seat and the next time you launch Leapfrog, you will not have to sign in using your Seequent ID, nor will you have to select your entitlements.
Graphics and Drivers
Many laptop computers come with two graphics options: low-powered graphics integrated into the CPU and a high-performance dedicated graphics option (a GPU). To save power, often the laptop’s default setting is to run programs using the slower integrated graphics option. However, selecting high-performance graphics options is very important to Leapfrog’s performance. If you have a dedicated graphics option, you should be using it. It’s also important to have the most up-to-date drivers to make the most of your computer’s capabilities.
To determine what graphics capabilities your computer has:
1. From the Leapfrog menu, select About.
2. Click on the System Info tab.
Under the Summary, you will see the following details:
- Graphics in use by shows the graphics option being used. Note that Leapfrog uses only the option indicated; if there are two options available, Leapfrog does not use both simultaneously.
- All available graphics hardware lists the options available. If there are two options listed, you will want Leapfrog to use the dedicated graphics option rather than the slower integrated graphics.
- Driver date shows the date at which the driver was last updated for each graphics option.
If your graphics drivers are out of date, it is recommended that they be updated prior to switching the graphics in use by Leapfrog. You can find detailed information on setting up your graphics correctly for Leapfrog on MySeequent.
You may need to know your installation path. The default installation path for Leapfrog version 2021.1 is: C:\Program Files\Seequent\Leapfrog2021.1\bin\Leapfrog.exe.
Running the Graphics Test
Leapfrog can run in one of three acceleration modes. These modes are selected by clicking on the button at the bottom of the main window:

See 3D Acceleration Mode in Settings for more information on these settings.
A newer computer will run in Full Acceleration mode without issues. However, if you are running Leapfrog on a computer that is more than five years old, it is a good idea to run the graphics test to test your computer’s graphics capabilities.
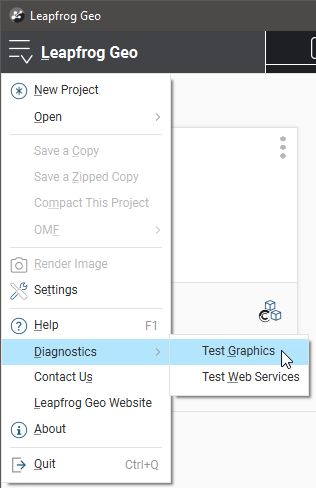
To start the test, open Leapfrog and select Test Graphics from the Leapfrog > Diagnostics menu:
The graphics test displays a series of image pairs that test your computer’s capabilities for the currently selected acceleration mode. For each pair, compare the images:
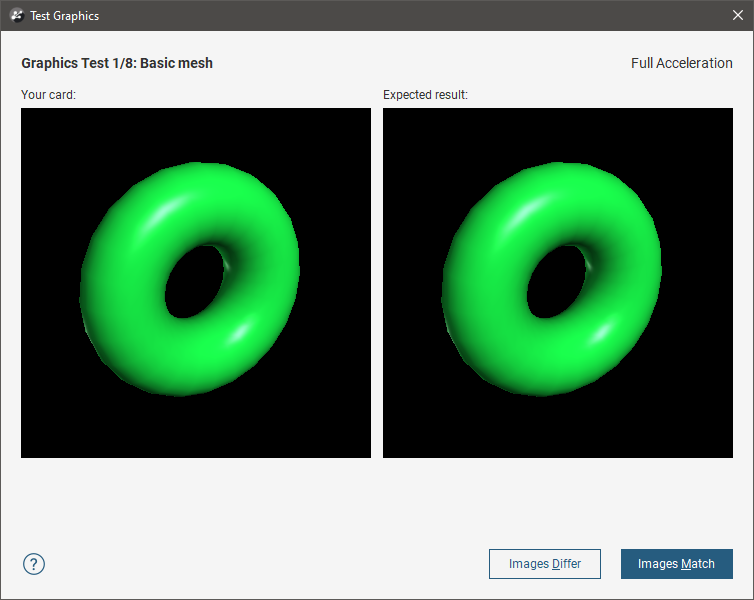
Even if the differences are slight, click the Images Differ button. If the images match, click the Images Match button. The next test will be displayed.
At the conclusion of the test, the result is displayed. If one or more tests have failed, information about solving problems will be displayed.
If you click on Save Report, you will be prompted to save the file on your computer.
If the test has failed, try switching to a different acceleration mode and running the test again. If possible, avoid using Software Rendering as it can be very slow.
If you cannot resolve the problem, save a copy of the graphics test report and contact technical support as described in Getting Support. Be sure to include information about your system copied from the About > System Info tab.
About Leapfrog Project Files
Leapfrog projects use the extension .aproj:
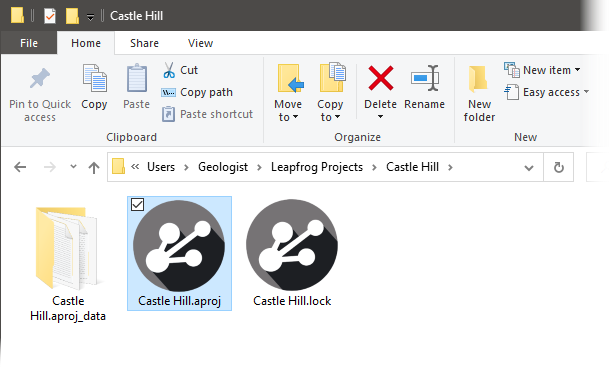
A project also has a project folder that contains information used by the project. This is named using the project name and the suffix .aproj_data.
Do not change the name of your .aproj_data folder or alter its contents. Doing so could render your project file unusable.
A .lock file is created when a project is opened. The .lock file protects the project from being moved while the project is open and from being opened by another instance of Leapfrog, which can happen when projects are saved on shared network drives.
Leapfrog is optimised for working off your local hard drive, and you will experience increased processing times and object load times if you access your project from a different storage system. It is strongly recommended that you do not work from network drives, synced drives (e.g. OneDrive, Dropbox) or USB drives as working in this way can result in corrupted projects.
The Projects Tab
After you have signed in, the Leapfrog main window will appear with the Projects tab displayed. The appearance of this Projects tab and how it works depends on whether or not you are using Leapfrog with Central.
If your organisation is using Central 3.0 or later, the Central servers you have access to are configured via your Seequent ID. You will have a single Projects tab that shows all your Leapfrog and Central projects.
See The Projects Tab - With Central.
If your organisation is using an older version of Central or is not using Central at all, you will still need to sign in to Leapfrog via your Seequent ID, but you will have two tabs, a Projects tab that shows all your local Leapfrog projects and a Central Projects tab.
See The Projects Tab - Without Central or Using an Older Version of Central.
The Projects Tab - With Central
If your organisation is using Central 3.0 or later, the Central servers you have access to are configured via your Seequent ID. You will have a single Projects tab that shows all your Leapfrog and Central projects.
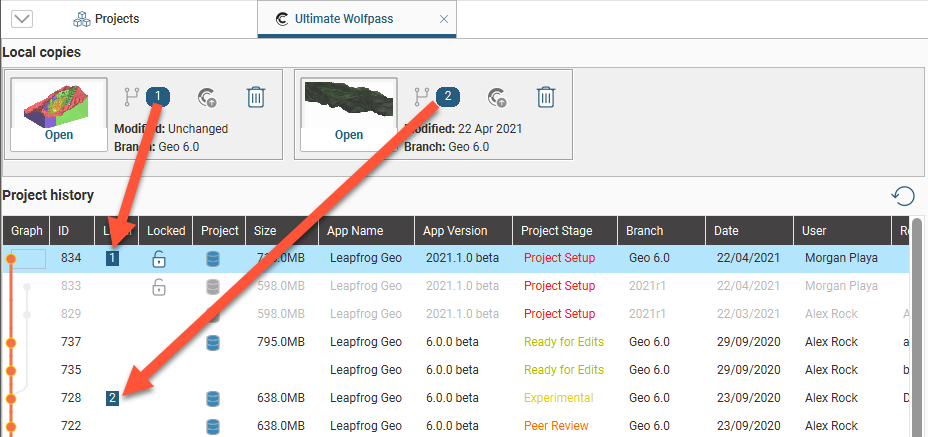
A Central project is the history of a Leapfrog project tracked through time, organised into revisions. In Leapfrog, you can view the history of a Central project, and you can download local copies of these revisions and work on them in Leapfrog. Here, the history of a Central project called “Ultimate Wolfpass” is shown, and there are two local copies of that project, one that has not been modified since it was downloaded and the other modified on the 22nd of April 2021:
In the Leapfrog Projects tab, three types of “project” are listed:
- Projects marked with the
 symbol are local Leapfrog projects not connected to Central. Double-click on a local Leapfrog project to open it.
 - Projects marked with the
 symbol are local copies of Central projects. Double-click on a local copy to view the Central project’s history. Until you are connected to the project’s Central server, the history will be blank.
 - Projects marked with the
 symbol are the Central projects themselves. These will only appear in the list when you are connected to a Central server. Double-click on the project to view its history.
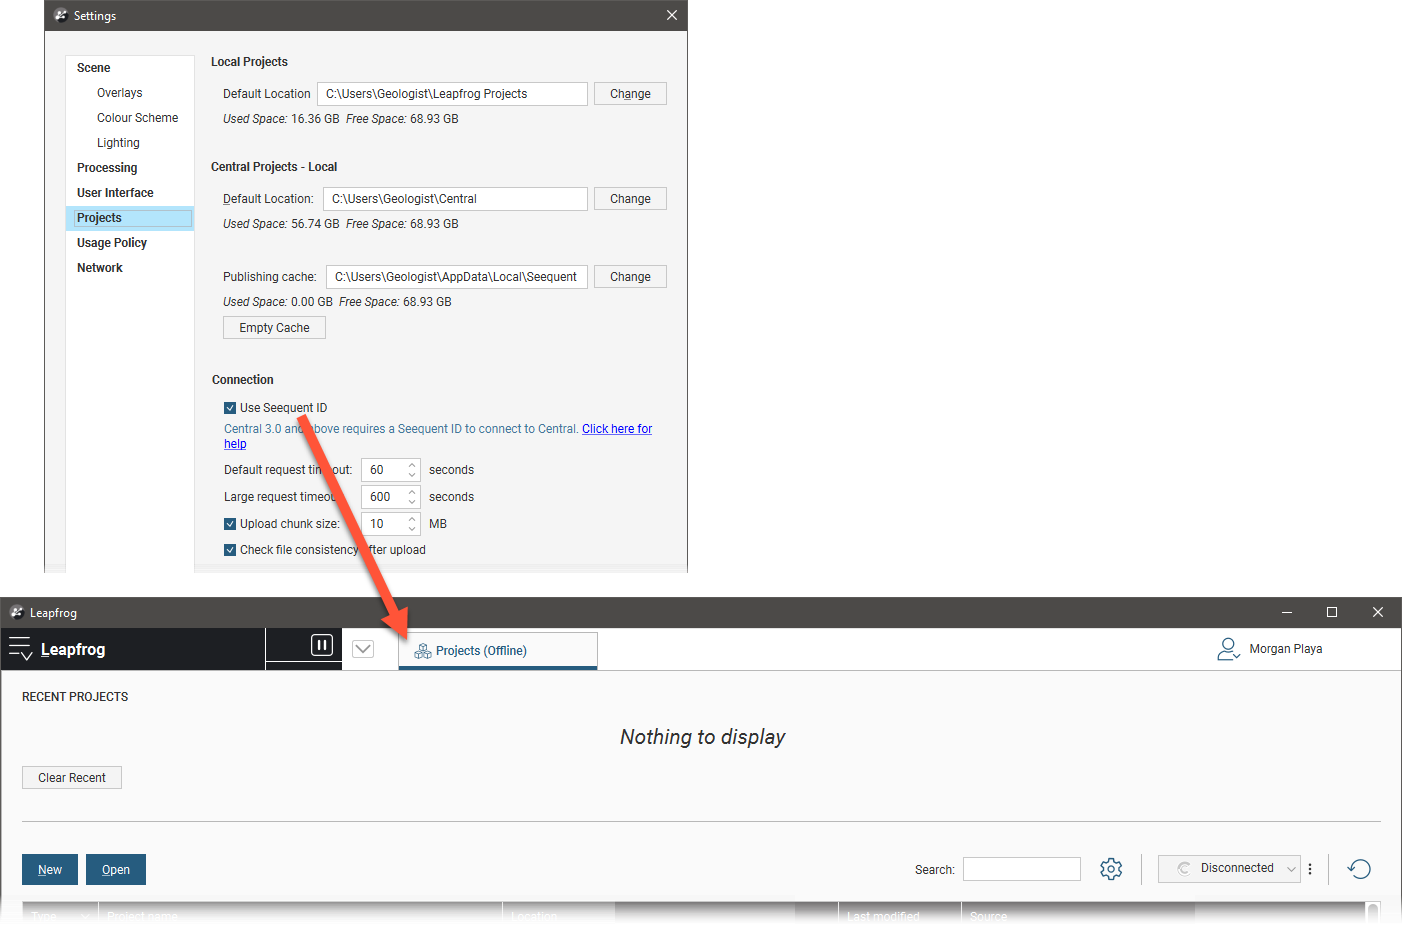
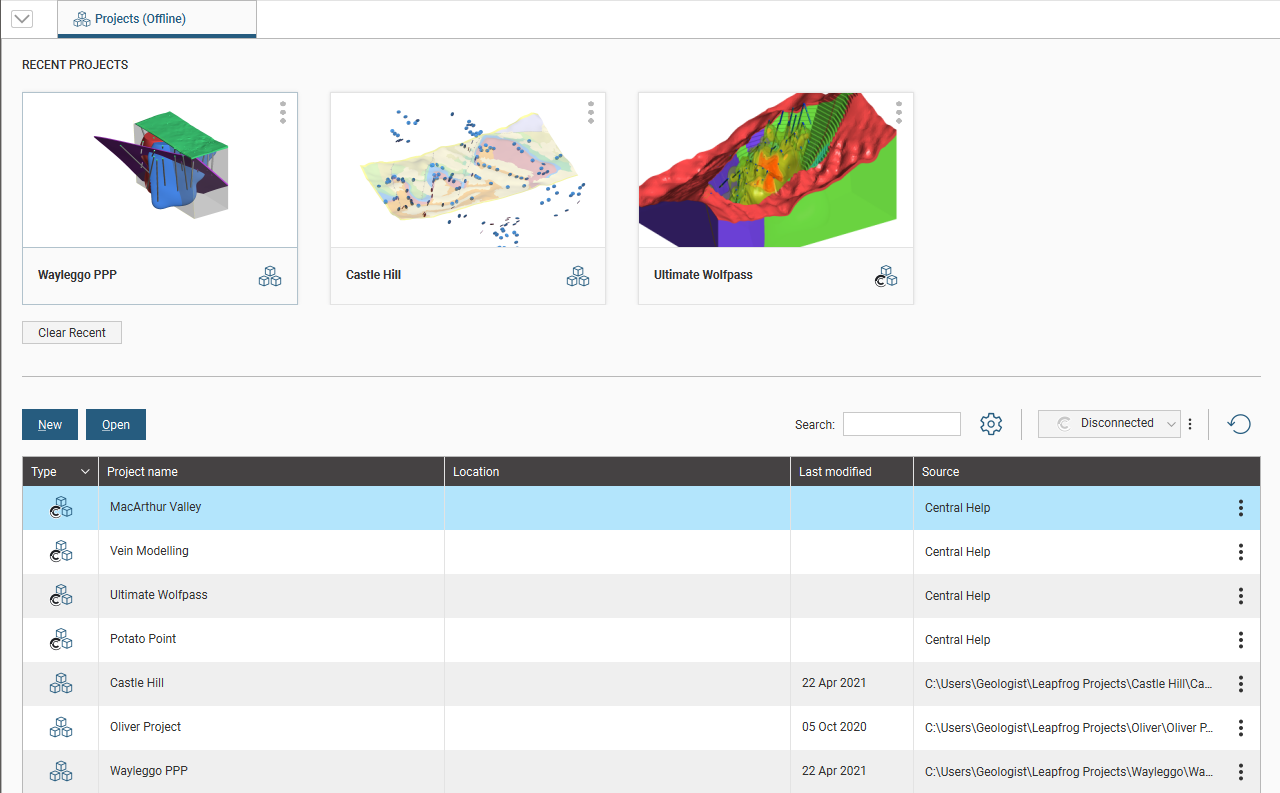
Here, Leapfrog is not connected to a Central server and so the Projects tab is marked as being Offline. There are three projects that have recently been opened, two local projects and a local copy of the Ultimate Wolfpass Central project:
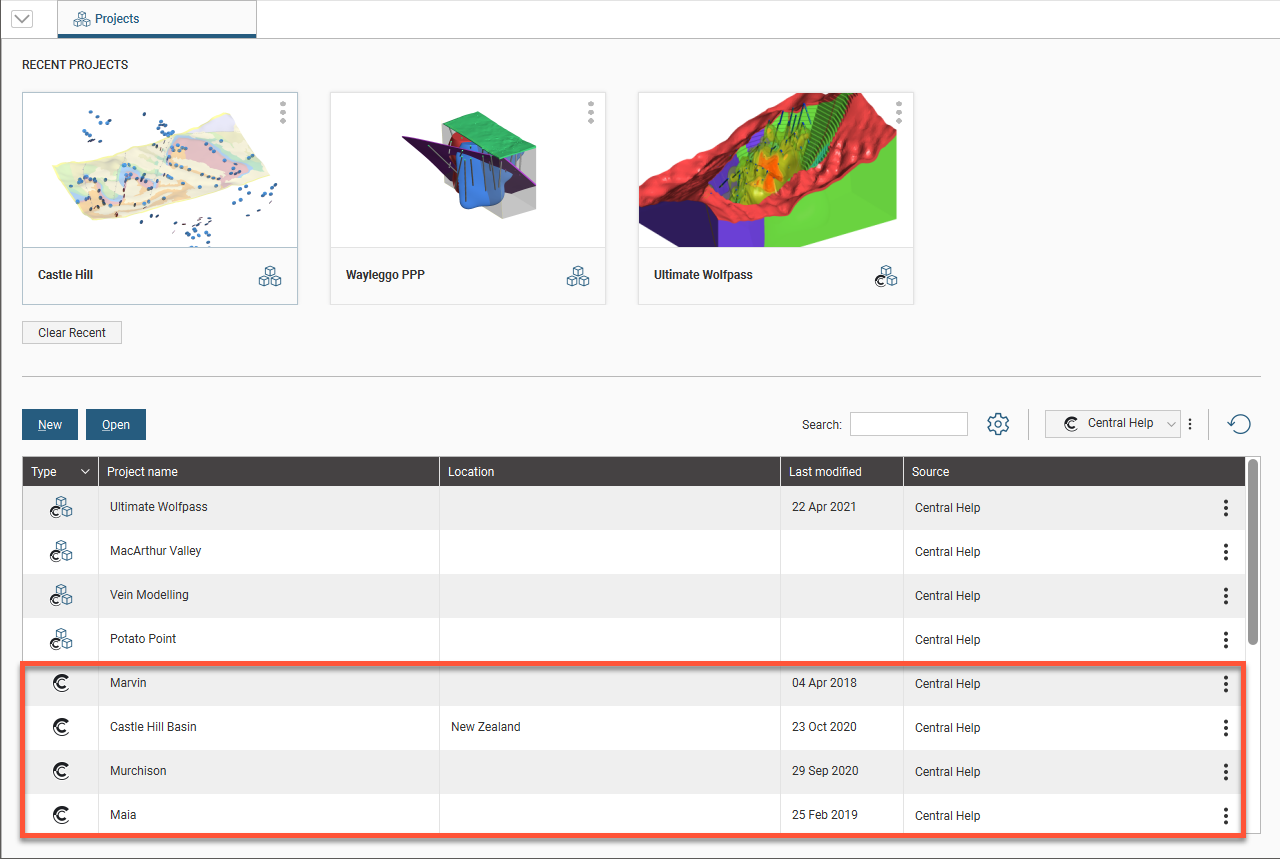
The list shows local copies of four Central projects and three local projects, whose file location is indicated in the Source column. The folder the Projects tab searches for local projects can be changed by clicking on the Settings button:

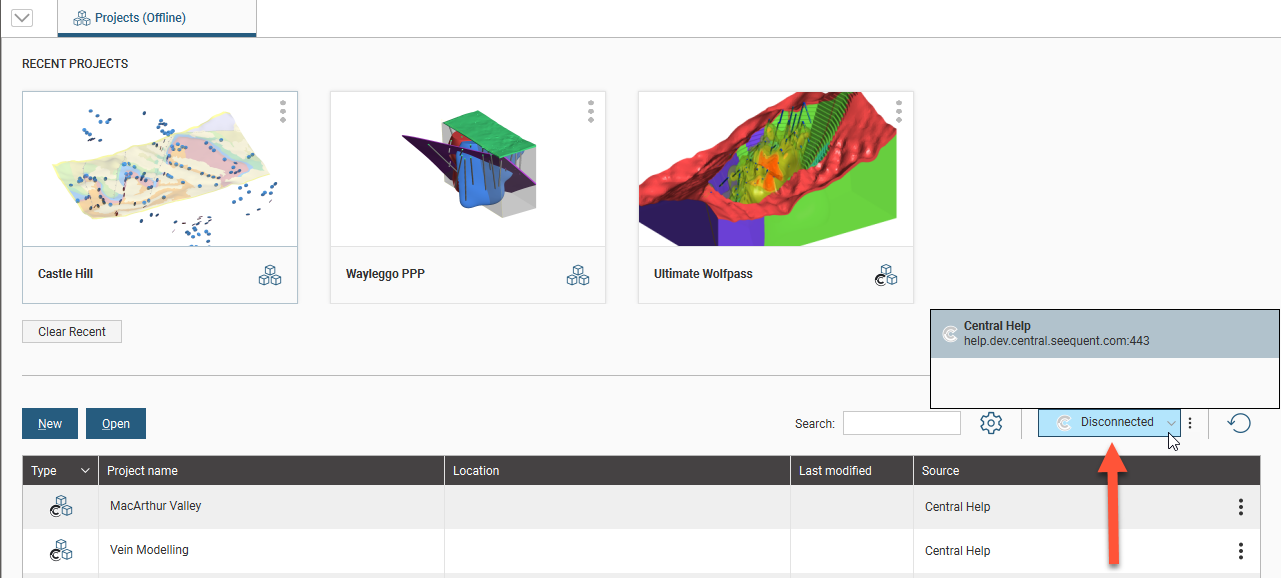
Connect to a Central server by clicking on the server button and selecting from those in the list:
Once connected, the list will be updated to show the Central projects available on that server:
Use the Search box to filter the list of projects.
As with the local copies of the Central projects, double-clicking on the Central project will open its history.
When not connected to a Central server, the list may show local copies of Central projects from multiple Central servers. Once connected to a server, only Central projects from that server are listed.
When you are connected to a Central server, the server name is shown in the bottom left-hand corner of the main window:
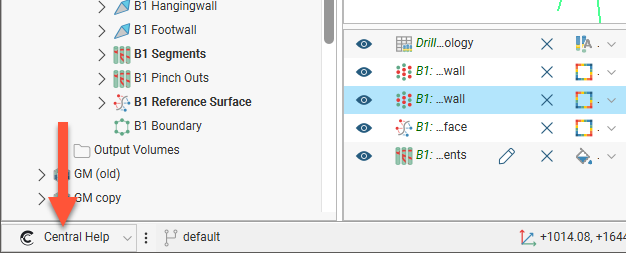
You can click on this button to connect to a different Central server.
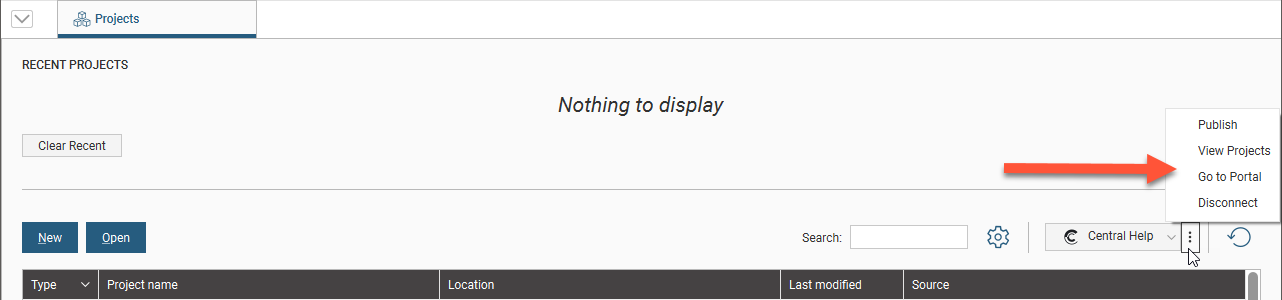
The More button (![]() ) next to the server button provides options for:
) next to the server button provides options for:
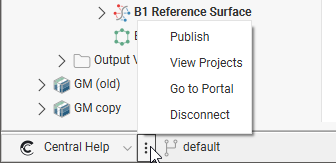
- Publishing the project you’re currently working in
- Viewing the list of projects on the server you’re connected to
- Opening the Central Portal for the server you’re connected to
- Disconnecting from the server
The More button is also available in the Projects tab, next to the server button:
For more information on working with Central, see the following topics:
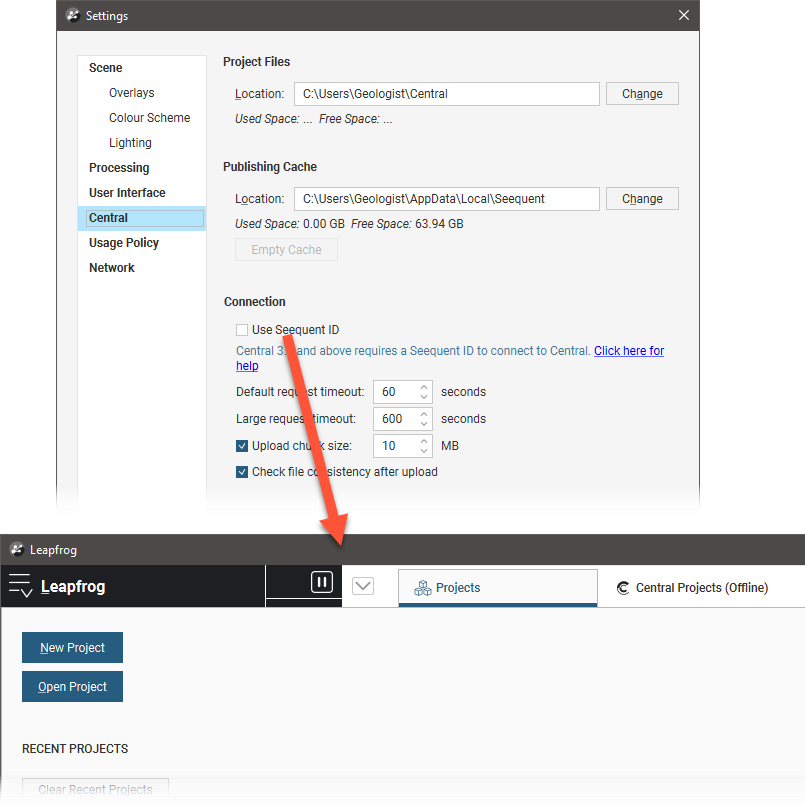
The Projects Tab - Without Central or Using an Older Version of Central
If your organisation is using an older version of Central or is not using Central at all, you will still need to sign in to Leapfrog via your Seequent ID, but you will have two tabs, a Projects tab that shows all your local Leapfrog projects and a Central Projects tab.
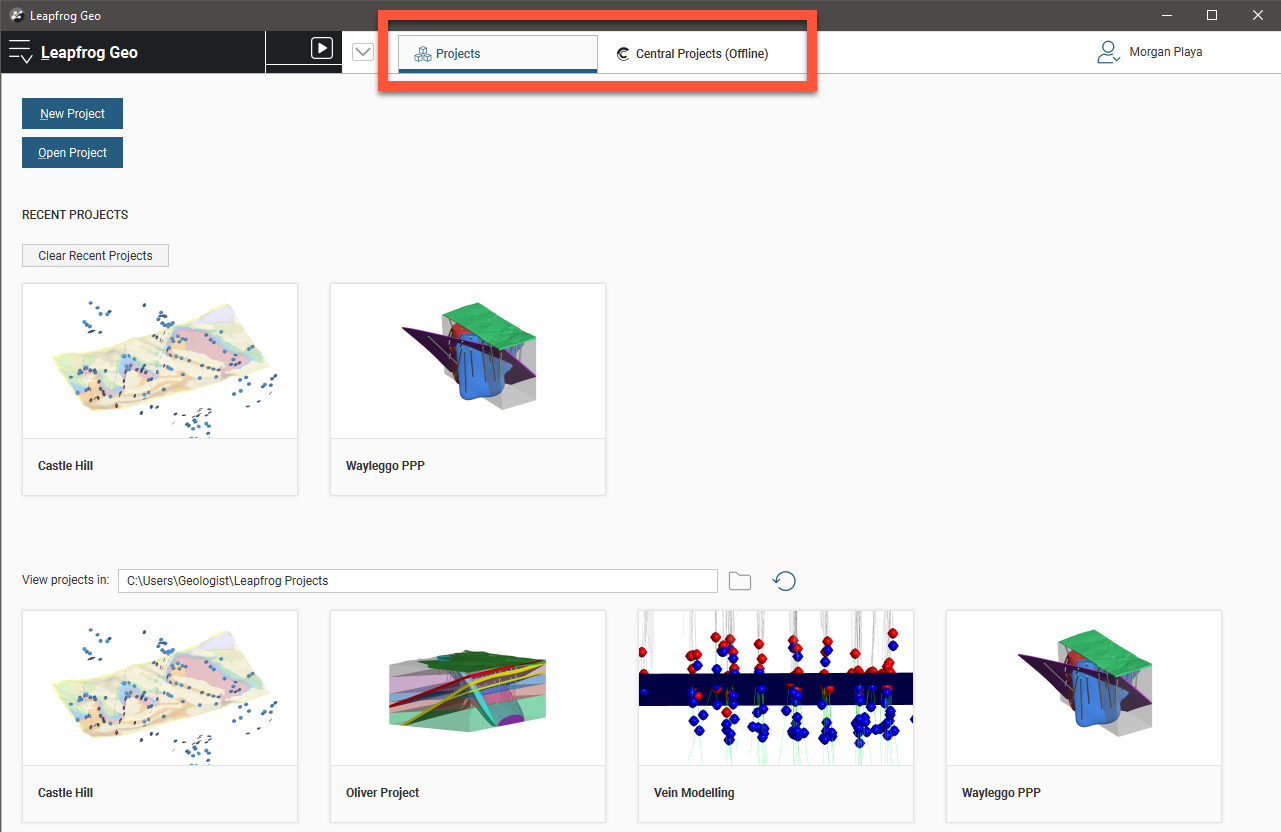
Thumbnails for the most recent projects are displayed in the Recent Projects list. The second set of thumbnails is for projects contained in the folder designated by the View projects in setting. This folder is useful if you have one folder in which you keep most of your Leapfrog projects.
You can:
- Open a project. Click on a thumbnail or by clicking the Open Project button and navigating to where the project is saved. Once a project file has been opened, Leapfrog switches to displaying the Scene View tab. See An Overview of Leapfrog Geo for a description of the different parts of the Leapfrog main window.
- Create a new project. Click on the New Project button. The new project will be saved in the View projects in folder.
- Change the View projects in folder. Click on the folder button (
 ) or press the F5 key, then select a different folder.
 - Update the list of projects in the View projects in folder. Click on the Refresh button (
 ) or press the F4 key.
Leapfrog Hydro projects are indicated in the Projects tab. See Converting Leapfrog Hydro Projects for more information.
Opening Projects
From the Projects tab, click on a thumbnail to open a project. You can also navigate directly to the required project file by clicking on the Open Project button.
Once a project file has been opened, Leapfrog switches to displaying the Scene View tab. See An Overview of Leapfrog Geo for a description of the different parts of the Leapfrog main window.
Upgrading Projects
When you open a project that was last saved in an earlier version of Leapfrog, you may be prompted to upgrade the project. A list of affected objects will be displayed. For large projects with many objects that need to be reprocessed, the upgrade process may take some time. However, it is a good idea to back up projects before opening them in a new version of Leapfrog and backing up the project is strongly recommended.
Tick the Back up the project before upgrading button, then click Upgrade and Open. Navigate to the folder in which to save the backup and click Save.
For large projects with many objects, upgrading without backing up the project is not recommended.
Converting Leapfrog Hydro Projects
Leapfrog Hydro projects can be converted to Leapfrog Geo projects. However, the process is one-way, and projects opened in Leapfrog Geo can no longer be opened in Leapfrog Hydro.
When you open a Leapfrog Hydro project, you will be prompted to save a backup before converting the project.
It is strongly recommended that you back up the project before converting it.
Missing Data Warnings
When a project is opened, Leapfrog checks the integrity of the project, looking for missing data. In some cases, Leapfrog can try to open the project and you may be able to continue working in it.
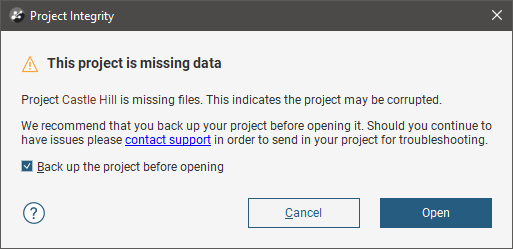
In other cases, Leapfrog can attempt to generate the missing files from data in the project, in which case you will be asked whether or not you wish to repair the project.
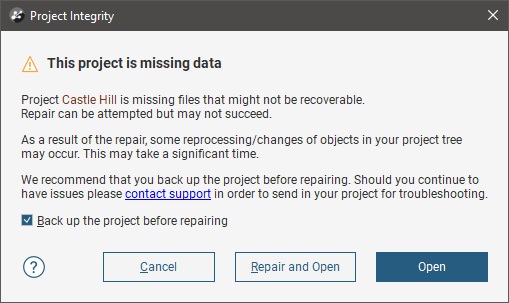
Whatever the case, read the information in the dialog and decide whether you wish Leapfrog to open the project or attempt a repair.
It is strongly recommended that you allow Leapfrog to back up a project that has files missing before attempting to open or repair it.
This message may be displayed if:
- You have copied a project to a different folder and the copying process is not yet complete
- You are unzipping a project and the process is not yet complete.
If this is the case, click Cancel and try opening the project again once the copying/unzipping is complete.
Saving, Backing Up and Compacting Projects
Leapfrog automatically saves an open project each time a processing task has been completed or settings have changed. Projects are also saved when they are closed so that scene settings can be restored when the project is next opened.
Three options available from the Leapfrog menu relate to saving and backing up projects:
- Save A Copy. Save a backup copy of your project to a location on your hard drive. You will be prompted to choose a new name and location for the saved project. Click OK to create the new project file. Leapfrog will save a copy of the project in the location selected. Once the backup copy is saved, you can open and use it from the Projects tab. Otherwise, you can keep working in the original copy of the project.
- Save A Zipped Copy. Save a zipped copy of a project to a location on your hard drive. You will be prompted to choose a name and location for the zipped project. Click Save to create the zip file.
- Compact This Project. When you delete objects from a project file, Leapfrog retains those objects but notes that they are no longer used. Over time, the project file will grow in size and data stored in the database may become fragmented. Compacting a project removes these unused objects and any unused space from the database. When you compact a project, Leapfrog will close the project and back it up before compacting it. Depending on the size of the project, compacting it may take several minutes. Leapfrog will then reopen the project. When you select this option, you will be asked to confirm your choice.
Creating New Projects
When you are working with Central, how you create new projects depends on the type of project you want to create.
Creating New Central Projects
To create a new Central project, connect to a Central server and then click on the New button in the Projects tab:

The new project will be created on the Central server, and a local copy will be created. Leapfrog will open that local copy and you can start working in it right away. See Publishing to Central for more information on the publishing process.
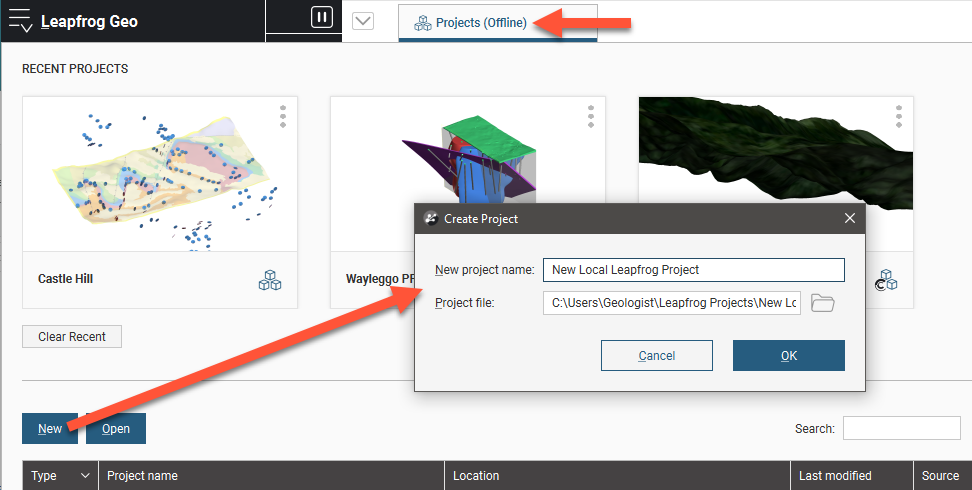
Creating New Local Leapfrog Projects
To create a new local Leapfrog project when you are not connected to a Central server, click on the New button in the Projects tab:
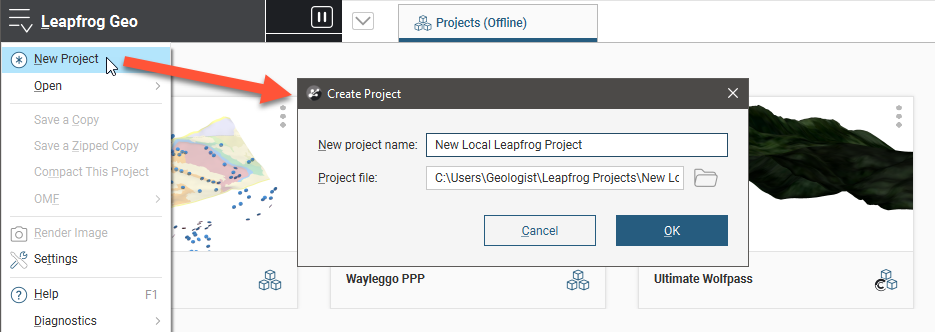
You can also create a new local project by selecting New Project from the Leapfrog menu:
Tracking Project Work Using Reference Codes
You can enter a reference code to track work on specific projects. The time associated with each reference code is included in your monthly usage report.
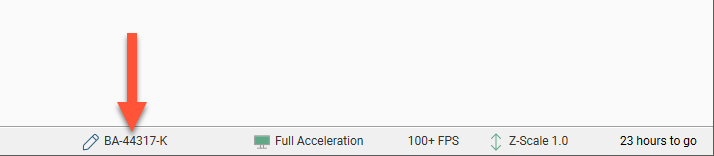
To enter a code, click the button in the status bar on the bottom edge of the Leapfrog main window:
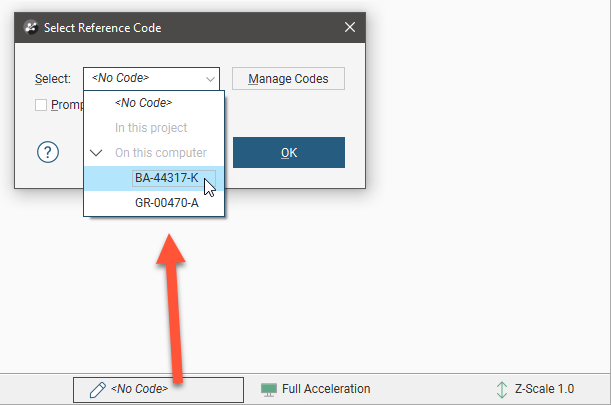
Select from the codes defined and click OK. The code entered will be displayed in the status bar:
To define new reference codes or delete old ones, click on the Manage Codes button. See Usage Policy Settings.
To work without a code, click on the button, select <No Code>, then click OK. Note that whether it’s possible to use Leapfrog without first entering a reference code depends on a setting in the Settings > Usage Policy window.
Got a question? Visit the Seequent forums or Seequent support