Importing Data From Central
When you are working on a Central project, you can import some data types from other projects on the same server. In this way, you can easily share data between projects and, if the data object is out-of-date, you can reload it from Central.
Data types that can be imported from Central are:
- Drilling data
- Points
- Polylines
- Meshes
- Planar structural data
- 2D grids
- Geophysical 2D and 3D grids
- Geological models
- OMF files
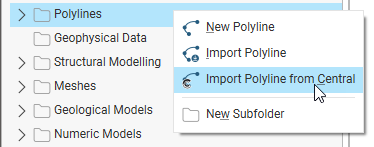
When import from Central is supported, right-clicking on a folder will show an additional import option.
Geological models and refined geological models imported from Central are imported as static geological models. See Creating a Static Copy of a Geological Model for information on how to work with static geological models.
For most data types, you can import data from revisions of the Central project and from the project’s Data Room. Drilling data and data in OMF files, however, can only be imported from a project’s data room.
Although drilling data can be published to Central, that is for the purpose of visualising the data in the Central Portal. Published drilling data cannot be imported into other Leapfrog Geo projects.
The rest of this topic describes how to import and reload data from Central. It is divided into:
- Object Availability
- Importing Central Data Objects
- Updating Out-of-Date Objects
- Appending Rows and Adding Columns to Data Tables
Object Availability
With the exception of drilling data and OMF files, data objects that can be imported from Central are those that have been:
- Published to Central as part of a revision via Leapfrog. These appear in the Import From Central window in the Project History tab.
- Uploaded to the project’s Data Room via the Central Portal. These appear in the Import From Central window in the Files tab.
For more information on publishing data to Central, see Publishing to Central in this help system.
When you publish a project revision to Central from Leapfrog Geo and wish to make a data object available for use in other projects, make sure you select that object from those in the project:
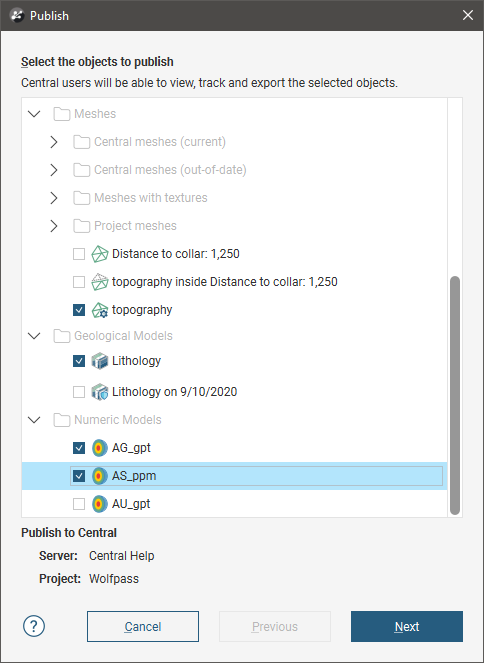
For example, in the project above, the data objects that will be available for use in other projects on the same Central server are:
- The Topography mesh
- The surfaces in the Lithology geological model
- The surfaces in the AG_gpt and AS_ppm numeric models
Unticked objects such as the Distance to collar mesh, the topography inside Distance to collar mesh, the Lithology on 9/10/2020 geological model and the AU_gpt numeric model will not be available.
Importing Central Data Objects
To import data objects from Central, first make sure you are already connected to Central. Then right-click on the folder for the data type you wish to import and select the Import From Central option. In the window that appears, select one of the projects in the repository.
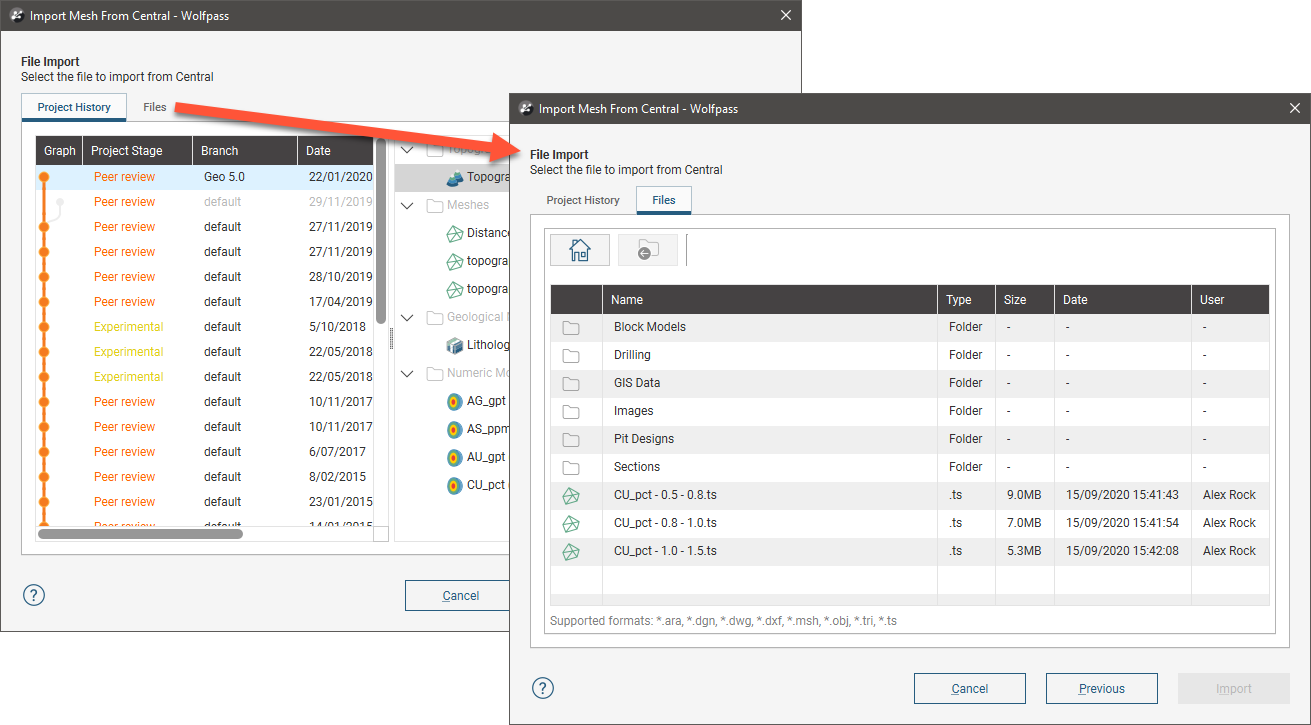
In the next window, there are two options, the Project History tab and the Files list:

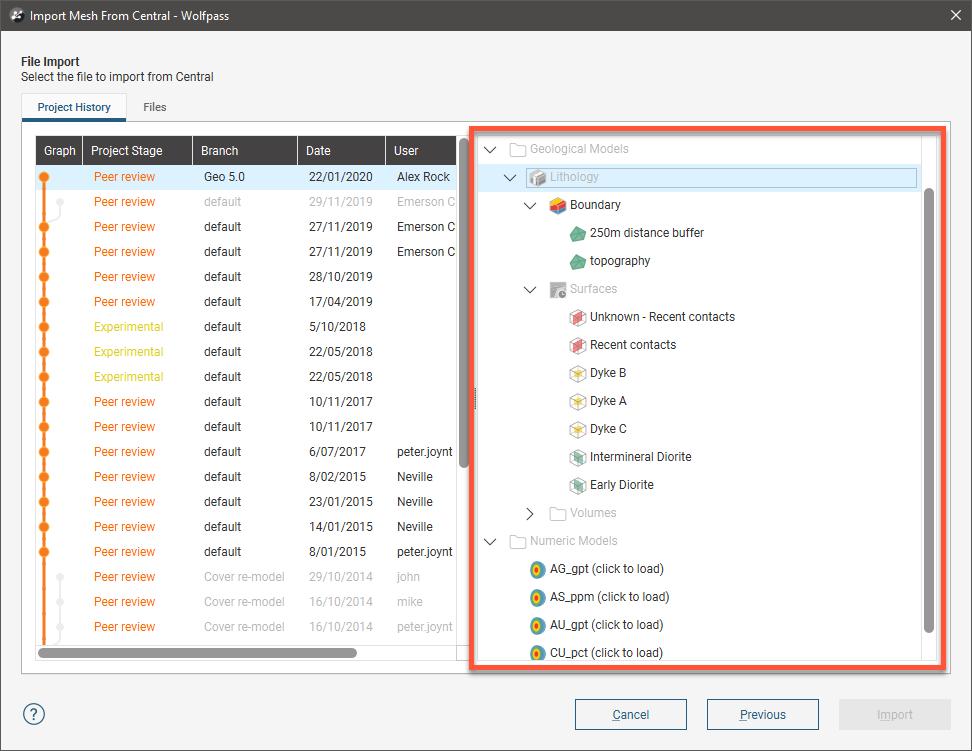
In the Project History tab, select a revision to view its published objects, then click on a model to load its list of objects. The list displayed will depend on the type of data object you are importing. Here, the surfaces in the project are displayed:
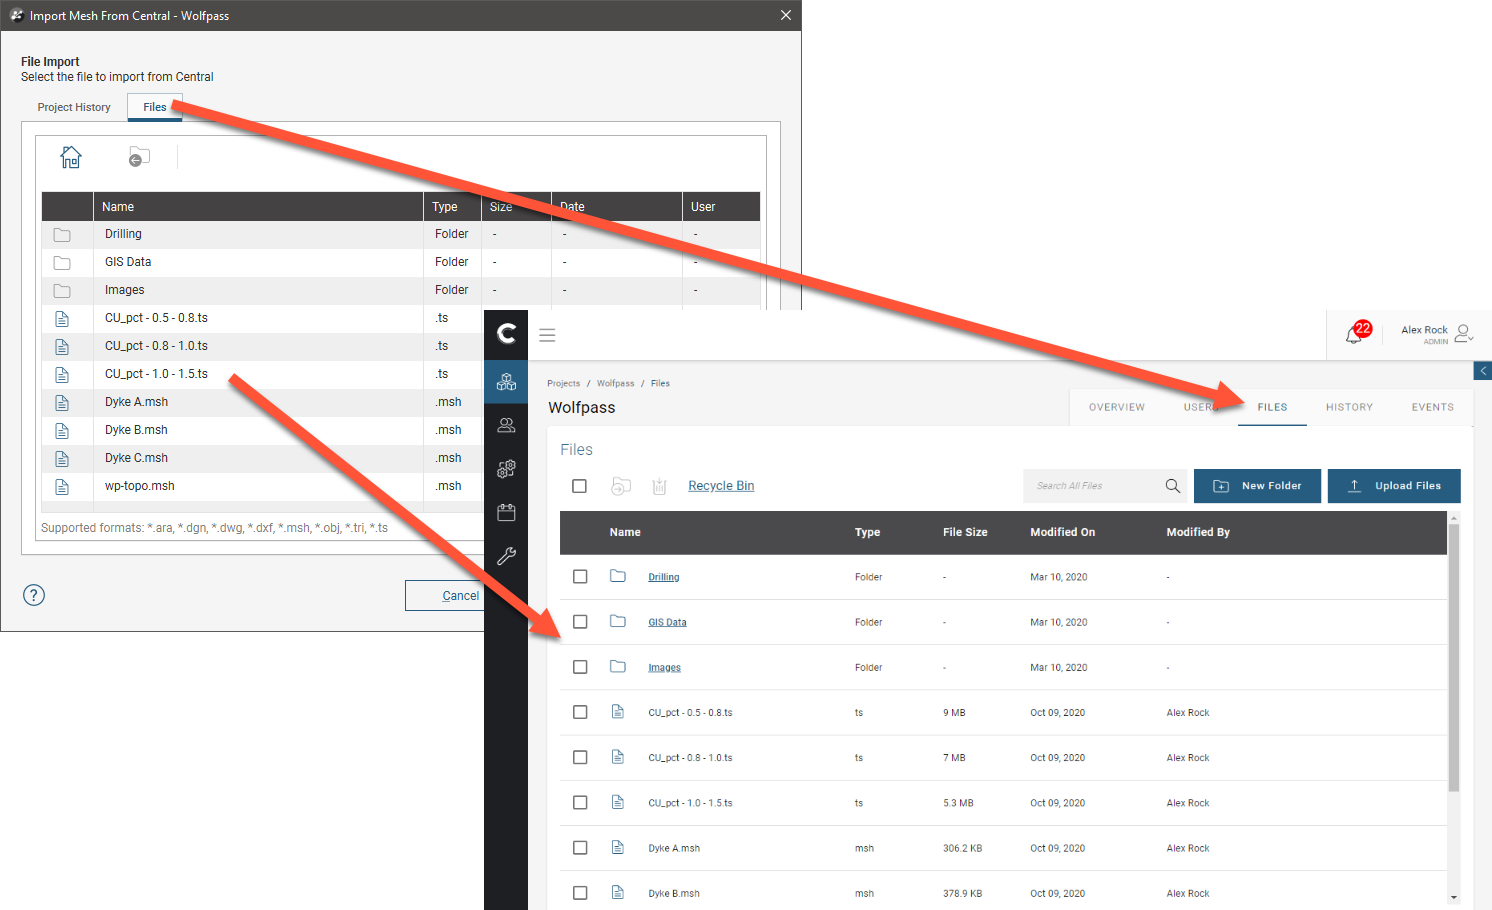
The Files tab shows any files that have been uploaded to the Central project’s Data Room:
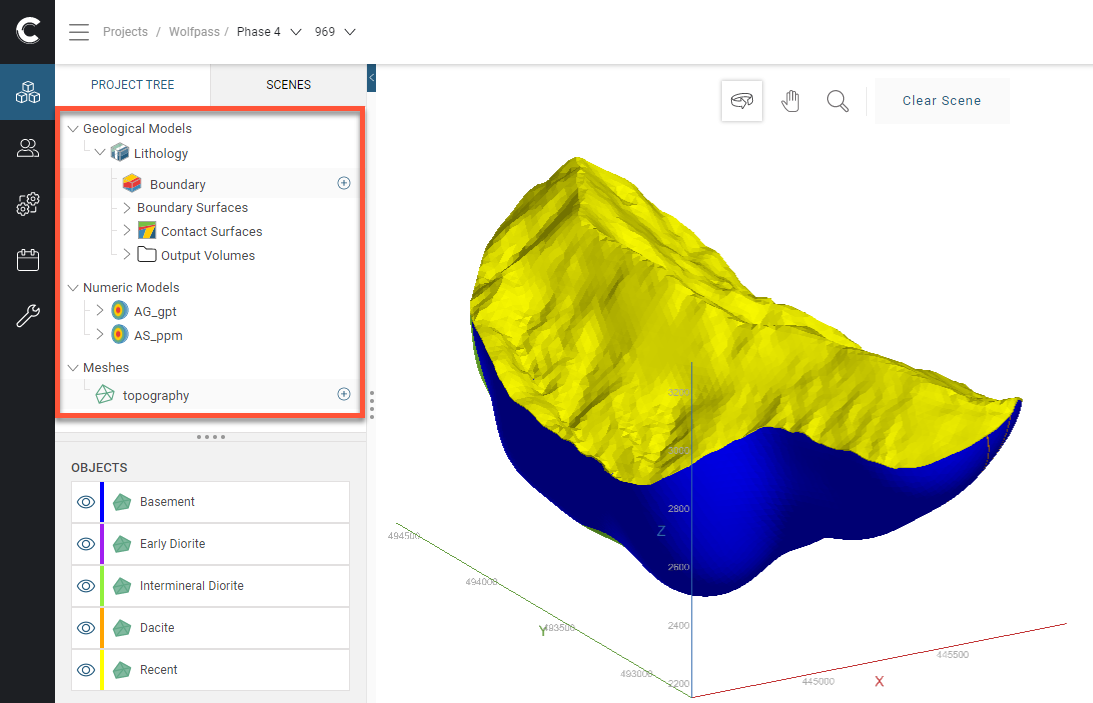
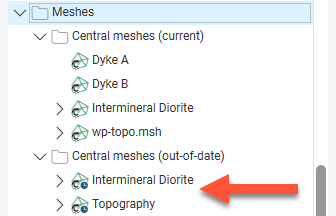
Whether you wish to import files from a revision or from the Data Room, use the Shift and Ctrl keys to select as many objects as required. Click Import to import the objects, which will be saved into the project tree. Objects imported from Central are displayed using a different icon. For example, here the meshes in the Central meshes (current) folder are marked with the Central logo (![]() ), whereas the meshes in the Project meshes folder are not (
), whereas the meshes in the Project meshes folder are not (![]() ):
):

Updating Out-of-Date Objects
Leapfrog Geo also checks to see if the object imported from Central is the latest version of that object. If a newer version of an object is available, the object’s icon will be marked as out-of-date (![]() ):
):
The options for reloading an out-of-date object depend on whether you imported the object from a project’s Data Room or from a project’s history.
When you have imported an object from Central, you have two options for updating out-of-date objects:
- Reload From Central > Reload Latest imports the newest version of the object available in the Central project the object was originally imported from.
- Reload From Central > Reload From History displays the file’s history so you can choose which version you want to use.
Right-click on a data object and choose one of these options.
When you select Reload From History, the colouring of each entry in the project’s history indicates whether or not that object is available in a revision:
- The revision highlighted in green is the one you currently have in your project.
- Revisions in white are those that have a copy of the object you’re reloading.
- Revisions in red do not have a copy of the object you’re reloading.
- The revision highlighted in blue is the one you have currently selected, which will be reloaded if you click OK.
For example, here the revision currently in the project is the one published on the Geo 6.0 branch on 22/04/2021, highlighted in green:

The revision on branch 2021r1 dated 31/05/2021 does not have a copy of this mesh and so is highlighted in red. All revisions in white have a copy of this mesh, and clicking OK will load the copy of the mesh from the Geo 6.0 branch published on 31/05/2021, highlighted in blue.
Appending Rows and Adding Columns to Data Tables
Data tables imported from the Central Data Room also have options for appending new data rows and adding data columns.
See Adding and Updating Data for Existing Tables in the Working With Data Tables topic for a discussion of the differences between reloading data, appending data and adding new data columns.
When you want to append new rows to a table, right-click on the table and select the Append from Latest File Version option. You will be prompted to select the project and file. Once you have selected the data source, the process is the same as described in Adding New Rows to Existing Data Tables.
When you want to add new columns to a table, right-click on the table and select either Import Column from Latest File Version or Import Column from File History. The from Latest File Version option will display the file and you can select additional columns to import, whereas the from File History option lets you select from the file history. In each case, the file’s contents will be displayed and you can select additional columns to import, as described in Importing Additional Columns to a Data Table.
Got a question? Visit the Seequent forums or Seequent support
© 2022 Bentley Systems, Incorporated