
Variable Z Sub-Blocked Models
Fully sub-blocked models and variable Z sub-blocked models were introduced in Leapfrog Geo 2023.1. Sub-blocked models from earlier versions of Leapfrog Geo will be upgraded as follows:
- A sub-blocked model that has the Variable height setting enabled will be opened in Leapfrog Geo 2023.1 and later as a variable Z sub-blocked model.
- A sub-blocked model that does not have the Variable height setting enabled will be opened in Leapfrog Geo 2023.1 and later as a fully sub-blocked model.
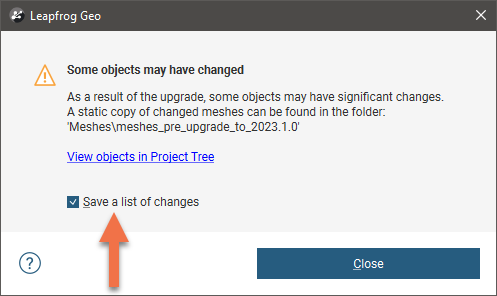
Fully sub-blocked models do not support using open meshes as triggers. For this reason, when a sub-blocked model is upgraded to a fully sub-blocked model, any open mesh used as a trigger will be removed from the block model and Leapfrog Geo will display a message after the upgrade. Click on the View objects in Project Tree link to highlight objects that may have changed, and enable the option for saving a list of changes:
You will then be prompted to save a text file on your local hard drive. Open this file to see identify any meshes that have been removed from the block model:

Grouped meshes can be used as triggers and if you want to use an open mesh as a trigger, first add it to a grouped mesh.
Variable Z sub-blocked models are fully sub-blocked in X and Y, but in Z the size of the sub-blocks varies to exactly follow triggering boundaries. Variable Z sub-blocked models can be exported in CSV and Datamine formats.
This topic describes:
- Creating a Variable Z Sub-Blocked Model
- Selecting Sub-blocking Triggers
- Selecting Evaluations
- Exporting Variable Z Sub-blocked Models
Creating a Variable Z Sub-Blocked Model
To create a new variable z sub-blocked model, right-click on the Block Models folder and select New Block Model. In the window that appears, select the Variable Z Sub-blocked Model option.
The New Variable Z Sub-blocked Model window will appear, together with a set of controls that will help you set the size, location and orientation of the model in the scene:
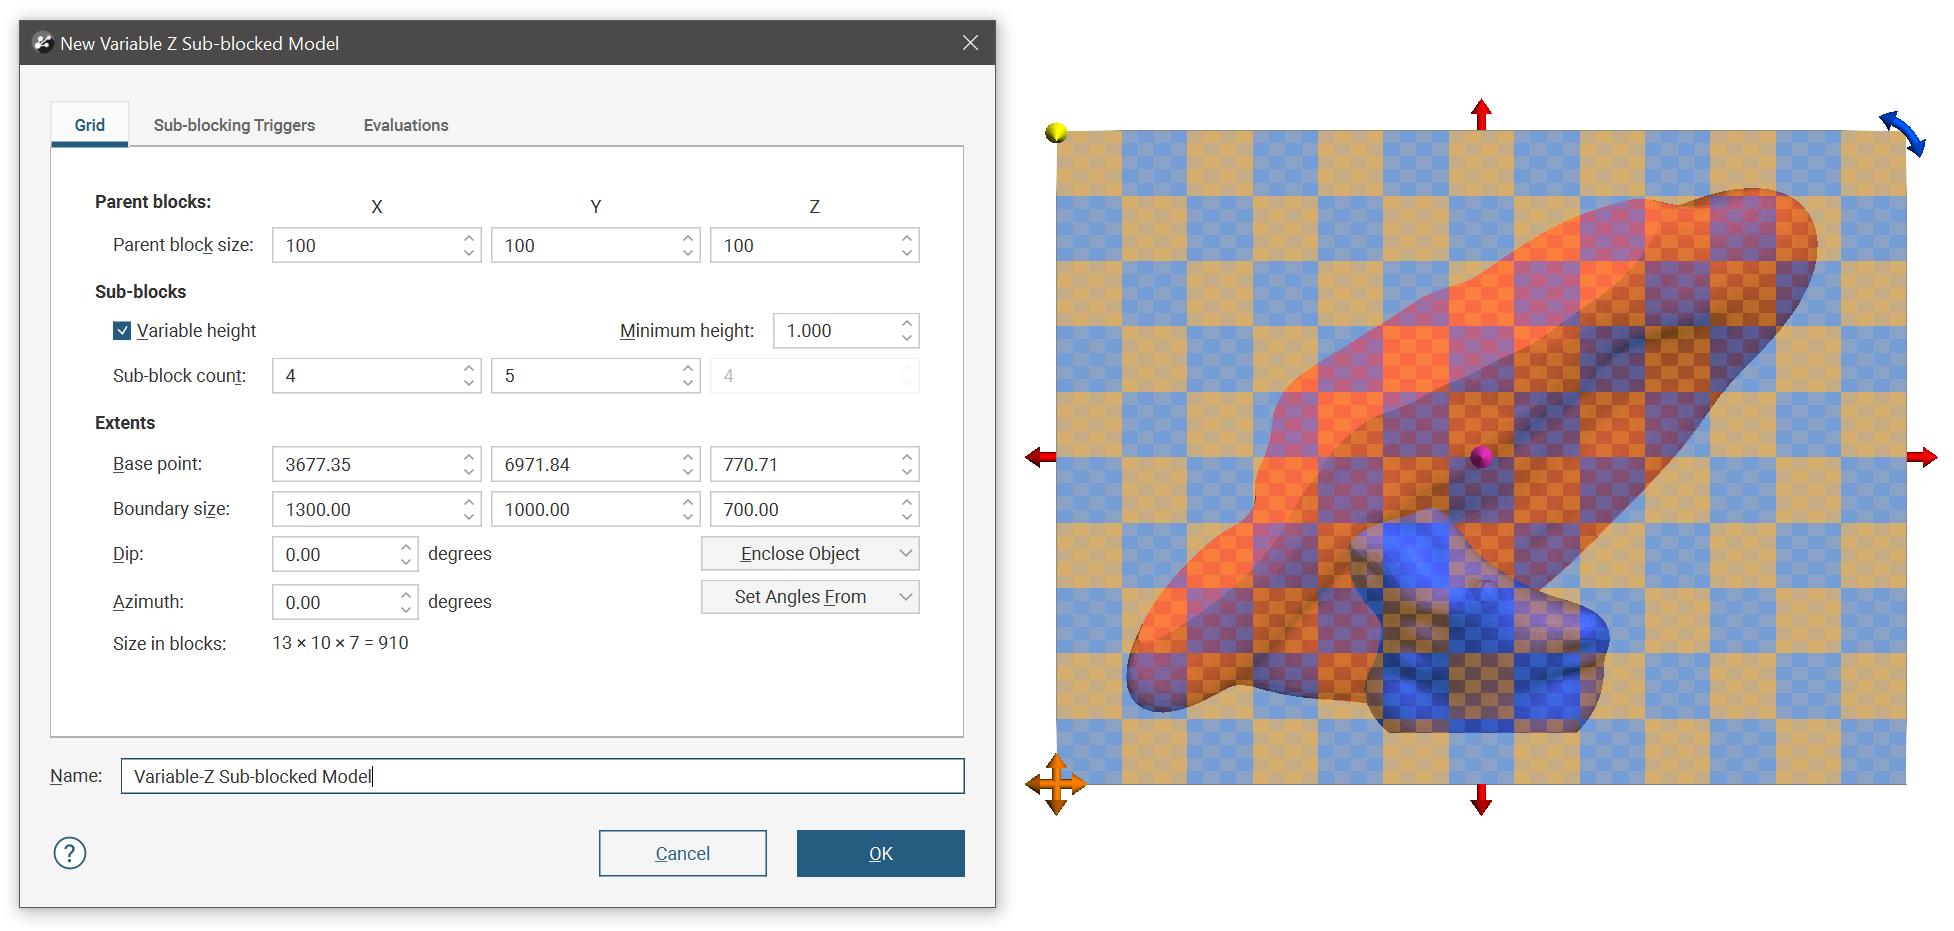
The block model is defined from its Base point, and the reference centroid is the Base point plus one half the Block size. Block models extents always include complete blocks, even when sub-blocking, and when changes are made to the Block size parameter, the model’s extents will be enlarged to fit the Block size.
It is a good idea to set the sub-blocked model’s extents from another object in the project, selecting the required object from the Enclose Object list.
The Dip and Azimuth set the rotation of the model. If you know the values you wish to use, enter them in the New Variable Z Sub-blocked Model window. You can also:
- Use the controls in the scene to set the orientation. The yellow handle adjusts the Dip and the blue handle adjusts the Azimuth.
- Use either the slicer or the moving plane to set the orientation. To do this, add the slicer or the moving plane to the scene and adjust the orientation. Then select the object to use from the Set Angles From list.
If you have set the extents from another object and then rotated the model, you will need to reset the extents by selecting the object again from the Enclose Object list.
The cross-hatched pattern displayed in the scene is useful in understanding how the parent blocks will be divided up into sub-blocks. These properties can be changed by adjusting the Parent blocks and Sub-blocks settings. The Sub-block count is the number of blocks each parent block is divided into when it intersects a trigger. The number of blocks in the Z axis can be:
- A variable value, based on when the parent blocks intersect triggers. Tick the Variable height box and set a Minimum height, if required.
- A fixed value. Untick the Variable height box and set the Z value required.
Here the block size is 100 and the sub-block count is fixed at 4 x 3 x 2. Note the regular size and placing of the sub-blocks.

This same model has been sub-blocked with a sub-block count of 4 x 3 with Variable height ticked and a Minimum height of 10.0. The sub-blocks are regularly sized and placed in the X-Y plane, but the Z height of the sub-blocks are not regular in size or placement. The height of a block is not divided into multiple sub-blocks, but the single block can be any height between 0 and the block height. The variable height block is measured inward from the top or the bottom edge of the block, making variable height blocks grow up and down from the block boundary, but sub-blocks will not hover between the top and bottom edges of parent blocks.
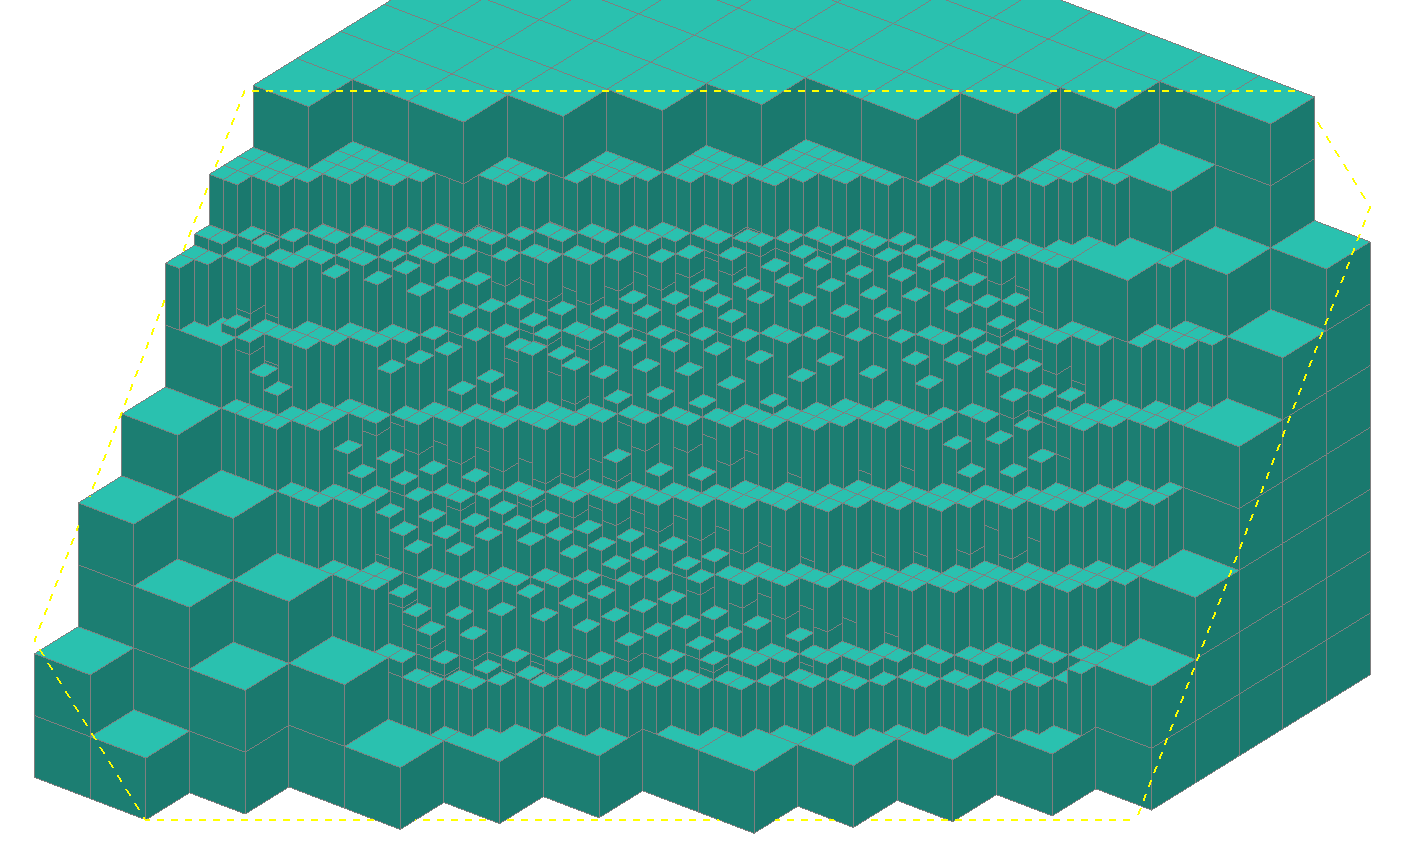
When Minimum height is increased, all the sub-blocks are at least as tall as the Minimum height.
Because the variable and minimum heights are measured from the top and bottom edges of the parent block, block heights will be one of:
- 0 (no sub-block)
- exactly the Minimum height
- somewhere between the Minimum height and the block height minus the Minimum height
- exactly the block height minus the Minimum height
- exactly the block height.
If the Minimum height is more than half the block height there will not be a (c) range of sub-block heights.
In this example where the block height is 16 and the Minimum height is 6, if the triggering boundary is:
- between 0 and 3 there will be no sub-block
- between 3 and 6, the block will be 6 high
- between 6 and 10, the sub-block will be between 6 and 10 as per the triggering boundary
- between 10 and 13, the sub-block will be 10 high
- between 13 and 16, the sub-block will be 16 high
Once you have set sub-blocking triggers and evaluations, enter a Name for the variable z sub-blocked model and click OK. The model will appear under the Block Models folder. You can make changes to it by double-clicking on it.
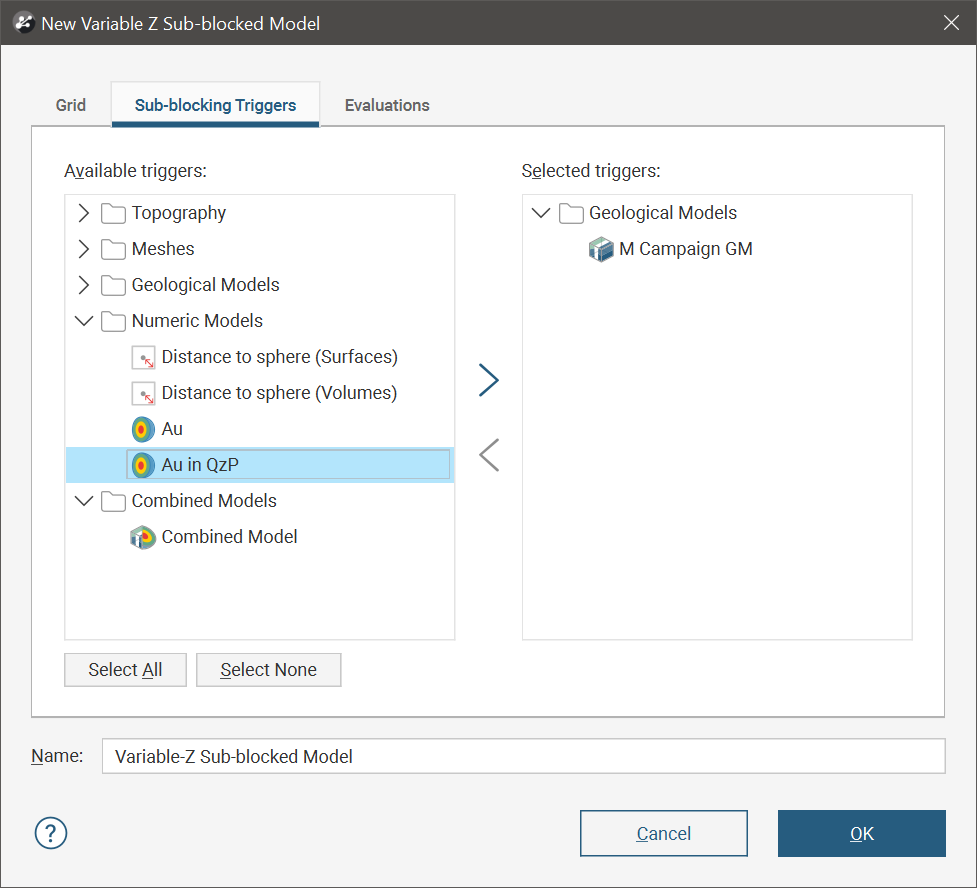
Selecting Sub-blocking Triggers
Click on the Sub-blocking Triggers tab to select triggers from the volumes available in the project. Triggers can be:
- Geological model volumes
- Combined model volumes
- Interpolant volumes
- Open meshes
All suitable objects in the project will be displayed in the Available triggers list.
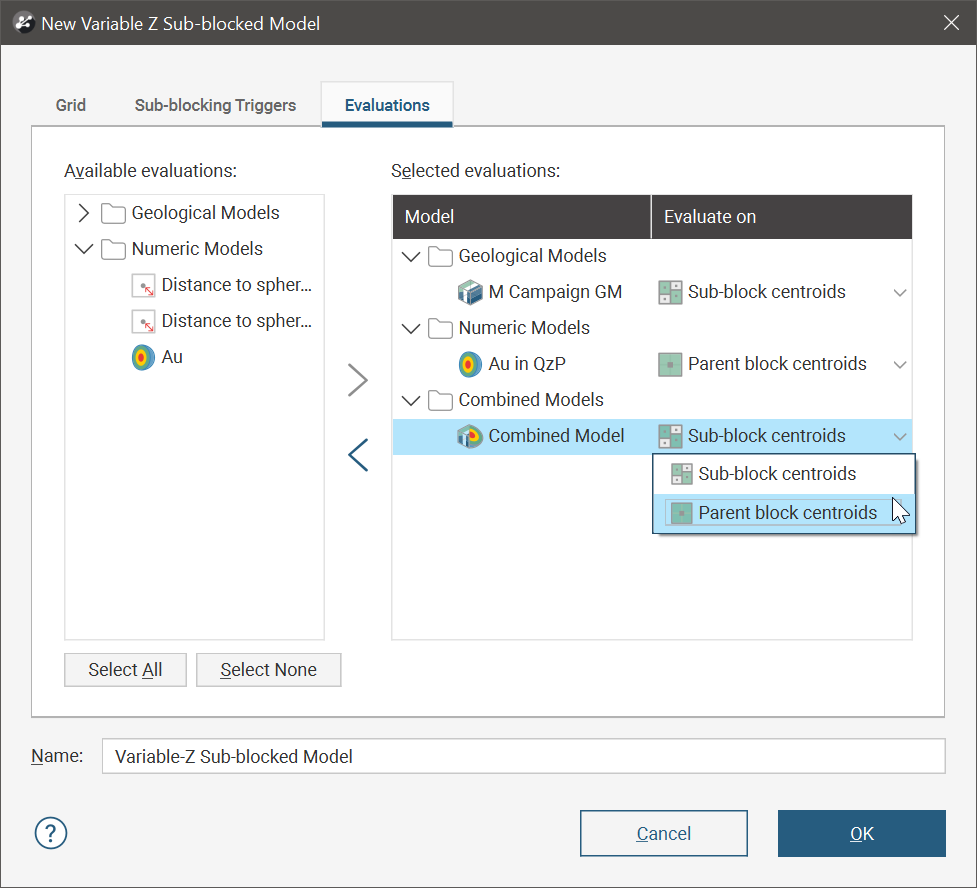
Selecting Evaluations
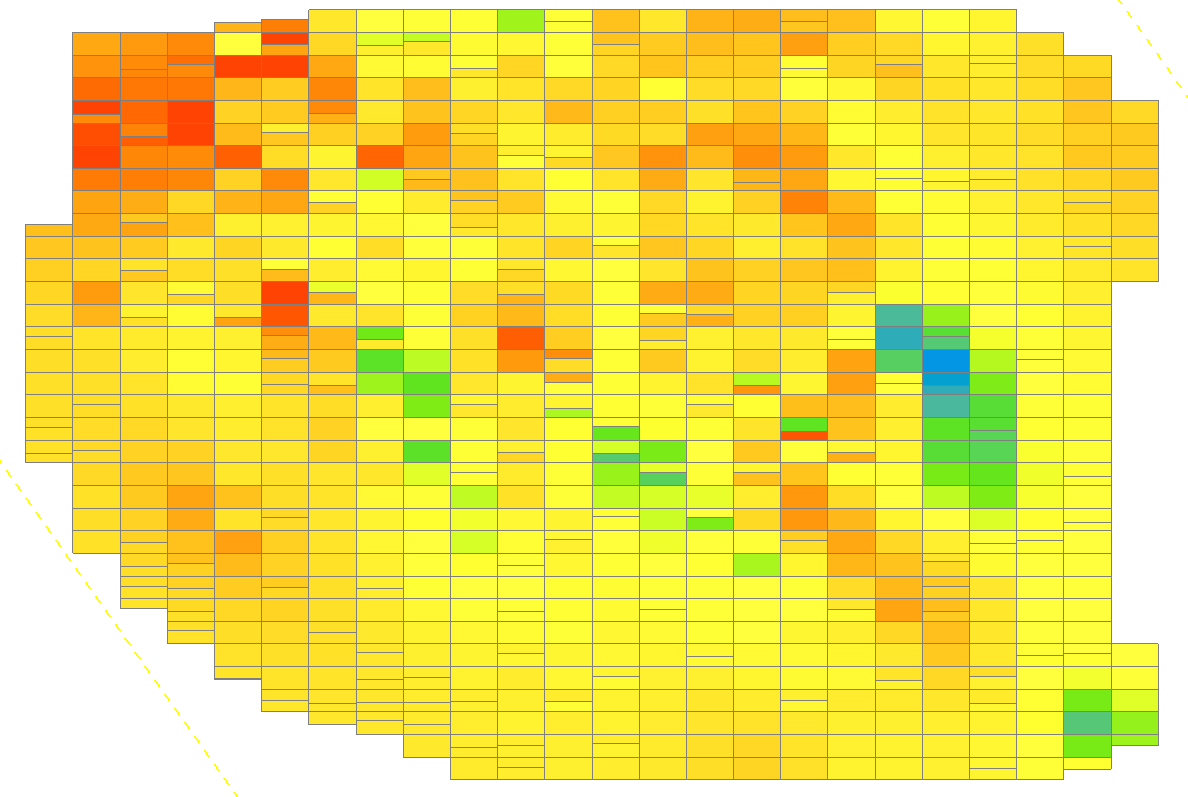
Variable z sub-blocked models can be evaluated against geological models, interpolants and distance functions in the project. To do this, click on the Evaluations tab. All objects available in the project will be displayed. Move the models you wish to use into the Selected evaluations list, then select whether to Evaluate on the Sub-block centroids or on the Parent block centroids.
Exporting Variable Z Sub-blocked Models
Variable Z sub-blocked models can be exported in CSV and Datamine formats. See:
Got a question? Visit the Seequent forums or Seequent support
© 2023 Seequent, The Bentley Subsurface Company
Privacy | Terms of Use