
Object Processing
Objects are added to the processing queue when you make changes to them via the project tree. With many objects in a project, changes made to them result in changes to other objects; those dependent objects will also appear in the queue.
The processing button next to the Leapfrog Geo menu shows how many tasks Leapfrog Geo is currently processing:
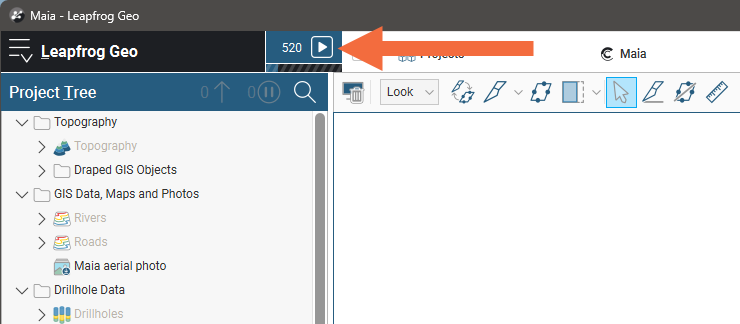
When no objects are being processed, the processing button will be black.
To view the objects in the processing queue, click the processing button or press Alt + P.
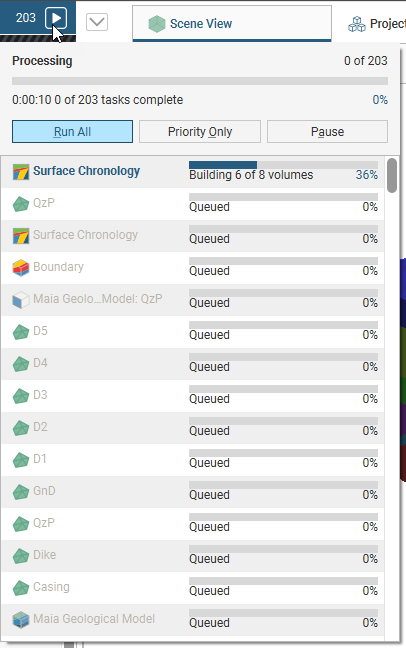
- To pause processing, click the Pause button in the processing queue or press Ctrl + P.
- To resume processing, click the Pause button or the Run All button or press Ctrl + P.
You can close a project while it is still running tasks. When you next open the project, the remainder of the tasks in the processing queue will be processed.
In the project tree itself, objects that are being processed are indicated using blue or grey text.
- Objects currently being processed are shown in blue.
- Objects displayed in grey are waiting in the queue.
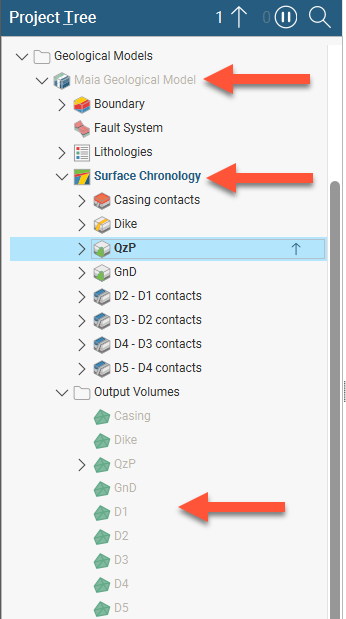
For example, here the Maia Geological Model is being updated:
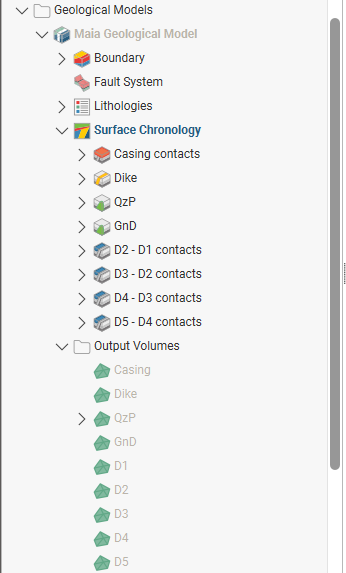
The Surface Chronology is currently being processed and so is shown in blue. The objects in the Output Volumes folder and the geological model itself are shown in grey:
- The Output Volumes folder objects are currently queued because they are dependent on the surface chronology.
- For the geological model itself, processing cannot be completed until all its child objects have been processed.
When a project contains only a small amount of data, all changes can be processed when they are made without interrupting your work. As a project grows larger and more complex, you may wish to use the different processing controls to determine when changes you make to objects are processed. There are two ways to control when objects are processed, by prioritising some objects or by freezing objects; these options are discussed below. Experiment with prioritising and freezing objects to get an idea of how they work; this will help in determining the approach that best suits your projects as you add more data and models to them.
The rest of this topic describes how to control processing via freezing and prioritising objects and how to find more information about processing errors. It is divided into:
Prioritising Objects
Objects can be prioritised so that they and their inputs are processed before other objects. To prioritise an object, right-click on it the project tree and click the Prioritise button (![]() ). Prioritised objects are marked in the project tree with an arrow:
). Prioritised objects are marked in the project tree with an arrow:
Prioritising an object is useful when you are editing it and wish to view the effect of changes without reprocessing all objects in the project. For example, you may be modifying a surface that is used for a model boundary. You can prioritise the surface, then run it each time you make changes; the surface and objects it is dependent on will be processed before any other objects are processed.
To limit processing of other objects further, you can set the processing queue so that only prioritised objects are processed. If your project has a lot of objects that are dependent on the object you are working on, this is useful for limiting the amount of time Leapfrog Geo dedicates to processing. To restrict processing in this way, click the processing button, then click Priority Only:
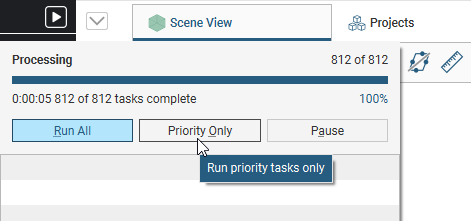
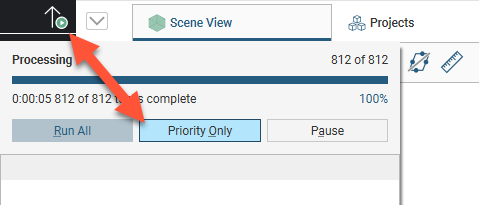
The processing button will change to show that only priority tasks will be run:
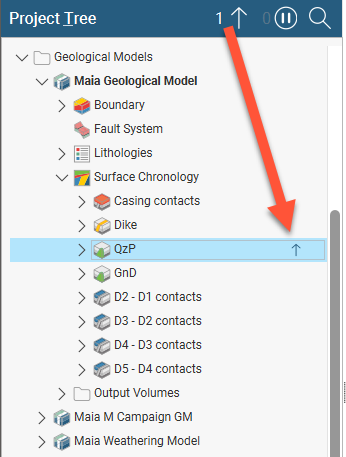
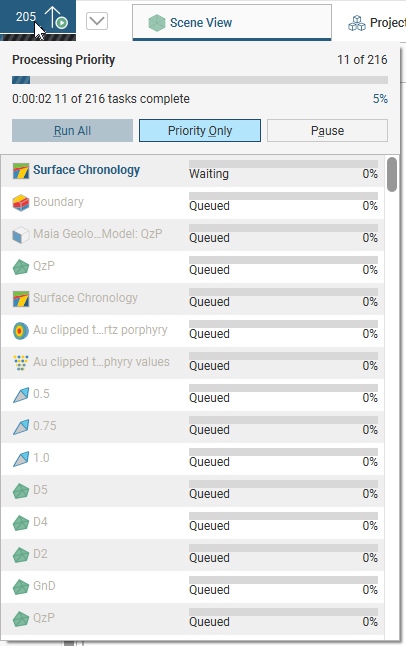
When changes are made to the prioritised object, the only objects processed will be those needed to make the prioritised object valid. For example, here the QzP surface has been prioritised. The geological model itself, its surface chronology and its output volumes will not be updated when the prioritised surface is updated:
These nonprioritised objects will remain in the processing queue in Waiting and Queued states:
The number of objects that have been prioritised is indicated by the button at the top of the project tree (![]() ):
):
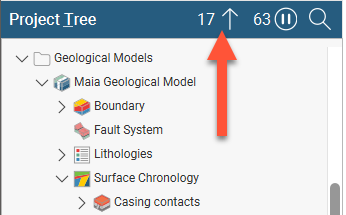
To view prioritised objects, click the button. All prioritised objects will be selected and displayed in the project tree.
To reset a priority object, right-click on it and click the Clear Priority button (![]() ).
).
Click the processing button, then click Run All to resume normal processing.
Freezing Objects
Some objects can be frozen so that they will not be processed, which is a useful way of working on one object without having all linked objects reprocess upon each change. For example, you may wish to modify a surface in a geological model, in which case you can freeze all objects other than the surface.
You can display frozen objects in the scene, change how they are displayed and export them, but you cannot make changes to the objects themselves.
Some objects become frozen because they are restricted objects created using features only available in extensions. Frozen restricted objects can only be unfrozen if you switch to using the relevant extension. See Restricted Objects in The Project Tree for more information.
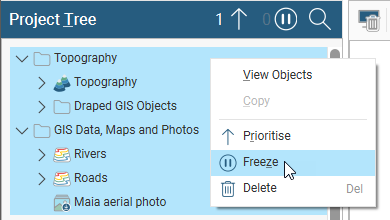
To freeze an object, right-click on it the project tree and click the Freeze button (![]() ). You can also quickly freeze multiple objects by selecting them and then right-clicking on the selection:
). You can also quickly freeze multiple objects by selecting them and then right-clicking on the selection:
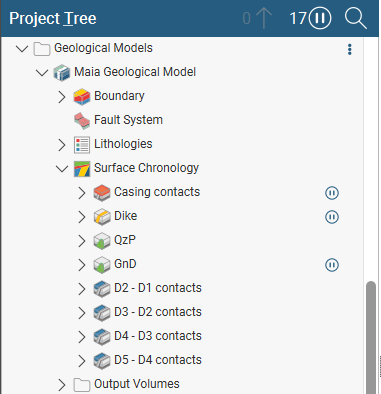
Frozen objects are marked in the project tree with a pause button (![]() ). Here, some of the contact surfaces have been frozen so that work can be done on the QzP surface without processing all other changes to the model:
). Here, some of the contact surfaces have been frozen so that work can be done on the QzP surface without processing all other changes to the model:
The number of objects that have been frozen is indicated by the button at the top of the project tree (![]() ):
):

To view frozen objects, click the button. All frozen objects will be selected and displayed in the project tree.
Correcting Processing Errors
If processing of an object fails, all other objects dependent on that object will also fail. Open the processing queue to view the errors. To inspect the source of error, right-click on the object in the queue and select Show Error:
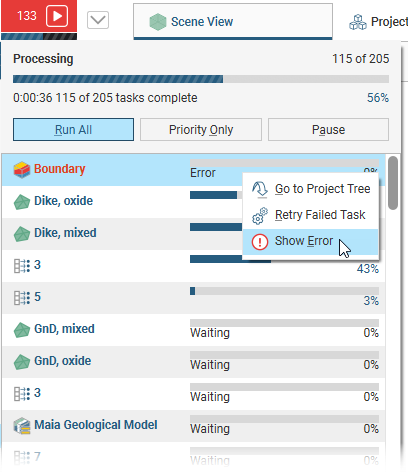
The object’s Properties window will be opened with the Errors tab displayed. The information in this tab may be helpful in fixing the error.