
The KORE Spector Geo Interface
This topic describes how to set up and use the KORE Spector Geo core photo interface. It is divided into:
- Setting Up the KORE Spector Geo Interface
- Using the KORE Spector Geo Interface
- Removing the KORE Spector Geo Link
Setting Up the KORE Spector Geo Interface
Before you can view core photos, you must first set up the link between Leapfrog Geo and the KORE Spector Geo database. To do this, right-click on the Drillhole Data folder and select Add Core Photo Link. In the window that appears, select KORE Spector Geo and click OK.
The KORE Spector Geo Settings window will appear.
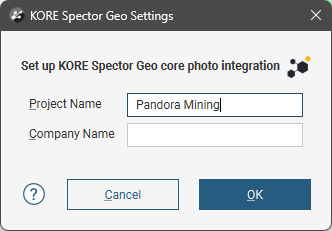
Enter the information required, being sure that it matches that in KORE Spector Geo.
Click OK to save the information. The KORE Spector Geo Link button (![]() ) will appear in the toolbar:
) will appear in the toolbar:

A link will also appear in the project tree as part of the Drillhole Data folder:
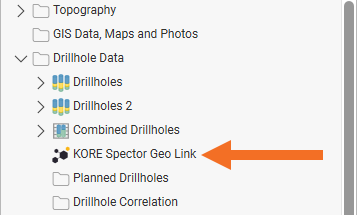
You can edit the link by double-clicking on it.
Using the KORE Spector Geo Interface
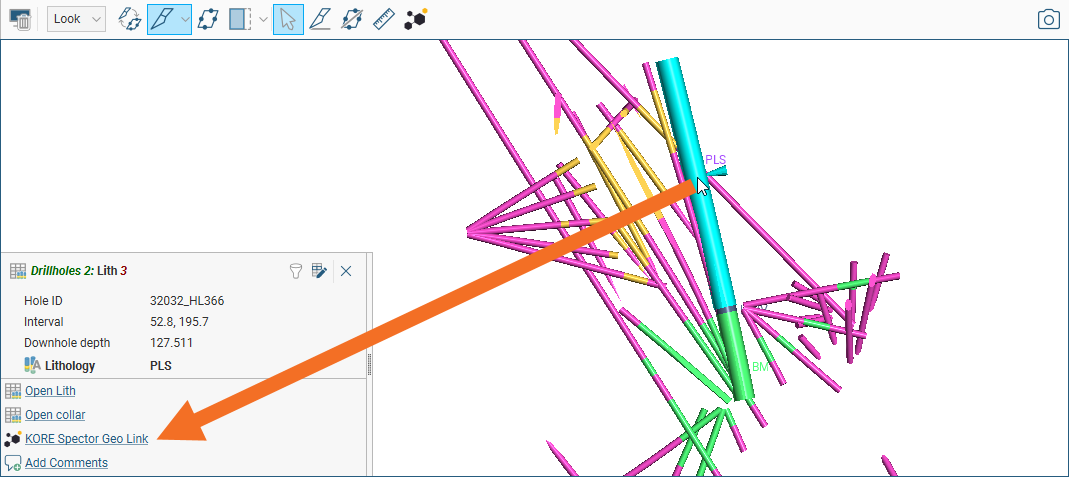
To view core photos, click on a drillhole in the scene, then click on the KORE Spector Geo Link button in the window that appears:
Your browser will be launched and you will be prompted to log in to the KORE Spector Geo database. Remember to allow the browser to save the details so that you will not be prompted to log in each time you wish to view a photo.
The KORE Spector Geo Link button (![]() ) in the toolbar allows you to view core photos in your browser in rapid succession. To do this, first make sure you are already logged into the database. Then click on the KORE Spector Geo Link button (
) in the toolbar allows you to view core photos in your browser in rapid succession. To do this, first make sure you are already logged into the database. Then click on the KORE Spector Geo Link button (![]() ) to enable the rapid viewing mode. Each time you click on an interval in the scene, the core photo link will open in your browser.
) to enable the rapid viewing mode. Each time you click on an interval in the scene, the core photo link will open in your browser.
Position your browser window alongside the Leapfrog Geo scene window to view drilling data in Leapfrog Geo alongside the core photo data.
To disable rapid viewing mode, click on another tool in the toolbar.
Removing the KORE Spector Geo Link
To remove the KORE Spector Geo link, right-click on it in the project tree and select Delete.