
Publishing Data to Seequent Evo
See the Leapfrog Geo/Seequent Evo Data Flow topic for an overview of importing, publishing and reloading Evo data.
This topic discusses the process of publishing to Seequent Evo. It is divided into:
- Starting the Publishing Process
- Setting a Coordinate System
- Invalid Data Entries
- The Publishing Window
- Starting the Publishing Process
- Publishing Block Models
- Republishing Revised Items
- Handling Publishing Errors
For information on importing data from Evo, see the Importing Data from Seequent Evo topic.
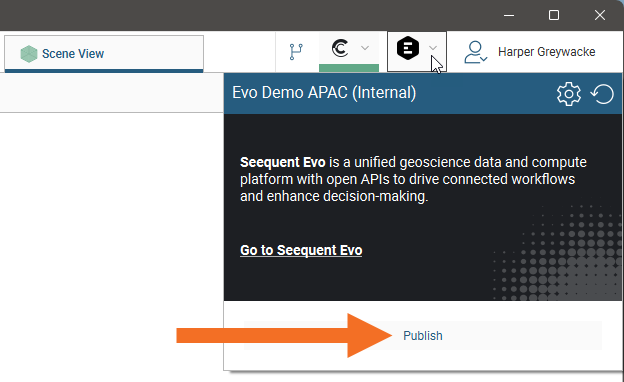
Not all data objects in a Leapfrog Geo project can be published to Seequent Evo. The easiest way to find out what objects in a project can be published to Evo is to click on the Evo menu next to the user ID menu and then click Publish:
This opens the Publish to Seequent Evo window, which lists all the objects in the project that can be published to Evo along with their Evo data type:
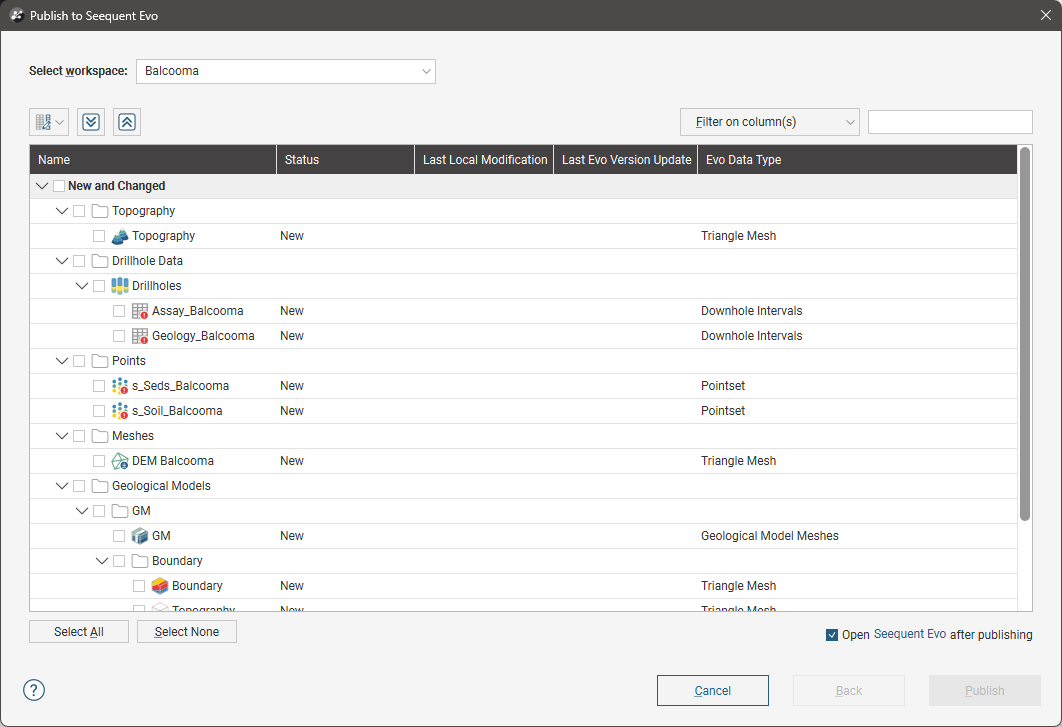
You may need to select an Evo workspace before you can scroll through the list.
Right-click on individual objects in the project tree to find out if an object can be published to Evo. The Publish to Seequent Evo option appears for those that can:
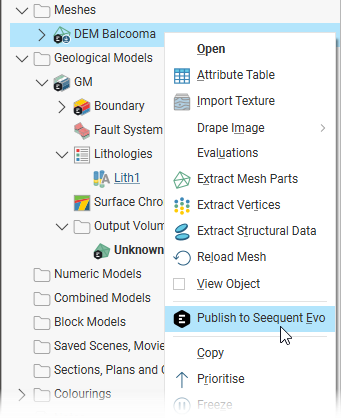
If you right-click on a project tree item and Publish to Seequent Evo does not appear in the menu, it is not an object that can be published to Seequent Evo.
Some Leapfrog Geo project tree folders also have a Publish to Seequent Evo menu. This means that some of the objects stored in that folder can be published to Evo. To find out what objects in that folder can be published, choose Publish to Seequent Evo and those objects that can be published will be listed in the window that appears.
Starting the Publishing Process
There are two ways to start publishing data to Evo:
- From the Evo menu next to the user ID menu. With this method, you can bulk publish all objects in the project that are able to be published to Evo. To do this, click on the Evo menu and then click Publish. This opens the Publish to Seequent Evo window, listing all the objects in the project that can be published to Evo. None of the objects will be selected.
- From the project tree. With this option, you can create a small set of objects you wish to publish or you can publish, say, all objects in a folder. Click on objects and/or project tree folders, then right-click on the items and select Publish to Seequent Evo. This opens the Publish to Seequent Evo window with the objects listed and selected for publishing. If one of the objects that you originally selected cannot be published to Evo, it will not appear in the list.
Setting a Coordinate System
The coordinate reference system that objects are published with depends on that set for the Leapfrog Geo project.
Setting a coordinate system for your project is recommended when working in Seequent Evo, and if one is not set for the project, you will be prompted to set one when you try to publish to Evo:
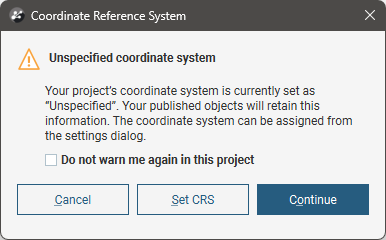
The Coordinate System setting is primarily an informational field. The project coordinate system should be set when the project is created and all the data imported into Leapfrog Geo should use the coordinate system that has been decided on for the project. Leapfrog Geo will not convert any data that is imported with references using a different coordinate system into the project coordinate system, nor does changing the project coordinate system perform a conversion of the data within Leapfrog Geo from the previous coordinate system to the new coordinate system.
Click the Set CRS button; the Settings > Coordinate System window will open where the coordinate system can be applied to the current project. See Coordinate System Settings for more information.
An object’s CRS information is published along with it the first time that object is published to Evo. If an object is initially published without CRS information or if the CRS information changes, it can be published to Evo and the CRS information will be updated in Evo.
Invalid Data Entries
If any of the objects selected for publishing contain invalid entries, a warning will be displayed listing those objects. For example, here there are tables in a drilling dataset that contain invalid entries:
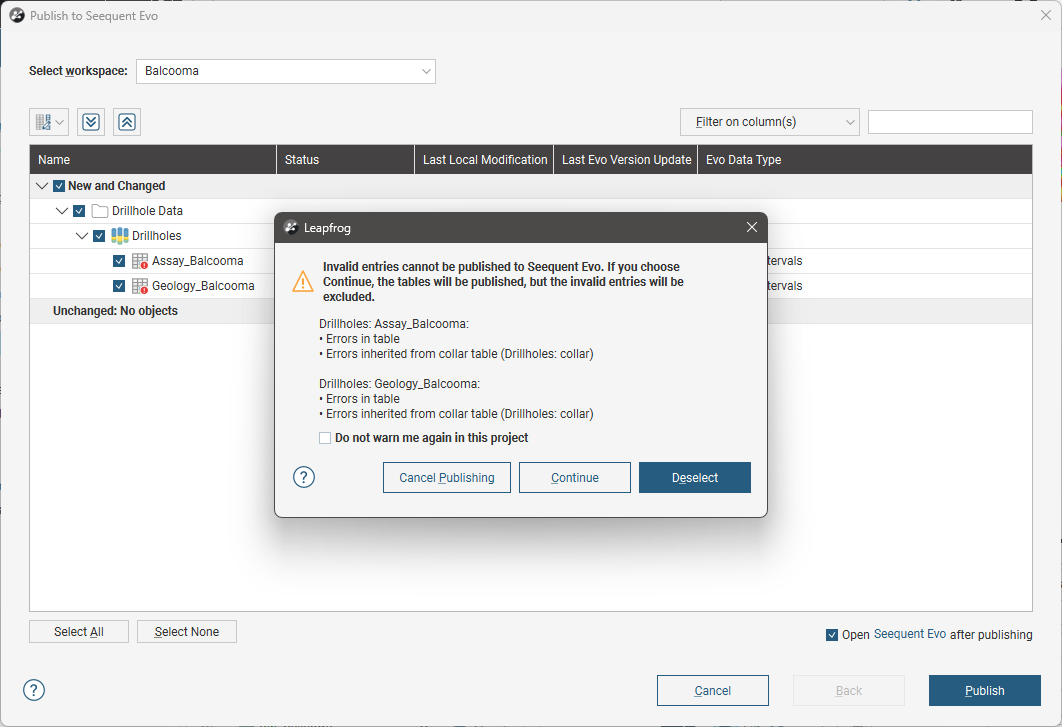
This warning does not mean that those objects cannot be published to Evo, but if you do go ahead with publishing those objects, the invalid entries in those tables will not be included.
If selected data objects contain invalid entries, you can:
- Cancel Publishing. Choose this option if you wish to correct errors in the data. This closes the Publish to Seequent Evo window without publishing any objects.
- Continue. Choose this option if you are satisfied with going ahead with publishing the selected data objects without the invalid entries. The warning window will be closed without closing the Publish to Seequent Evo window. You can then continue with publishing the selected objects.
- Deselect. Choose this option if you decide not to publish the objects that have invalid entries. The warning window will be closed without closing the Publish to Seequent Evo window but objects that contain invalid entries will be deselected. You can then continue with publishing the selected objects.
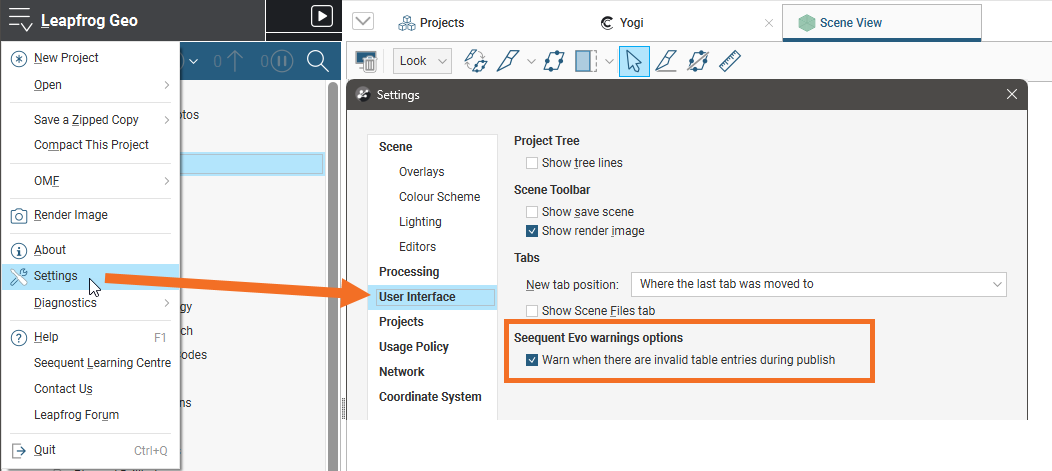
If you no longer wish to see this warning in the currently open Leapfrog Geo project, enable the tickbox. If you later decide you want to see this message when publishing data objects that contain invalid entries, you can enable it via the Settings window. Click on the Leapfrog Geo menu, select Settings, then click on the User Interface tab:
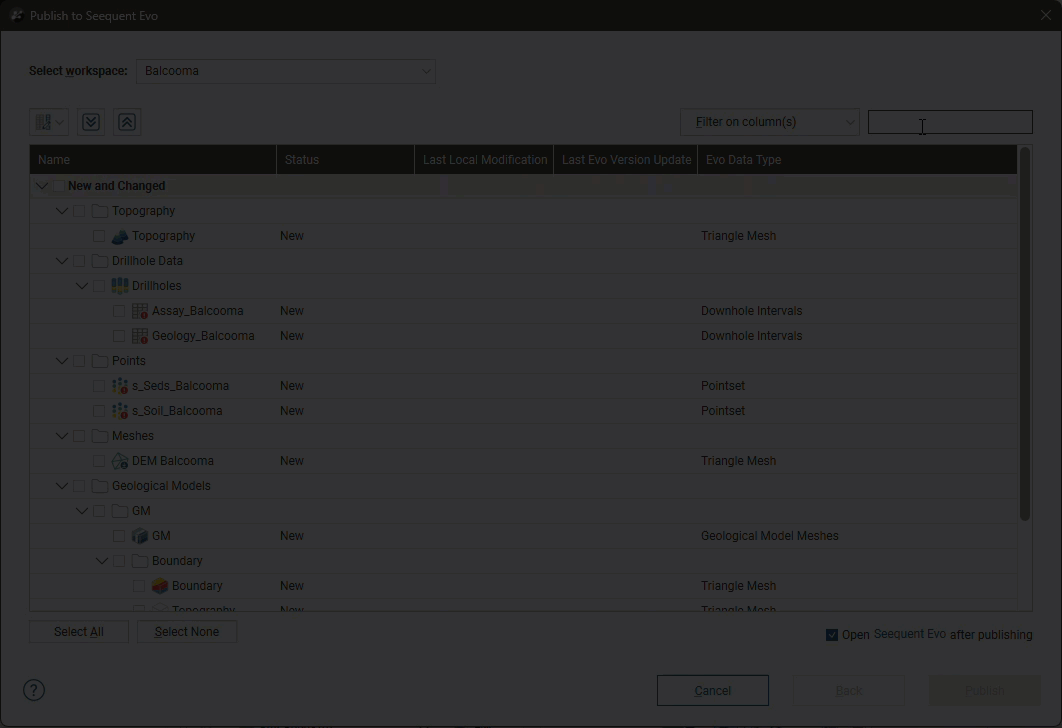
The Publishing Window
Once you have decided how to handle any invalid entries, select the workspace you will publish to; you will not be able to scroll through the objects list without doing so.
If a workspace you expect to see is not listed, click on the Evo menu next to the user ID menu and click the Refresh button (![]() ).
).
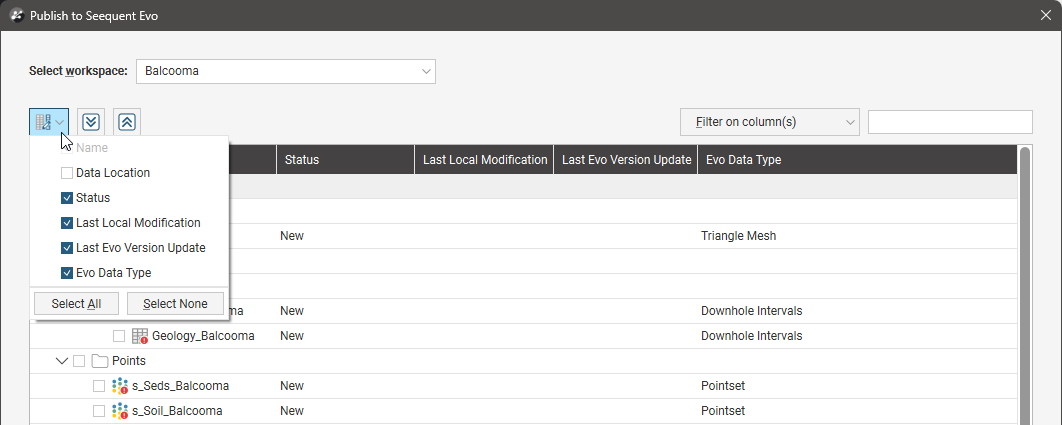
With the column button (![]() ), you can choose which columns appear in the table, which can assist in selecting data to publish when the project contains a lot of data.
), you can choose which columns appear in the table, which can assist in selecting data to publish when the project contains a lot of data.
The expand all (![]() ) and collapse all (
) and collapse all (![]() ) buttons above the list and the expand (
) buttons above the list and the expand (![]() ) and collapse (
) and collapse (![]() ) buttons in the list are useful for finding specific items, especially when there are a lot of objects that can be published or if you’re focusing on publishing one type of object.
) buttons in the list are useful for finding specific items, especially when there are a lot of objects that can be published or if you’re focusing on publishing one type of object.
You can also filter the list to limit the number of objects displayed. For example, here we have used the filter to restrict the list to the term ‘mesh’, which shows all objects that include ‘mesh’ in their names or whose Evo data type contains ‘mesh’:

Publishing notes:
- Geological model contact surfaces and fault surfaces can be published to Evo, but they will only appear in this window if they are active in the geological model.
- When publishing sections, the geometry of the evaluations is published, not the layout.
- Curved long sections cannot be published to Evo.
You can choose which columns are used to filter the list by clicking on Filter on columns. When no columns are selected, the filter is applied to only object names, which is why the first filter applied returns no objects:
When the Evo Data Type column is selected, the data types with ‘mesh’ in their names are listed.
Note that filtering out objects in this way does not deselect them, if they were selected before the filter was applied. The actual number of selected objects will always be displayed below the list. For example, the list has been filtered to show only two objects but 10 are selected:

If you wish to view the published objects in Seequent Evo once publishing is complete, enable the Open Seequent Evo after publishing option. Seequent Evo will open in your web browser and display the destination workspace.
Once you have selected the objects you wish to publish, click the Publish button. Progress will be displayed in the processing queue.
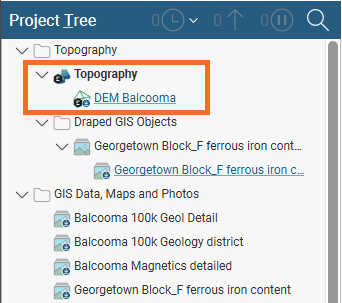
Objects in a project that have been published to Evo are indicated in the project tree using an Evo badge, which is the case for the Topography and DEM Balcooma objects here:
Objects that have already been published to one workspace cannot be published to another. If you wish to publish an object to another workspace, you must either:
- Sign in to Seequent Evo at evo.seequent.com
 and delete the object from the workspace. In Leapfrog Geo you will then be able to publish the object to a different workspace.
 - In Leapfrog Geo, make a copy of the published object and publish that copy to a different workspace.
Publishing Block Models
If the list of objects you are publishing includes one or more block models, each block model will require an extra step in the publishing process. This is to assign which evaluations are to be mapped to the BlockSync block model stored in Seequent Evo.
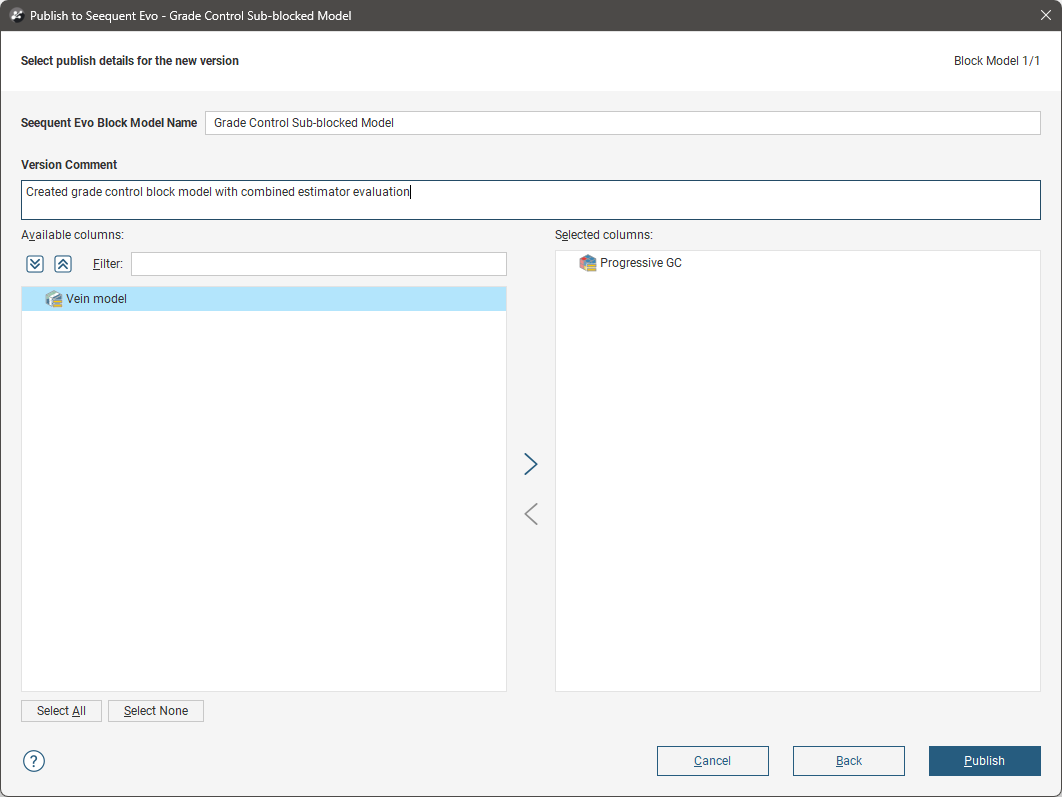
Fore more information on publishing block models to Seequent Evo, see Publishing an Updated Model in the BlockSync integration help.
Republishing Revised Items
When you have made changes to data in your Leapfrog Geo project, those changes need to be published to Evo; they are not automatically republished when the data changes in Leapfrog Geo.
To publish changes to Evo, you can start the process using either of the methods described in Starting the Publishing Process above. When you have made changes to a lot of different data objects, it is often easier to use the Evo menu bulk publish option as that provides you with a better overview of what has changed in the project and what you might want to republish.
The Publish to Seequent Evo window categorises objects into those that have changed and those that haven’t:
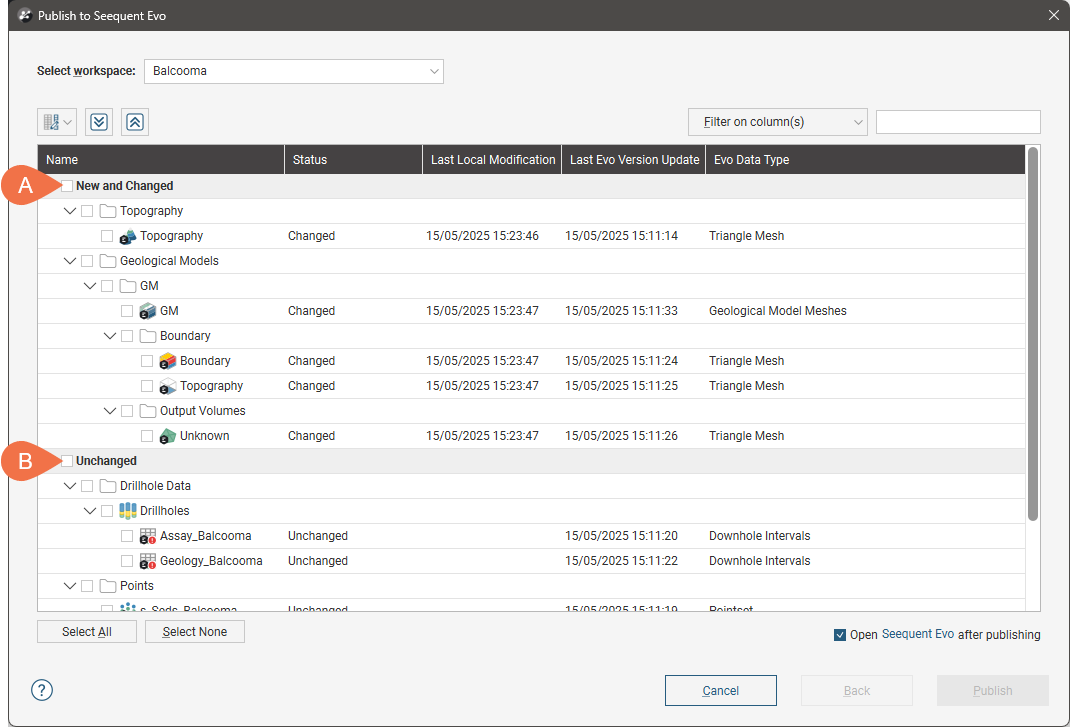
New and changed objects can include:
- Objects that have been updated in the Leapfrog Geo project.
- Objects that are new to the Leapfrog Geo project.
- Objects that were previously published to Evo but have since been deleted from Evo. If this is the case, you will be prompted to publish the object as a new object. You cannot publish an ‘update’ to an object that has been deleted from Evo.
Select the items you wish to republish and then click Publish.
Handling Publishing Errors
Invalid Entries
Invalid data cannot be published to Seequent Evo. See Invalid Data Entries earlier in this topic for more information.
Geoscience Object Already Exists
Seequent Evo workspaces require that objects have unique names. If you are trying to publish an object to a workspace and it has the same name as an existing Evo object, you will receive an error message indicating that some of the objects selected in the Publish to Seequent Evo appear to be duplicates.
If an object is not in fact a duplicate and you want to publish it to Evo, rename the object in Leapfrog Geo. You will then be able to publish the object to Evo.