Introduction to Polylines in Leapfrog Geo
With Leapfrog Geo‘s polyline tool, you can draw both 2D and 3D polylines in the 3D scene. Leapfrog Geo also imports many common polyline formats, and polylines in a project can be exported in different formats.
The rest of this topic describes:
- How Polylines are Organised in the Project Tree
- Sharing and Unsharing Polylines
- Displaying Polylines
Separate topics describe:
- Using the Polyline Editor
- Drawing Hotkeys
- Importing, Reloading and Appending Polylines
- Assigning Attributes to Polylines
- Exporting Polylines
How Polylines are Organised in the Project Tree
In the project tree, polylines may be saved in the Polylines folder or they may be stored in the project tree as part of another object. Where they are saved depends on how they were created. This is discussed further in Sharing and Unsharing Polylines below.
Polylines imported into Leapfrog Geo are always saved in the Polylines folder or in one of its subfolders.
Whether polylines are created in Leapfrog Geo or imported into Leapfrog Geo, you can start editing an existing polyline in one of two ways:
- Right-click on the polyline in the project tree and select Edit Polyline. The polyline will be displayed in the scene and the polyline editor will be opened.
- If the polyline is already displayed in the scene, click on its Edit polyline button (
 ) in the shape list. The polyline editor will be opened.
Sharing and Unsharing Polylines
Polylines in the Polylines folder can be added to other objects as part of many different Leapfrog Geo workflows.
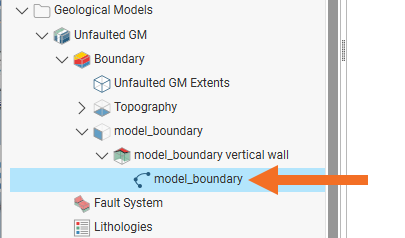
However, polylines created as part of working with other objects are saved in the project tree as part of that objects. Such polylines are regarded as “local” and are not available elsewhere in the project. An example of this is a polyline drawn as part of creating a model boundary.
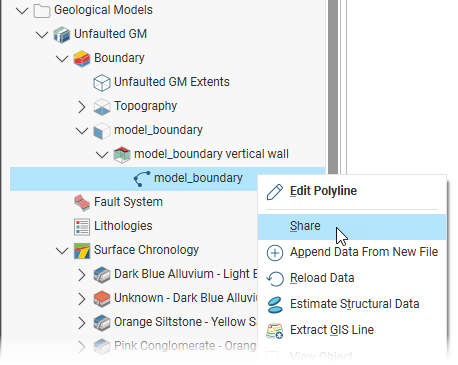
To make the polyline available elsewhere in the project, it needs to be “shared”. Do this by right-clicking on the polyline in the project tree and clicking Share:
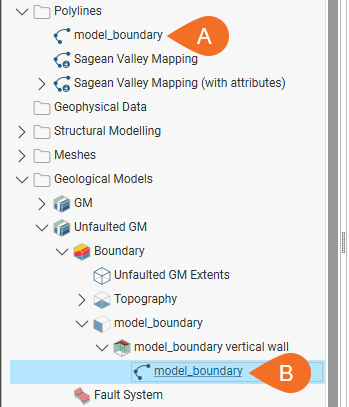
The polyline will be copied to the Polylines folder (A). A hyperlink to the polyline (B) will added to the object it was shared from:
Polylines that have been shared can be unshared by making a local copy of the polyline. To do this, right-click on the shared polyline and select Create Local Copy:

The polyline in the Polylines folder remains, but a local copy of it is made and the hyperlink to the Polylines folder copy is deleted. This means you can now work on, for example, the Polylines folder copy without changes to it affecting the geological model’s copy.
Displaying Polylines
Polylines can be drawn using as straight or curved 2D or 3D lines or using points with or without normals. Here we have three polylines:
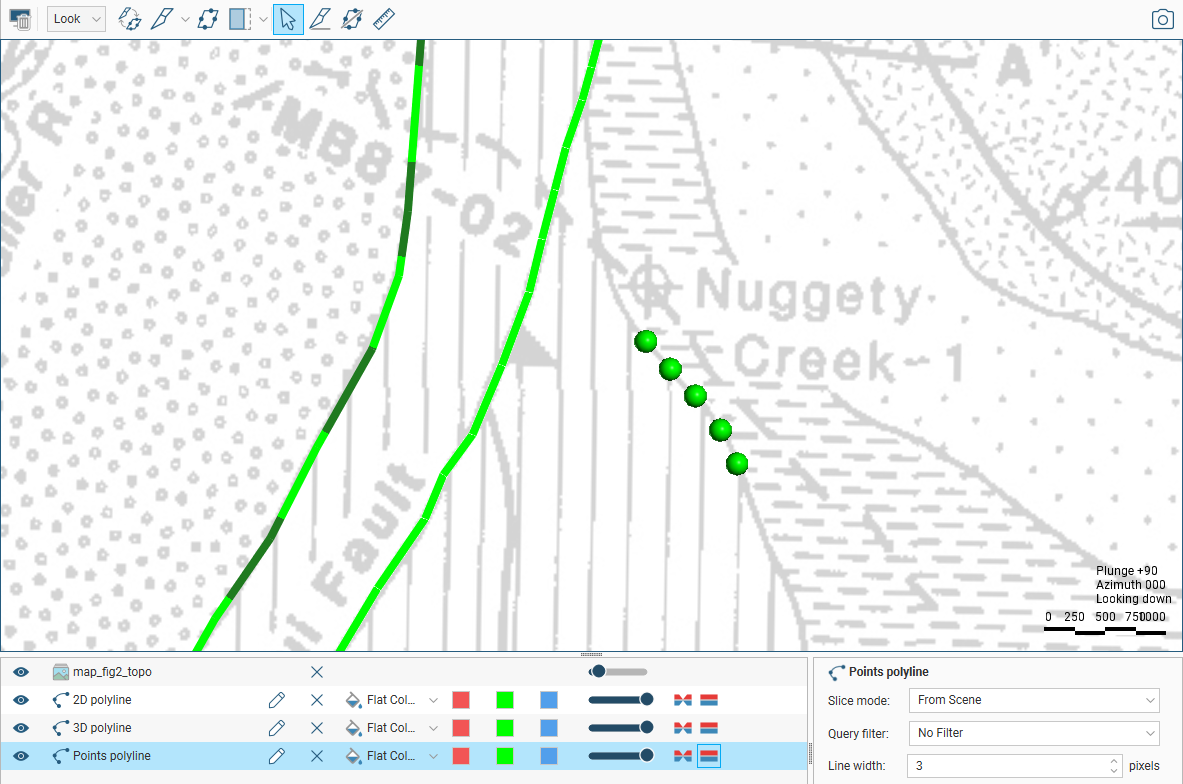
- The green dashed line is a 3D polyline.
- The green solid line is a 2D polyline.
- The green points are a points polyline.
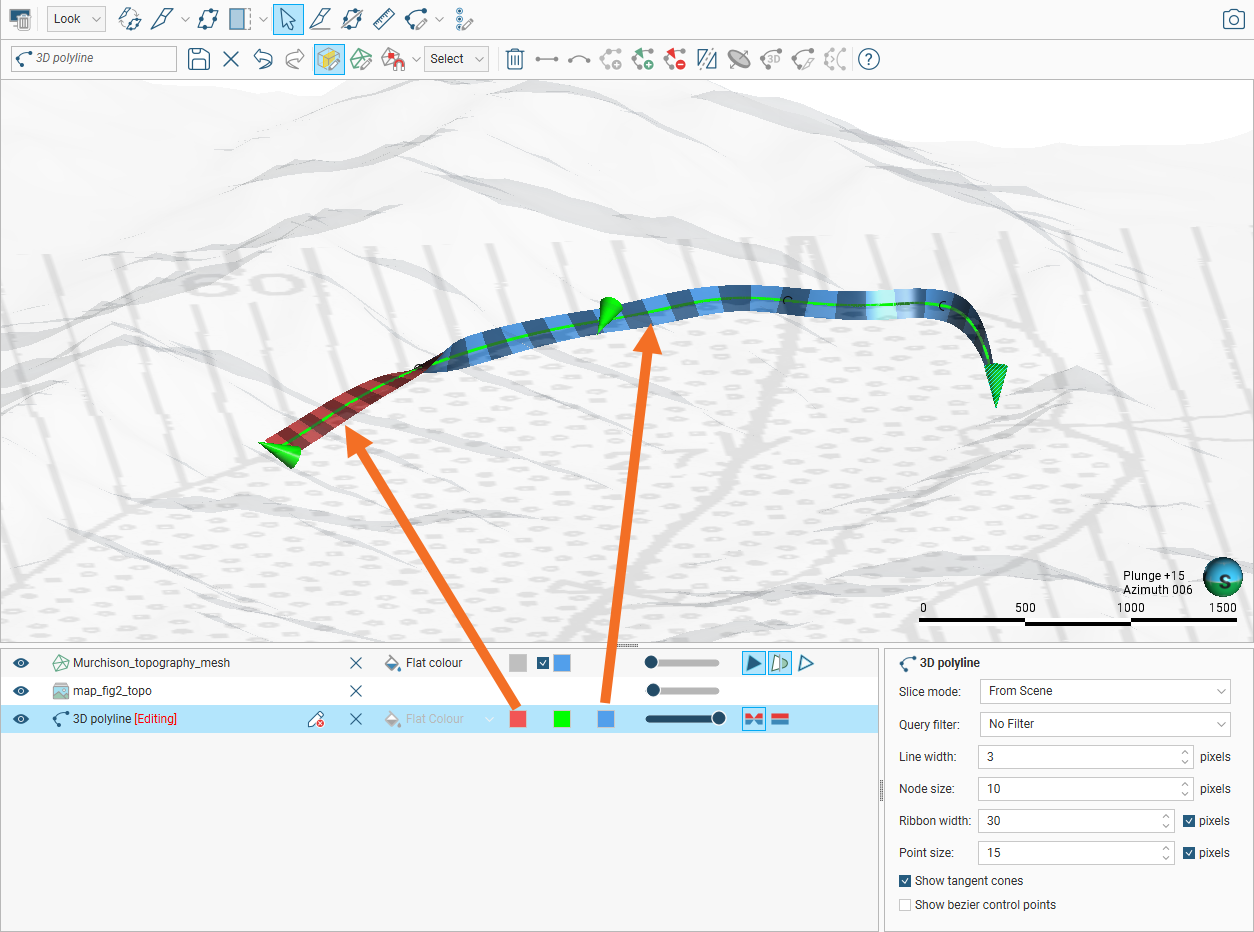
When 2D and 3D polylines are displayed in the scene, you can control the colour of the positive and negative surfaces of the line and of the line itself. In this example, the positive side of the polyline is red, the negative side is blue and the polyline itself is green:

For contact surfaces, the colour of the positive and negative sides of a ribbon will be determined by the lithologies or categories assigned to either side of the surface.
With the Node size and Point size controls in the properties panel, you can change the size of nodes and points in the scene to make working with the polyline easier.
Polylines with a tangent cone have a Surface ribbon(![]() ) and Normal ribbon(
) and Normal ribbon(![]() ) to help you to determine the orientation of the polyline in the scene. The surface ribbon reflects the orientation of the polyline and the normal ribbon is perpendicular to the surface ribbon. For example, click on the Surface ribbon button (
) to help you to determine the orientation of the polyline in the scene. The surface ribbon reflects the orientation of the polyline and the normal ribbon is perpendicular to the surface ribbon. For example, click on the Surface ribbon button (![]() ) to determine which side of the polyline is positive (red) and which side is negative (blue):
) to determine which side of the polyline is positive (red) and which side is negative (blue):
If a tangent cone has not been added to a polyline, the green line will be shown in the scene without any associated ribbon.
If you are having trouble seeing the ribbons, you can change their size using the Ribbon width control in the properties panel.
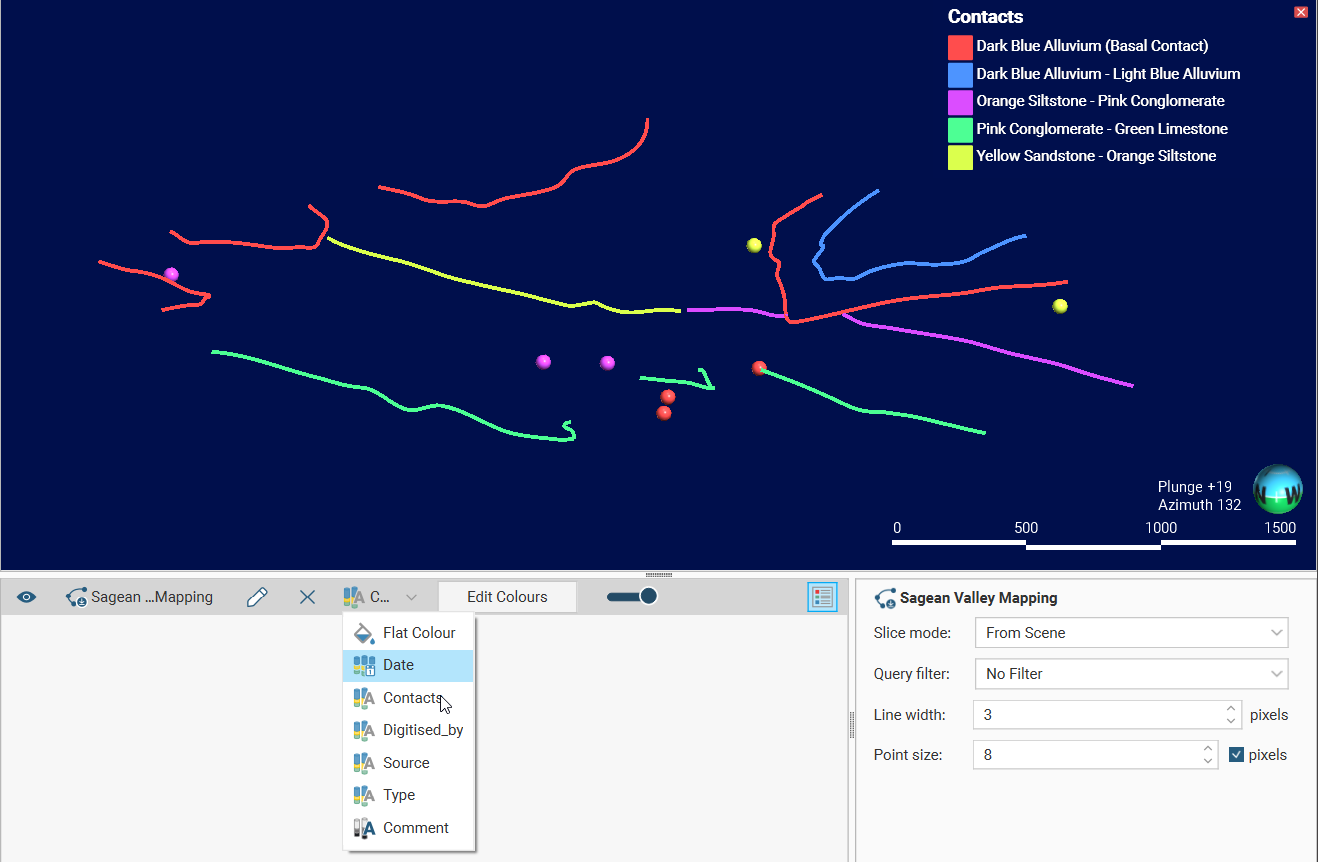
By default, polylines are displayed using the Flat Colour option. The view list will also include attributes, if the polyline has any. To view a polyline by an attribute, choose that attribute from the view list. Here a polyline is displaying using a category attribute called Contacts: