Leapfrog Central Integration
The Leapfrog Central platform is a model management system. Leapfrog Central’s integration with Leapfrog Geo lets you work in different project revisions, publish models to the server, view documents and annotations and make your own annotations. The Leapfrog Browser displays the project history so you can navigate through revisions and branches, explore models, view documents and annotations and make your own annotations.
Projects shared within Leapfrog Central can be downloaded and worked on locally in Leapfrog Geo. When you have finished working on a project, select the objects you wish to publish to Leapfrog Central and add notes about the revision. New projects can be added to Leapfrog Central by building them from scratch or by uploading an existing project.
This topic describes how to set up and work with Leapfrog Central from within Leapfrog Geo. It is divided into:
- Enabling Leapfrog Central
- Setting Up the Connection
- Connecting to Leapfrog Central
- Viewing a Project’s History
- Downloading a Local Copy of a Project
- Publishing to Leapfrog Central
- New Leapfrog Central Projects
- Disconnecting a Project from Leapfrog Central
To learn more about Leapfrog Central, see the Leapfrog Central help.
Enabling Leapfrog Central
To enable Leapfrog Central, open the Settings window by clicking on the Leapfrog Geo menu. Select Leapfrog Central and tick the box to enable Leapfrog Central. A Central Projects tab will appear in the main window.
When you connect to Leapfrog Central, you can download projects and work on them locally. To change the location where projects are saved, click the Change button under Project Management and navigate to where you want to save projects:
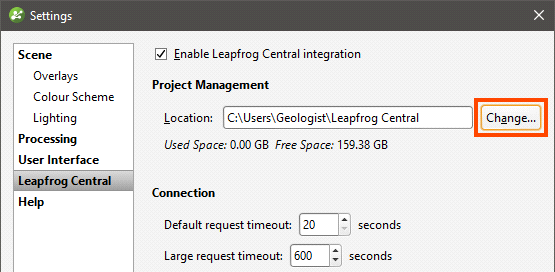
The Connection settings determine the timeout settings for connection to the Leapfrog Central server. The Large request timeout is used for publishing, uploading attachments and getting a revision. All other communication with the Leapfrog Central server uses the Default request timeout. The Default request timeout and Large request timeout should only be adjusted upward if you have problems with a poor connection. The default values are 20 seconds and 600 seconds.
There is an option for checking the integrity of a revision after it has been uploaded. If you wish to do this, enable the Check file consistency after upload option.
Setting Up the Connection
The first time you connect to Leapfrog Central, you will need to set up your connection. Request an account from your Leapfrog Central administrator, who will provide you with your login and connection details. Once you have these details, click on the Central Projects tab. Click the Add button to add a new server:
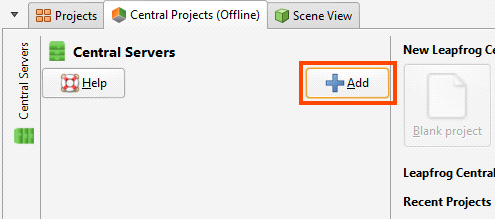
Enter the information provided to you by your Leapfrog Central administrator and click New user to enter your login token.
Create a password, then click Save.
Connecting to Leapfrog Central
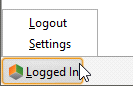
Once Leapfrog Central integration has been enabled, you can see the status of your connection to Leapfrog Central in the lower lefthand corner of the Leapfrog Geo main window. Click this button to logout or change Leapfrog Central settings:
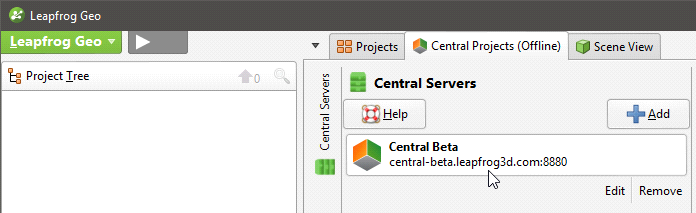
If you are logged out, click on the Central Projects tab and click the server you wish to log in to:
To hide the Central Servers panel, click the button:

Viewing a Project’s History
The Central Projects tab shows the projects available in Leapfrog Central.
Leapfrog Central projects are organised into revisions and branches:
- Different points in the modelling process are captured as revisions, which are specific points in time.
- Any revision can be the basis for any number of alternate revisions, forming the start of a new branch.
These are displayed visually in a project’s history tab. Revisions are displayed chronologically, from the most recent down to the oldest. In the Graph, offshoots from a revision are branches where an alternative hypothesis has been investigated. Changes made in a branch do not appear in other branches; branches effectively diverge from the base revision. The dots on the graph line up with the revision information.
To view more information about a revision, click on it in the history.
Locking Branches
When working on a branch in Leapfrog Geo, the branch can be locked so no other Leapfrog Central users can make changes to it. This is useful for letting others users know that a model is being worked on.
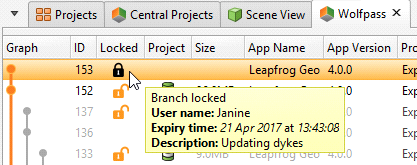
The Locked column indicates whether or not the branch is available to be worked on. If a branch is locked, hold the cursor over it to see who locked it and when it will be available once again:
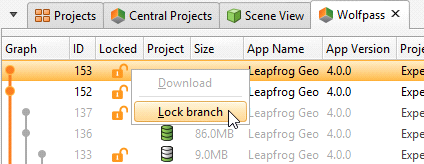
To lock a branch, right-click on it in the project history and select Lock branch:
In the window that appears, set the Lock duration and add any comments. The lock can be set for as little as one day; when the lock expires or when a new publish is completed, the branch will be unlocked for other users. While the branch is locked, other users are still able to download projects, create new branches and publish to branches that are not locked.
If you locked a branch, you can unlock it before the lock expires by right-clicking on it and selecting Unlock branch:

The Leapfrog Central administrator can also unlock branches via the Admin Portal.
Project Included
The Project column indicates whether or not the Leapfrog Geo project was included when the revision was published. If there is no icon displayed, then no project was uploaded when the revision was published. You can view the revision in the Leapfrog Browser, but you cannot work on it in Leapfrog Geo.
When Leapfrog Geo projects are included in a revision, they can be published in a Complete state (![]() ) or in an Unprocessed state (
) or in an Unprocessed state (![]() ). The difference between the two is whether or not stored modelling calculations are included in the published project. Removing stored modelling calculations can make the upload/download size of a revision considerably smaller and is useful when internet connectivity is poor. The tradeoff is that when the project is downloaded by a Leapfrog Geo user, the project will have to be reprocessed before they can use it. This may take some time.
). The difference between the two is whether or not stored modelling calculations are included in the published project. Removing stored modelling calculations can make the upload/download size of a revision considerably smaller and is useful when internet connectivity is poor. The tradeoff is that when the project is downloaded by a Leapfrog Geo user, the project will have to be reprocessed before they can use it. This may take some time.
Project Stages
The Project Stage is useful for promoting projects through an organisation’s procedures. For example, your organisation may have project stages defined that include “Experimental”, “Ready for Peer Review” and “Ready for Production”. Different stages are displayed in different colours so it is easy to see at a glance what revisions belong to each stage.
Annotations and Attachments
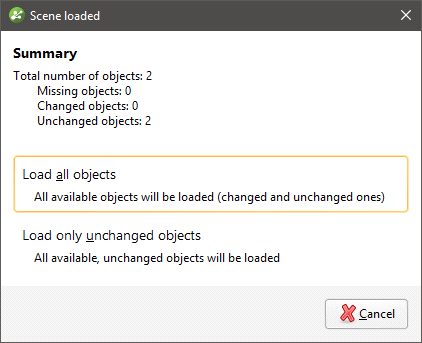
With Annotations, Leapfrog Browser and Leapfrog Geo users can carry out conversations about specific aspects of the model. Annotations include a scene. If you already have the project open in Leapfrog Geo, you can load any scene from that project’s history by clicking on it. Information about the selected scene will be displayed and you will be prompted to load all the objects or only the unchanged objects:
If the selected scene has a geotag, it will be added to the shape list and displayed in the scene.
Leapfrog Browser users can also attach files, which can be downloaded in Leapfrog Geo.
Downloading a Local Copy of a Project
Select a revision and then click Download to download a local copy of the project. The project will be downloaded to the location on your local drive specified in the Settings > Leapfrog Central window. A new revision of the project will be created in the history, as an unpublished project.
Click the Open button at the bottom of the tab to open the project.
Work in the project as you would any other Leapfrog Geo project.
Publishing to Leapfrog Central
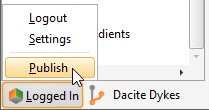
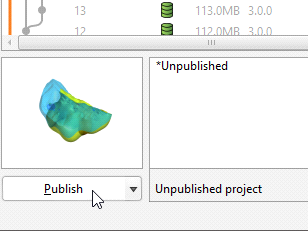
When you are ready to submit your project to Leapfrog Central, you can start the publishing process by clicking on the Leapfrog Central button in the lower lefthand corner of the screen and selecting Publish:
You can also select the Publish button in the Project History window:
The steps in publishing a project to Leapfrog Central are:
- Selecting Objects
- Setting the Project Workflow Stage
- Including the Project
- Adding Revision Information
- Preparing the Package
When you click Publish, you may receive a message saying there is an unfinished publish event:
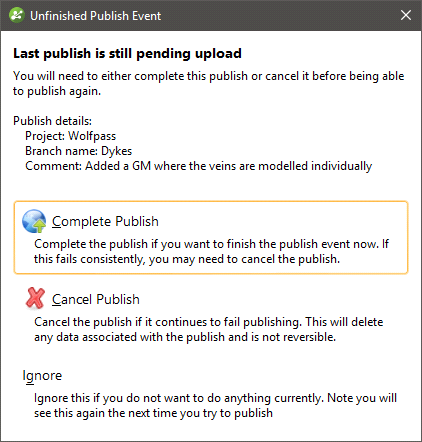
This occurs when a previous publish event was interrupted. Choose from the options presented.
If the publish was abandoned, it can be removed via the Admin Portal.
Selecting Objects
Select the objects you wish to publish from those available in the project:
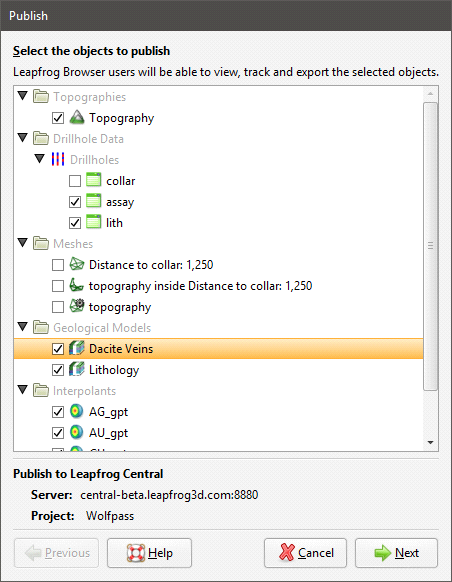
Although sub-blocked models can be published to Leapfrog Central, the dip will not be included.
Click Next to choose options choose options for how the project will be uploaded.
Setting the Project Workflow Stage
Project stages are useful for advancing projects through an organisation’s processes. If the project is ready to be moved on to a different stage, select a different Project Workflow Stage from the list.
Project stages can later be changed in the Leapfrog Browser.
Including the Project
Select whether or not to include the Leapfrog Geo project. There are three options:
- No. The Leapfrog Geo project will not be published. Other Leapfrog Central users will not be able to download the project and work on it in Leapfrog Geo.
- Complete.This option publishes the complete Leapfrog Geo project, including stored modelling calculations. Other Leapfrog Central users will be able to download the project and work on it in Leapfrog Geo without reprocessing the project.
- Unprocessed. An unprocessed project has a smaller upload/download size because stored modelling calculations are removed. When an unprocessed project is downloaded again, all of the modelling calculations will need to be reprocessed from the underlying data. Other Leapfrog Central users will be able to download the project and work on it in Leapfrog Geo. Depending on the size of the project, reprocessing may take some time.
Click Next.
Adding Revision Information
Enter information about the new revision. If you want to create a new branch, click the New Branch button and enter a name for the branch.
Preparing the Package
Click Next to begin the processes of packaging the project for publication. There are two options for starting the upload:
- If you want the upload to begin automatically once the package has been prepared, tick the Auto upload box.
- If you want the option to cancel the upload once it has been packaged, leave the Auto upload box unticked. Once the project has been packaged, click Publish to upload the project to Leapfrog Central.
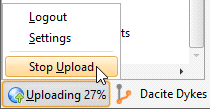
If for some reason you need to stop the upload, click on the Leapfrog Central button in the lower lefthand corner of the screen and select Stop Upload:
You can resume the download by clicking Publish in the project history. You will be prompted to resume the unfinished publish event, as described in Publishing to Leapfrog Central above.
If the upload is interrupted because the connection to the server is lost, you will be prompted to finish the publish event the next time you log in to Leapfrog Central.
New Leapfrog Central Projects
There are two options for putting a project into Leapfrog Central:
- Create a new Leapfrog Central project.
- Put an existing project into Leapfrog Central.
Creating a New Leapfrog Central Project
Use this option to create a new Leapfrog Geo project and put it into Leapfrog Central. In the Central Projects tab, click Create blank project. Enter a name for the project and click OK. A new Leapfrog Geo project will be created and saved in the location on your local drive specified in the Settings > Leapfrog Central window.
Work in the project as you would any other Leapfrog Geo project. When you are ready to publish the project to Leapfrog Central, do so as described in Publishing to Leapfrog Central above.
Adding a Project to Leapfrog Central
Use this option to add an existing project to Leapfrog Central.
Open the project you wish to import, then in the Central Projects tab, click Import open project. Enter a new name for the project, if you wish, then click OK. The project will be opened and copied to the location on your local drive specified in the Settings > Leapfrog Central window.
Work in the project as you would any other Leapfrog Geo project. When you are ready to publish the project to Leapfrog Central, do so as described in Publishing to Leapfrog Central above.
Disconnecting a Project from Leapfrog Central
Disconnecting a project from its Leapfrog Central server saves a copy of the project in a new location on your computer. When a project is disconnected, it will no longer be possible to publish the project to Leapfrog Central and its history will no longer be tracked.
If you wish to remove a project from Leapfrog Central, select Disconnect This Project from the Leapfrog Geo menu. You will be prompted to confirm your choice. Once you click Proceed, you will be prompted for a new location in which to save the project.