Importing ioGAS Data
This feature is only available as part of the Geochemistry module. See Geochemical Data for more information.
When Leapfrog Geo is connected to ioGAS and a dataset is open, you can import the ioGAS data into Leapfrog Geo. There are two options:
When data is imported as points, it is added to the Points folder. When imported as intervals, data is added to an existing interval table or used to create a new interval table. Whichever method is selected, if the data is changed in ioGAS, it will need to be reimported.
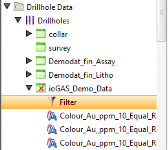
ioGAS version 6.1 and later can send a “Filter” attribute to Leapfrog Geo. If you wish to import this attribute, set it to a category column. This imported column will appear in Leapfrog Geo as a query filter:
Importing ioGAS Data as Points
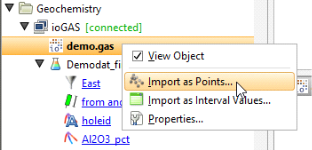
To import ioGAS data as points, right-click on the ioGAS data object in the project tree and select Import as Points:
In the window that appears, select the data columns you wish to import and how they will be imported. Click Finish to import the data, which will appear in the Points folder. You can then display the points in the scene and work with them as you would any other points object. The new points object will remain in Leapfrog Geo once the connection to ioGAS is terminated.
Importing ioGAS Data as Intervals
To import ioGAS data as intervals, right-click on the ioGAS data object in the project tree and select Import as Interval Values. Select the table to which the imported column will be added or select the option to create a new table. Click Import.
- For a new table, select the columns you wish to import and enter a name for the table. Click Finish. The new table will be added to the Drillholes object.
- For adding the data to an existing table, the process is similar to that for adding a column. Select the columns to import, then click Finish.

