Structural Trends
Structural trends create a flat ellipsoid anisotropy that varies in direction with its inputs. This topic describes working with structural trends. It is divided into:
Creating a Structural Trend
To create a new structural trend, right-click on the Structural Trends folder (in the Structural Modelling folder) and select New Structural Trend. The Structural Trend window will appear:
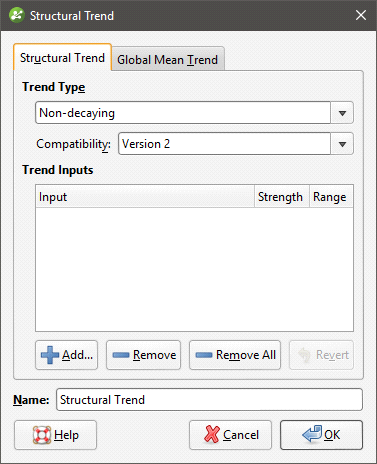
Structural trends can be created from surfaces and from structural data. Click Add to select from the suitable inputs available in the project. The list of inputs will be displayed:
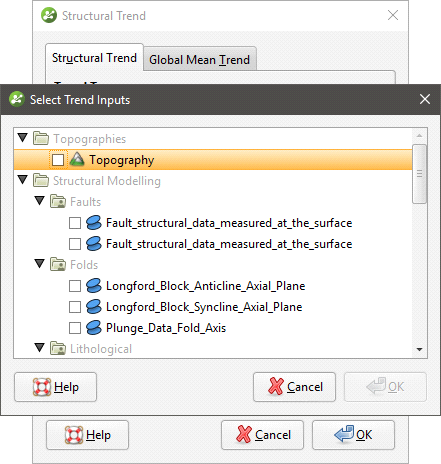
Tick the box for each input required, then click OK. The selected inputs will be added to the Structural Trend window:
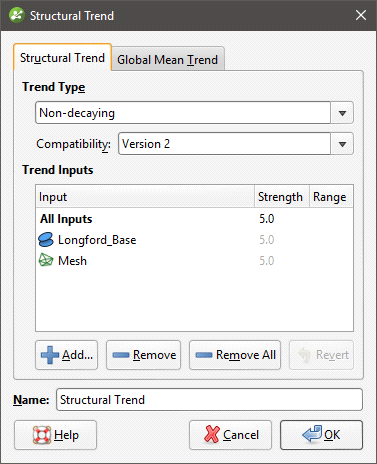
The Strength parameter determines the shape of the ellipsoid, and the Range parameter indicates how far the influence of this mesh reaches. If the Trend Type is Non-decaying, the distance from the mesh no longer affects the anisotropy and the Range value cannot be set.
Trends that are Strongest along meshes or Blending can include a global trend. To set this, click on the Global Mean Trend tab.
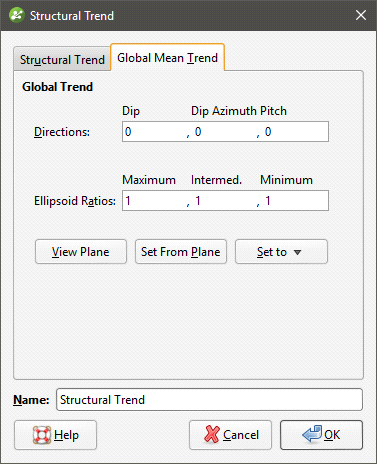
You can enter the trend manually or add the moving plane to the scene and set the trend using the moving plane, as described in Global Trends.
The Compatibility setting determines the algorithm used to create the structural trend. Structural trends created in earlier versions of Leapfrog Geo (before 2.2) used the Version 1 algorithm. When these structural trends are upgraded, you can change them so they use Version 2, which may be desirable if adding more data to the trend results in significant changes in areas that are not close to new data.
Enter a Name for the trend and click OK. The new trend will appear under the Structural Trends folder.
Displaying a Structural Trend
When displayed in the scene, the trend is shown using disks placed on a regular grid:
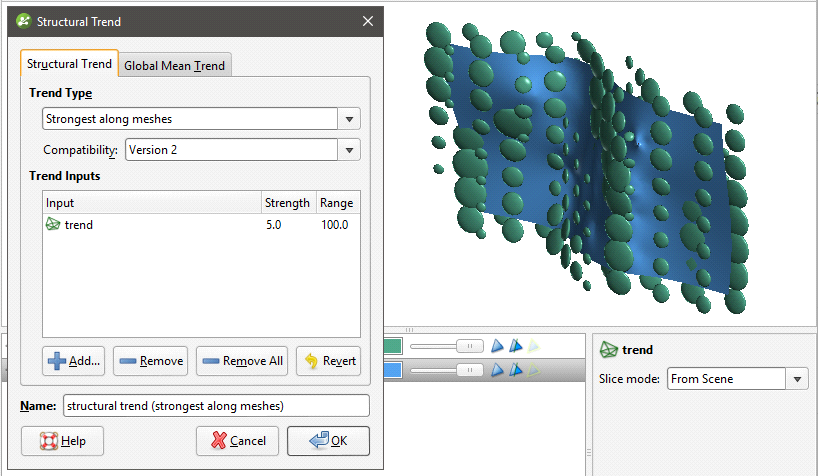
The orientation of the disk gives the direction of the anisotropy. The size of a disk is proportional to the anisotropy strength. Where there are no disks (or the size is very small) the trend is isotropic.
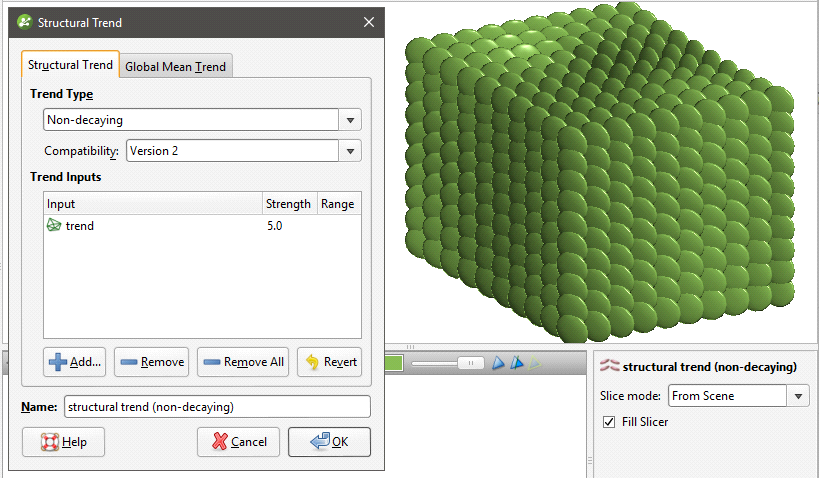
If the Trend Type is set to Non-decaying, the distance from the mesh no longer affects the anisotropy and all disks have the same size:
The Blending option requires multiple meshes and blends them according to their individual strength settings. A trend with higher strength makes a stronger impact on the blending. The blended trend is of decaying-type, and its strength weakens further away from the mesh.
Applying a Structural Trend
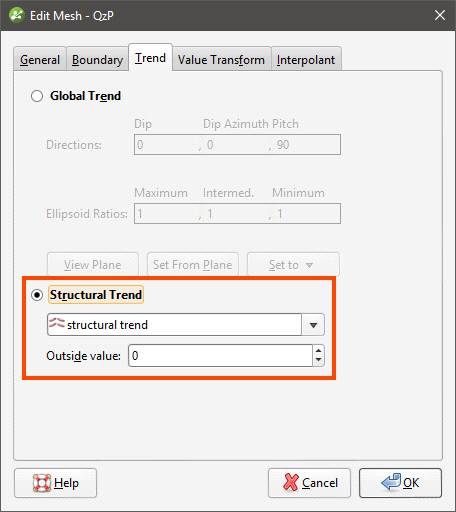
To apply a structural trend to an interpolated editable mesh or an interpolant, double-click on the object in the project tree and click on the Trend tab:
To apply a structural trend to an intrusion contact surface, enable Show additional surfacing options in the Surfacing tab, then click on the Trend tab.
Click on Structural Trend, then select the required trend from the list. Click OK to apply the trend to the surface.
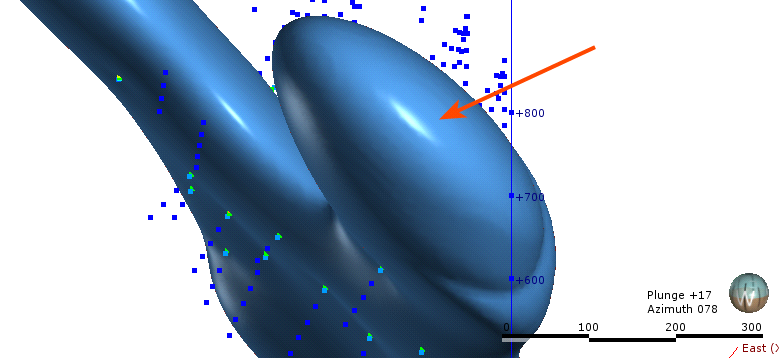
When a structural trend is applied, surfaces may appear distorted further away from the data:
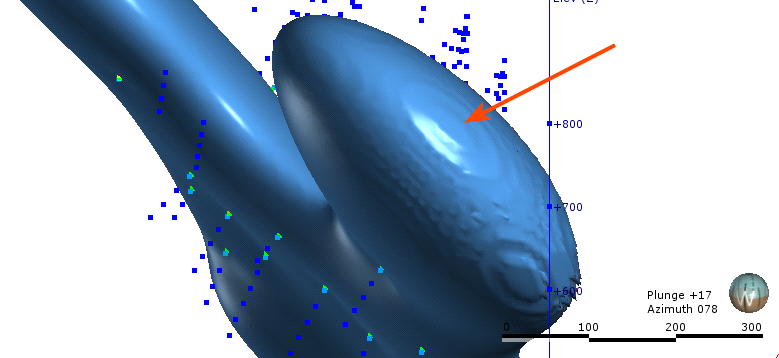
If this is the case, experiment with the Outside value setting. The Outside value is the long-range mean value of the data. Setting a value of -1 for intrusions (where the positive values are on the inside) and +1 for other surfaces will result in a smoother surface in most cases. For example, here, the Outside value has been set to -1 for this intrusion, resulting in a much smoother surface: