Central Integration
Central’s integration with Leapfrog Geo lets you work in different project revisions, publish models to the server, view documents and annotations and reply to annotations. Projects shared within Central can be downloaded and worked on locally in Leapfrog Geo. When you have finished working on a project, select the objects you wish to publish to Central and add notes about the revision. New projects can be added to Central by building them from scratch or by uploading an existing project.
The rest of this topic describes how to connect to Central from within Leapfrog Geo. It is divided into:
To learn more about Central, see the Central help.
Connecting to Central
Seequent is in the process of transitioning to using Seequent ID to connect to Central.
- If your organisation is using Central 3.0 or later, you will need to connecting using Seequent ID. See Connecting Via Seequent ID.
- If your organisation has not yet upgraded to Central 3.0, you will need to connect manually using the information provided by your administrator. See Manual Setup.
Connecting Via Seequent ID
If you connect to Central using your Seequent ID, open the Settings window by clicking on the Leapfrog Geo menu. Select Central and tick the box to Enable Central integration. A Central Projects tab will appear in the main window. Next, enable the Use Seequent ID option.
The Central servers you connect to are set up via your Seequent ID. To connect to a specific server, click on the Central Projects tab and click the button for the server you wish to connect to. If a server you expect to see does not appear in the list, click the Refresh button (![]() ).
).
If your organisation is switching to using Seequent ID to connect to Central, you may be prompted to change your Central settings when you attempt to connect to your Central server. To do this:
1. Click on the Leapfrog Geo menu and open the Settings window.
2. Click on Central.
3. Enable the Use Seequent ID option.
4. Close the Settings window.
5. Restart Leapfrog Geo.
The Central servers you have access to via your Seequent ID will be listed in the Central Projects tab.
Manual Setup
If your Central server requires that you manually set up your Leapfrog Geo connection to it, you will need to enable Central. To do this, open the Settings window by clicking on the Leapfrog Geo menu. Select Central and tick the box to Enable Central integration. A Central Projects tab will appear in the main window.
The first time you connect to Central, you will need to set up your connection. Request an account from your Central administrator, who will provide you with your connection details. Once you have these details, click on the Central Projects tab. Click the Add button to add a new server:
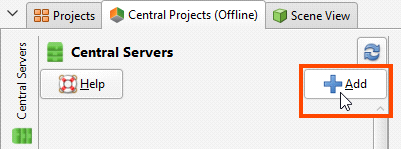
Click New user to enter your activation code, then enter the information provided to you by your Central administrator.
The activation code can be used a single time and is for the purposes of setting up your user name and password.
Enter a new password, then accept the terms and conditions and click Save.
If you are logged out, click on the Central Projects tab and click the server you wish to connect to.
Leapfrog Geo version 5.1 is compatible with Central Server versions 2.2, 3.0 and 3.1. If you get a message saying that the version of Leapfrog Geo you are using is not compatible with the Central Server you are trying to connect to, follow the instructions in the message, then try connecting again.
Troubleshooting Connectivity Issues
Leapfrog Start checks to see if your network will support the connection of Leapfrog web-based services to your desktop applications. If you are having trouble with your connection to Central, see Checking Connectivity with Leapfrog Start.
Got a question? Visit the Seequent forums or Seequent support