Non-Editable Meshes
Leapfrog Geo provides you with several tools for creating non-editable meshes:
- Mesh from the Moving Plane
- Combining Meshes
- Clipping a Volume
- Clipping a Mesh
- Merging 2D Meshes
- Extracting Mesh Parts
These tools produce non-editable meshes (![]() ).
).
Mesh from the Moving Plane
When a vertical wall, flat fault plane or other flat geological surface is required, the moving plane can be used to create a simple mesh.
To create a new mesh from the moving plane, first display the plane in the scene by clicking on the Show Plane button (![]() ). Use the controls in the scene to position the plane, then right-click on the Meshes folder and select Mesh From Moving Plane. The Mesh From Plane window will appear:
). Use the controls in the scene to position the plane, then right-click on the Meshes folder and select Mesh From Moving Plane. The Mesh From Plane window will appear:
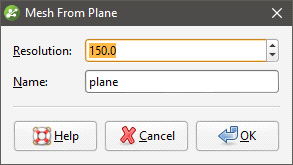
Set the Resolution for the mesh, enter a name and click OK. The new mesh will appear in the Meshes folder.
See Surface Resolution in Leapfrog Geo for more information on the resolution setting.
Combining Meshes
To create a new mesh from two existing closed meshes, right-click on the Meshes folder and select Mesh Operations > Boolean Volume. The Boolean Volume window will appear:
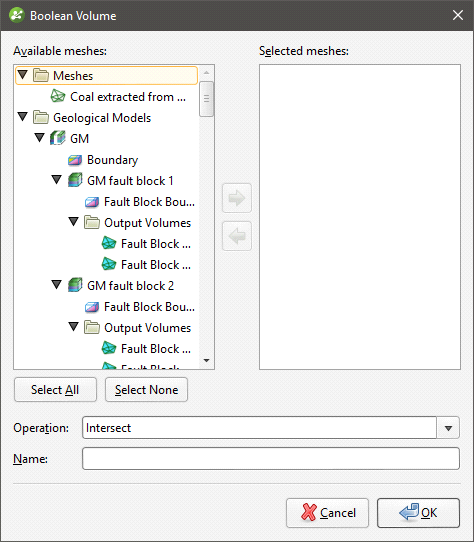
The Available list shows all closed meshes available in the project. Select a mesh by double-clicking on it or by clicking on it, then on the arrow.
The Operation type can be Intersect or Union.
Click OK to save the new mesh, which will appear in the Meshes folder. To edit the mesh, double-click on it. The Boolean Volume window will appear.
When any of the meshes used to create the volume is modified, the volume will be updated.
Clipping a Volume
To clip a closed mesh using another mesh, right-click on the Meshes folder and select Mesh Operations > Clip Volume. The Clip Volume window will appear. Select the meshes you wish to use and whether to retain the inside or outside of the clipped mesh.
Click OK to save the new mesh, which will appear in the Meshes folder. To edit the mesh, double-click on it.
When either of the meshes used to create the clipped volume is modified, the clipped volume will also be updated.
Clipping a Mesh
This option creates a new mesh that consists of the parts of a Clip mesh that are inside, outside or overlap with the Using mesh. To clip one mesh using another mesh or boundary in this manner, right-click on the Meshes folder and select Mesh Operations > Clip Mesh. The Clip Mesh window will appear:
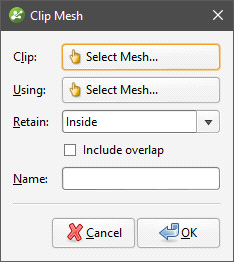
Select the meshes to use, then choose whether to retain the inside or the outside of the clipped mesh. Tick the Include overlap box to include the overlap between the two meshes as part of the new mesh.
Click OK to save the new mesh, which will appear in the Meshes folder. To edit the mesh, double-click on it. The Clip Mesh window will appear.
When either of the meshes used to create the clipped mesh is modified, the clipped mesh will be updated.
Merging 2D Meshes
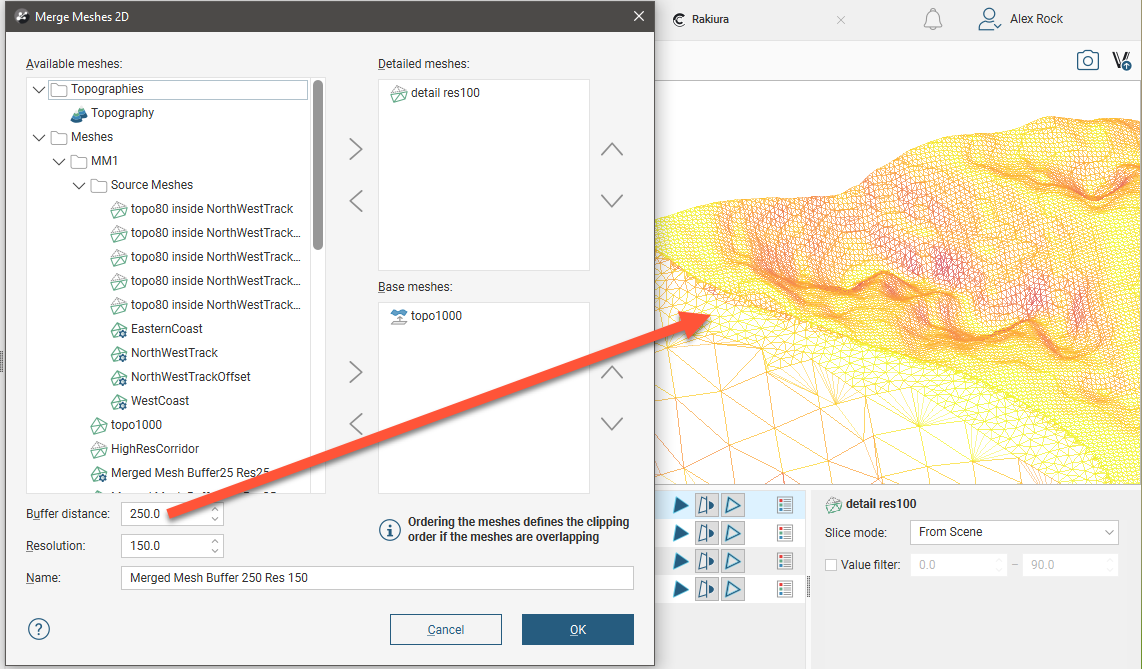
This option creates a new mesh from two or more open meshes and specifies the priority in which input meshes will be used to create the final mesh. This is useful when, for example, a single mesh is required that represents the topography (with less detail) and the area around a site (with more detail). To merge 2D meshes, right-click on the Meshes folder and select Mesh Operations > Merge Meshes 2D. In the window that appears, select the meshes you wish to use.
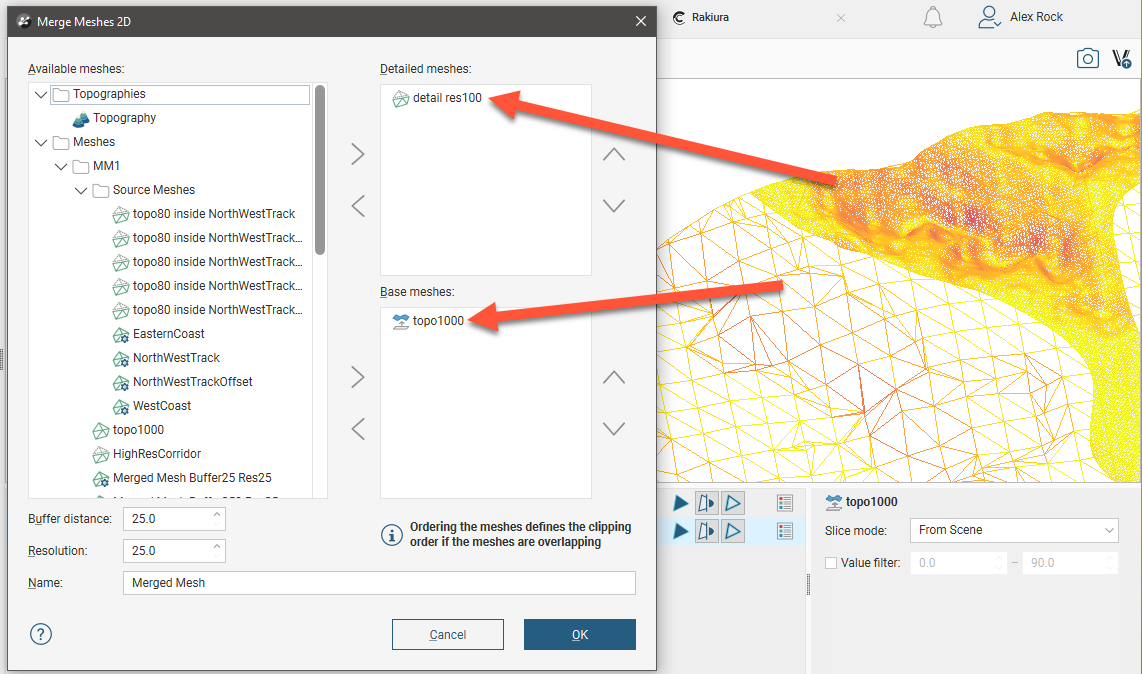
If you use more than one detailed mesh or base mesh, the meshes higher in the list will have higher priority over those lower down in the list.
The Buffer distance value determines the zone in which the selected meshes are merged and the Resolution setting determines the resolution of that zone. For example, here the Buffer distance is 250:
Click OK to save the new mesh, which will appear in the Meshes folder. To edit the mesh, double-click on it.
When any of the meshes used to create the merged mesh are modified, the merged mesh will be updated.
Extracting Mesh Parts
To extract the triangles from a mesh and create a new mesh, right-click on the surface and select Extract Mesh Parts. The Extract Mesh Parts window will appear:
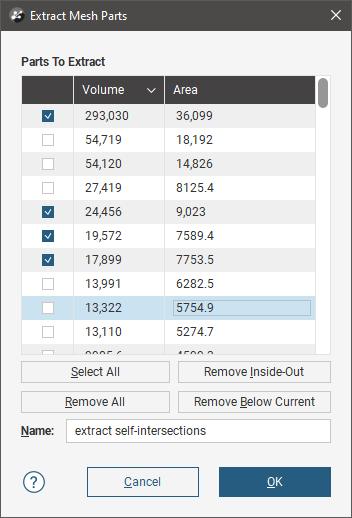
The Extract clipped mesh option is only available for meshes that are clipped to a boundary. The largest part is initially selected. You can sort the mesh parts by Volume or by Area by clicking the heading of the respective column. Other options are:
- Select all parts by clicking the Select All button. To de-select all parts click the Remove All button.
- Some mesh parts may have a negative volume. If the first mesh part has a negative volume, clicking the Remove Inside-Out button will untick mesh parts with positive volumes; if the first mesh part has a positive volume the Remove Inside-Out button will untick mesh parts with negative volumes.
- To remove parts smaller than a given size, first click the Select All button. Select the last item you want to keep and click the Remove Below Current button.
Click OK to save the new mesh, which will appear in the Meshes folder. The mesh generated is a non-editable mesh (![]() ).
).
Meshes created in this way are not connected to the mesh they were created from. Changes to the original mesh will not be reflected in the selected parts.
If the quality of the mesh produced is not acceptable, clip the mesh as described in Clipping a Mesh.
Got a question? Visit the Seequent forums or Seequent support