Central Projects
This topic describes how to work with Central projects in Leapfrog Geothermal. It is divided into:
- Viewing a Project’s History
- Sharing Projects
- Collaborating with Your Team Members
- Downloading a Local Copy of a Project
- New Central Projects
The Central servers you have access to via your Seequent ID are shown in the Projects tab when you click on the server button:

If a server you expect to see does not appear in the list, click the refresh button (![]() ).
).
Leapfrog Geothermal version 2021.2 is compatible with Central Server versions 4.x.
Click on a server to connect to it.
Viewing a Project’s History
See An Introduction to Projects, Revisions, Branches and Nodes in the Central help for an overview of how Central projects are organised.
Once you’re connected to a Central server, the Projects tab shows all the projects you have access to. Use the search bar to narrow down the list of projects displayed.
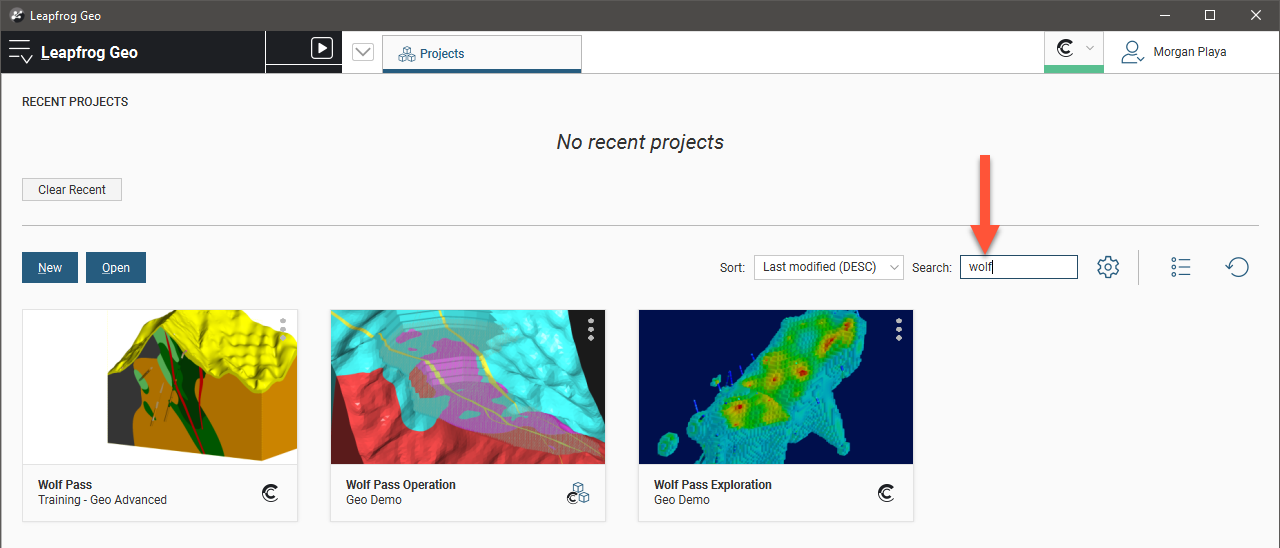
Projects will be organised by location if there are multiple projects at a given location; otherwise projects will simply appear in a list. If a project you expect to see is not listed, click the Refresh button (![]() ) in the Central Servers part of the Central Projects tab. This will refresh the list of projects for the server you are connected to.
) in the Central Servers part of the Central Projects tab. This will refresh the list of projects for the server you are connected to.
A project’s location is set in the Central Portal, in the project's Overview tab. You cannot change its location from Leapfrog Geothermal.
Click on a project to view its history, which will open in a new tab.
Central projects are organised into revisions and branches:
- Different points in the modelling process are captured as revisions, which are specific points in time.
- A revision can be the basis for a new branch, exploring an alternative hypothesis.
These are displayed visually in a project’s history tab, with local copies of projects shown in the panel at the top of the tab:
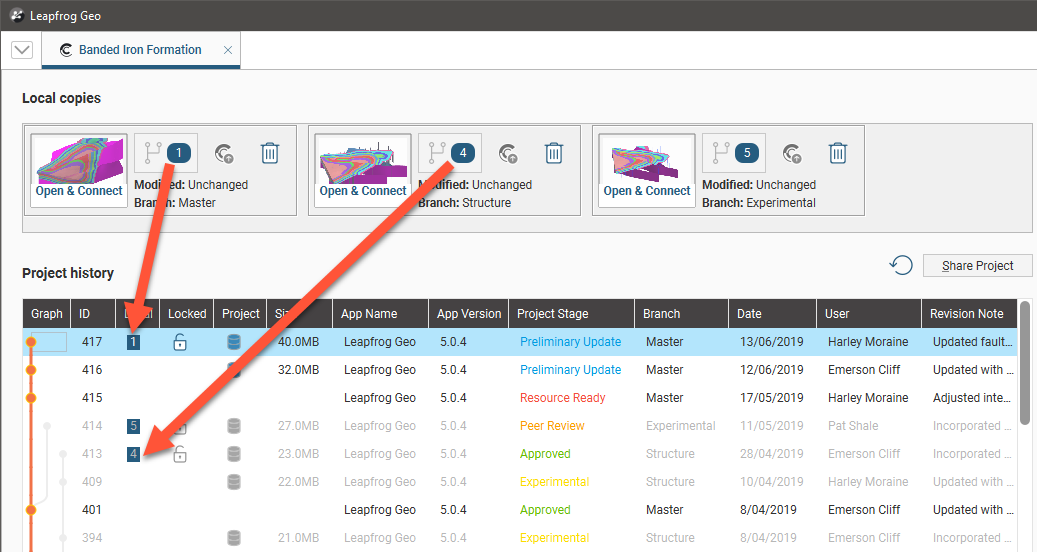
Each local copy is numbered so that it can easily be seen what versions have local copies in the Local column. The number in the column corresponds to the project in the Local copies panel. You can also:
- Click a thumbnail to open a local copy.
- Click the branch/copy number button (
 ) to identify the parent version of the local copy in the project history.
 - Click the Publish button (
 ) to publish the copy being edited to Central.
 - Click the Delete button (
 ) to delete a local copy, if the project is not open.
In the Project history, revisions are displayed chronologically, from the most recent down to the oldest. In the Graph, offshoots from a revision are branches where an alternative hypothesis has been investigated. Changes made in a branch do not appear in other branches; branches effectively diverge from the base revision. The dots on the graph line up with the revision information.
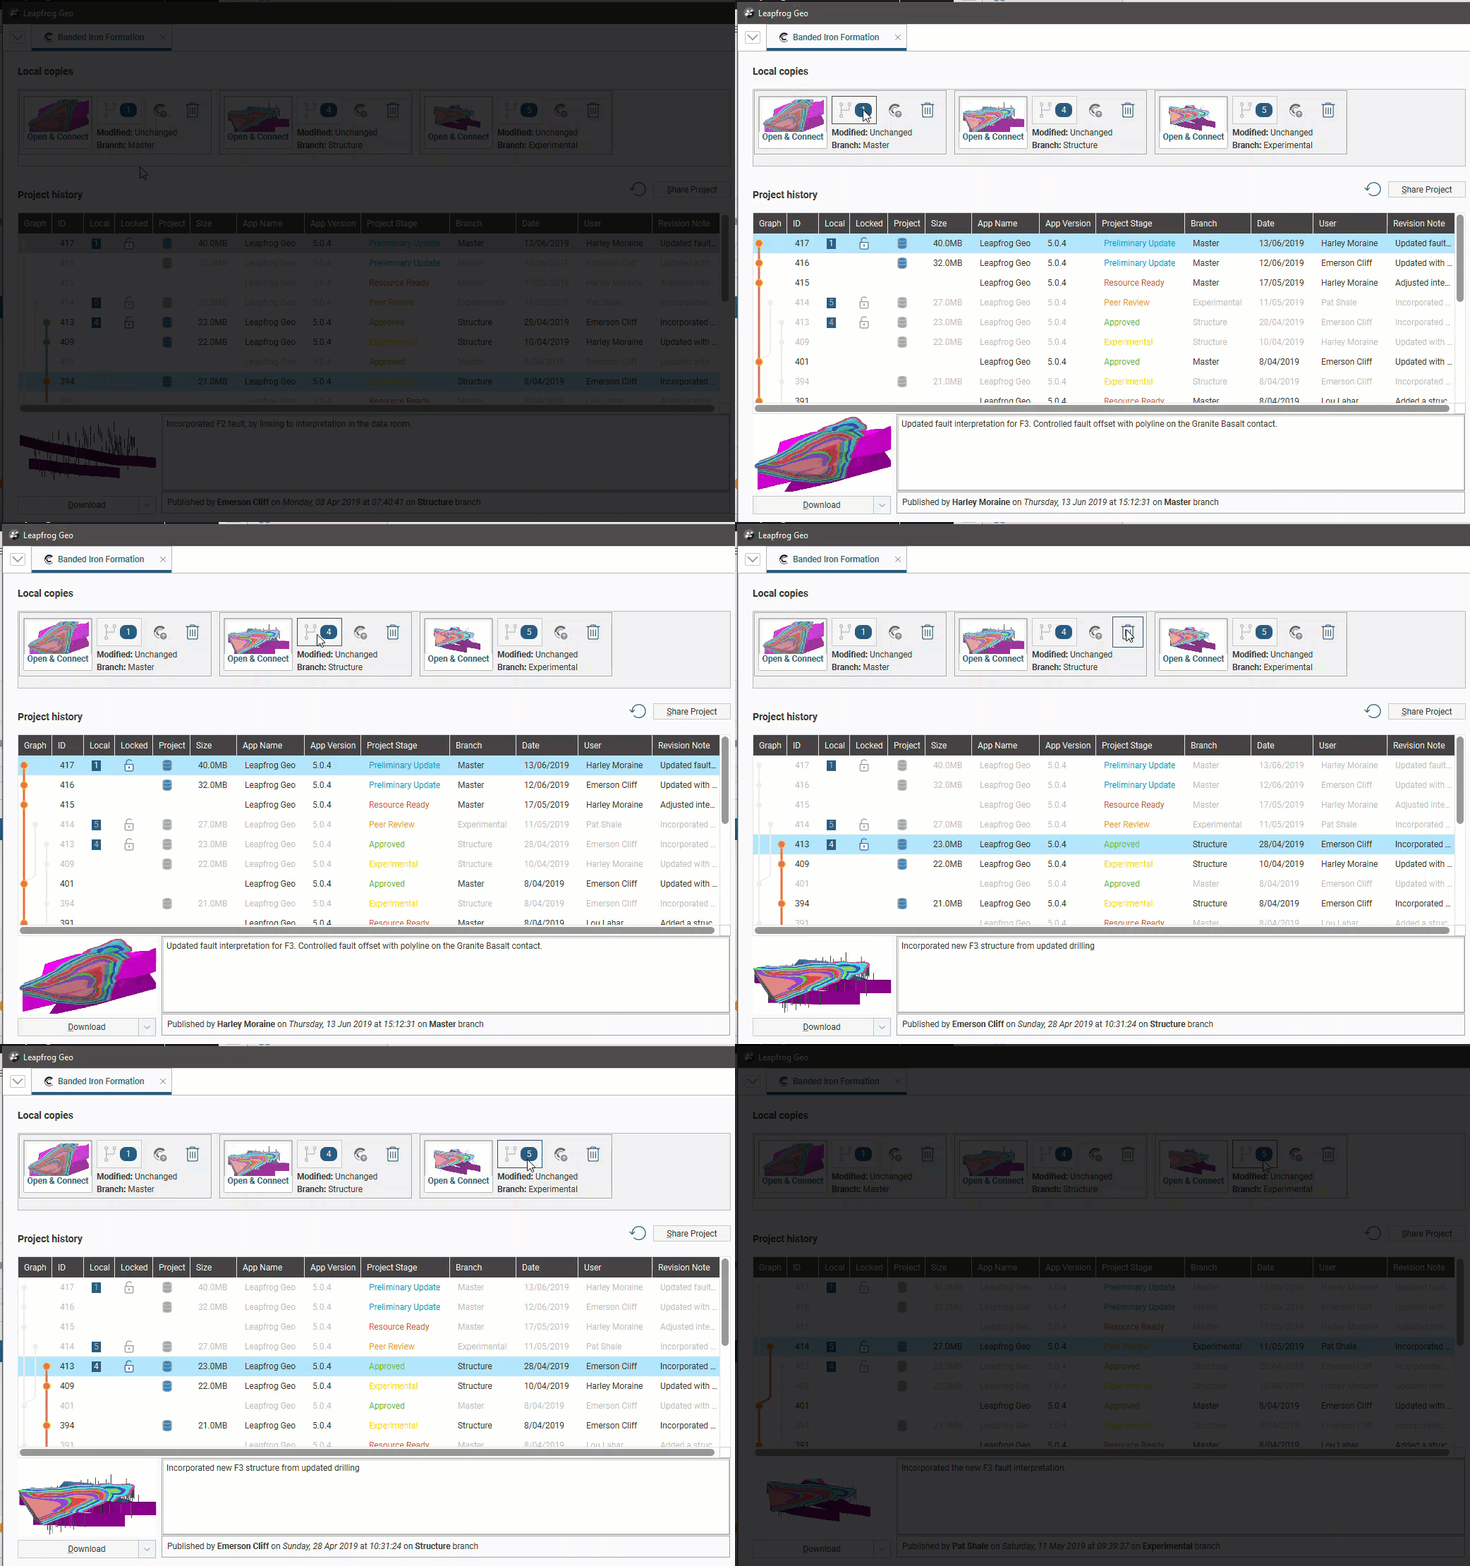
To view more information about a revision, including information about the branch it belongs to, click on it in the history. You can also click on the branch/copy number button (![]() ) to highlight that revision in the history. Here note how clicking on the button highlights that revision in the list and shows the branch history:
) to highlight that revision in the history. Here note how clicking on the button highlights that revision in the list and shows the branch history:
Locking Branches
When working on a branch in Leapfrog Geothermal, the branch can be locked so no other Central users can make changes to it. This is useful for letting others users know that a model is being worked on.
The Locked column indicates whether or not the branch is available to be worked on. If a branch is locked, hold the cursor over it to see who locked it and when it will be available once again.
To lock a branch, right-click on it in the project history and select Lock branch:
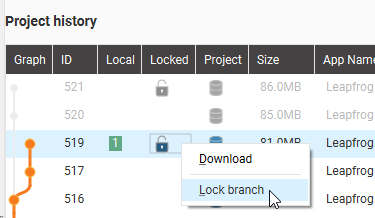
In the window that appears, set the Lock duration and add any comments. The lock can be set for as little as one day; when the lock expires or when a new publish is completed, the branch will be unlocked for other users. While the branch is locked, other users are still able to download projects, create new branches and publish to branches that are not locked.
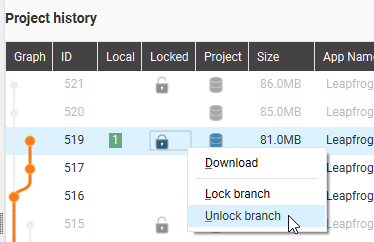
If you locked a branch, you can unlock it before the lock expires by right-clicking on it and selecting Unlock branch:
You can also ask your Central administrator to unlock a branch.
Project Included
The Project column indicates whether or not the Leapfrog Geothermal project was included when the revision was published. If there is no icon displayed, then no project was uploaded when the revision was published. You can view the revision in the Central Browser, but you cannot work on it in Leapfrog Geothermal.
When Leapfrog Geothermal projects are included in a revision, they can be published in a Complete state (![]() ) or in an Unprocessed state (
) or in an Unprocessed state (![]() ). The difference between the two is whether or not stored modelling calculations are included in the published project. Removing stored modelling calculations can make the upload/download size of a revision considerably smaller and is useful when internet connectivity is poor. The tradeoff is that when the project is downloaded by a Leapfrog Geothermal user, the project will have to be reprocessed before they can use it. This may take some time.
). The difference between the two is whether or not stored modelling calculations are included in the published project. Removing stored modelling calculations can make the upload/download size of a revision considerably smaller and is useful when internet connectivity is poor. The tradeoff is that when the project is downloaded by a Leapfrog Geothermal user, the project will have to be reprocessed before they can use it. This may take some time.
Project Stages
The Project Stage is useful for promoting projects through an organisation’s procedures. For example, your organisation may have project stages defined that include “Experimental”, “Ready for Peer Review” and “Ready for Production”. Different stages are displayed in different colours so it is easy to see at a glance what revisions belong to each stage.
Sharing Projects
If you are a project’s owner, you can share it with other Central users by clicking the Share Project button in the project’s history tab:
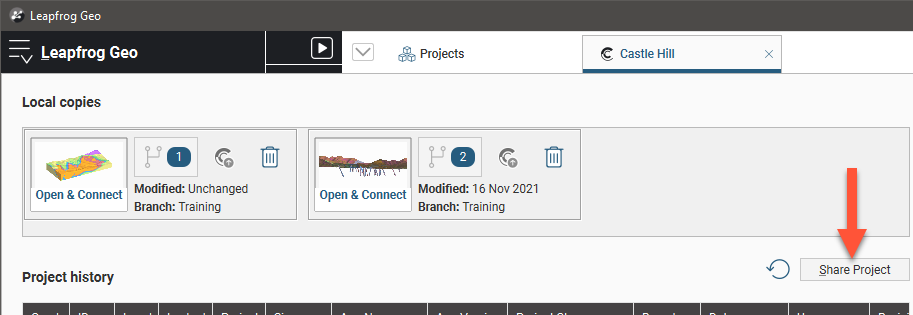
Clicking Share Project opens the Central Portal, displaying the list of users for that project.
You may need to sign in to the Portal.
You can select from the other users in the system or enter a user’s email address, then assign their permissions.
There are four levels of project permissions in Central: Owner, Editor, Viewer+Export and Viewer.
An Owner can:
- Assign other users as the owner. A project can have more than one owner.
- Configure and add an integration to a project they own.
A user who uploads a new project to Central is automatically assigned as the project owner.
Editor access allows a user to work in a project in Leapfrog.
Viewer+Export access allows a user to open a project in the Central Browser and export data from the project.
Viewer access allows a user to open a project in the Central Browser and make annotations. They cannot export data from the project.
Collaborating with Your Team Members
Leapfrog Geothermal provides support for Central collaboration features to assist a team to work together on a project.
With comments, Leapfrog Geothermal, Central Portal and Central Browser users can carry out conversations about specific aspects of the model. Comments include a scene snapshot to help you point out specific features in a model to your team. If you already have the project downloaded and open in Leapfrog Geothermal, you can load the current version of the object referred to by the comment. Click on the scene snapshot; you will be prompted to load all the objects or only the unchanged objects:
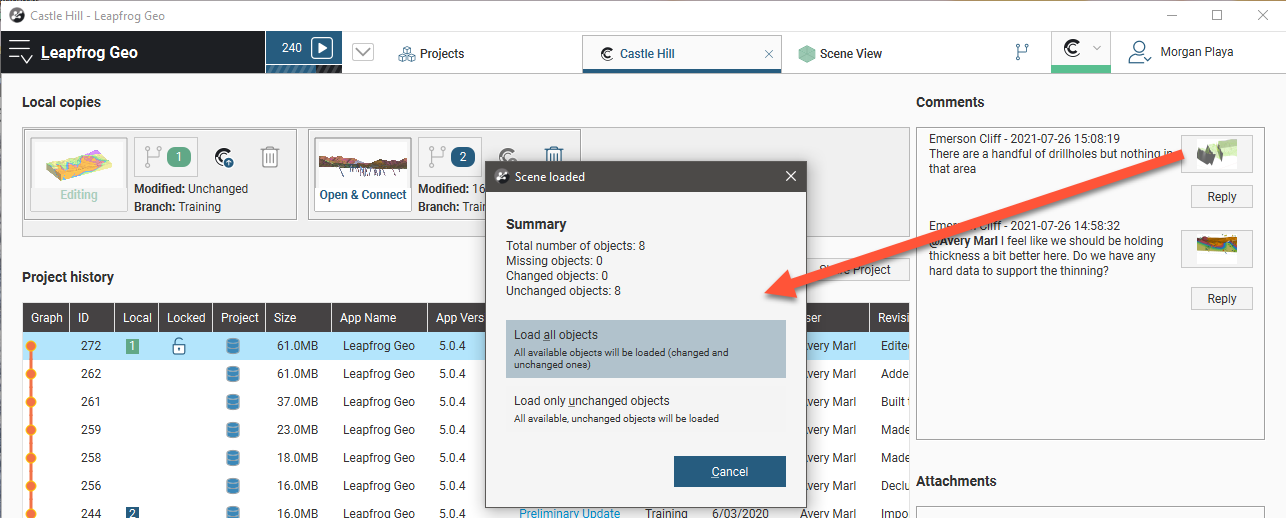
If the snapshot has a geotag, it will be added to the shape list and displayed in the scene.
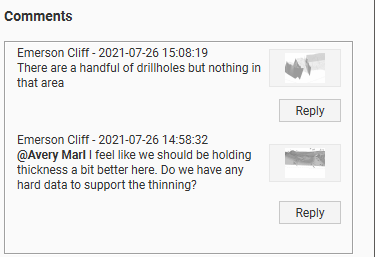
If the project is not open, the scenes shown in comments will be greyed out:
You can draw the attention of another user to a comment by using an @ mention. When you type @ in a comment, a list of users who are assigned to the project appears. As you continue to type, the list is filtered to make it easier to select an individual from the list. When an @ mention is included in a comment, the named user will have a message appear in their notifications in the Central Portal. For people who access Central mainly throughLeapfrog Geothermal and who rarely use the Central Portal, it is recommended that email notifications are enabled. When they have email notifications enabled, a user who is addressed using an @ mention will also receive an email notification of the message.
Downloading a Local Copy of a Project
Select a revision and then click Download to download a local copy of the project. The project will be downloaded to the location on your local drive specified in the Settings > Projects window.
While you work on the project in Leapfrog Geothermal, other Leapfrog Geothermal users who have access to the project on the Central server may also download and work on the project. However, if they publish a revision before you do, you will not be able to publish to the branch used when you downloaded the project. If you wish to prevent other Leapfrog Geothermal users from publishing to that branch, you can lock it, as described in Locking Branches above.
Click the Open & Connect button in the Local copies panel to open the project:
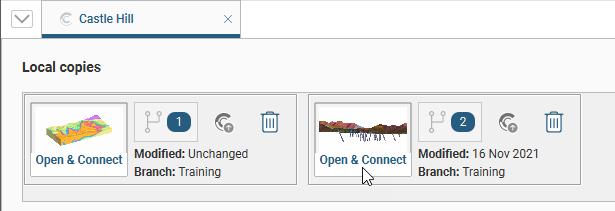
Work in the project as you would any other Leapfrog Geothermal project, then once your work is complete, you can publish a new revision, as described in the Publishing to Central topic.
New Central Projects
There are two options for putting a project into Central:
- Create a new Central project
- Put an existing project into Central
Creating a New Central Project
Use this option to create a new Leapfrog Geothermal project and put it into Central. In the Projects tab, first make sure you are connected to the Central server you wish to add the project to. Then click the New button:
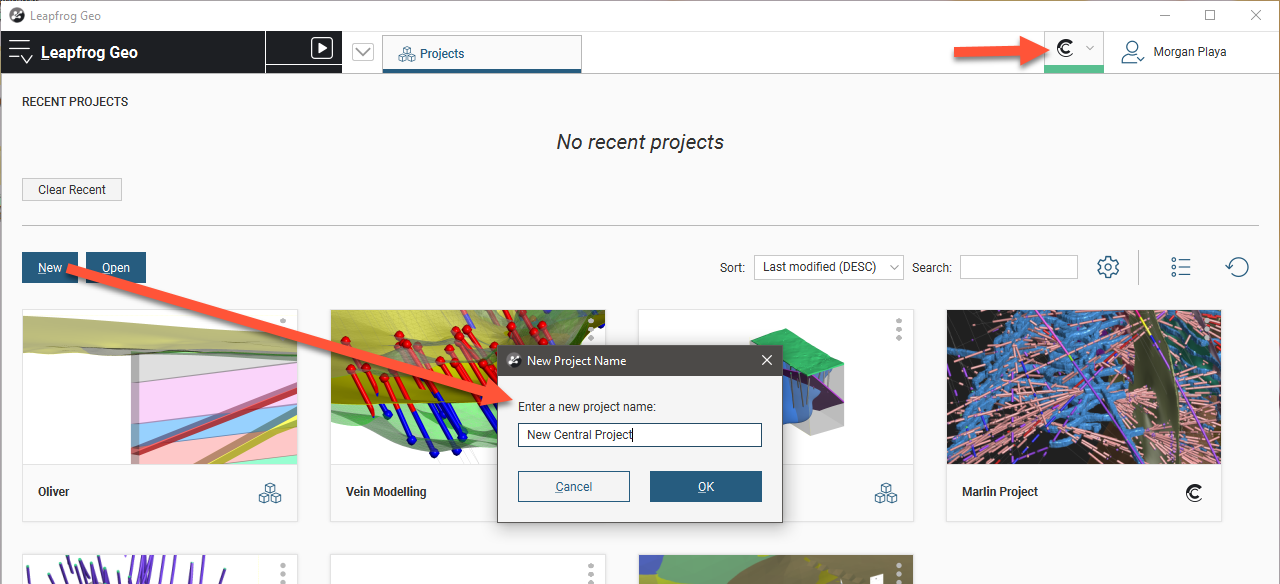
Enter a name for the project and click OK.
A new Leapfrog Geothermal project will be created and saved in the location on your local drive specified in the Settings > Projects window.
Work in the project as you would any other Leapfrog Geothermal project. When you are ready to publish the project to Central, click on the Central menu and select Publish:
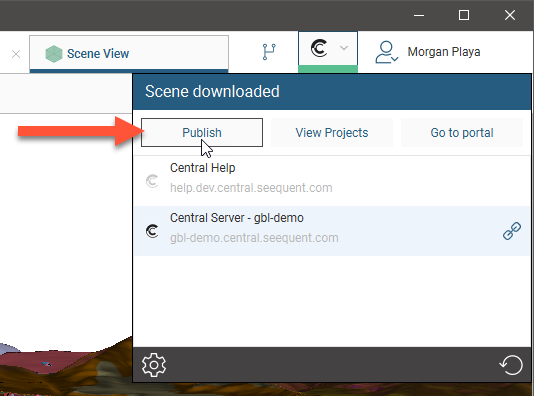
Adding a Project to Central
Use this option to add an existing project to Central. First:
- Ensure you are connected to the Central server you wish to import the project to.
- Open the project.
Click on the Central menu and select Publish:
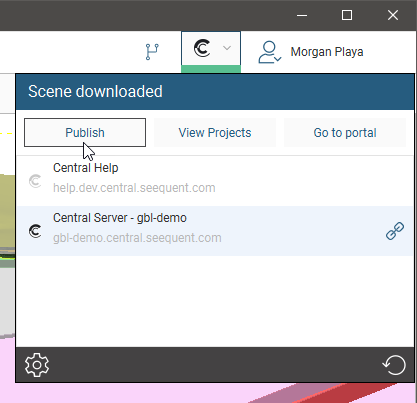
You can also import a project from the Projects tab. Click on the project’s overflow menu (![]() ) and select Publish to Central:
) and select Publish to Central:
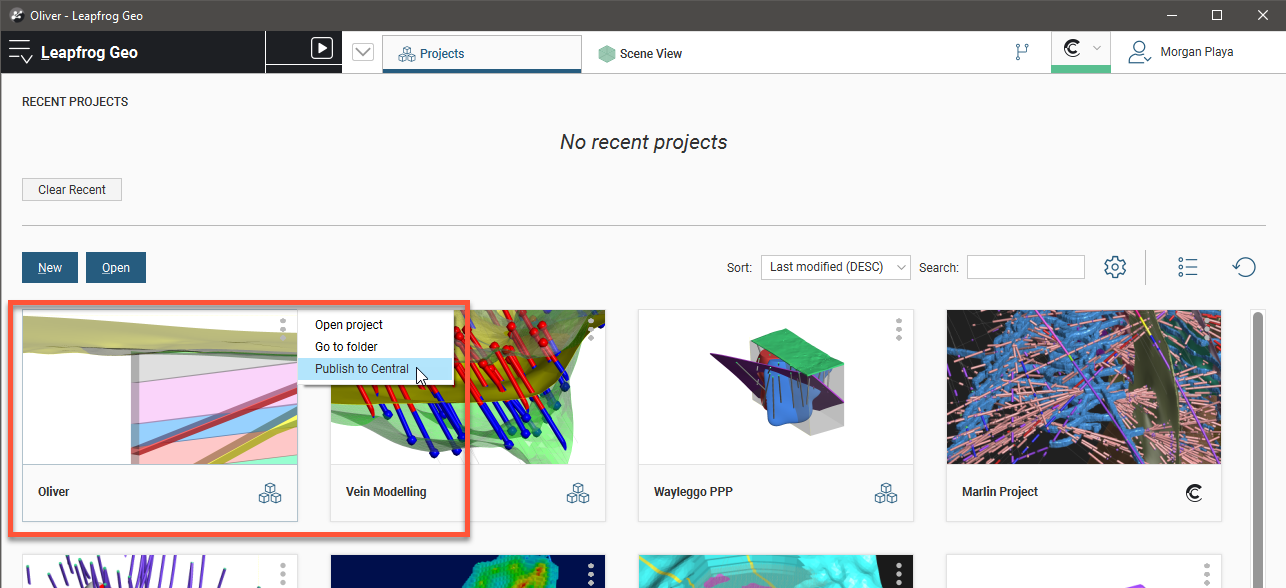
When prompted, enter a name for the project and click OK. Next you will be prompted to backup your project before it is published to Central:
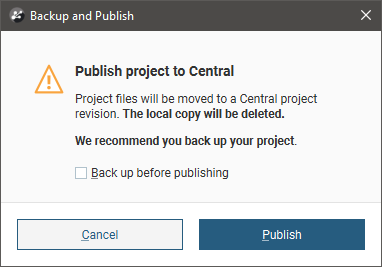
Tick the box to back up the project, then select where on your local drive you wish to save the backup. Once the backup has been created, a new Central project will be created and the existing project will be copied to the location on your local drive specified in the Settings > Projects window.
Work in the project as you would any other Leapfrog Geothermal project. When you are ready to publish the project to Central, click on the Central menu and select Publish.
Got a question? Visit the Seequent forums or Seequent support
© 2022 Bentley Systems, Incorporated