
Branching in Central Projects
Branching is the duplication of objects in a project under version control. Branching helps your team explore alternative hypotheses because duplicates can be modified in parallel, on separate branches, while also preserving the original object on its branch. Once hypotheses have been explored and decisions made on which hypothesis to pursue, the modified object can be copied over to a master project. Alternative hypotheses are preserved on branches, which makes it easier to audit the decisions made on the project.
This guide discusses branching in Central Projects. It is divided into:
- An Introduction to Projects, Revisions, Branches and Nodes
- Viewing the Project History
- Navigating Between Branches in the 3D View
- Creating New Branches
An Introduction to Projects, Revisions, Branches and Nodes
Data in each Central project is tracked through time, organised into revisions. Central projects can also branch so that alternative hypotheses can be explored.
In a project’s history, a graph shows the history of the project, going backward in time:
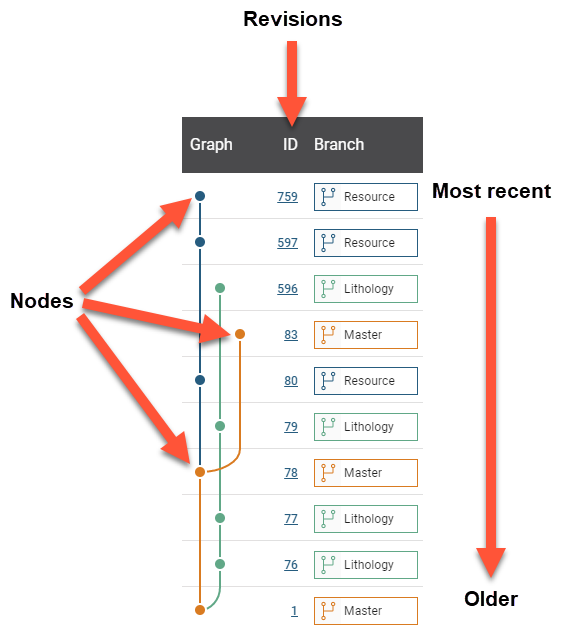
Each node in the graph represents a revision, which belongs to a branch.
Viewing the Project History
In the Central Portal, an abbreviated history is shown in a project’s Overview tab. To view the full project history, click on the History tab or on the All History link:
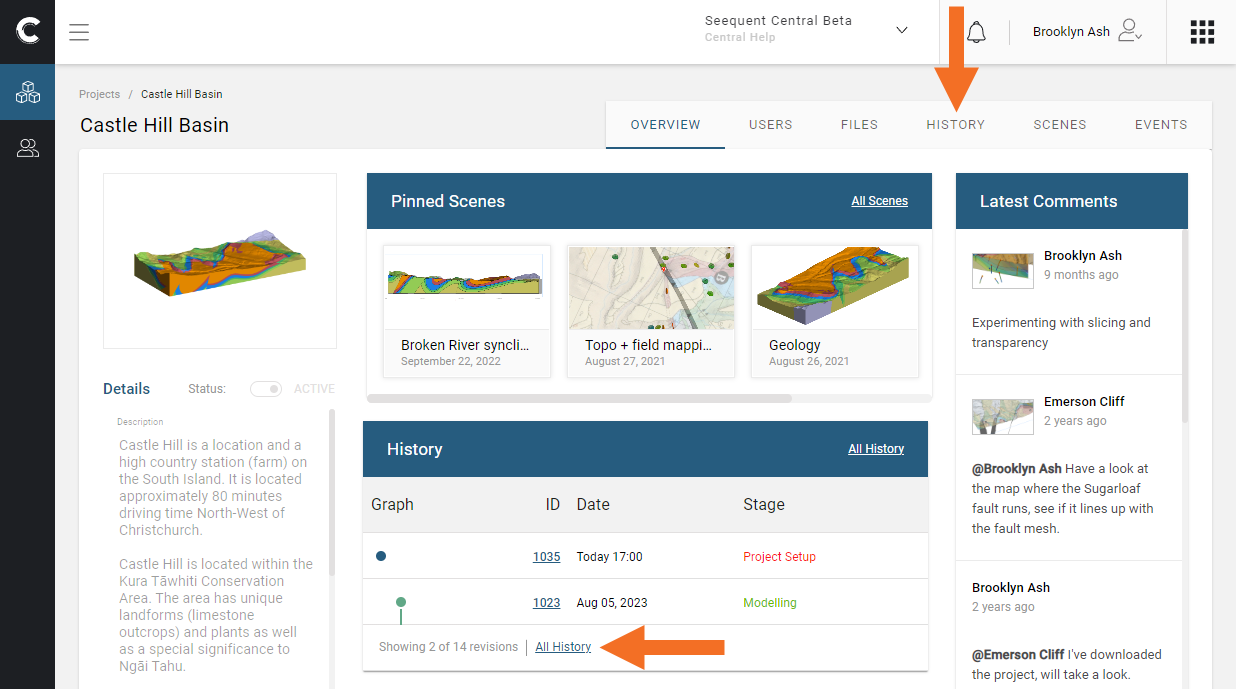
This shows the full project history:
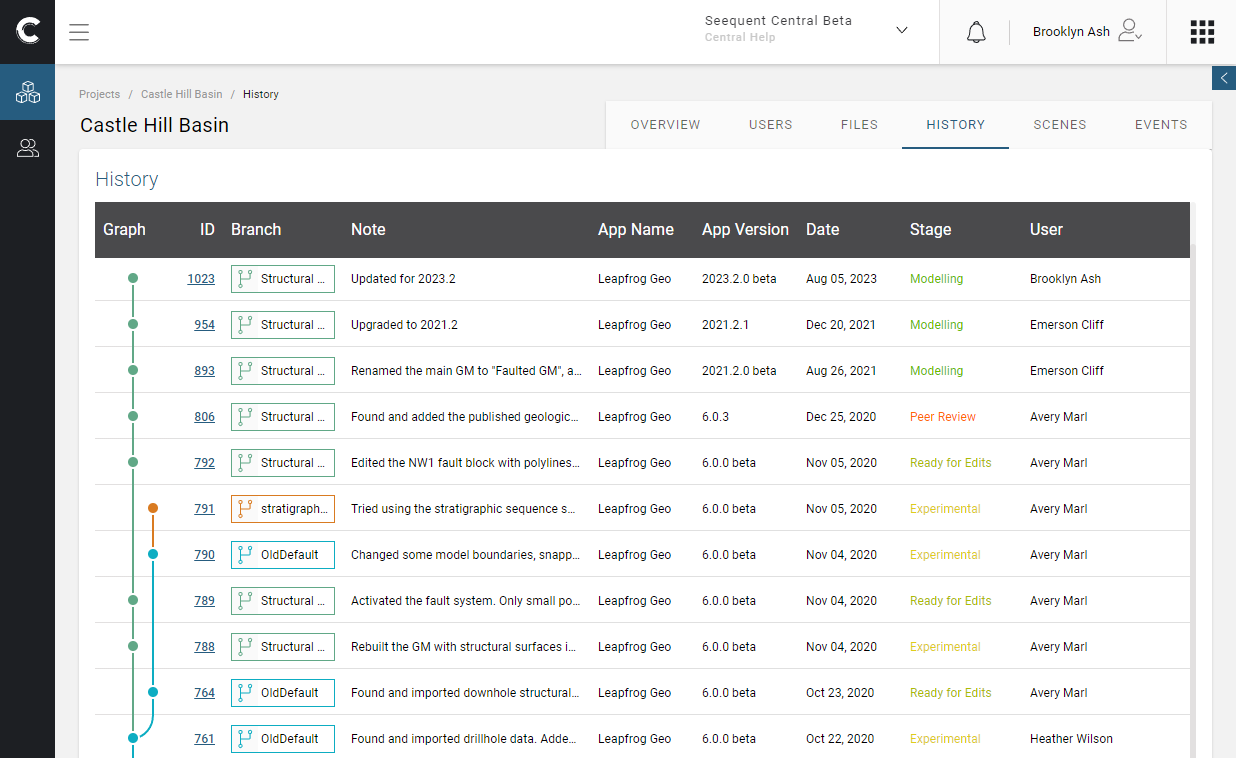
Click on a revision ID number to open the revision in 3D.
See Visualising Data in the Central Portal for information about the Central Portal’s tools for viewing data in 3D.
Click on either a node in the Graph or a Branch to open the Revision Properties panel, which shows information about the selected revision:
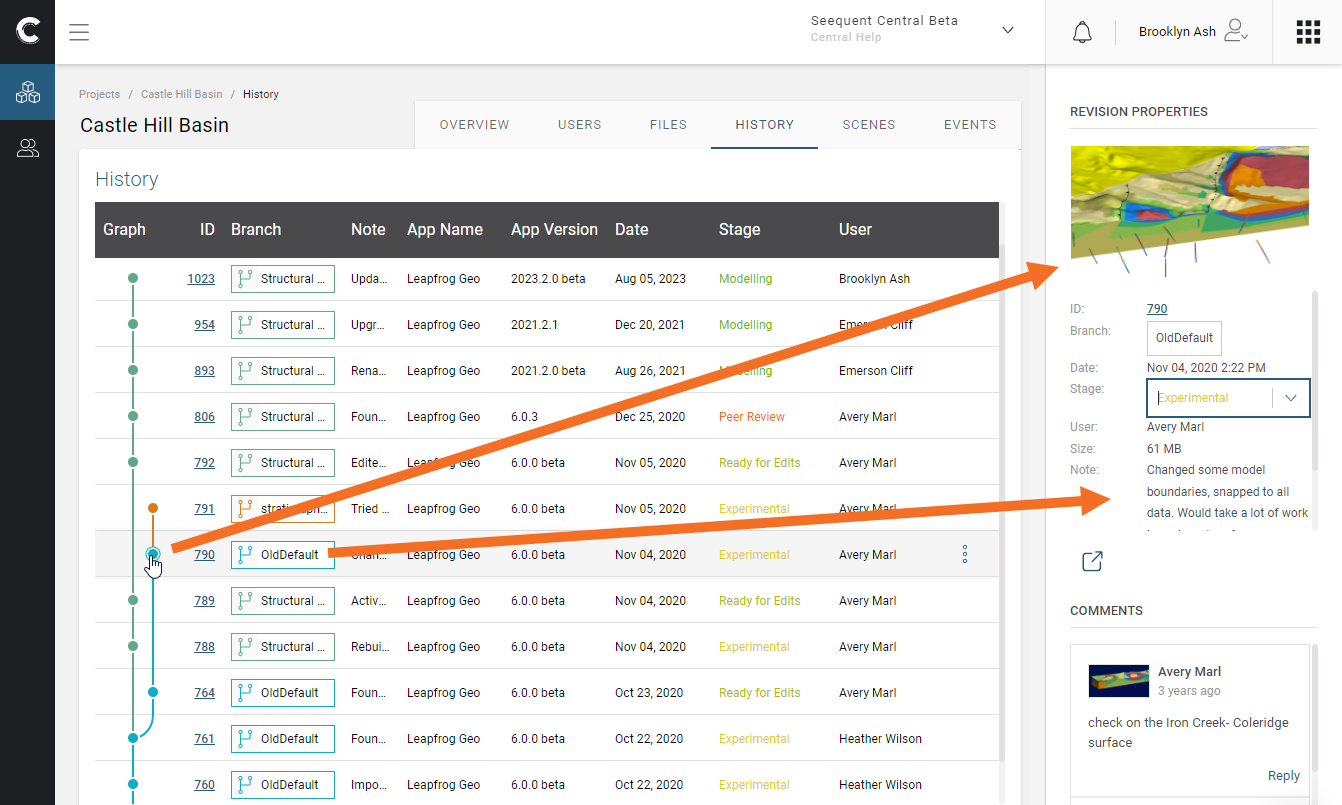
In this panel you can:
- Open the revision to view it in 3D. Anyone who has access to the project can open the revision in the 3D view.
- Edit the branch name. You must be either an Owner or an Editor of the project.
- Change the project stage. Anyone who has access to the project can change its stage.
- Delete Leapfrog data for the revision. You must be an Owner of the project.
- Reply to any comments on the revision.
Navigating Between Branches in the 3D View
When viewing a revision in 3D, you can move between revisions using the breadcrumbs above the Project Tree/Scenes panel:
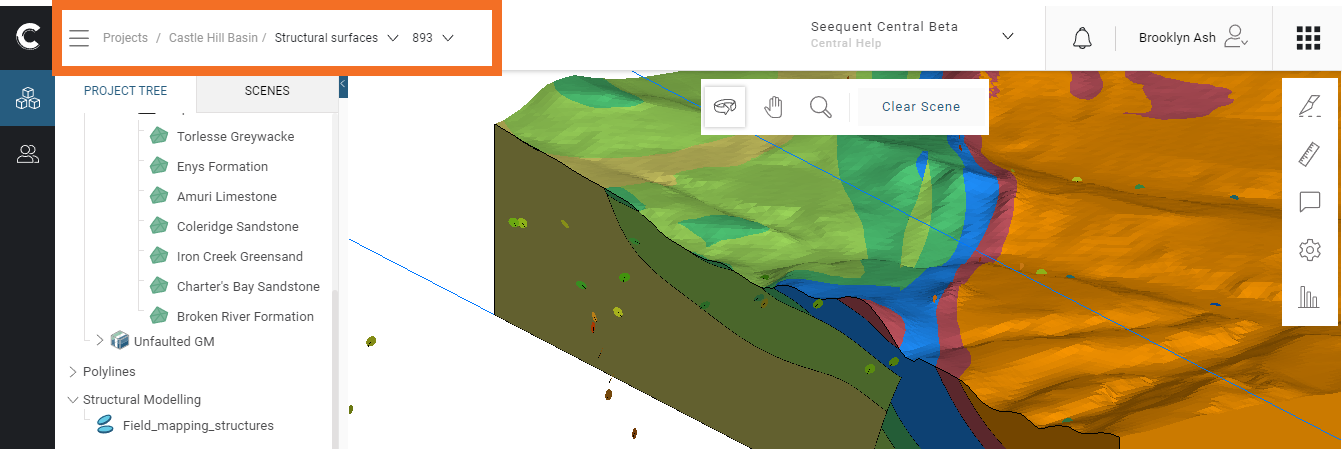
Breadcrumbs are organised as follows:
- Project: Castle Hill Basin in the example above
- Branch name: Structural surfaces
- Revision ID: 893
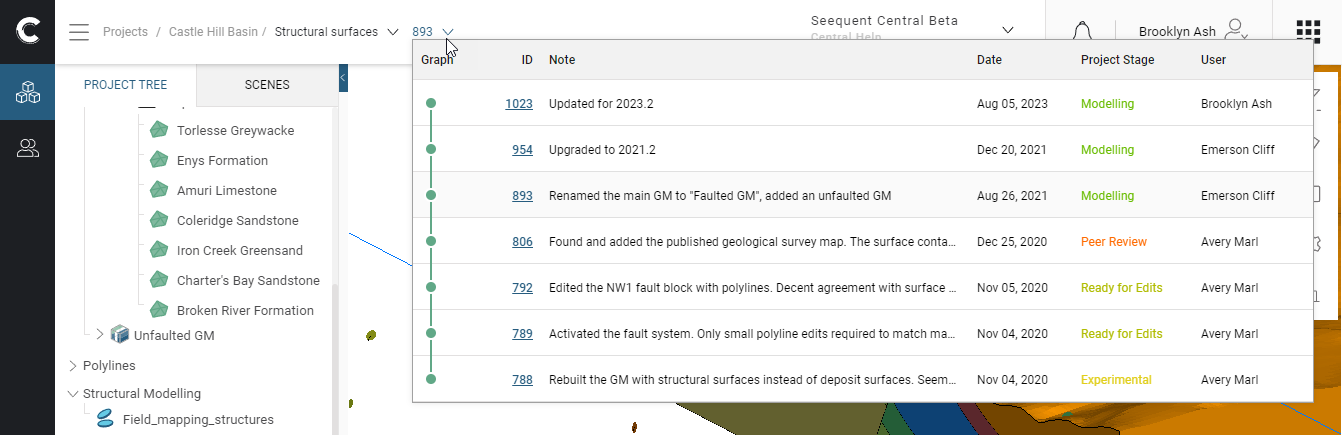
Click on the revision ID in the breadcrumb to show the other revisions on that branch:
Click on the branch’s name to show the entire project history:
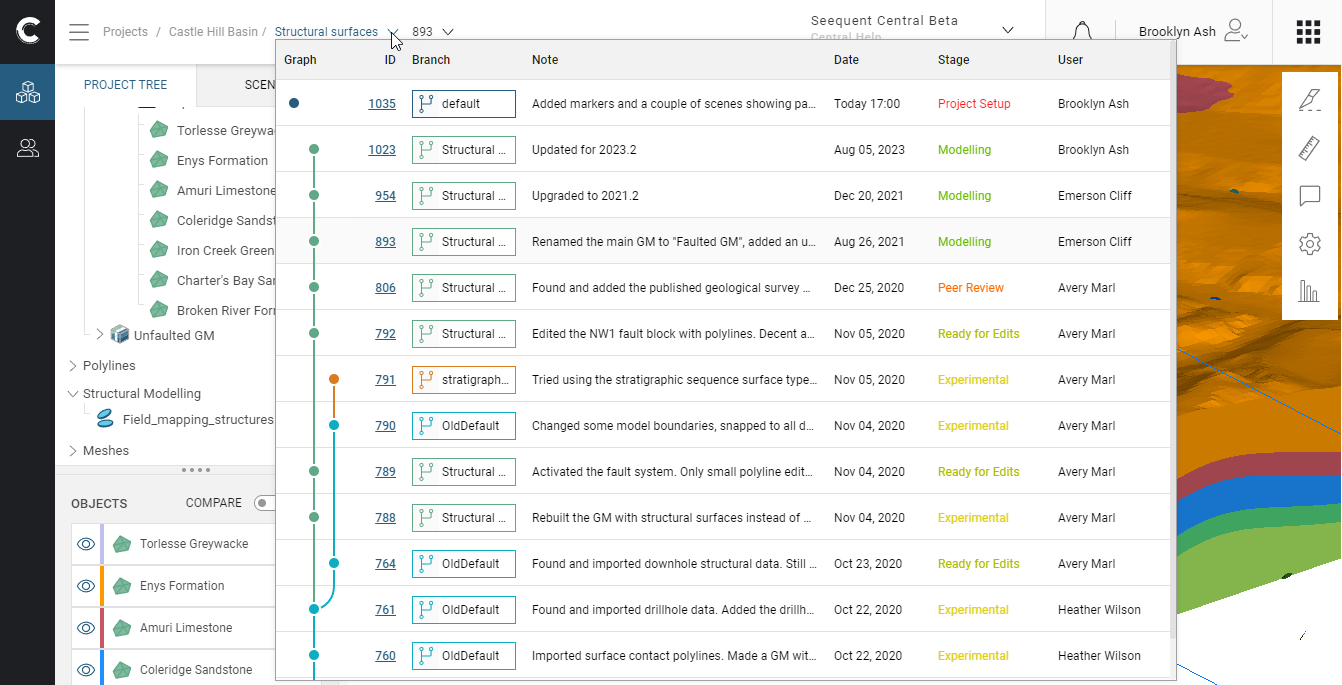
Click on a revision ID to switch to displaying that revision in 3D. If the same objects are present in the newly-selected revision, they will remain in the scene.
Creating New Branches
New branches are created in Leapfrog when a Leapfrog project is published to Central.
See Publishing to Central in the Leapfrog Geo help for more information.