Capture X Settings
To change Capture X settings, click on the Settings button in the main window:

The Settings window is divided into:
General Settings
If you wish to upload photos regularly while you are capturing images, enable Automatically upload photos and then set the interval you wish to use.
If you are using the Live View option when capturing intervals, you can set Capture X so that Live View is on by default. When this setting is enabled, Capture X will display the Live View when you start defining a new interval.
Profiles
The Profiles tab shows all the Capture X profiles your Imago admin has given you permissions for. If you expect to see a profile that does not appear in the list, click the Refresh Profile List button.
In the Profiles tab, you can also:
- Select which profile you wish to use. Click the Active button for that profile.
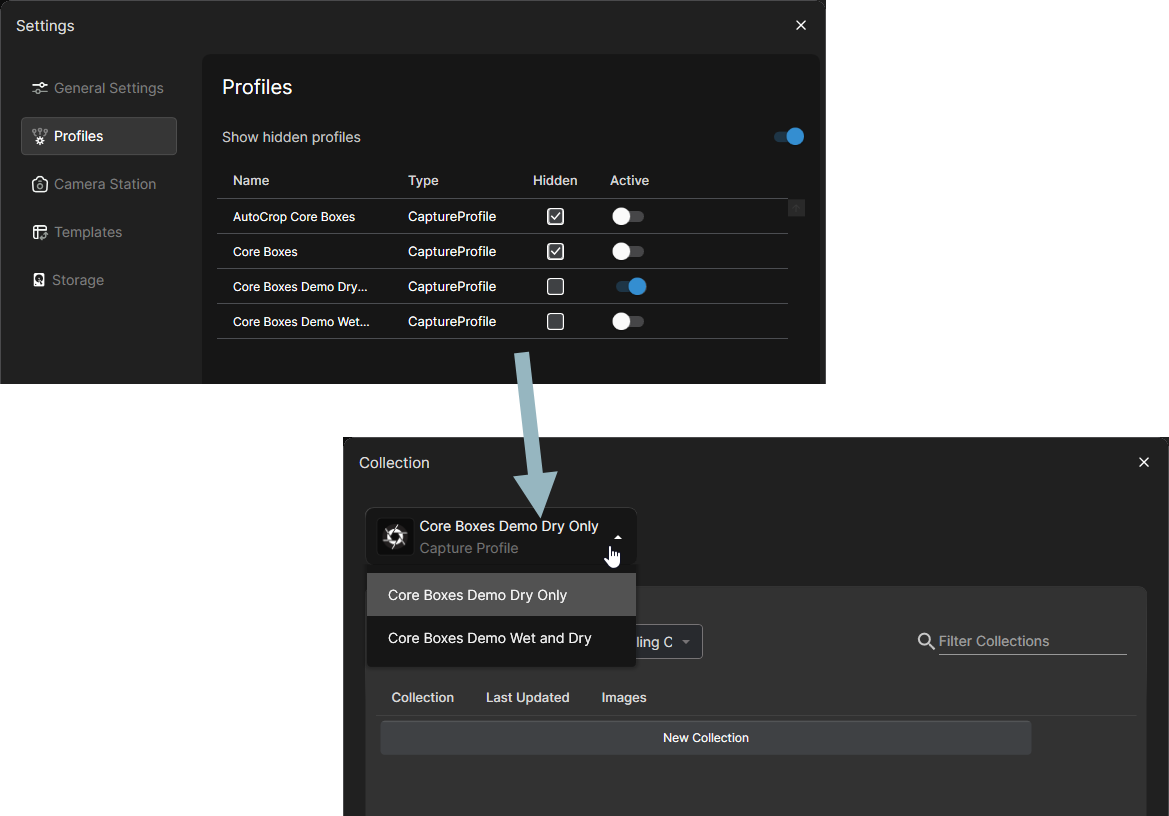
- Hide one or more profiles. This is a temporary setting that will reduce the number of profiles listed in the Collection window for the current session. This is useful if you have permissions for a large number of profiles but are only using a few of them.
Hiding profiles reduces the number of profiles listed in the Collections window. Here, for example, two profiles are hidden and so only two are displayed in the Collection window:

When you restart Capture X, the Hidden setting will be cleared and all profiles will be listed in the Collection window.
Camera Station
In the Camera Station tab, you can manage the cameras Capture X is using.
Watcher Directories
A watcher directory is a folder on your computer’s local drive that Imago Capture X will monitor for new images. This is useful when the camera being used is not currently supported by Capture X; images captured by the unsupported camera are saved to the watcher directory and from there imported into Capture X.
Click the Add button, then navigate to the folder on your local drive that you will be using.
If you are using more than one camera, you would have a different watch directory for each camera. In Advanced Settings, map the different Cameras options to the corresponding watcher directory.
Advanced Settings
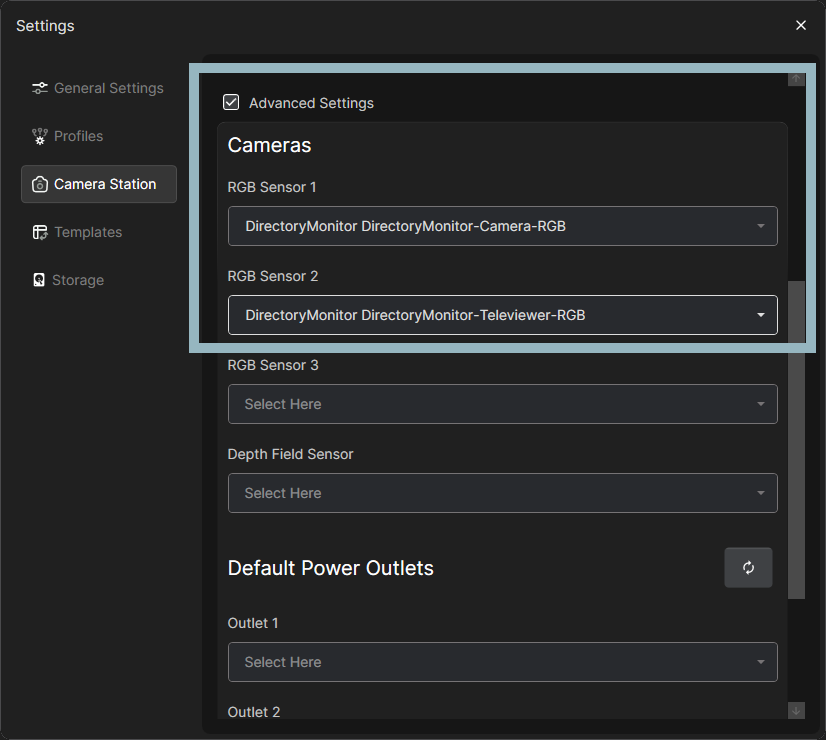
Under Advanced Settings are options for identifying cameras, power outlets and the default port Capture X should use. If you are using one camera, it is usually not necessary to change these settings. For example, for a single camera setup, the camera being used should automatically be mapped as RGB Sensor 1 once it has been connected to the computer.
If, however, you are using multiple devices or a watch directory configuration, be sure that each device is mapped to the one of the camera options. For example, here RBG Sensor 1 is mapped to a watcher directory called ‘Camera’ and RGB Sensor 2 is mapped to a watcher directory called ‘Televiewer’:

Templates
The Templates tab shows all the cropping templates that have been defined for Capture X. You can also:
- Delete templates you no longer wish to use.
- Export templates in *.json format. This is useful if you are setting up a new computer with Capture X and wish to copy over the existing templates.
- Import templates from files.
- Change the colours used when applying templates to images.
Storage
In the Storage tab, you can see where on your computer Capture X is storing images and change it, if required.
Got a question? Visit the Seequent forums or Seequent support
© 2025 Seequent, The Bentley Subsurface Company
