
Applying AutoCrop to Core Tray Images
AutoCrop can be applied to diamond drilling core tray images that have not already been cropped. AutoCrop can be applied:
- To images newly captured using Capture X. AutoCrop will be run on uncropped images as part of the process of uploading them to Imago.
- To images already stored in Imago. This is carried out via Image Tools in the Imago Portal.
For images stored in Imago that have already been cropped, e.g. in Capture X before being uploaded, there is an option to override the existing cropping. This, too, is carried out using Image Tools.
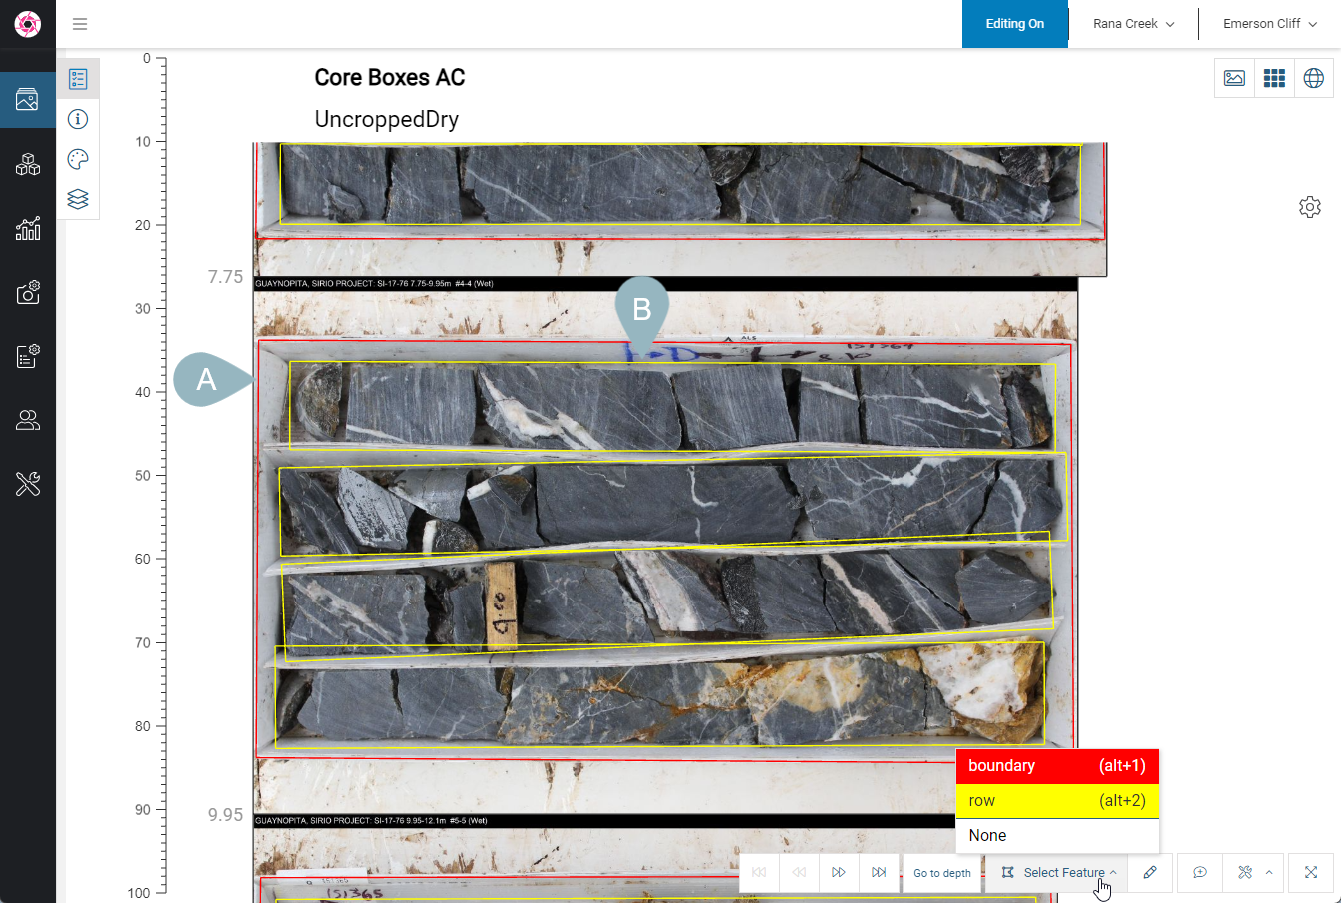
In all cases, AutoCrop identifies the core tray boundary and row boundaries in the images.
- For the core tray boundary, AutoCrop generates a closed boundary feature (A).
- For each row identified, AutoCrop generates a closed boundary feature (B).
This guide describes how to use Seequent’s machine learning technology to automatically crop core tray images. It is divided into:
- Using AutoCrop for Capturing Images in Capture X
- Running AutoCrop on Uncropped Images
- Troubleshooting Validation Errors
Using AutoCrop for Capturing Images in Capture X
Common Capture X workflows for cropping core tray images are for the Capture X operator to:
- Set the cropping as each image is captured
- Create a cropping template that is applied as each image is captured
When the image capture process is set up to use AutoCrop, when the uncropped images are uploaded to Imago, AutoCrop will be applied to the images as part of the upload process.
If you are modifying an existing capture process to start using AutoCrop, there are two changes you may need to make to the image capture workflow, one in the capture profile and the other in Capture X itself.
Capture Profile Settings
If you are modifying an existing Capture X profile to no longer prompt the Capture X operator to crop captured images, you need to make sure the following settings are disabled in the Quality Control tab for Capture X profiles:
- Check if cropping boundary is defined
- Check if core rows are defined
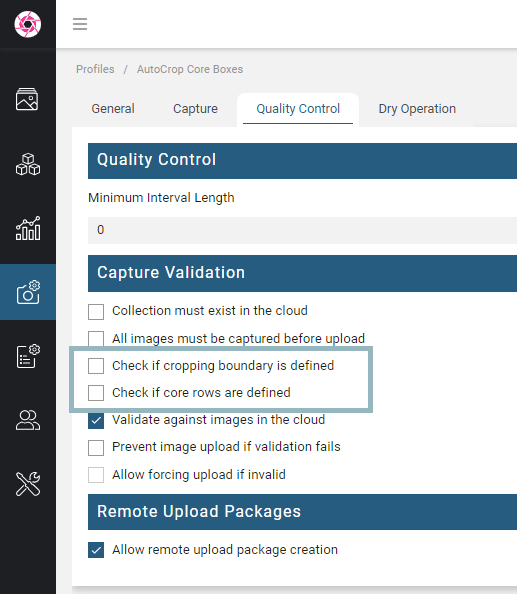
If Check if cropping boundary is defined and Check if core rows are defined are left enabled, the Capture X operator will be required to set boundaries and AutoCrop will not run on the uploaded images.
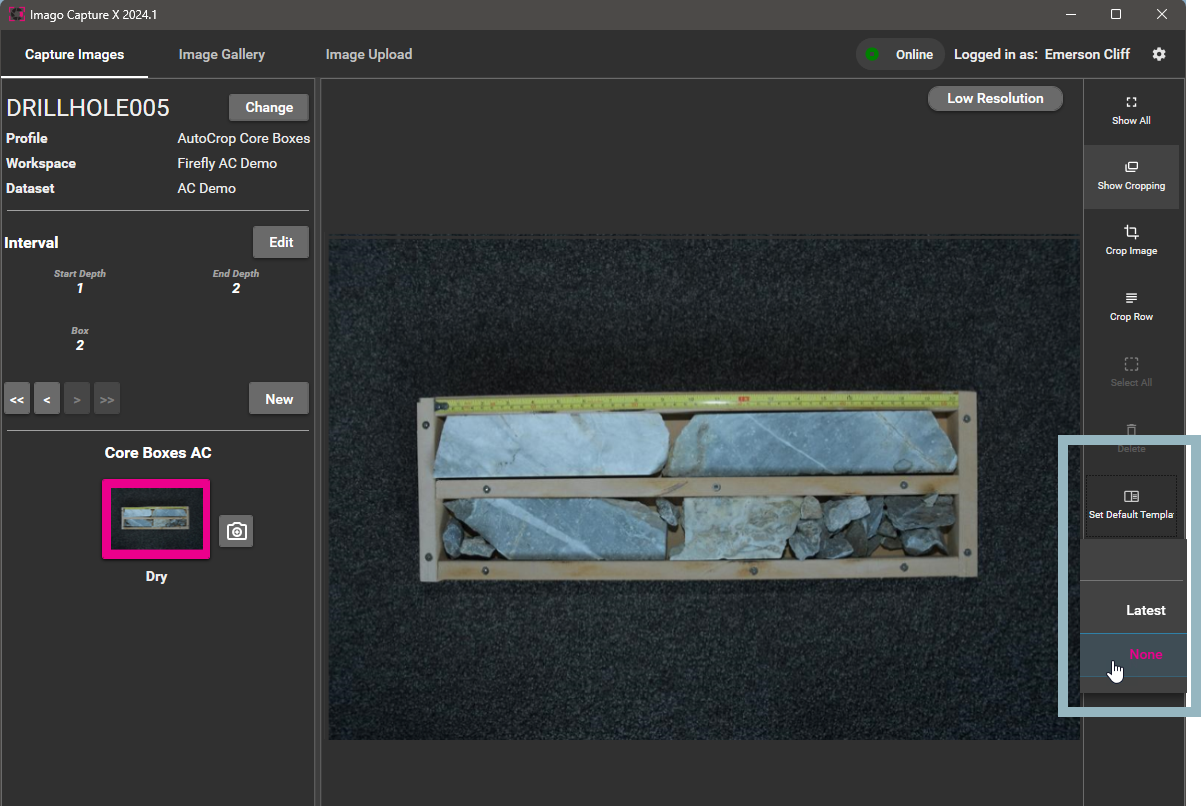
Capture X Settings
When capturing images In Capture X, make sure that no cropping template is being used on images. To do this, make sure cropping options are visible by clicking Show Cropping. Then click on Set Default Template and choose None:
Running AutoCrop on Uncropped Images
Imago’s Image Tools include an option for running AutoCrop on existing images. However, before you run AutoCrop on images already stored in the Imago Portal, you need to make sure there is a derived image type in the definition for that imagery type. See Imagery Type Considerations in the Machine Learning in Imago topic.
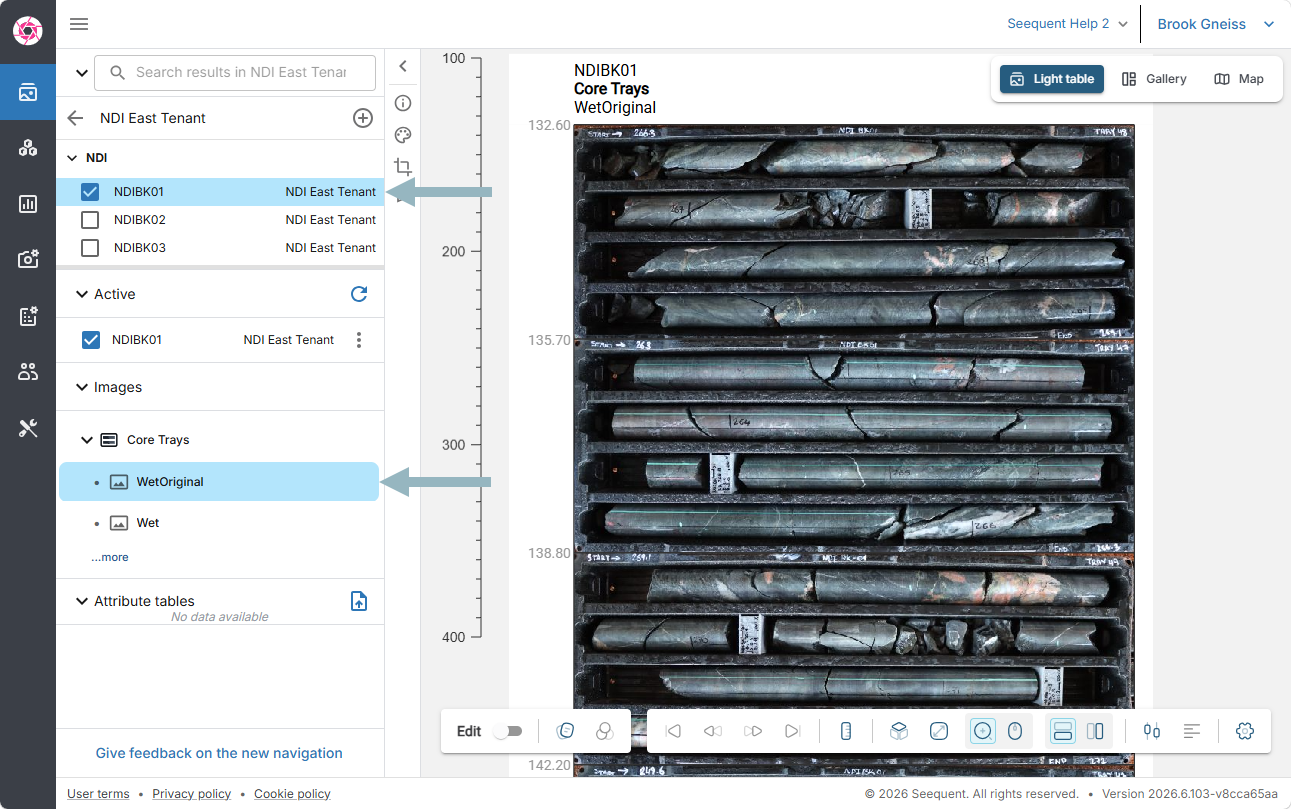
The AutoCrop tool runs AutoCrop on one image type at a time in a selected collection. To start, add the images you wish to crop to the light table by selecting a downhole collection and an image type from the imagery panel:
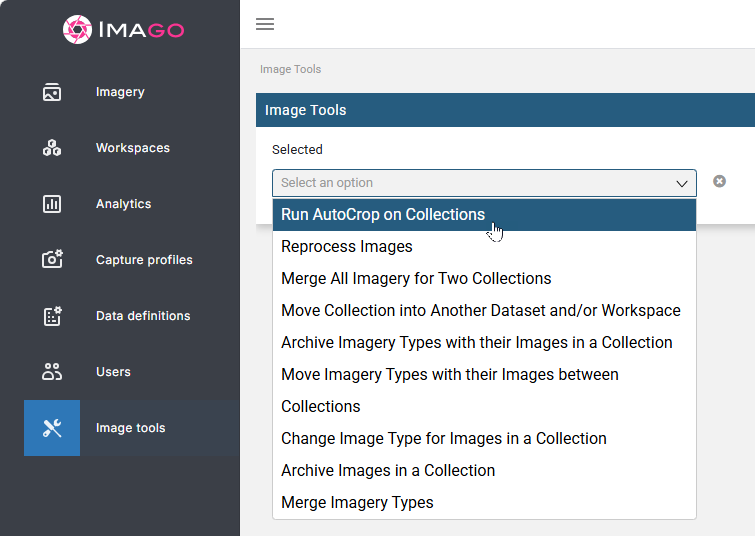
Once you have done this, click on Image Tools in the sidebar and choose Run AutoCrop on Collections:
Next, choose the collection, imagery type and image type you wish to crop. The image type you choose for the Trigger this image type option should be the original uncropped image.
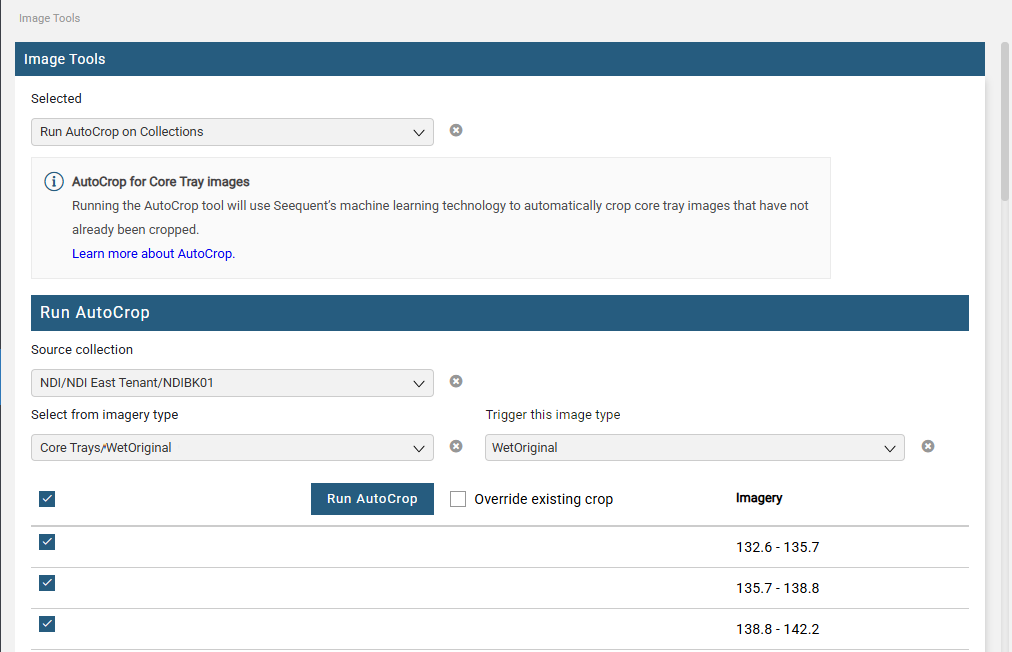
The list of individual images will be displayed and you can choose which ones to run AutoCrop on.
If images already contain cropping information, e.g. if cropping boundaries have been manually applied in Capture X, then AutoCrop will not be run on those images. If you wish to apply autocropping instead, enable Override existing crop.
Click Run AutoCrop to process the images.
To view the processed images, switch back to the light table and refresh your browser. Then add the processed collection to the light table.
Troubleshooting Validation Errors
To see if there have been any processing errors, click on Analytics in the sidebar, then click on the Validations tab:
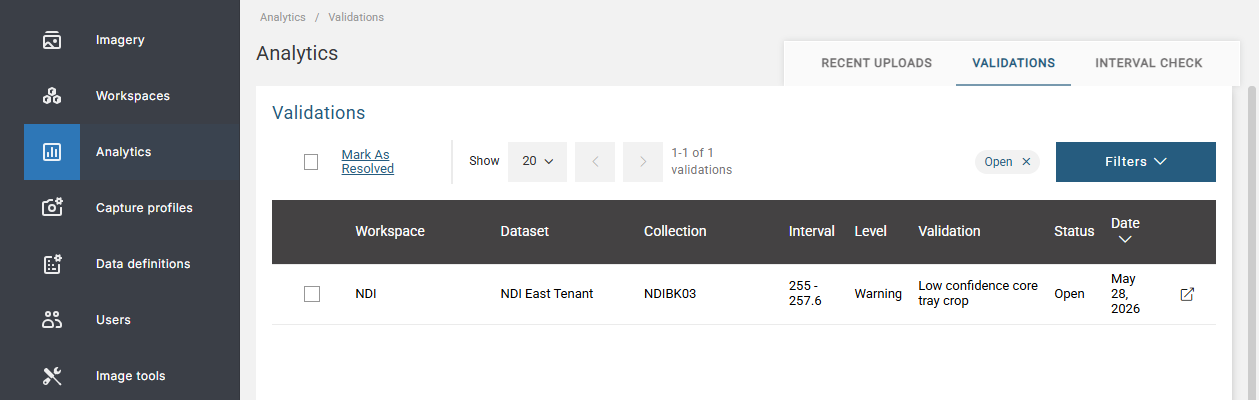
Clicking on an error displays the affected image.
Cropping and row finding may fail if:
- One of the core trays in the image has been cut off
- A row is cut off
- There are multiple boxes in an image that are not aligned
- There are multiple boxes in an image at different angles
- There is a gap between boxes that is more than one row in height
See Imagery Type Considerations in the Machine Learning in Imago topic.
Got a question? Visit the Seequent forums or Seequent support
© 2025 Seequent, The Bentley Subsurface Company