Uploading Attribute Data to Imago
Attribute data in external files can be uploaded to Imago using Imago Connect. The attribute types supported are:
- Strings
- Notes
- Numbers
- Dates
This topic describes how to upload attribute data stored in files in *.csv format. It is divided into:
Defining Required Attributes
The data in the *.csv file will only be uploaded if there are already attributes defined for them in Imago. What attribute type to define depends on the data type in the file.
- For category data columns, define a string attribute.
- For numeric data columns, define a number attribute.
- For columns containing descriptive text, define a note attribute.
- For columns contains dates, define a date attribute.
Columns Expected
Imago expects columns containing:
- A HoleID, which will correspond to a collection in Imago
- A from depth
- A to depth
- Columns containing the attributes
In Imago Connect
Visit MySeequent for the latest version of Imago Connect.
Launch the Imago Connect application and sign in. Select the Upload Attributes option from the sidebar, then select the file containing the attribute data.
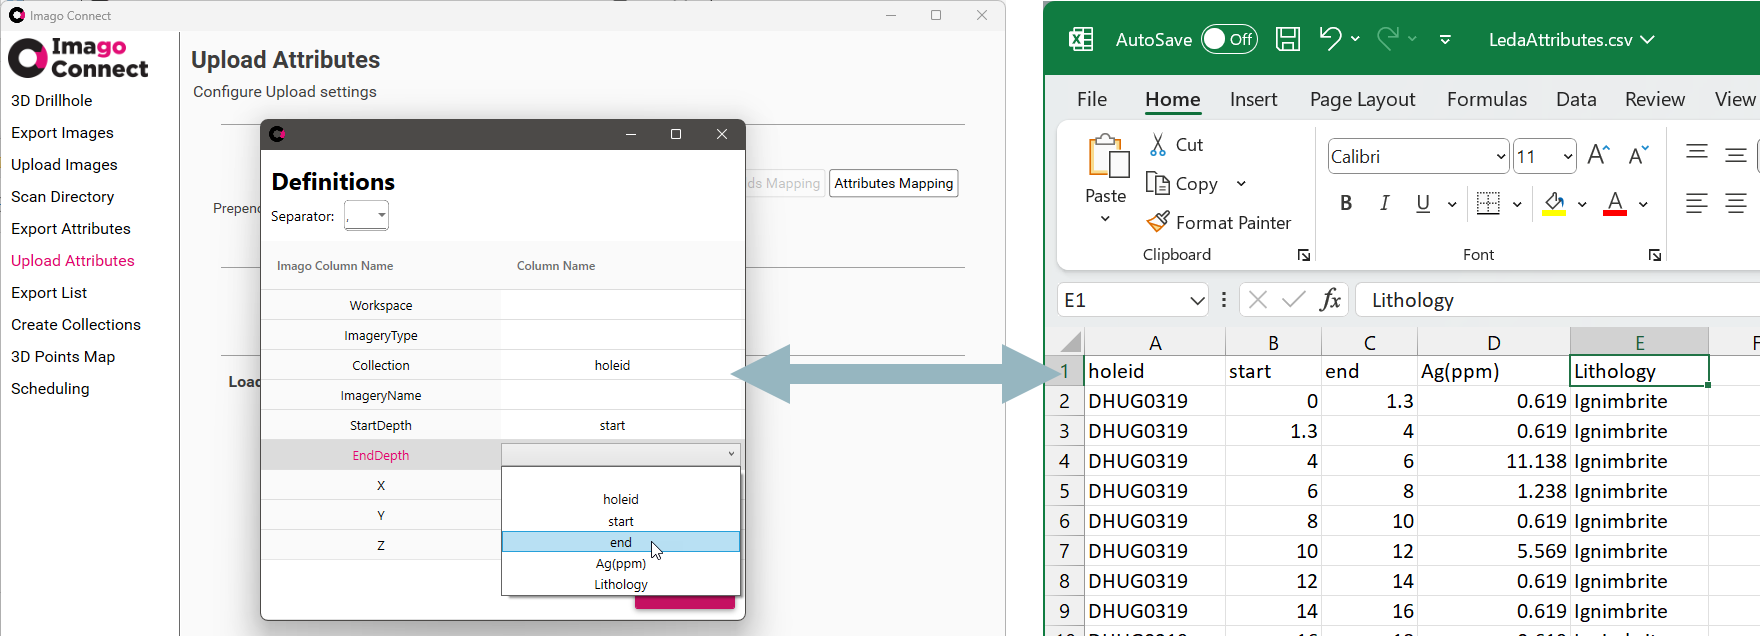
Click Fields Mapping to map the columns in the file to those Imago requires. For example, here we have mapped the holeid column in the file to the Collection column Imago expects and the start and end columns to Imago’s StartDepth and EndDepth columns:

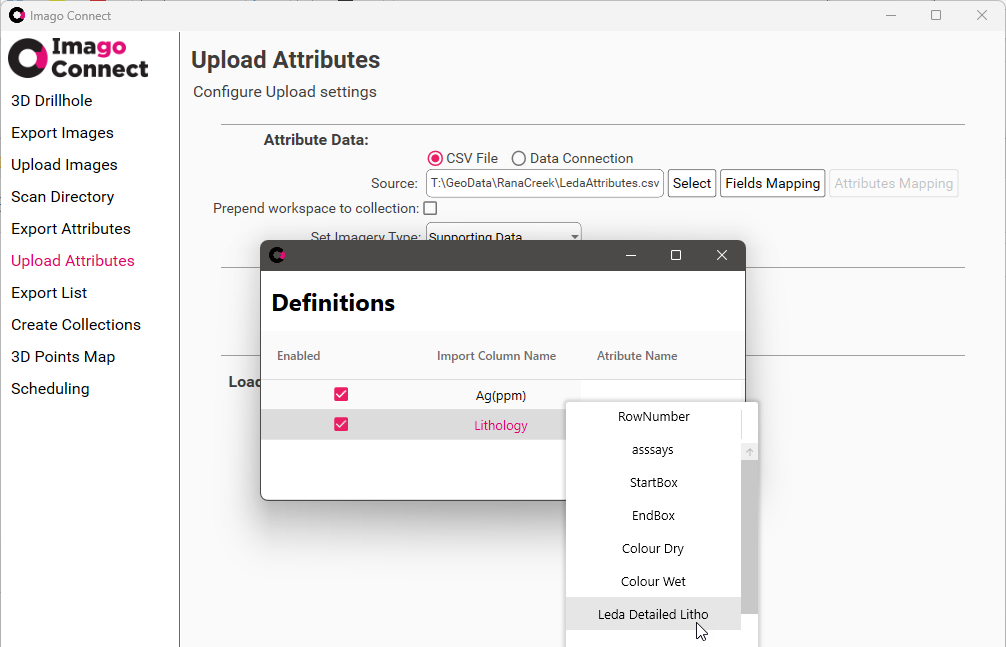
Next, click Attributes Mapping to match the file’s attribute columns to those available in Imago. Here the Ag(ppm) column has automatically mapped to the same-named number attribute that exists in Imago, but we need to map the file’s Lithology column to an Imago attribute. To do this, tick the box for Lithology, then click on the Attribute Name list to see what’s available. We will choose the Leda Detailed Litho column:

We want to upload this file to:
- The Leda Exploration workspace
- The Drilling dataset
- The Supporting Data imagery type
There is nothing in the file indicating a workspace, dataset or imagery type. However, we do have the holeid/Collection information, which is sufficient for Imago to know where to store the attribute data, once we specify which imagery type we will be uploading to.
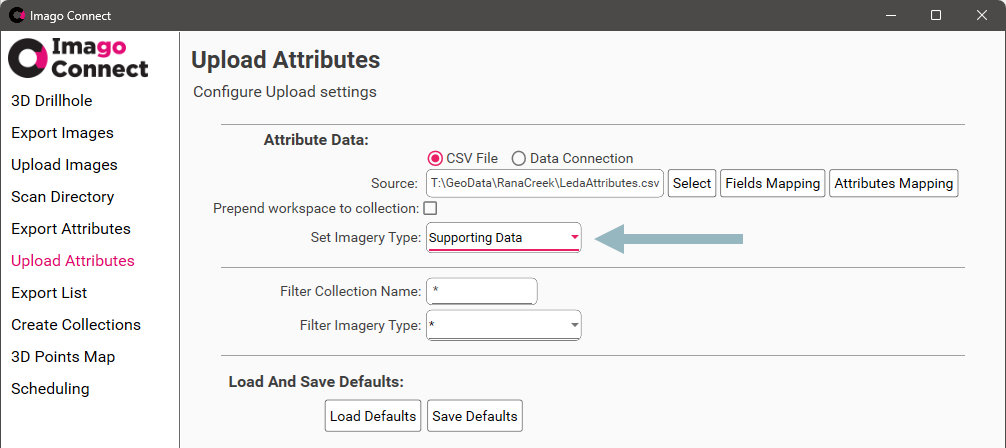
The Set Imagery Type list shows all imagery types defined for the Imago instance. For this example, we will choose Supporting Data:

Once the columns are correctly mapped and the imagery type is set, click Upload. When uploading is complete, refresh your browser window to see the uploaded data.
Got a question? Visit the Seequent forums or Seequent support
© 2025 Seequent, The Bentley Subsurface Company
