
Migrating Your Imago Users to Seequent ID
Signing in to Imago using a Seequent ID has the advantage of connecting Imago users to other Seequent-connected applications, including Leapfrog and MX Deposit.
This topic is for Imago Admins who are migrating their teams to signing in to Imago with Seequent ID. It is divided into:
- Migration Process
- Getting Started
- Migrating Imago ID Users
- Migrating Security Groups (Imago Enterprise Licence)
- Removing Migrated Imago ID Users
Migration Process
The process of migrating your Imago subscription to using Seequent ID involves adding new Seequent ID users that correspond to existing Imago ID users. The new Seequent ID users need to have the same settings as the old Imago ID users. These settings are:
- Role and Applications, and Workspaces/Permissions, which are all set in the New User window
- Capture profile permissions, which are set in the Capture Profiles list
Before starting, record:
- The users assigned to each workspace and their permission level. In the Workspaces list, open each workspace, then click Users.
- The users assigned to each capture profile. In the Capture Profiles list, open each profile, then click Users.
Getting Started
If you are an Imago admin and you want to start migrating your organisation to using Seequent ID, start by creating for yourself a new user.
- Sign in to Imago using your old Imago ID.
- In the Users list, click New User.
- Create a new user using the email address you will be using to sign in to Imago.
- If you already have a Seequent ID, use the email address you use for your Seequent ID.
- If you do not already have a Seequent ID, use the email address you wish to sign in with. Once you click Save, you will receive an email inviting you to create a Seequent ID.
- Assign this new user the Admin Role.
- Assign this new user your existing Applications.
- Click Save.
- Assign your new user the Workspaces/Permissions of your old Imago ID user.
- In the Capture Profiles list, assign your new user the capture profiles of your old Imago ID user.
- Sign out of Imago.
- Sign in again using your Seequent ID.
Once you have signed in using your Seequent ID, check that you have the same access as you did when signing in using your old Imago ID.
You can then start migrating your existing Imago ID users.
Migrating Imago ID Users
The same steps are used for migrating existing Imago ID users to using Seequent ID:
- Create a new user that has the same details as the existing user.
- Assign the new user the applications, workspaces and roles of the existing user.
- In the Capture Profiles list, assign the new Seequent ID user the capture profiles of the old Imago ID user.
The user will automatically be sent an email containing instructions for their next steps. In the Imago Admin Portal, they will appear as PENDING, as shown here for the Harley Moraine Seequent ID user:
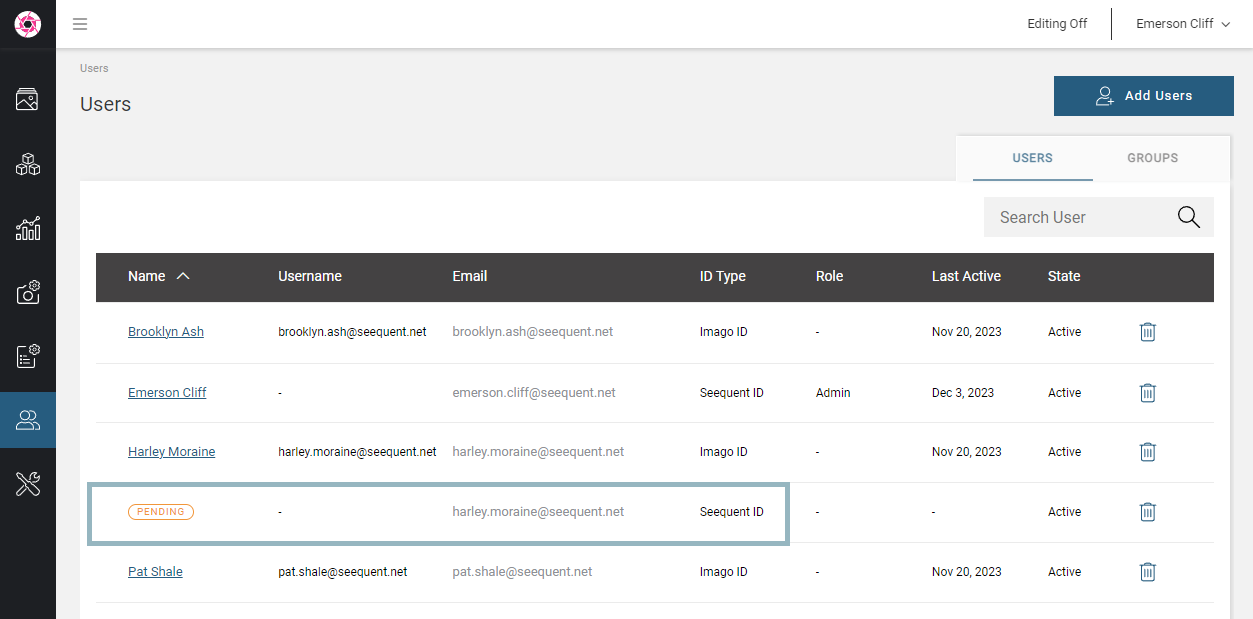
Once the user has signed in using their Seequent ID, they will no longer show as PENDING.
Migrating Security Groups (Imago Enterprise Licence)
If you have an Enterprise Licence and organise your users into security groups, you may wish to stage your Seequent ID migration by group. To do this:
- For all users assigned to a security group, follow the process described above for Migrating Imago ID Users.
- Add the newly-created Seequent ID users to the security group.
- Later, once all migrated users in that group no longer appear in the Users list as PENDING, delete those users from Imago.
Removing Migrated Imago ID Users
When migrated users have signed in using their Seequent IDs, they will no longer appear as PENDING in the Users list. You can then remove the old Imago ID for those users.
Got a question? Visit the Seequent forums or Seequent support
© 2025 Seequent, The Bentley Subsurface Company