
Seequent Imago
If you have an active Imago subscription, you can connect to Imago from MX Deposit and view the images stored in Imago alongside data in MX Deposit.
The rest of this topic describes the MX Deposit integration with Seequent Imago. It is divided into:
Connecting to Imago
Open the Integrations list from the Admin panel and click on the Imago tile. You will be prompted to enter your credentials.
At present, you can only connect to an Imago account via MX Deposit if you are using Imago ID. Connecting via Seequent ID is not yet supported.
Once you have done so, the tile will be updated to show MX Deposit is now connected to your Imago account.
You will only have to enter your credentials once, although you may need to reconnect from time to time.
Adding Imago Columns to Tables
Once the connection to Imago has been established, you will be able to add Imago columns to tables. In the Tables collection, open a table. In the Configure columns step, add a new column. There will be an option for adding an Imago File column:
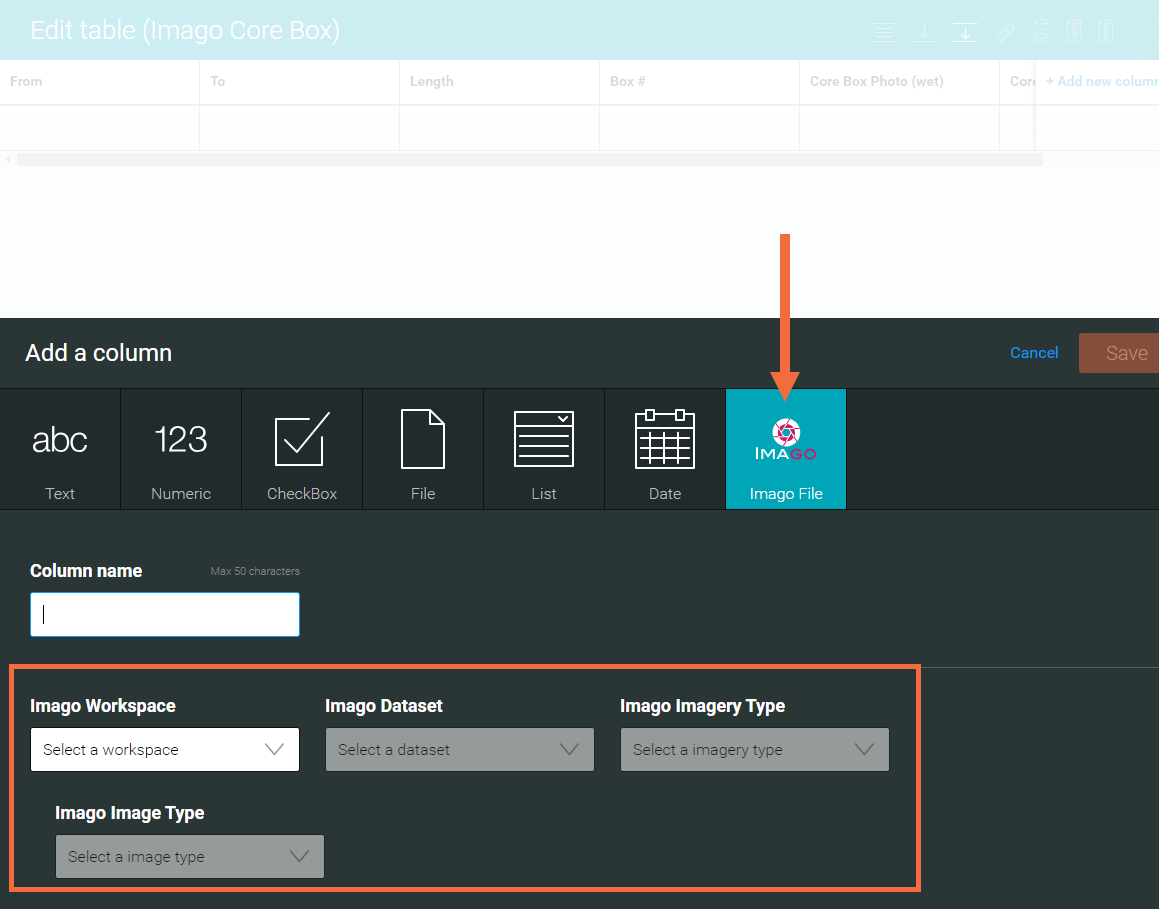
When you choose the Imago File option, you will be prompted to enter information about the Imago workspace, dataset, imagery type and image type you wish to include; match this information to the dataset in your Imago account you wish to use.
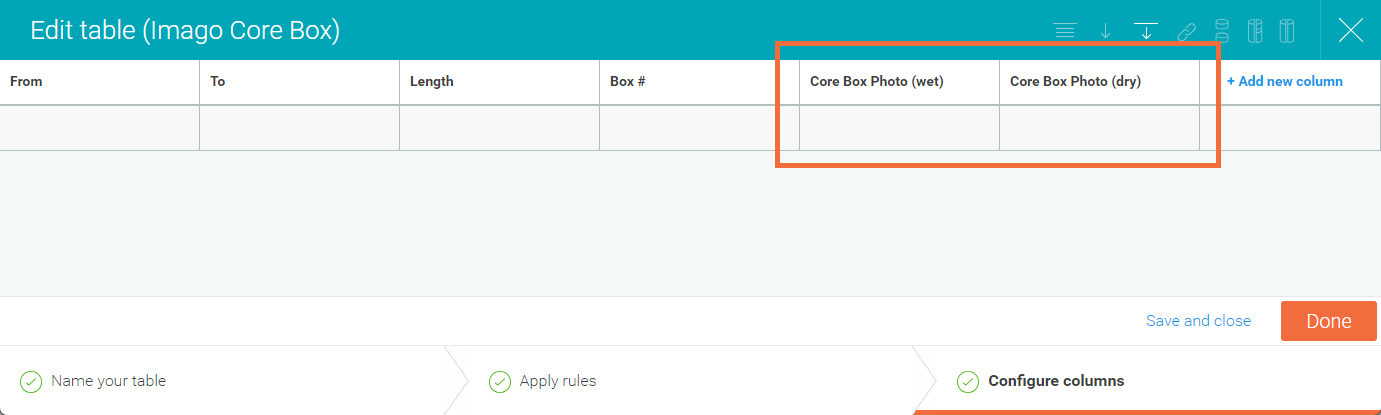
You can add multiple image columns to a table, which is the case here where there are two columns, one for a wet image and one for a dry image:
Synchronising with Imago
Once the Imago integration has been configured and one or more Imago File columns have been added to a table, you can synchronize with Imago for an activity that uses that table.
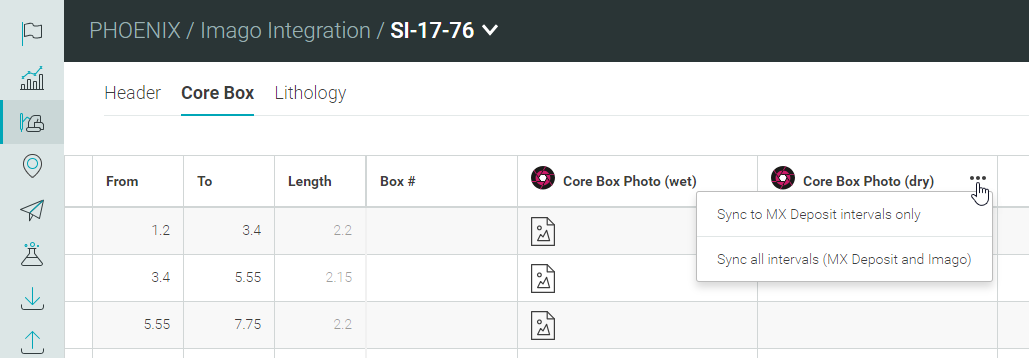
To do this, open an activity and select a drill hole or point. Click on the overflow menu for the column you wish to synchronize and select an option:
- Sync to MX Deposit intervals only. This searches Imago for the current drill hole/point and finds all Imago files that fall within the MX Deposit intervals. No new intervals will be created.
- Sync all intervals. This, too, searches for intervals that match the intervals in MX Deposit, but also creates new intervals from the data in Imago.
If you have an interval table that has already been logged and do not wish to add more intervals to it, choose Sync to MX Deposit intervals only. This will populate only the intervals that already exist in MX Deposit with images from Imago.
If, instead, you are working with an interval table that has not yet been logged, choose Sync all intervals. This will populate the table with the intervals from Imago, along with the images.
Here we have two Imago columns in a drilling activity. The first column has already been synced and so shows that there have been files found for some intervals:
Viewing Imago Files
To view the Imago images, click on the Imago column for the interval you wish to view. Thumbnails for all available images will be displayed and you can click on a image to view it.
The View in Imago link will open the image in a new browser window.