
Customising Lists for an Activity
Once your master lists have been configured, you can customise how they are used in specific activities. This streamlines the data entry process for loggers.
The tools for customising lists in order to streamline data entry are:
- Disabling list items that are not relevant for the activity. See Disabling Unneeded Values.
- Setting a default value that is the most likely value a logger is able to choose for a specific activity. See Setting a Default Value.
- Creating a cascading list that progressively narrows down the values a logger can choose from. See Creating a Cascading List.
- Associating different columns that represent values ranging from general to specific. This achieves a similar effect to using cascading lists but in a different way. See Using Associated Columns.
Disabling Unneeded Values
If you are using a list for an activity but not all values in that list are relevant for the activity, you can disable some values for the activity. For example, you may have a master list of rock types that contains hundreds of different codes. You can turn off the codes that are not relevant to that activity, shortening the list loggers must choose from.
In the activity builder, choose Configure Lists from the overflow menu of the table that has the list you want to customise.
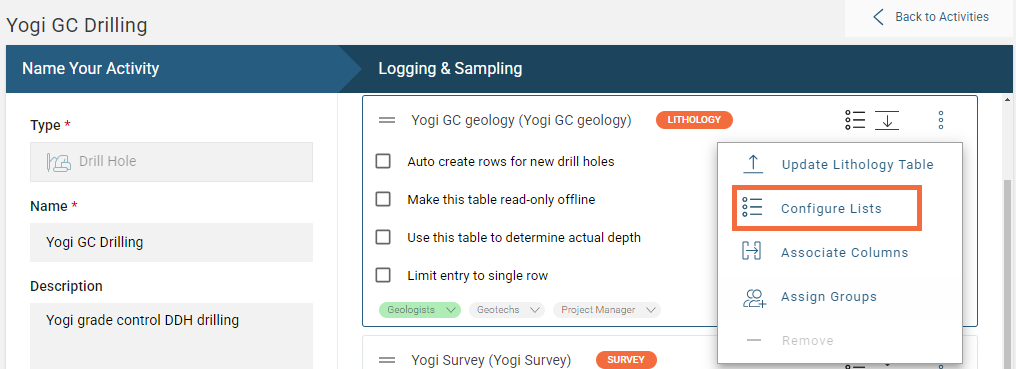
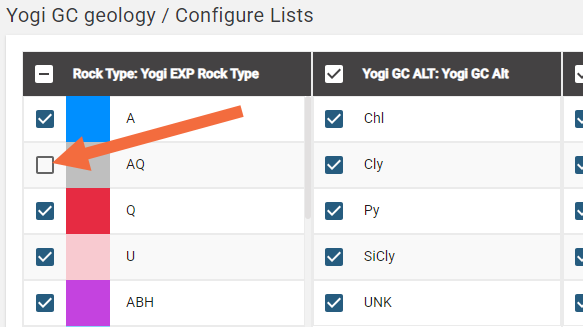
To disable a list item, clear the check mark for it. The list item will now no longer appear in the picklist of the logging sheet for this activity.
In a similar manner, you can hide columns that are not needed.
Setting a Default Value
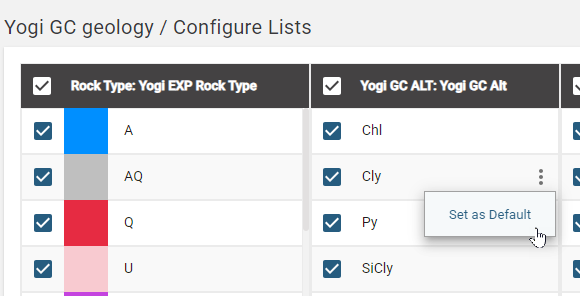
You can set a value in the list to be the default value so that it will be automatically suggested when a logger adds a new row of data.
Click the overflow menu for the value you want to set as the default, then click Set as default.
Creating a Cascading List
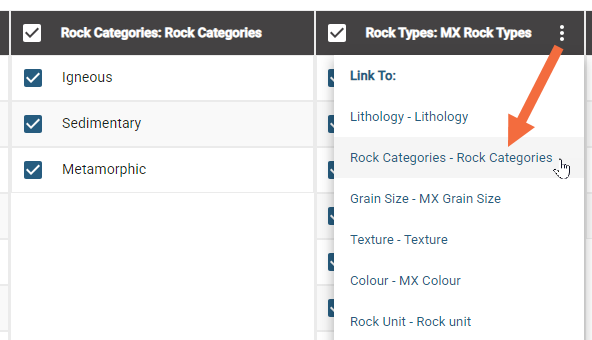
You can also have lists linked to display only data that is relevant to what is being logged, such as linking your Rock Categories to your Rock Types.
Click the overflow menu on the column you wish to link. Here we have chosen to link the Rock Types list to the Rock Categories list.
Next, select the cell you wish to link list items to.
Clicking the check-box does not select the cell. Instead, click on the cell itself. A selected cell is outlined in blue.
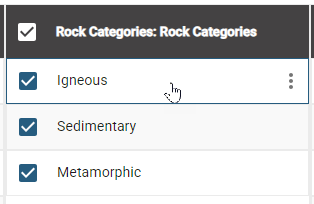
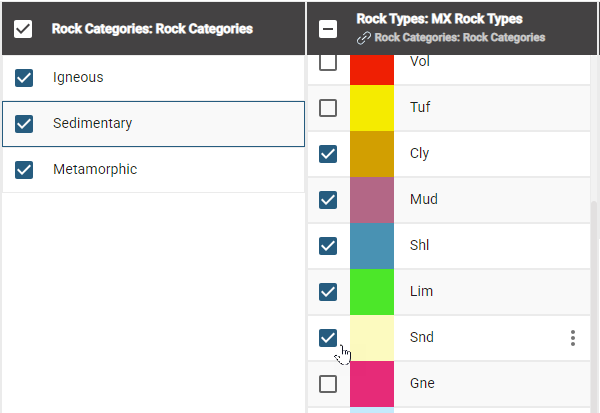
To include the items in the list tick the box of the list times you want associated with it. Here we have selected Igneous and the Rock Types that are relevant to it:
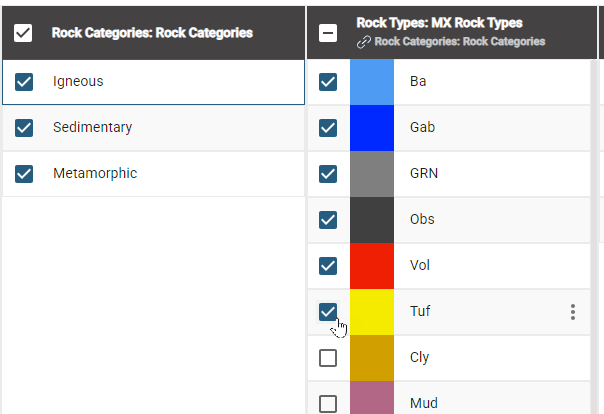
Select the next cell to continue with the list item selection until all have been selected.
Using Associated Columns
Using associated columns achieves a similar effect to using cascading lists but in a different way. When you create a cascading list, it links only two columns and filters the list items based on what value is selected in the initial column. Using associated columns gives you more flexibility in that it allows you to collect further detail for some values but not others. For example, you may want to capture two characteristics for all lithologies logged, e.g. grain size and texture. You would set these as common columns, and for background lithologies, these might be the only characteristics captured. But for mineralized lithologies, you may want to capture additional details, such as mineralization, alteration and mineralogy. Using associated columns allows you to customise the workflow in this way.
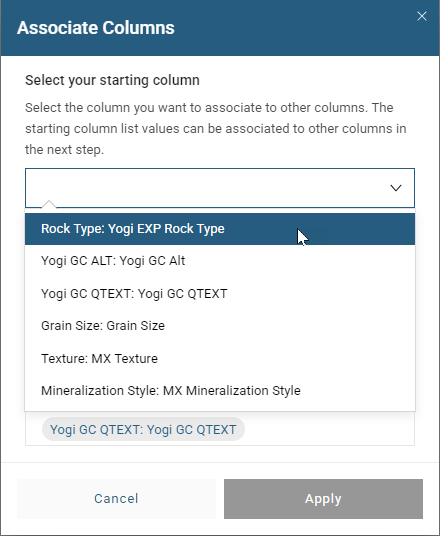
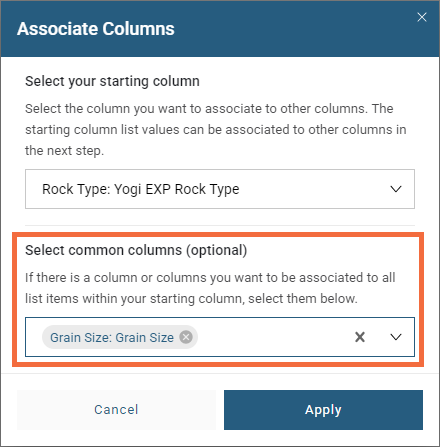
To create an associated column, choose Associate columns from the overflow menu for the table that has the list you want to customise.

You will be prompted to choose the starting column, that is, the one that will be the first set of values the logger selects from. For example, here we will select the Rock Type column as we want to collect more detail for some rock type values:
Next, choose any columns you want to associate with all values in the starting column. You would choose a column here if, for example, you wanted to capture more detail for every value in the Rock Type list. However, this step is optional. Here we have chosen to associate the Grain Size column, containing the MX Grain Size list, as a group of characteristics that we want captured for every rock type:
If there are any required columns or columns that have already been linked to create cascading lists, these will appear as selected and cannot be deselected.
Click Apply.
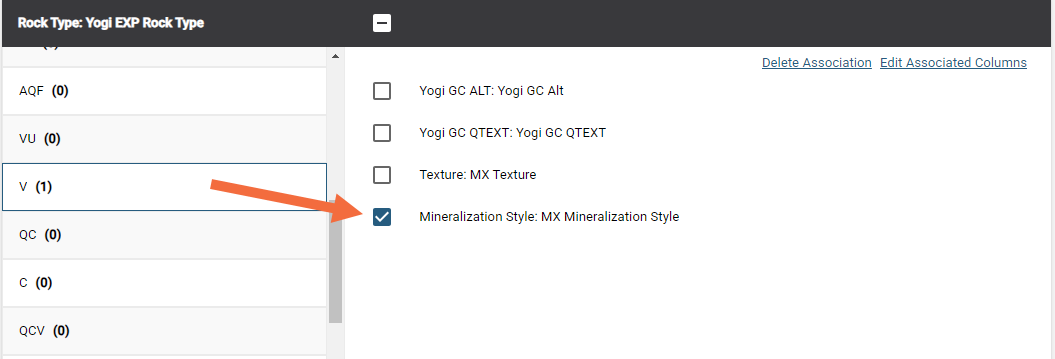
Now you can go through your starting list and select your associated columns. First select the list item, then select the column to associate it with.
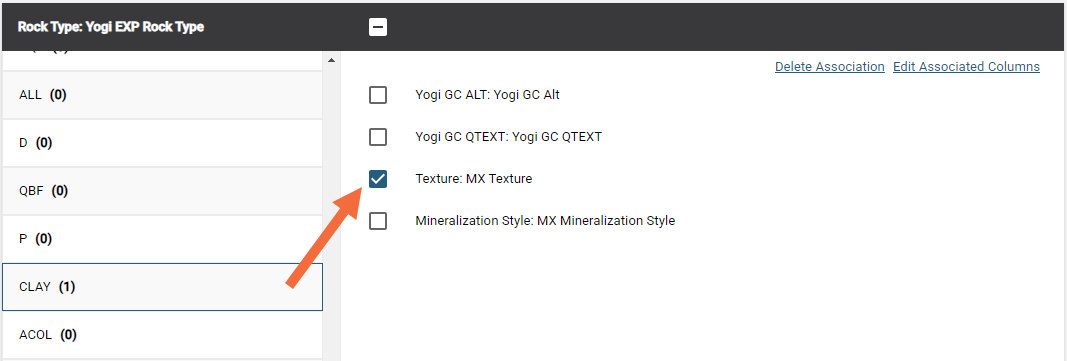
Here we have chosen the Texture column containing the MX Texture list to be associated with the CLAY rock type. When the logger selects clay, they will then need to choose an option from the MX Texture picklist.
Once you have associated all the columns you wish to use, you can return to your activity. Any changes you make will be saved automatically.