
Importing Lists
If your organisation already has lists you wish to use in configuring workflows, you can import them into MX Deposit. There are two ways to do this:
- Bulk Importing Lists. This can be used when you have a number of lists to import. It also gives you more control in categorising the list, mapping the column and naming the list.
- Importing to a Single Existing List. This option is used when you already have a list in MX deposit that you would like to add more list items to.
The rest of this topic describes both options.
When importing lists, it is important to make sure that what you import matches what MX Deposit expects. The best way to ensure this is to export a list from MX Deposit and use the exported file as the basis for the file or files that will be imported.
Bulk Importing Lists
Bulk importing lists involves exporting existing lists in order to copy their structure, populating those lists outside of MX Deposit and then importing the populated lists into MX Deposit.
Exporting Existing Lists
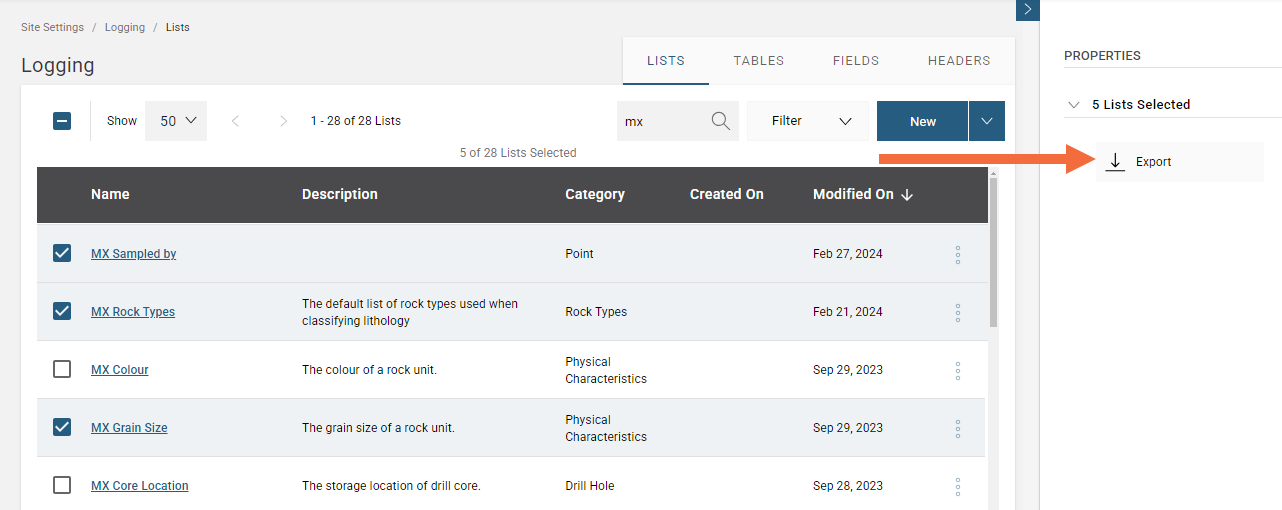
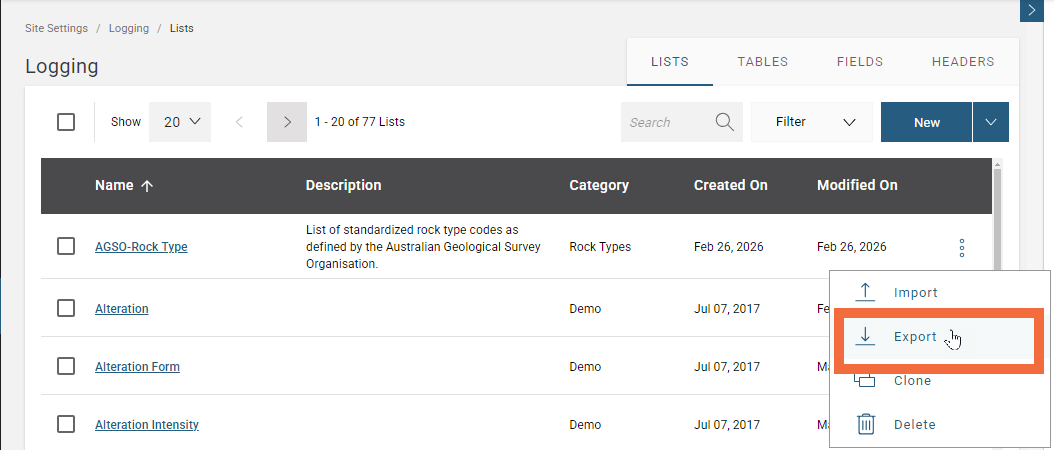
To start, go to Site Settings > Logging > Lists and select the lists you want to use as a structure for your imported lists. Click Export in the Properties panel.
Populate the exported *.csv files with your existing list data.
Importing the Populated Lists
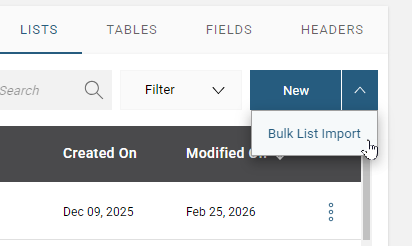
When you are ready to re-import the lists, navigate to the lists you will be importing to, then click New > Bulk List Import:
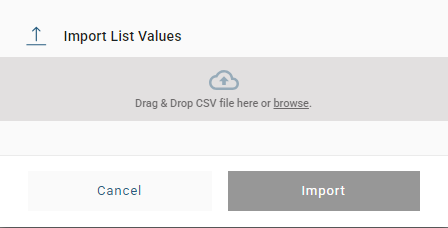
In the window that appears, navigate to where your *.csv files have been saved, then click Import.
In the next step, you can Pick your date format and Configure your files before importing them. You can also:
- Change the List Name when the Create New List option is selected.
- Select or deselected the Create New List option.
- Select a list in the Add To Existing List column when the Create New List option is deselected.
- Select a Category.
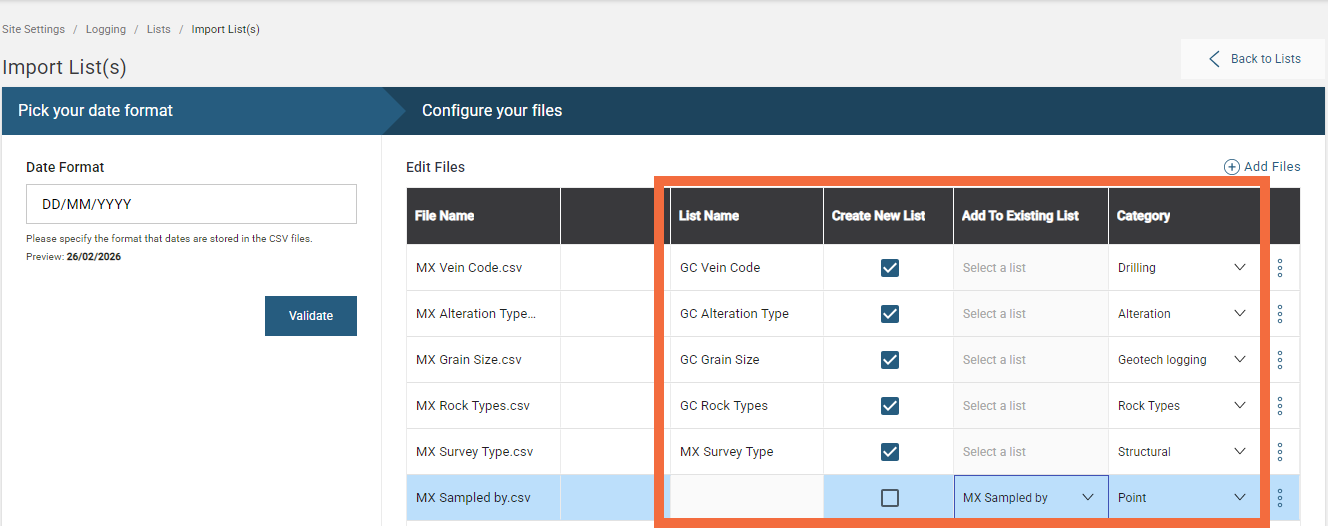
Once you have configured your files, click Validate. MX Deposit will then check for potential errors and warnings before importing.
Resolving Errors
If there is an issue, click View logs to view information that will help you in troubleshooting the errors.
You also need to remove the file from the import before the corrected file can be re-imported. To do this, click Remove Import File:
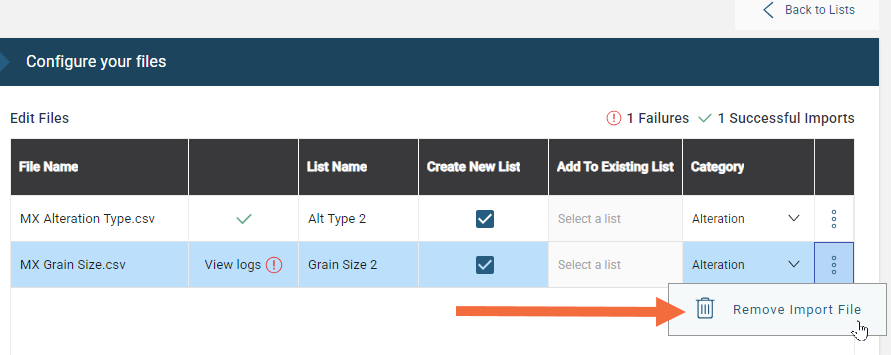
Once you have corrected the errors outside of MX Deposit, re-import the list.
Resolving Warnings
Although errors need to be resolved in the *.csv file before it can be re-imported, warnings can be resolved in MX Deposit.
Click on any warnings to see the options for resolving them. Here, a warning gives you the option to select the column type:

Finalising the Import
When both the errors and warnings have been addressed, select Import.
Importing to a Single Existing List
If new list items are available for a list that is already in MX Deposit, you can import them to the existing list. Importing to an existing list involves exporting the existing list in order to copy its structure, updating that list outside of MX Deposit and then importing the updated list into MX Deposit.
Exporting an Existing List
Go to Site Settings > Logging > Lists and find the list you want to add list items to. In this example, we would like to import additional rock types to the AGSO-Rock Types list. Choose Export from the overflow menu or from the Actions menu in the Properties panel.
Populate the exported *.csv file with your new list items.
Importing the Populated List
When you are ready to re-import the list, choose Import from the overflow menu:

In the window that appears, navigate to where your *.csv file has been saved, then click Import.
The list will be updated with the new data.